Who’s excited about Thanksgiving? Can I get a WHOOP WHOOP?
I hear Criss Cross pumped UP in the background of this post!
That’s right. Thanksgiving make ya wanna, “JUMP JUMP!”
And it’s so NOT “wiggly wiggly wack.” It’s where it’s AT!!
Ok, I will stop. But it’s not that I want to!!
Thanksgiving is one of my favorite holidays for many reasons; one, it’s like Christmas without all of the gifting pressure; two, it involves CRANBERRY SAUCE SLICES, and three, you get to eat lots of carbohydrates with the ones you love. #signmeup
This week’s recipe is an easy way to eat the rest of that leftover turkey AND the sweet potato that didn’t make it into the casserole. Actually, come to think of it, if you tried really hard I bet you could smash up the mashed sweet potato and instead make a patty/bread slice of sorts. However, this way is much easier if you are like me and plan to binge-watch the new season of Gilmore Girls in your pajamas with your sister the day after Thanksgiving. So this way definitely appeals.
In case you missed it, Luv Cooks Sweet Potato Sammiches! (me making these tasty treats). You can always tune into Luv Cooks on Facebook Live to check out the week’s recipe; right now, my goal is post videos Tuesday afternoons.
Alright my friends! Happy almost Turkey Day and mad PROPs to you for doing your leftovers planning already. #winning
Sweet Potato “Bread” Sandwiches with Roasted Turkey and Cranberry Sauce
These roasted sweet potato slices act like bread in a delicious, post-Thanksgiving treat.
1 medium sweet potato, sliced into about 1/4 inch slices
1 tablespoon olive oil
Sea salt
Freshly cracked black pepper
Olive oil mayonnaise (to taste)
Shredded turkey
Slices cranberry sauce (to taste)
What You Will Do:
Preheat oven to 425. Line a dark metal baking sheet with aluminum foil and spray lightly with cooking spray of choice.
In a large bowl, toss sweet potato slices with olive oil, then add salt and pepper to taste and combine.
Spread sweet potato slices on baking sheet, making sure to leave room around the edge of each slice so the air can circulate and ensure crispiness similar to a bread crust.
Bake the slices for 10 minutes, then flip. Bake 10 minutes more, remove from oven, and allow slices to cool slightly.
Once the slices are cool to the touch, spread each sweet potato slice with mayonnaise. Top one slice with shredded turkey, and the other with a cranberry slice.
For some reason I felt I needed to shout that OUT. In my mind, I also equate “Paleo” with the Geico Caveman at the Country Club.
https://www.youtube.com/watch?v=27Q5RE0q9Lo
Not sure where that correlation began, but Paleo eating (in my mind) equals Cross Fit equals foraging for grass-fed meat in my neighbor’s yard (they built a Cross Fit gym in their tool shed).
WOW have I been wrong!! But let’s be real- nutrition has never been my strong suit.
However, I also realize that lots of the people I love, and love to cook for, are eating like cave people these days. No bread, no cheese, no cheese puffs, no Pumpkin Spice Oreos. Alas, they are all eating how we are probably supposed to eat- like our ancestors did- but our ancestors also did not have access to Tootsie Rolls or The Best Nachos in the World List. I rest my case.
Anyway, because I want to ALWAYS make my table about bringing people in, making them feel comfortable and always welcoming anything food-wise that makes them happy, I decided to pursue this paleo business and learn more about it. I found Against all Grain (listed below). I bought it. The rest, as they say, is in the books.
I adore Danielle Walker, a Paleo recipe pioneer, for many reasons. One- she took her health seriously enough to make changes in her life that blessed her body. Two, her recipes are legit, and three- actually taste good. Four- ok one more- her Thai peanut dressing is life-changing and you must buy her cookbook if not for that recipe and the cookie recipe ALONE.
But the cookies. Ohhh, the cookies.
This cookie was the recipe that shook my knowledge of “health food” to the core. These Paleo chocolate chip cookies made with almond flour, coconut flour, vegan palm shortening, and dark chocolate chips. They were SO good, in fact, that I was actively comparing them to my alted brown butter chocolate chip cookies (which I dig SO hard.) Y’all, fresh out of the oven and warm- well, you’ll have to see my response on Facebook or Paleo Chocolate Chip Cookie Taste Test!.
So, check out This week’s Luv Cooks video for paleo chocolate chip cookies, make them, and everrrybody get your cave man on.
Ok, so for some of you this may be a slight stretch- including those of us that ahem, may live below the Mason Dixon line. The highs are still in the 90’s, but hope springs eternal with 60 degree lows once the sun sets. We’ll take what we can get.
There is something about cooler temperatures that makes me crave warm chocolate. This is not a new phenomenon-note ALL of my previous chocolate dessert posts-but a less-humid climate opens up all kinds of possibilities for the Southern sweet tooth. Turn on the oven and blast fudge-y batter at high heat? Why yes, I DO have the mental capacity to consider that idea. Gently simmer coconut milk on the stove and whisk in dark cocoa powder, sugar, vanilla, and a pinch of salt? Yes, I’ll take that warm beverage, thank you very much.
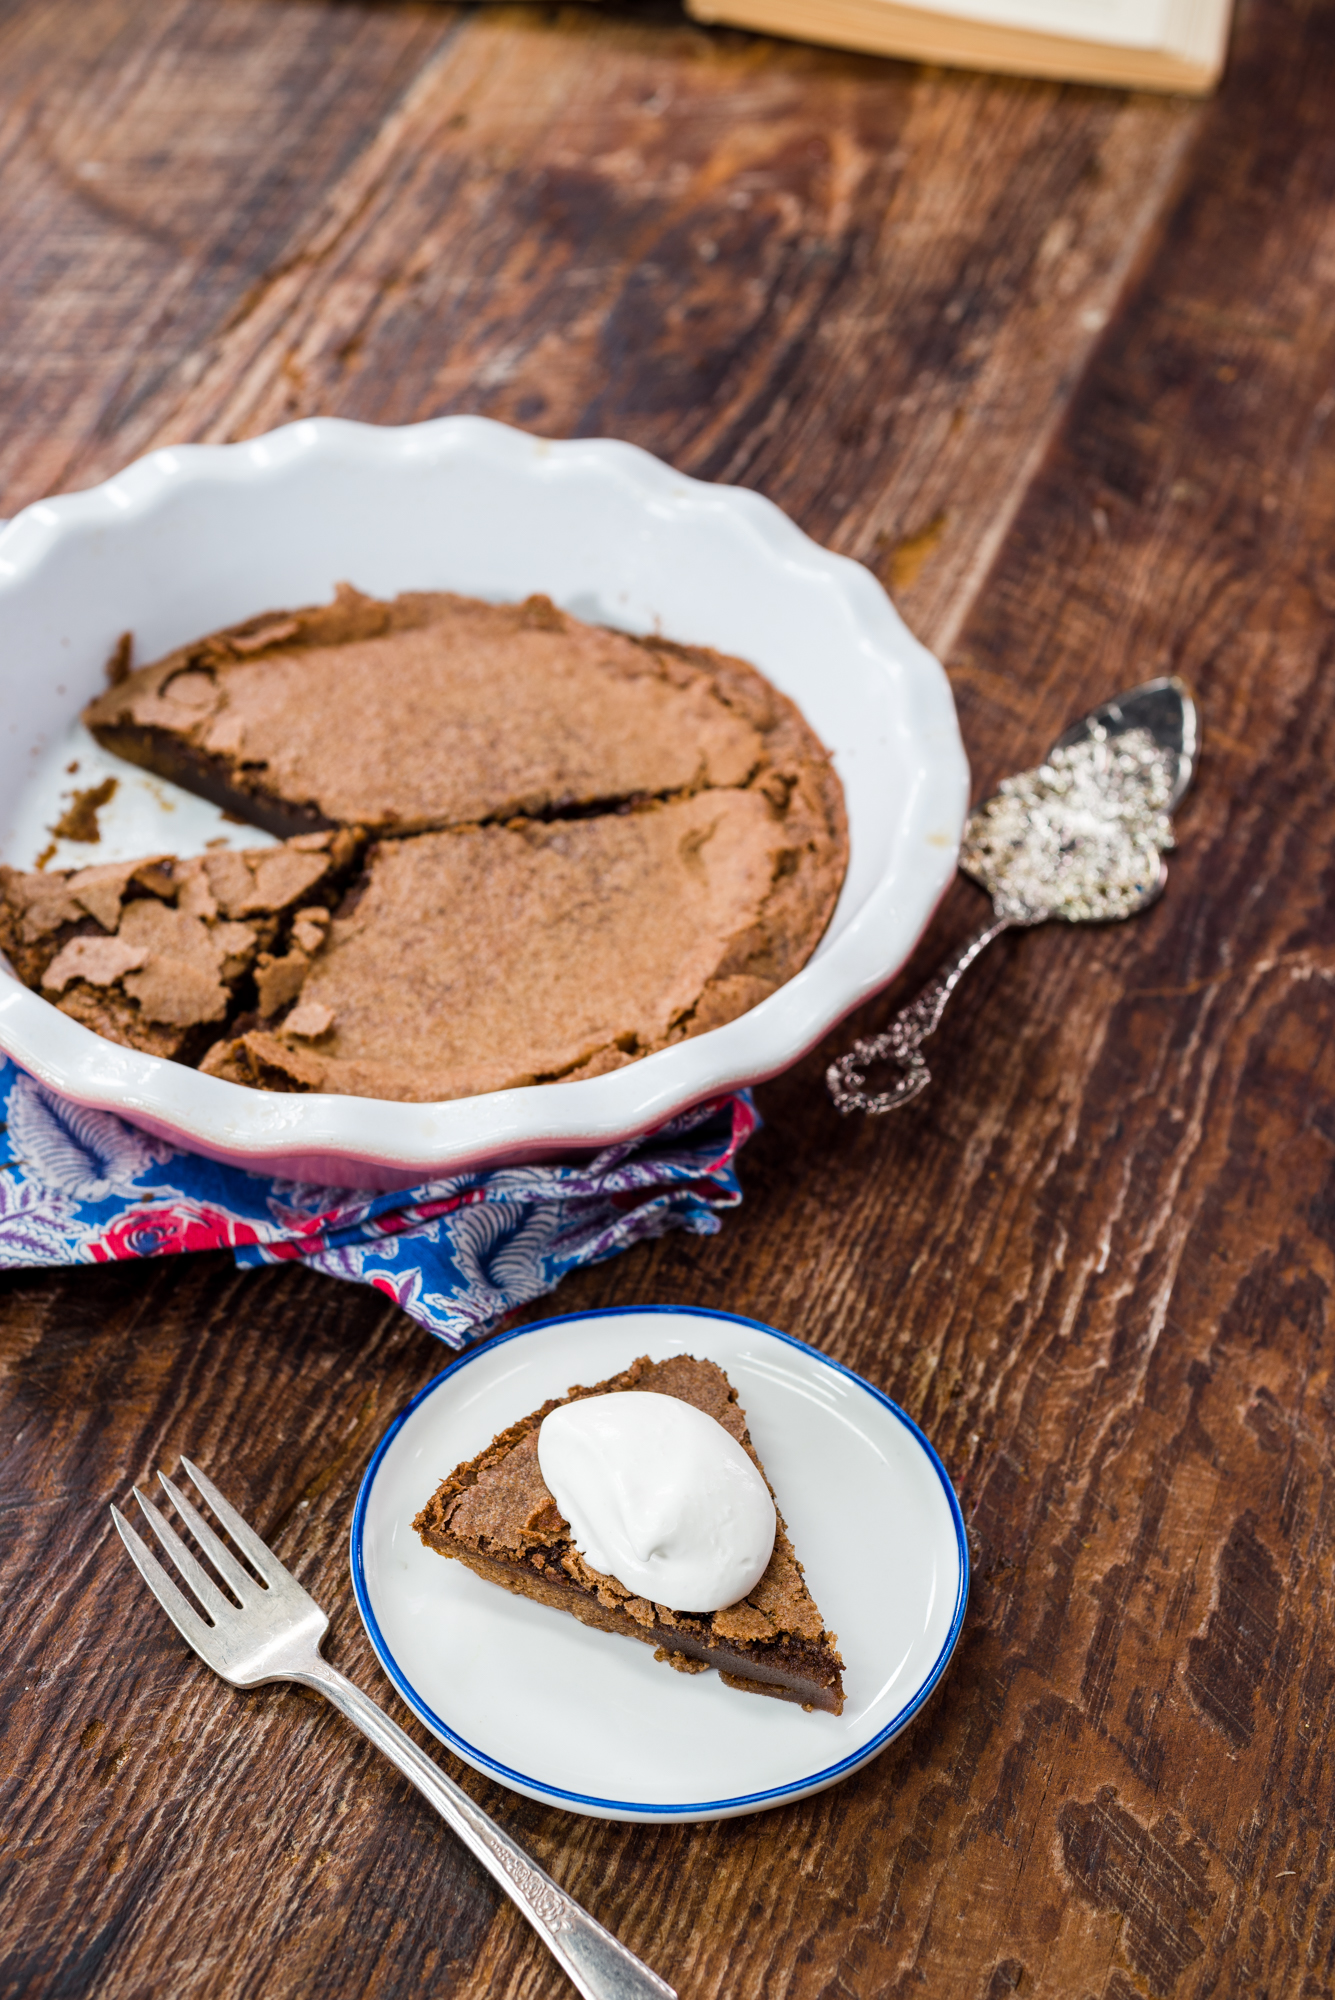
So, today’s post is a fantastic combination of oh-so-easy Southern dessert, fudge brownie-esque goodness, and the perfect vehicle for fresh whipped cream. It takes only a few ingredients and you are on your way to fudge pie glory.
Also, side note- which you will see in the video- the possible reason why this fudge pie is called Edelweiss Fudge Pie is because in the 70’s Methodists took to singing the The Benediction (one of my favorite songs) to the tune of Edelweiss (from the Sound of Music, one of my favorite movies as child).
For your viewing pleasure:
My theory is that so many Methodists were having pot luck dinners on Sundays that the fudge pie served after the Benediction (at the end of service) became known as Edelweiss Fudge Pie. Just my theory, but I think it’s a good one.
Alright y’all. Time to get out there, enjoy the fresh air, and bake up a pie to share with the people you love. Who knows, maybe it will inspire a round of “The Hills are alive…” karaoke.
Edelweiss Fudge Pie from The Nashville Cookbook
With only six ingredients, this is one of the easiest Southern desserts to whip up. It’s, excuse the pun, “easy as pie!”
What you will need
1/2 cup (or 1 stick) butter
2 ounces sweet german chocolate, coarsely chopped
3 farm fresh local eggs
1 cup sugar
1/2 cup flour
1 teaspoon quality vanilla extract
freshly whipped cream, for topping, if desired
What you will do
1. Preheat oven to 325 and grease a 9-inch pie pan.
2. Melt butter and chocolate in a small saucepan over low heat. Allow to cool.
3. Beat eggs in a stand mixer on medium speed until foamy (this should take a few minutes). Beat sugar in gradually, on low speed, until well combined.
4. Add flour slowly to mixer, stirring continually on low speed, and using a rubber spatula to wipe down sides occasionally to make sure it is evenly distributed in the batter. Add 1 teaspoon vanilla and stir until combined.
5. Add cooled chocolate mixture slowly to batter, stirring continually, until evenly distributed.
6. Pour into lightly greased pie pan. Bake for 30-35 minutes (checking at about the 28 minute mark for doneness; toothpick inserted in should come out clean).
7. Let pie cool for about an hour and top with whipped cream. Enjoy!
GUYS. This could be the most exciting Wednesday I’ve ever had.
Today, this morning, I am so excited to put our first Luv Cooks full-length video into the internet stratosphere!
Shout outs for this project are absolutely due to my incredible husband. He not only wrote the musical score for this whole series, he edited these videos late into the night, and arranged the clips just perfectly (he shows me love and grace in countless ways). Also shout out to friends of ours for lending invaluable opinions to the reviewing process! We couldn’t be prouder. I hope this first video will be a launching point for many, many more to come!
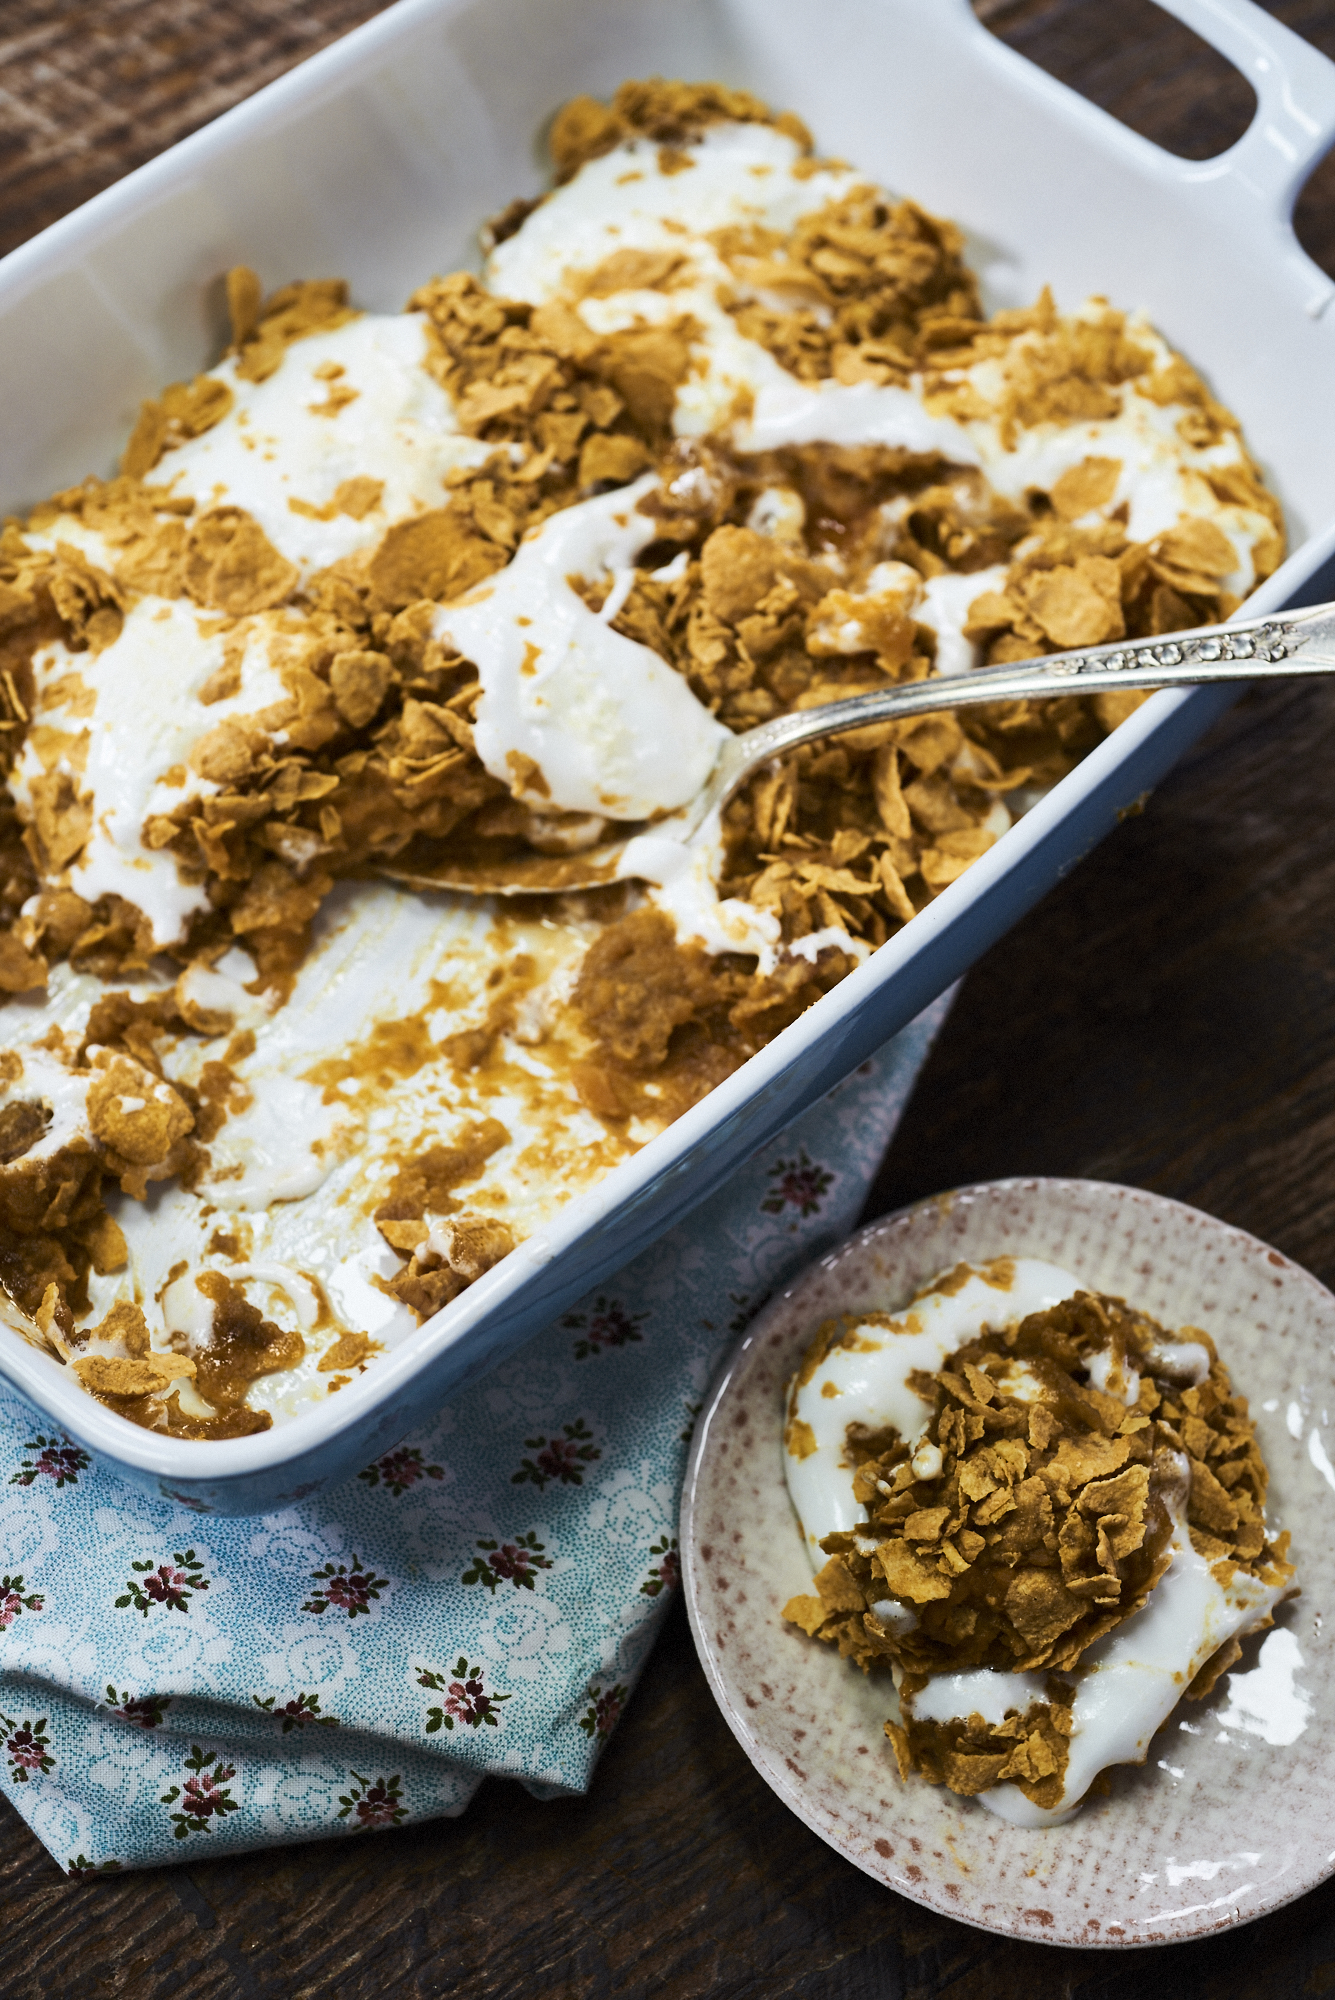
So, take this Wednesday, and be reminded of the fact that dreams DO come true. That things happen in our lives that are beyond our imagination or understanding. And for that, we take marshmallows, roll them sweet potatoes, pecans, and cornflakes, and bake their happy selves until they are lightly toasted. Let’s raise a gooey treat to the fact that life is good- and dreams are worth pursuing.
Luv y’all!
Sweet Potato Puffs
Sweet Potato Puffs by Faye House from The Nashville Cookbook
These easy sweet potato treats will be the hit of your next get-together! They take only a few minutes to throw together after you boil the sweet potatoes, and you get to use an immersion blender.
What You Will Need
4 large sweet potatoes (I like Plano Farms in Nashville; about 2.6 lbs)
4 tablespoons melted butter
4 tablespoons brown sugar
4 tablespoons heavy cream (I like JD Country Milk– their chocolate milk is LEGIT)
1 cup chopped pecans
5 cups cornflakes
Jumbo marshmallows (the big daddy kind- absolute biggest you can buy)
What You Will Do
Boil the sweet potatoes until they are tender. Preheat oven to 375 and spray a 9X13 baking pan with cooking spray.
Drain potatoes, then pour into a large bowl. Add the butter, sugar, heavy cream. Whip with an immersion blender until smooth. Wear large apron to guard against sweet potato splatters. Consider wearing a hair net because if, like me, you have long hair, it might end up on your ends.
Stir in pecans to the potatoes.
Pour cornflakes into a large bowl, then crush with your hands (#fun).
Dip jumbo marshmallows into the potato mixture, covering evenly. Now, roll the marshmallows in the cornflakes, then place into 9X13 baking pan.
Once the pan is full, bake for 15 minutes, or until the tops are toasty brown and the marshmallows have melted a bit. Enjoy immediately! (This is a now tater, not a later-tater!)
In my book, chocolate is one of the best ways to luv somebody.
I mean, as my friend Angela Roberts of Spinach Tiger blog recently said, “Chocolate is my favorite food group.” Agreed, whole heartedly, my friend.
And readers, have I told you lately? I LOVE YOU! So, here is my virtual love gift: chocolate cake.
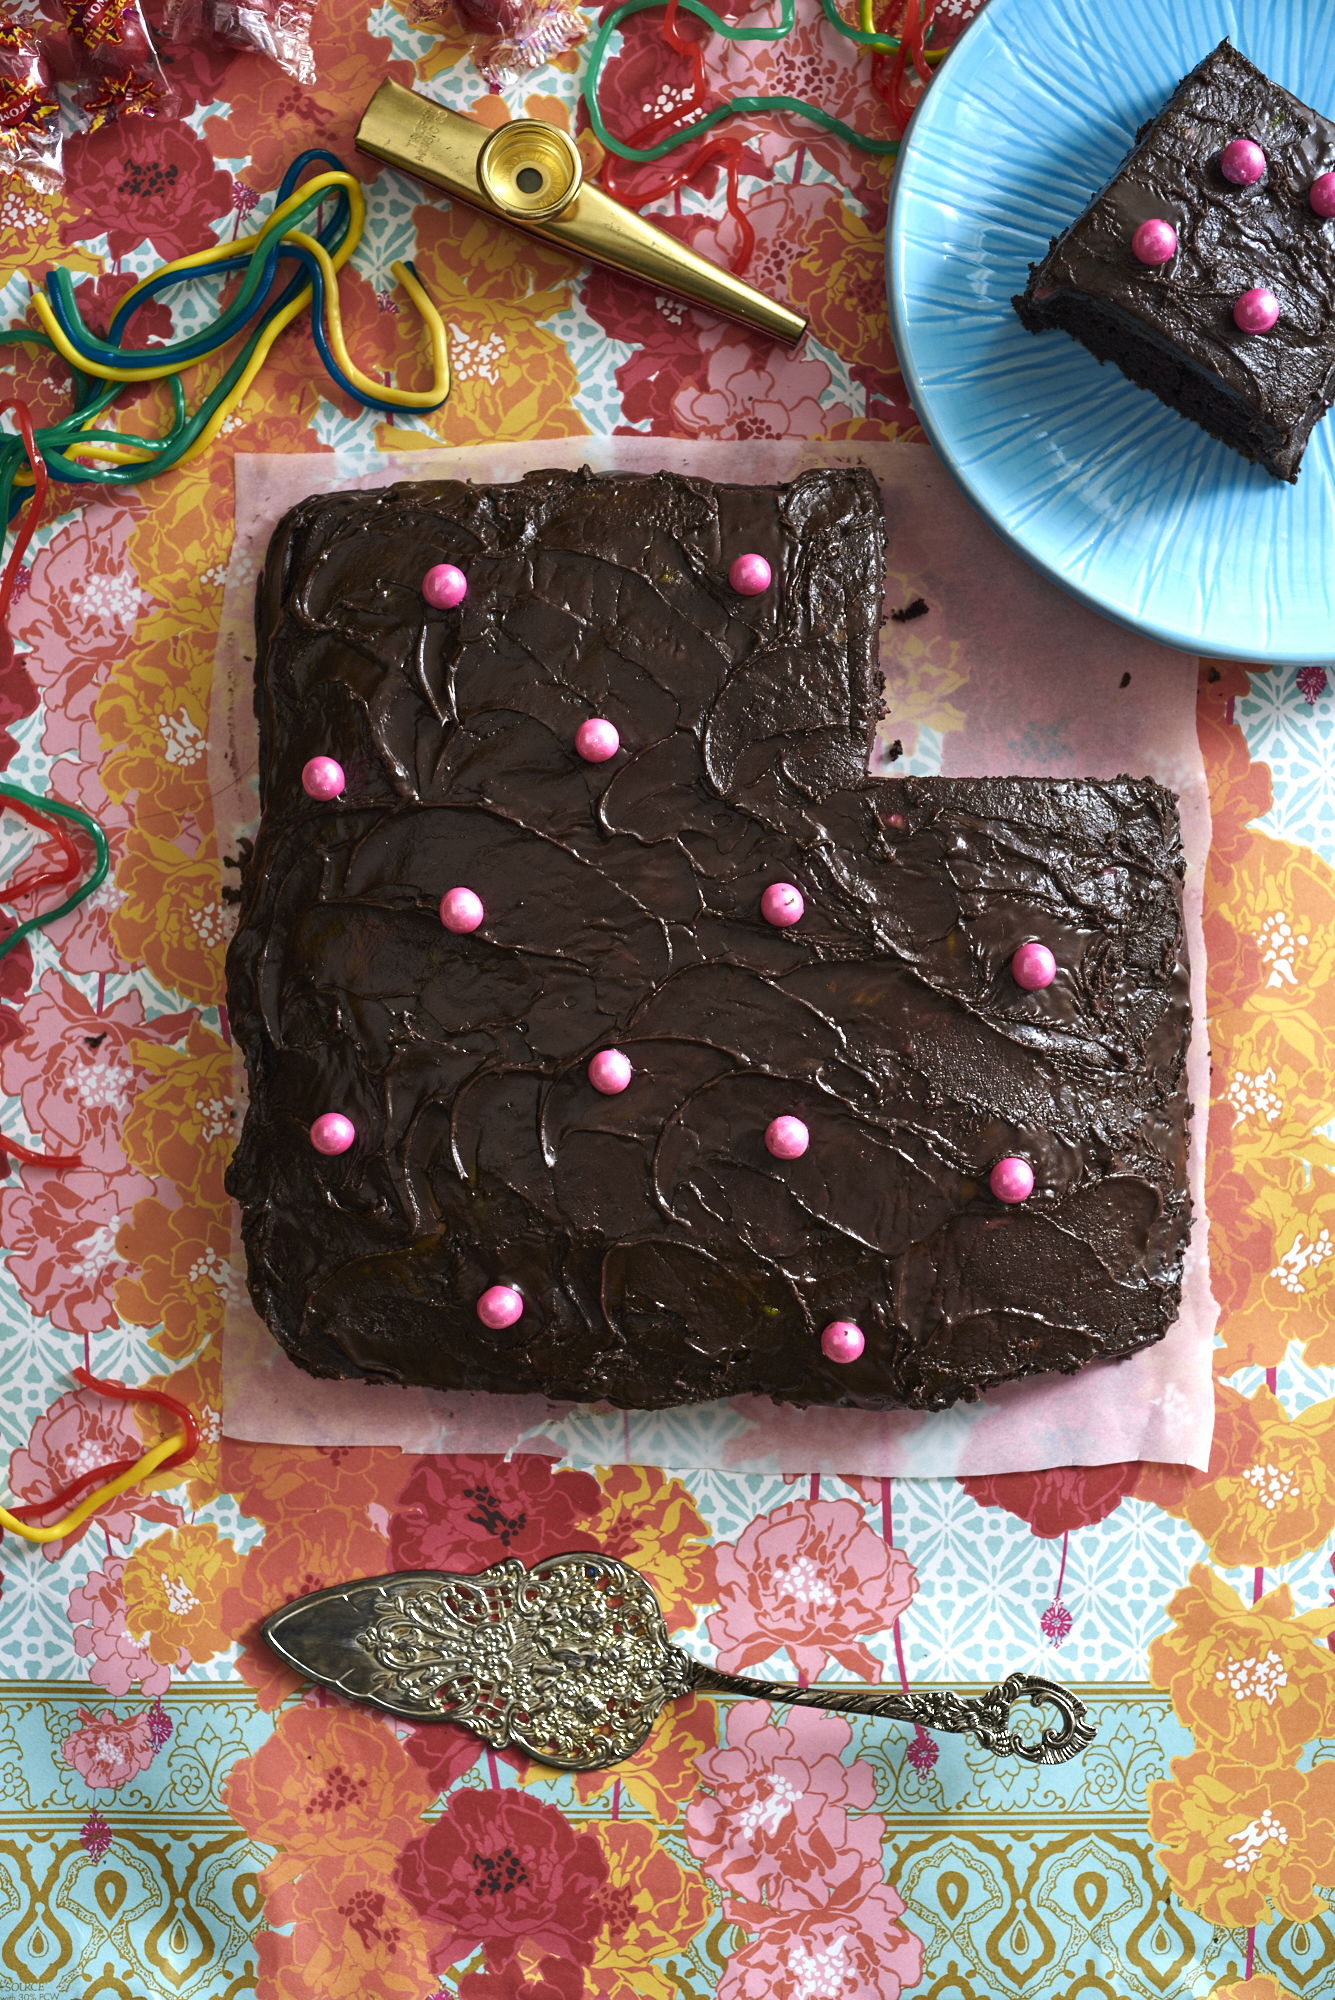
This week’s recipe from The Nashville Cookbook is one of my favorite chocolate cakes I’ve made. If the title of the recipe wasn’t enough- I mean, who can resist “Wacky Cake?”- it involves ONE BOWL. One mixing bowl! Can you imagine? The chocolate cakes I’ve tried in the past involved layered steps of beating in liquids, egg shells, mayonnaise, chocolate batter all over my hands, flour in the crevices of my counter tops, and needless to mention, icing in my hair.
All this recipe requires is a quick sift of the dry ingredients; adding them to the wet ones in a mixer bowl; and a good beating for two minutes. Bake in oven. Viola! This recipe is simple, straightforward, reliable, and good.
***We interrupt this post for a historical fact. Gettin’ you educated!****
The reason why this cake is called “Wacky Cake” is because the traditional version allows you to sift, mix, and bake ingredients in the same pan. I like the mixer method this one uses because I am always concerned with cakes sticking to my pan, thus my love of greasing with shortening. This cake is also called “Three Hole” cake because you can potentially put the dry ingredients in your pan, make three holes, then fill those holes with your liquid mixture. Kids would LOVE this recipe too because it’s so easy and they get to dig in cake mix and make holes. You’re welcome.
Oh, and the recipe has ties to the Depression era because of it’s lack of butter and eggs (due to rationing). Our ancestors were so smart.
****Historical Fact Time Ended. You know, just loving you with some conversation starters this week.***
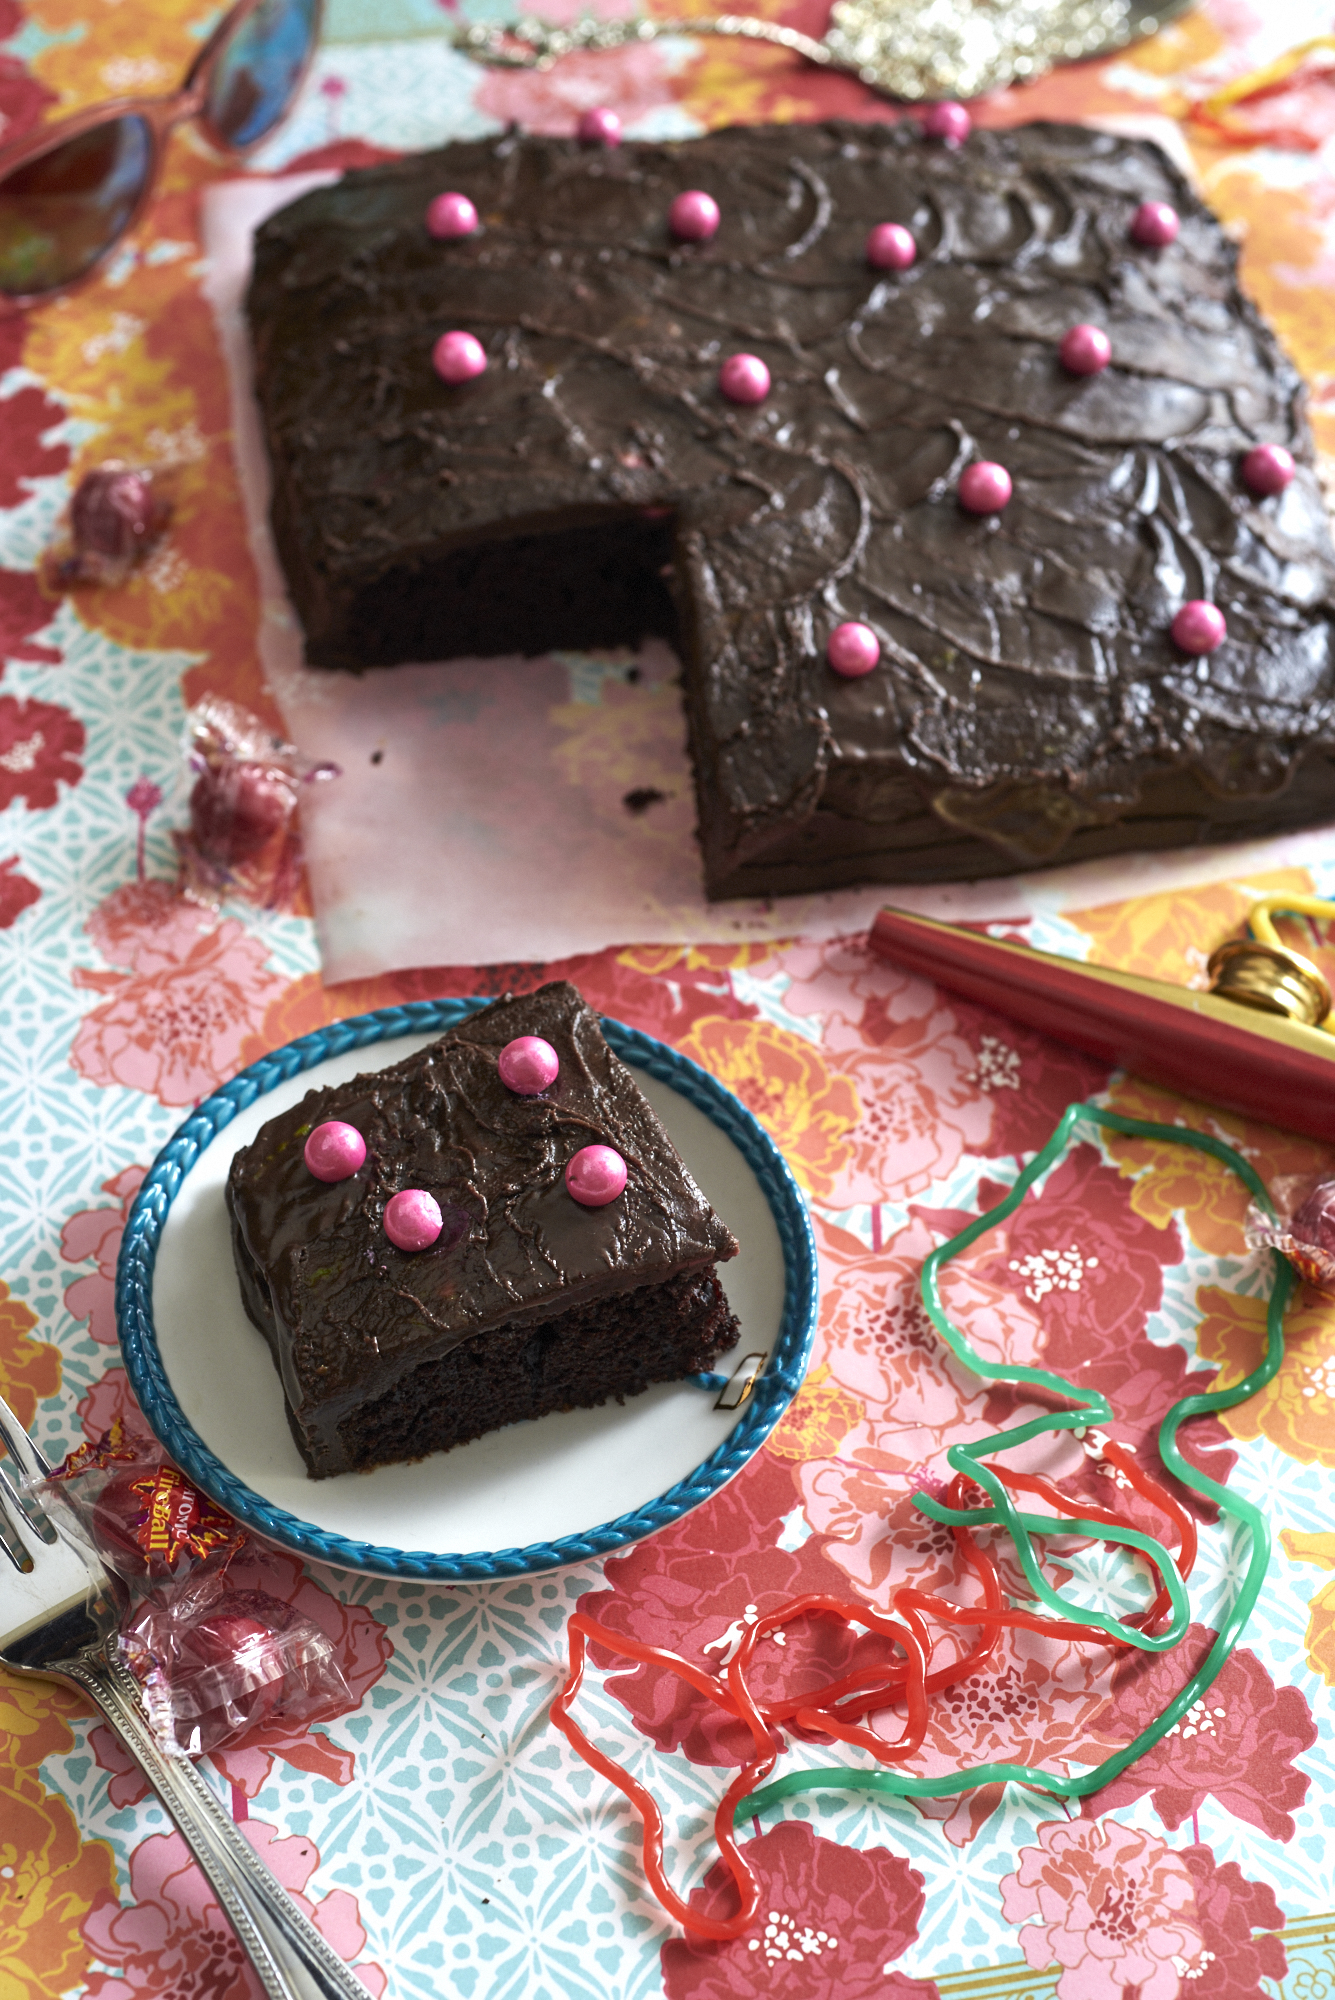
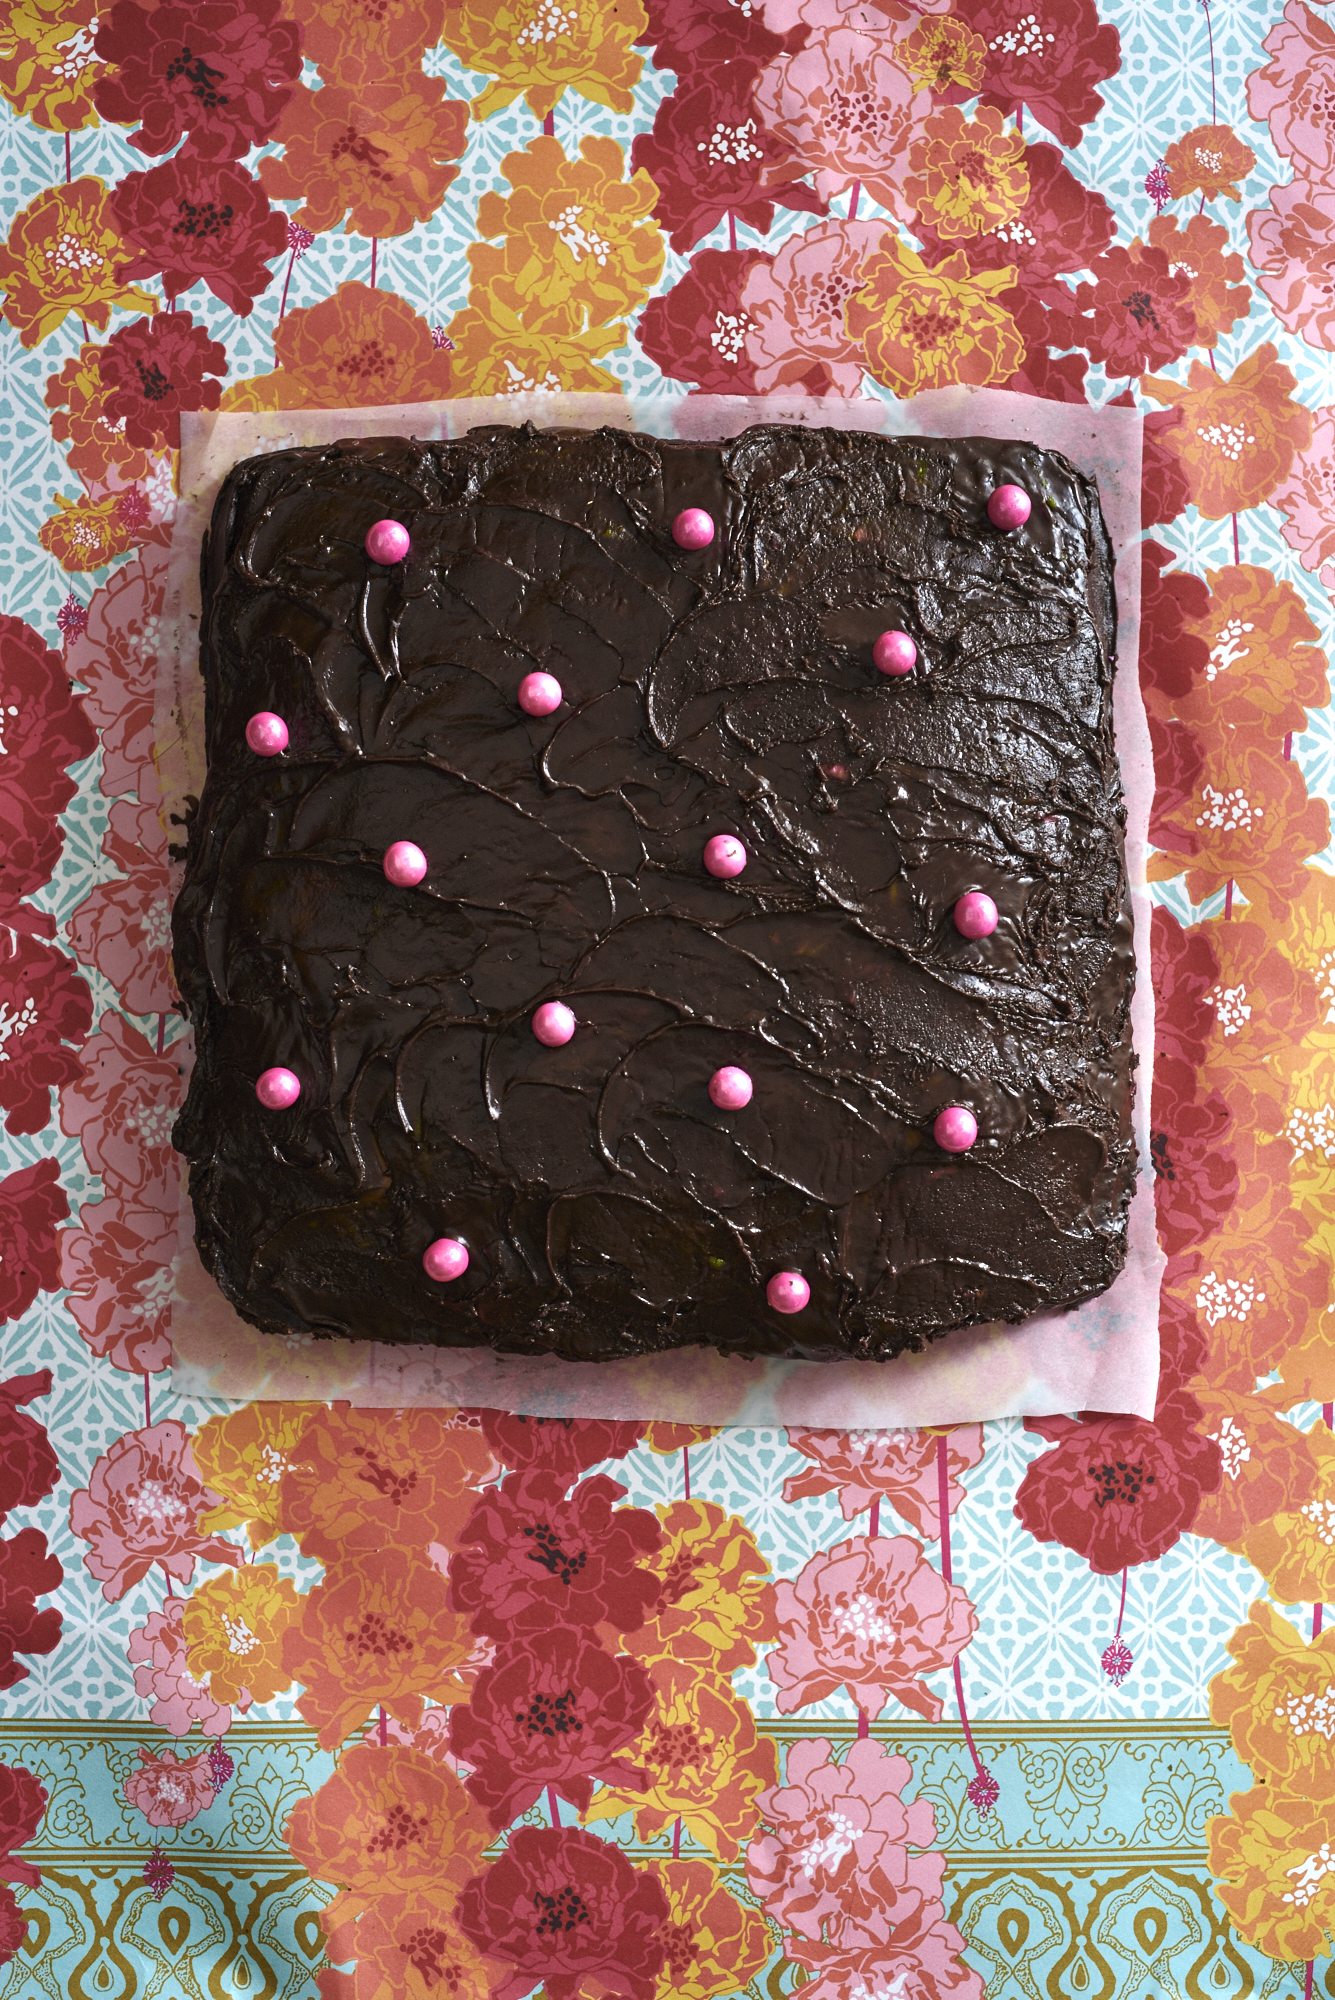
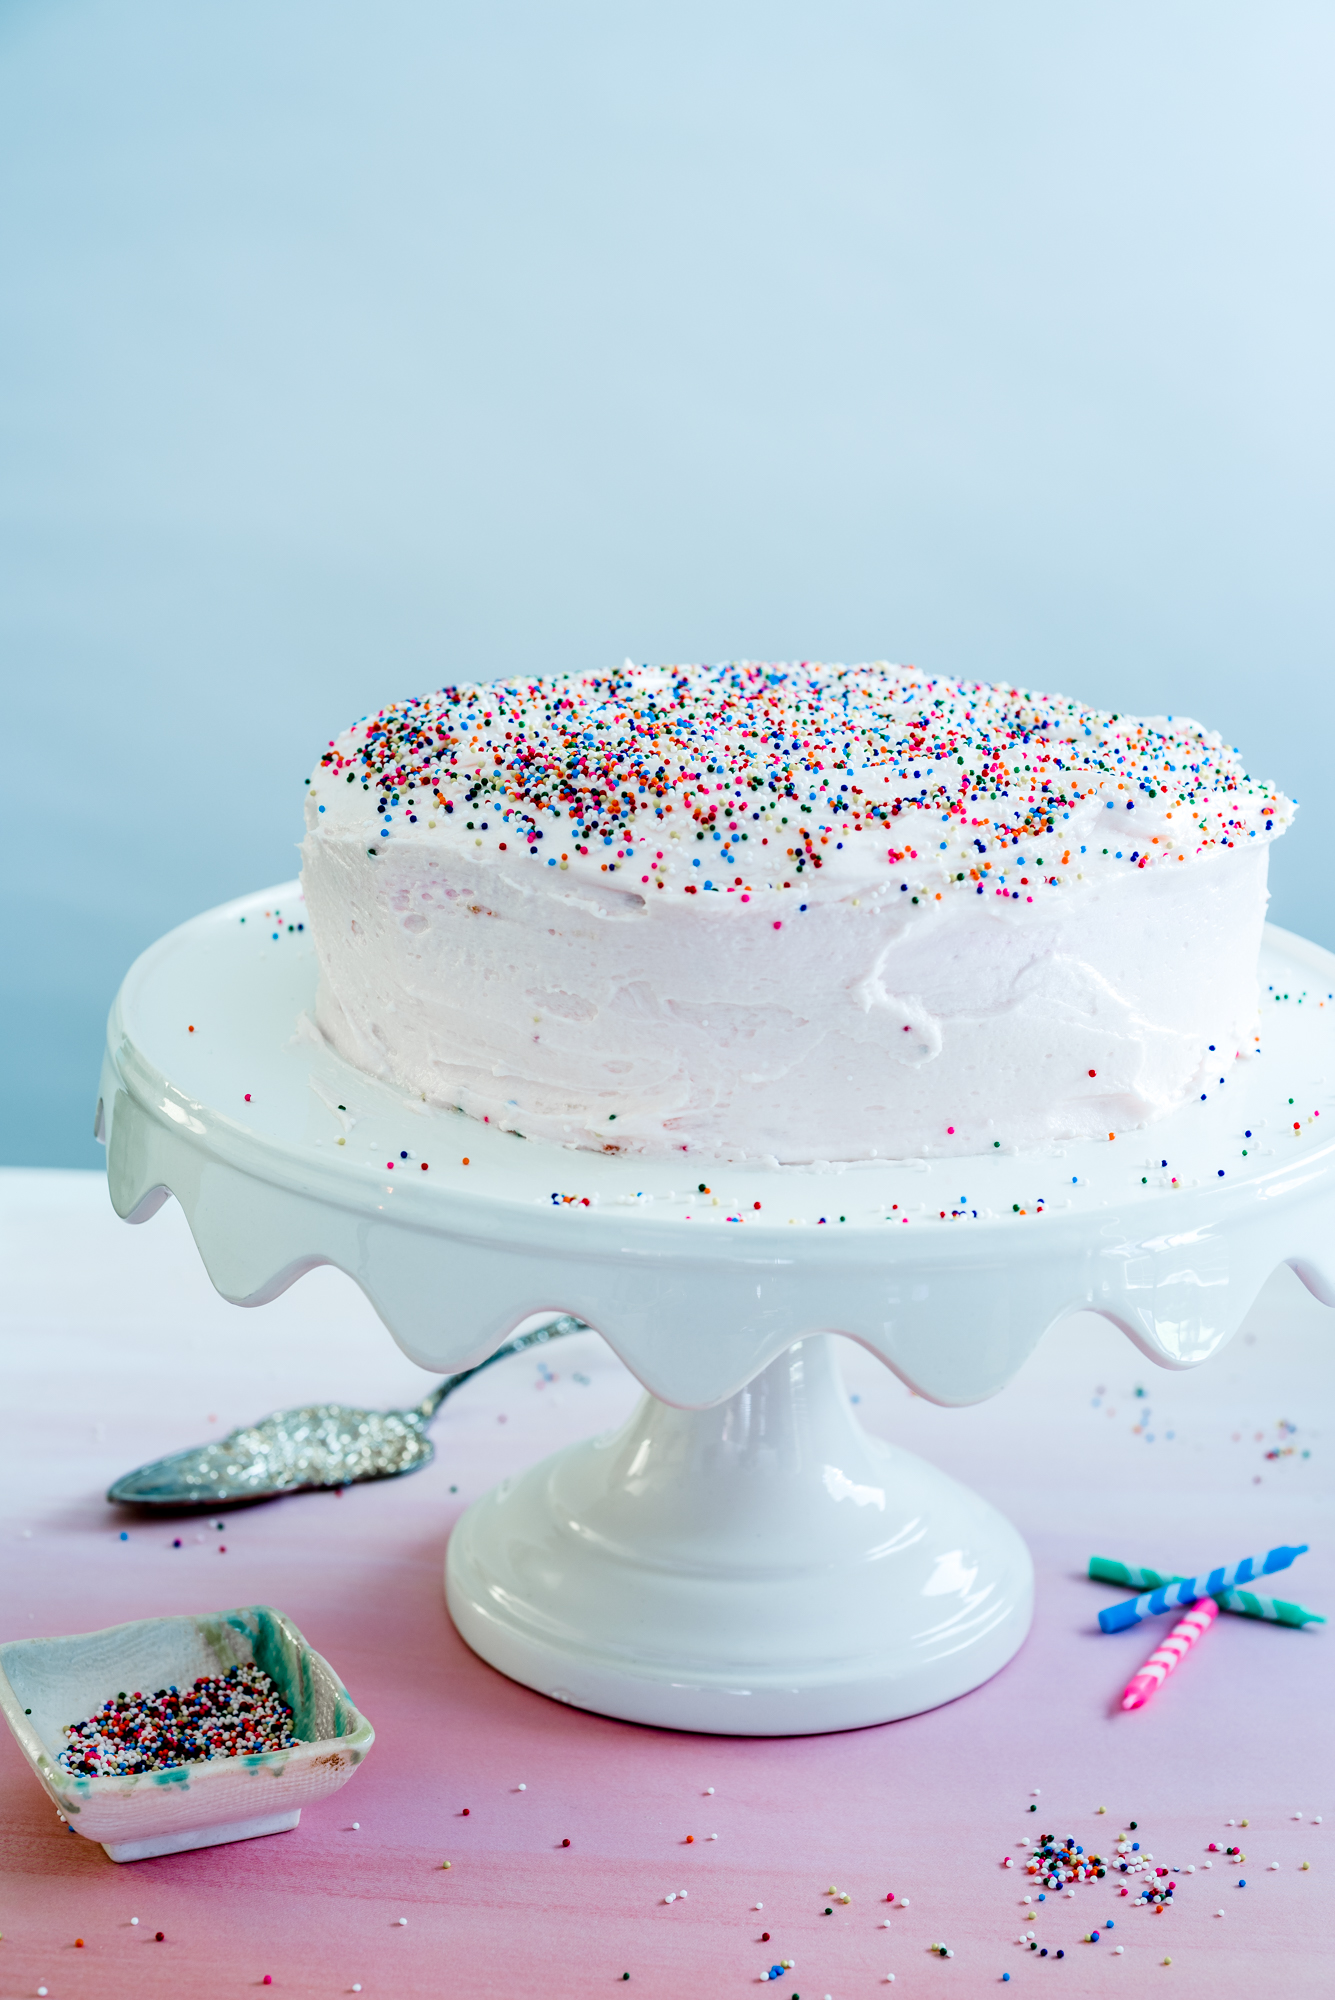
Also, in the spirit of all things fun and Luv Cooks, this cake is presented to you in honor of Valentine’s Day (it’s topped with cute pink chocolate balls for goodness sake). I know it will make anyone in your life who loves chocolate, eats cake, and loves you happy. And for those of you who are vanilla or strawberry people on Valentine’s Day, I apologize. This blog will probably not ever go in that direction. But we luv you anyway!!
Ok y’all- so saddle up those kids, your significant other, your dog- whoever you love on Valentine’s Day, have a BLAST, and make a wacky cake. Silly string not included.
Wacky Cake with Cocoa Fudge Frosting
This cake could not be easier. All you need is a mixing bowl, a few minutes of prep work, and you will be baking a light, chocolatey cake in no time.
What You Will Need:
For the cake:
1 1/2 cups all purpose flour
3 tablespoons cocoa powder
1 cup sugar
1 teaspoon baking soda
1/2 teaspoon salt
1/3 cup vegetable oil
1 cup water
1 tablespoon vinegar
1 teaspoon vanilla
For the Frosting:
1/2 pound powdered sugar
1/4 cup cocoa
1/4 cup softened butter
1 teaspoon vanilla
2 tablespoons water (plus more if needed)
1/4 cup (plus 1 tablespoon if needed) corn syrup
What You Will Do:
Preheat the oven to 350 degrees. Grease and flour a 9-inch square baking pan.
Sift the flour, cocoa powder, sugar, baking soda, and salt together in a mixer bowl. Add your wet ingredients (oil, water, vinegar, and vanilla) and mix on medium speed for two minutes.
Pour the batter into the cake pan and bake for about 40 minutes, or until a toothpick inserted in the middle comes out clean. The cake should also spring back when you touch it.
Allow to cool in the pan before you ice this beauty!
Now, make the icing:
Combine the sugar, cocoa, butter and vanilla in a mixing bowl until no lumps remain and things are looking smooth.
Pour the water and corn syrup in a small saucepan, and heat the mixture to simmering but don’t boil it (you want gentle bubbles to start forming, then take it immediately off the heat). Pour your warmed syrup mixture into the mixing bowl.
Beat the icing at a low speed until smooth and glossy. My icing wasn’t smooth and glossy at this point, it got a bit too thick. So I added one more tablespoon warm water and 1 more tablespoon corn syrup. If your icing is still thick, continue adding warm water and corn syrup until it loosens.
Now, frost the cake! You want to do this while the icing is warm, or it becomes hard to smooth.
If you haven’t, I need you to stop what you are doing right now and put it in your Netflix que.
Babette’s Feast is the story of two sisters who live in a tiny Danish sea village. Now, this village isn’t the type found in romantic fantasies; it is incredibly windy, cold, and seemingly full of dried fish.
Both of the sisters are raised by a very conservative, minister father who encourages them to stay at home and live the life of Godly, puritan women. Each has the chance to leave the village- one to marry a soldier, the other to be swept away as a performer in the Parisian opera house- but both choose to live at home and instead give their lives on behalf of the poor.
Danish music plays and winds sweep across the ocean. Scenes of boats. Women in long cloaks. And then…
Babette arrives. Perfectly on cue, she, amidst pain and suffering of her own, arrives on the scene and becomes the color to these precious womens’ meager kitchen. She swaps what appears to be cement-like brown stew for fresh rolls; clear broth dotted with dumplings and fresh herbs; bacon, and fresh fruits the townspeople had never laid eyes on, let alone tasted. The story continues and, without giving too much away (You must see this movie!!) Babette’s fortune changes as fast as a mail carrier can reach her. The rest, as they say, is movie- and food- magic.
I watched Babette’s Feast this afternoon with two beautiful, inspiring Creative women. Each has their own area of expertise- and is incredibly skilled and intelligent in their prospective realms- but, in their heart of hearts, is an artist. It expresses itself in the light in their eyes; the way Jan set our table for lunch, taking time to light the candles and tweak the Christmas greenery on the table runner; the way Ana beautifully whisked her own farm-raised basil sheep’s cheese into golden olive oil, berry red wine vinegar, maple syrup and a dash of dijon mustard to dress our greens salad.
There was such an artistry and experience and heart-felt loveliness to the afternoon. It was just what I needed after a busy holiday rush, tracking miles in our tiny Prius, to sit in a warm living room, the afternoon sun setting, snacking on peppermint ice cream and toasted pumpkin nut bread and Ana’s dark chocolate sheep’s cheese truffles.
It truly fed my soul, and echoed what Babette said- “An artist is never poor.”
You know- in my limited experience- I agree. When we do what we were brought on to this earth to do, just like Jan and Ana do, just like I attempt to do as a stylist and Creative mentor- it makes us come alive. It colors the world around us and brings what was once a gray environment alive and awake to the beauty of it’s Creator. It’s transcendent and generous and soul-stirring. It is true and loving and in the moment. It’s love and it’s food and it’s spiritual.
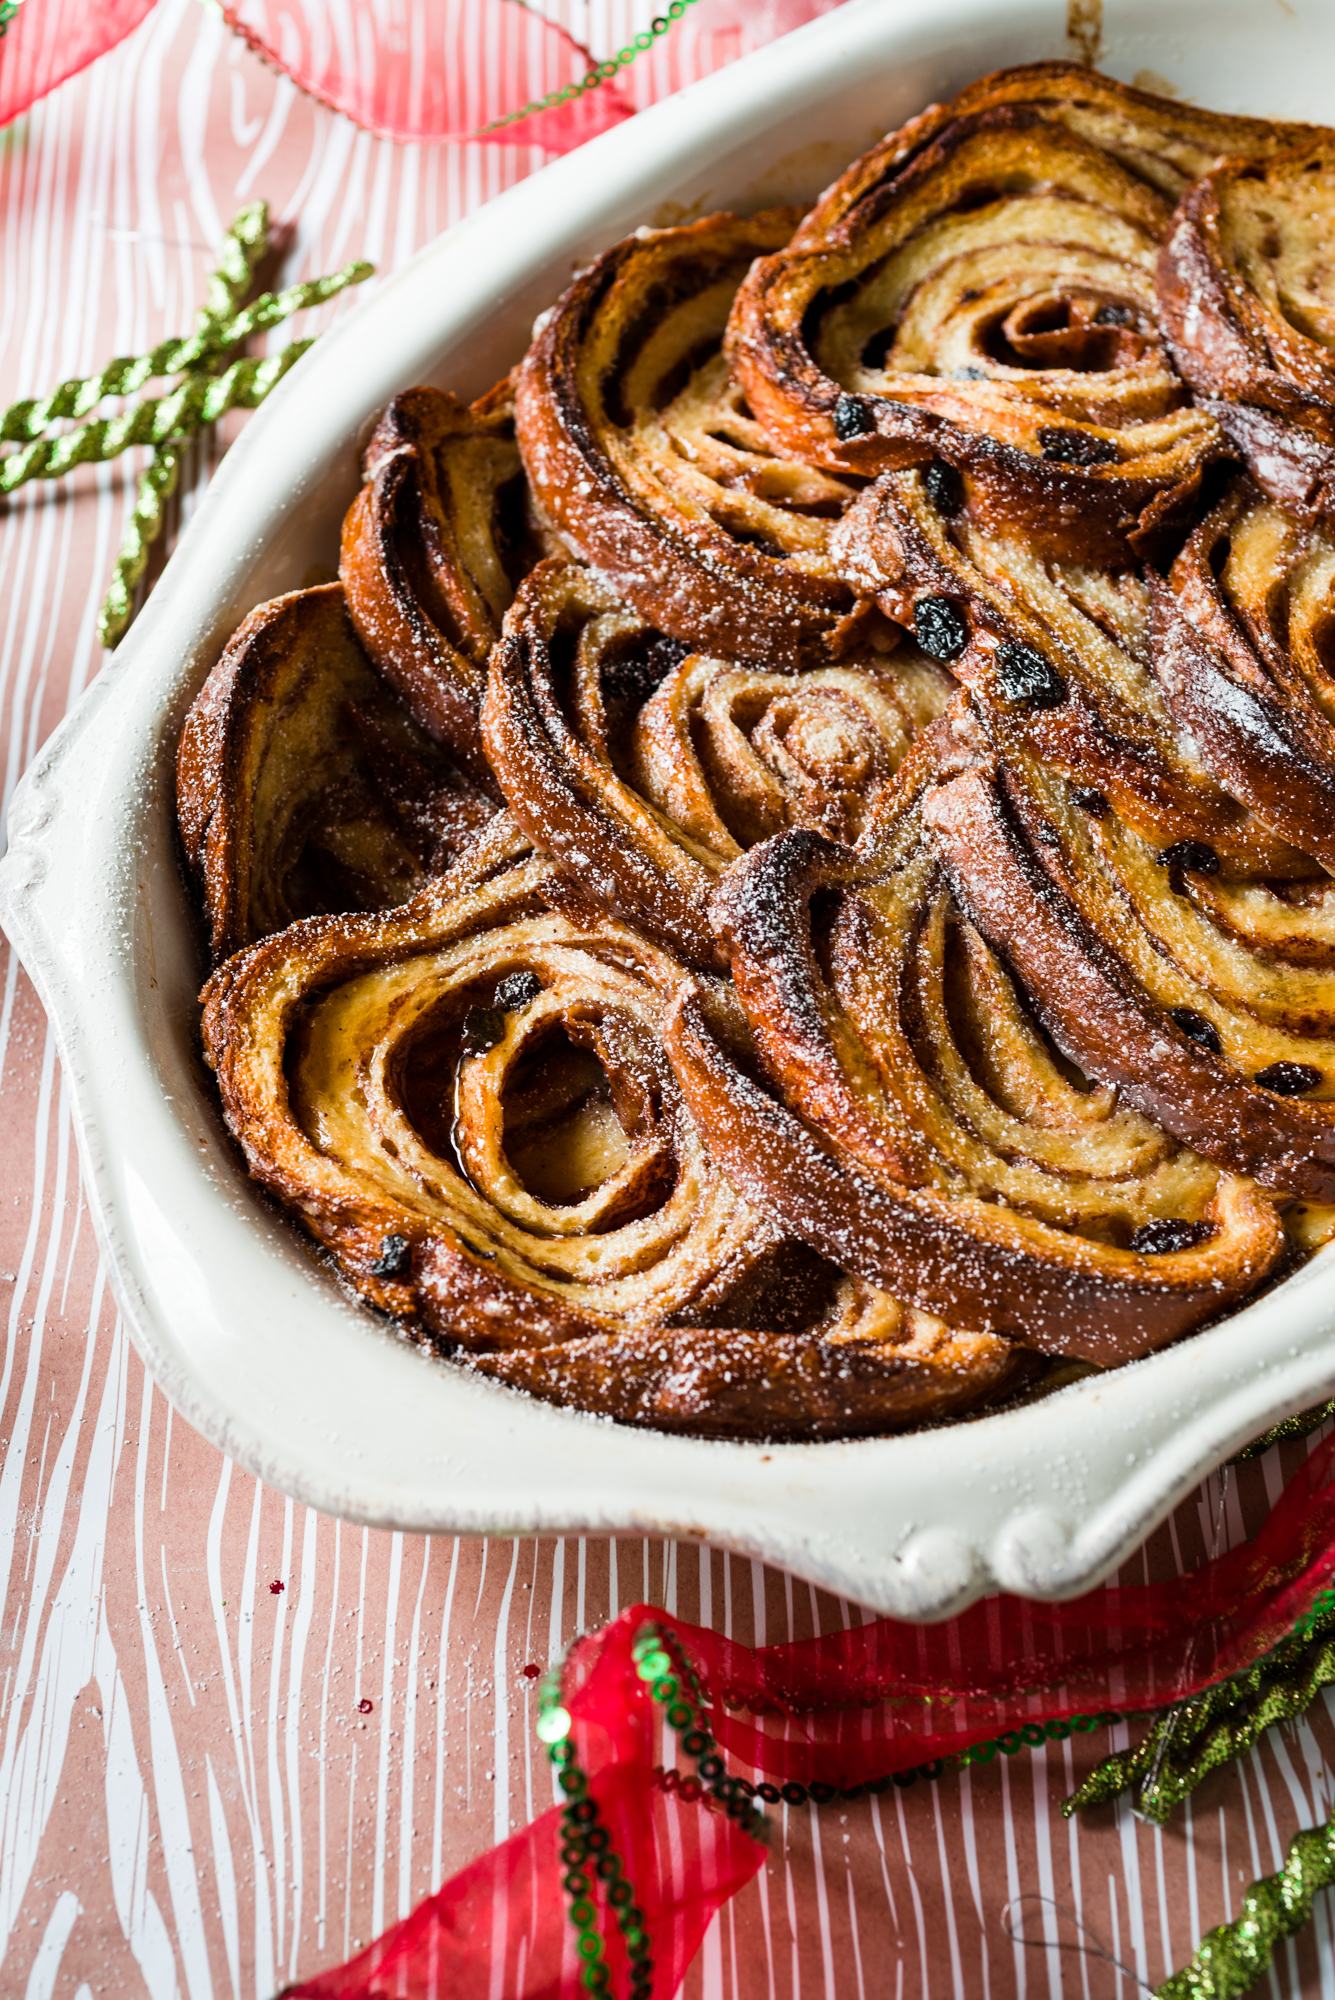
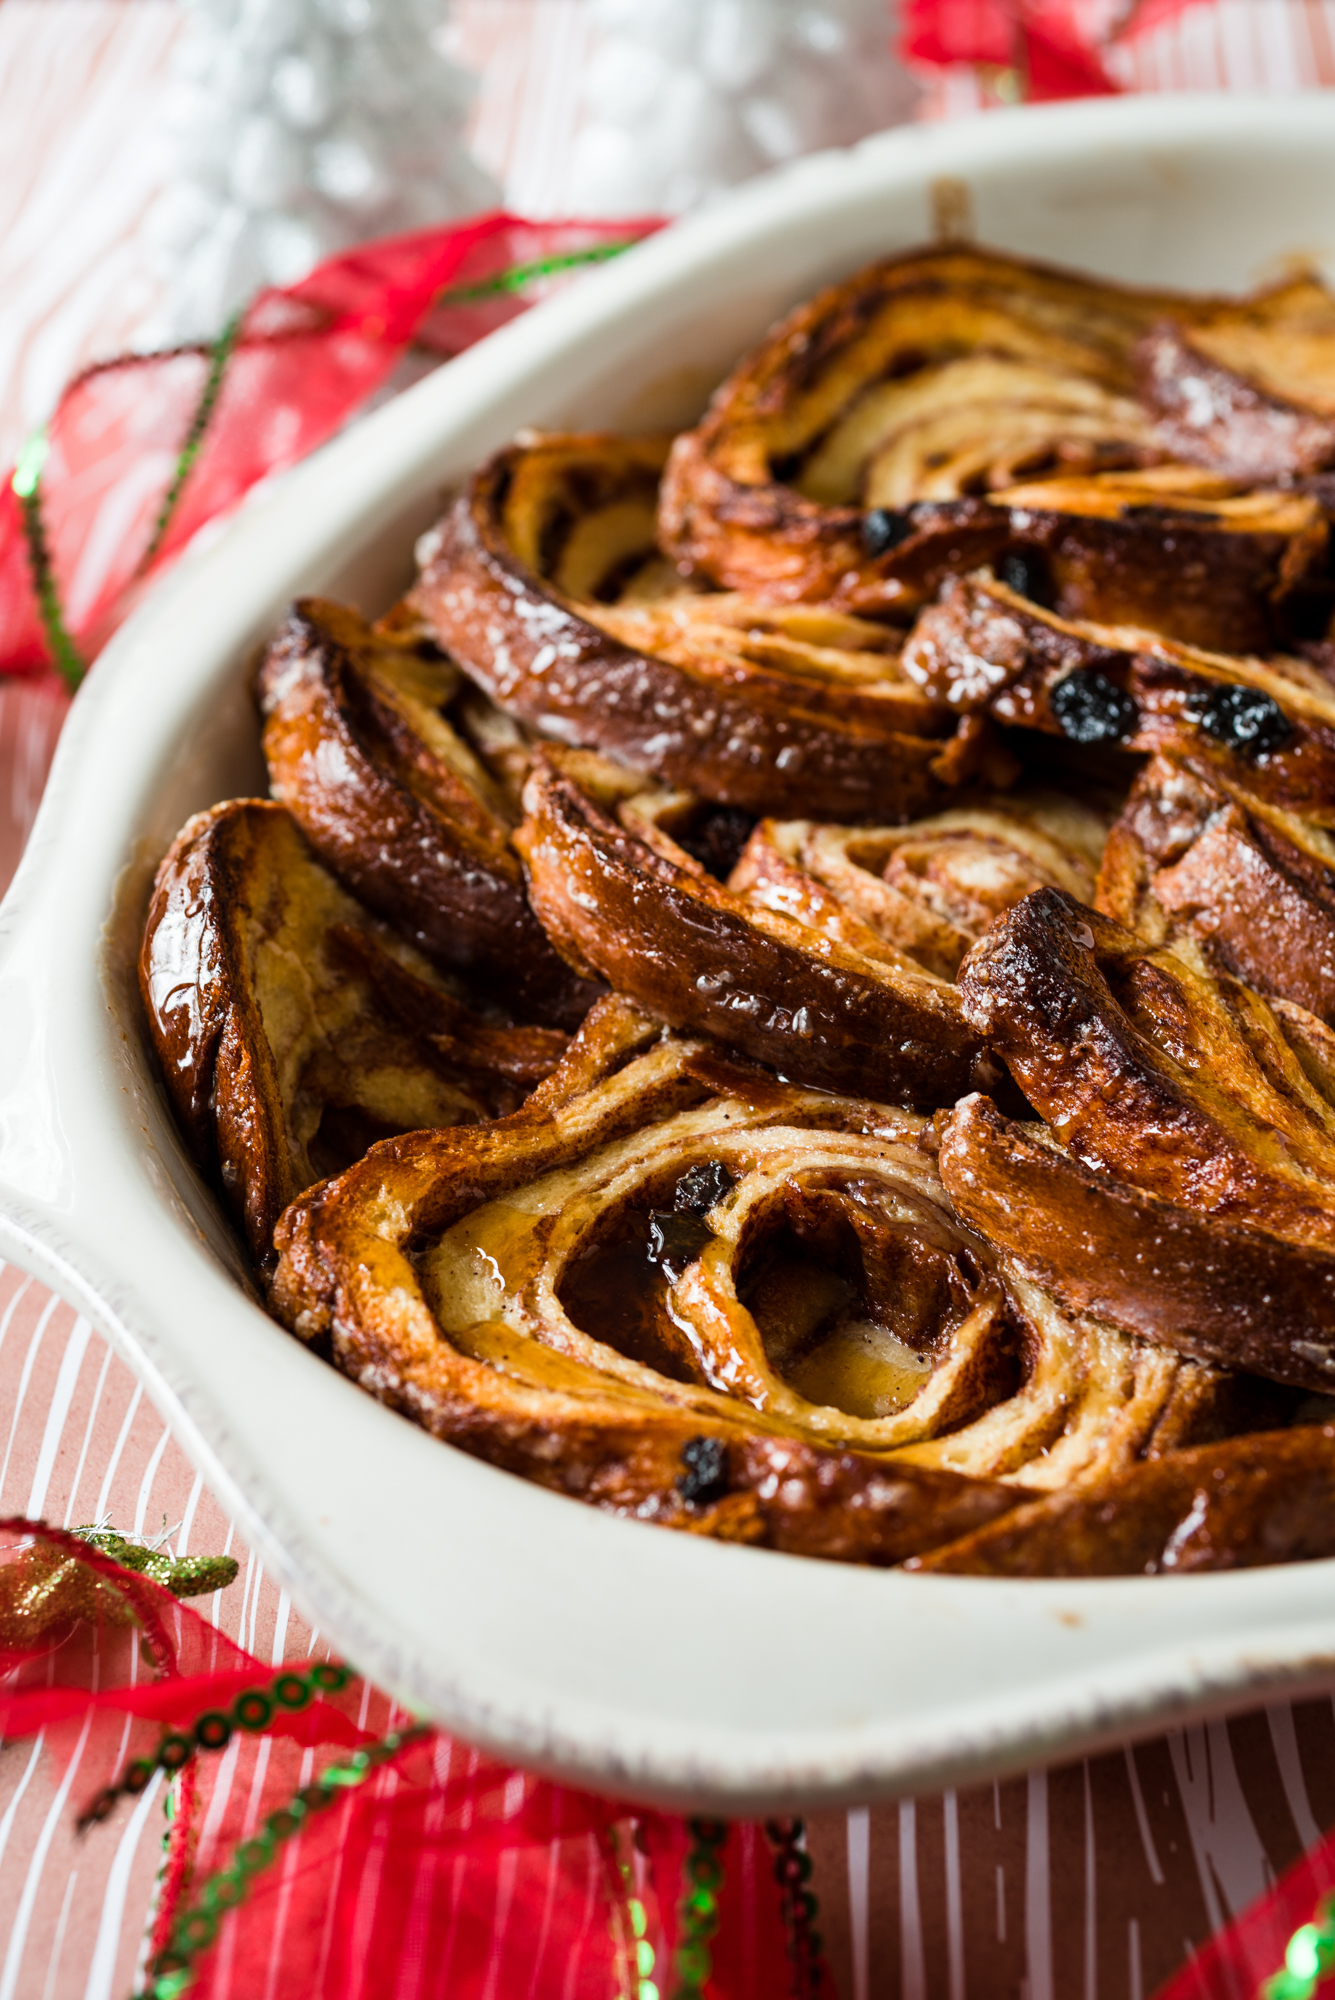
The reason I love this french toast is because it started off with an act of generosity, that also came from the heart of an artist. My husband and I ran into Vance, who owns Savage’s Bakery in Homewood, a few weeks ago during a Christmas open house near where we live. With a sparkle in his eye he shared about all they are baking these days, the history of his family’s recipes, and how important it was to him that every one of his customers experience all of the tastes and flavors that come from their ovens. I went in expectant to try a few things- and walked out with armloads of fresh rolls and a loaf of the best cinnamon raisin bread. It’s fantastic. Not too sweet, warm and soft on the inside, with cinnamon lacing around in swirls towards the thin crust, lightly glazed with icing. It’s perfection in a slice, and I knew I had to share it with you. I had to find a way to share the beauty of his generosity with you.
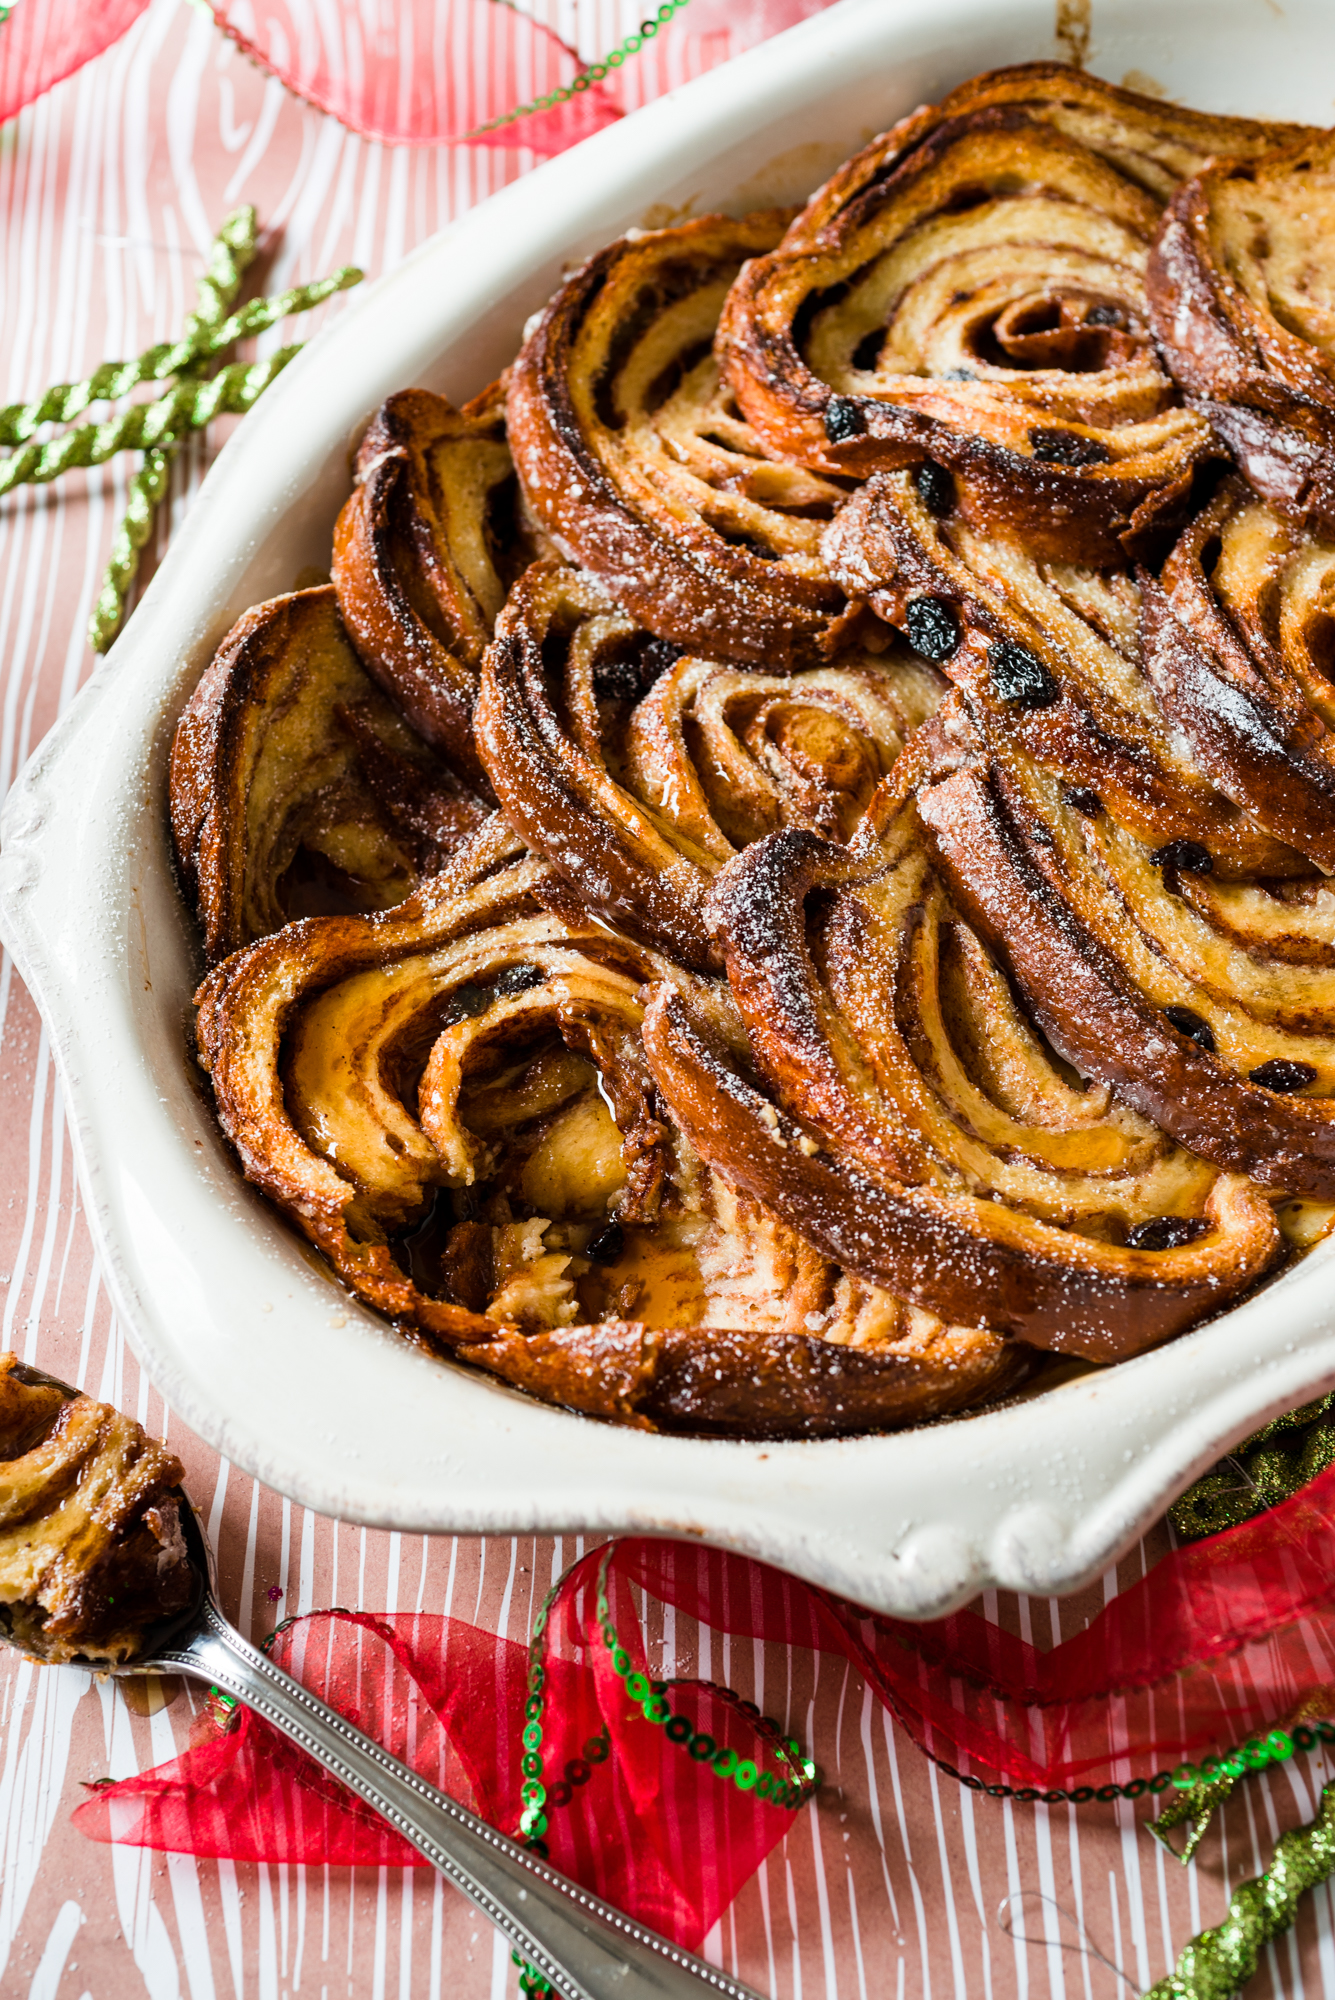
So, here is my spin on Smitten Kitchen’s Boozy French Toast, something I am calling Cinnamon Raisin French Toast Bake. The recipe calls for the mixture to sit overnight, but I’ve tried it both ways (sitting overnight and sitting for about 30 minutes) and each version is delicious. I think it just depends on what your schedule allows! But please do make this. Put it in your oven, pour some maple syrup in a small sauce pan to warm, and invite the people you love over to share it with you. Style your table however you like and create beauty how you see fit. Because those are the moments and memories, like Babette’s-like my afternoon- that last forever.
You can either let this french toast sit overnight, or chill it in the fridge for at least 30 minutes. Both ways seem to work!
What You Will Need:
1 loaf Savage’s cinnamon raisin bread, cut into 1/4 inch slices
3 cups whole milk
3 eggs
3 tablespoons sugar
1/2 teaspoon salt
butter, for greasing baking dish
1/4 teaspoon ground nutmeg
maple syrup, warmed, for topping
powdered sugar, for topping
What You Will Do:
1. Generously grease a 9×13-inch baking dish with butter.
2. Arrange bread in one tightly-packed layer in the pan. If you have end pieces left from your slicing, I like to cut them in half and stick them in or around any gaps you see in the layer of bread. Also, feel free to snack on the extra scraps (just a hint of what you will be in for ).
3. Whisk milk, eggs, sugar, salt and nutmeg and pour over the bread.
4. Wrap tightly with plastic wrap and refrigerate overnight. The bread will absorb all of the milk custard while you sleep.
5. Bake at 425 for about 30 minutes, or until puffed and golden.
6. Cut into generous squares and top with warmed maple syrup, powdered sugar, or both.
Y’all- there is nothing like Southern women. Those of you who know me know my deep love for the classic, Southern-drawl, all-out fabulous women of the South. But grandmothers in particular are my total favorite.
Yesterday I was on one of the most fun video shoots I’ve been on in a while, and it was entirely about Southern grandmothers. Their presence on camera was perfect. Open, ridiculously honest, hilarious, yet still maintaining the epitome of Southern charm (all the while sporting a host of fur-trimmed clothing items and pearled accessories) they were stunningly beautiful. I found myself praying that I would one day become like them- each had such a spark, a love, a vitality and joy to them.
But the thing that struck me the most about these women was their love for the food they cook and the people they cook it for. The majority of them grew up family farms and ate like queens. As in, fresh produce from the backyard, homemade cornbread, fresh milk at their disposal- hallelujah!
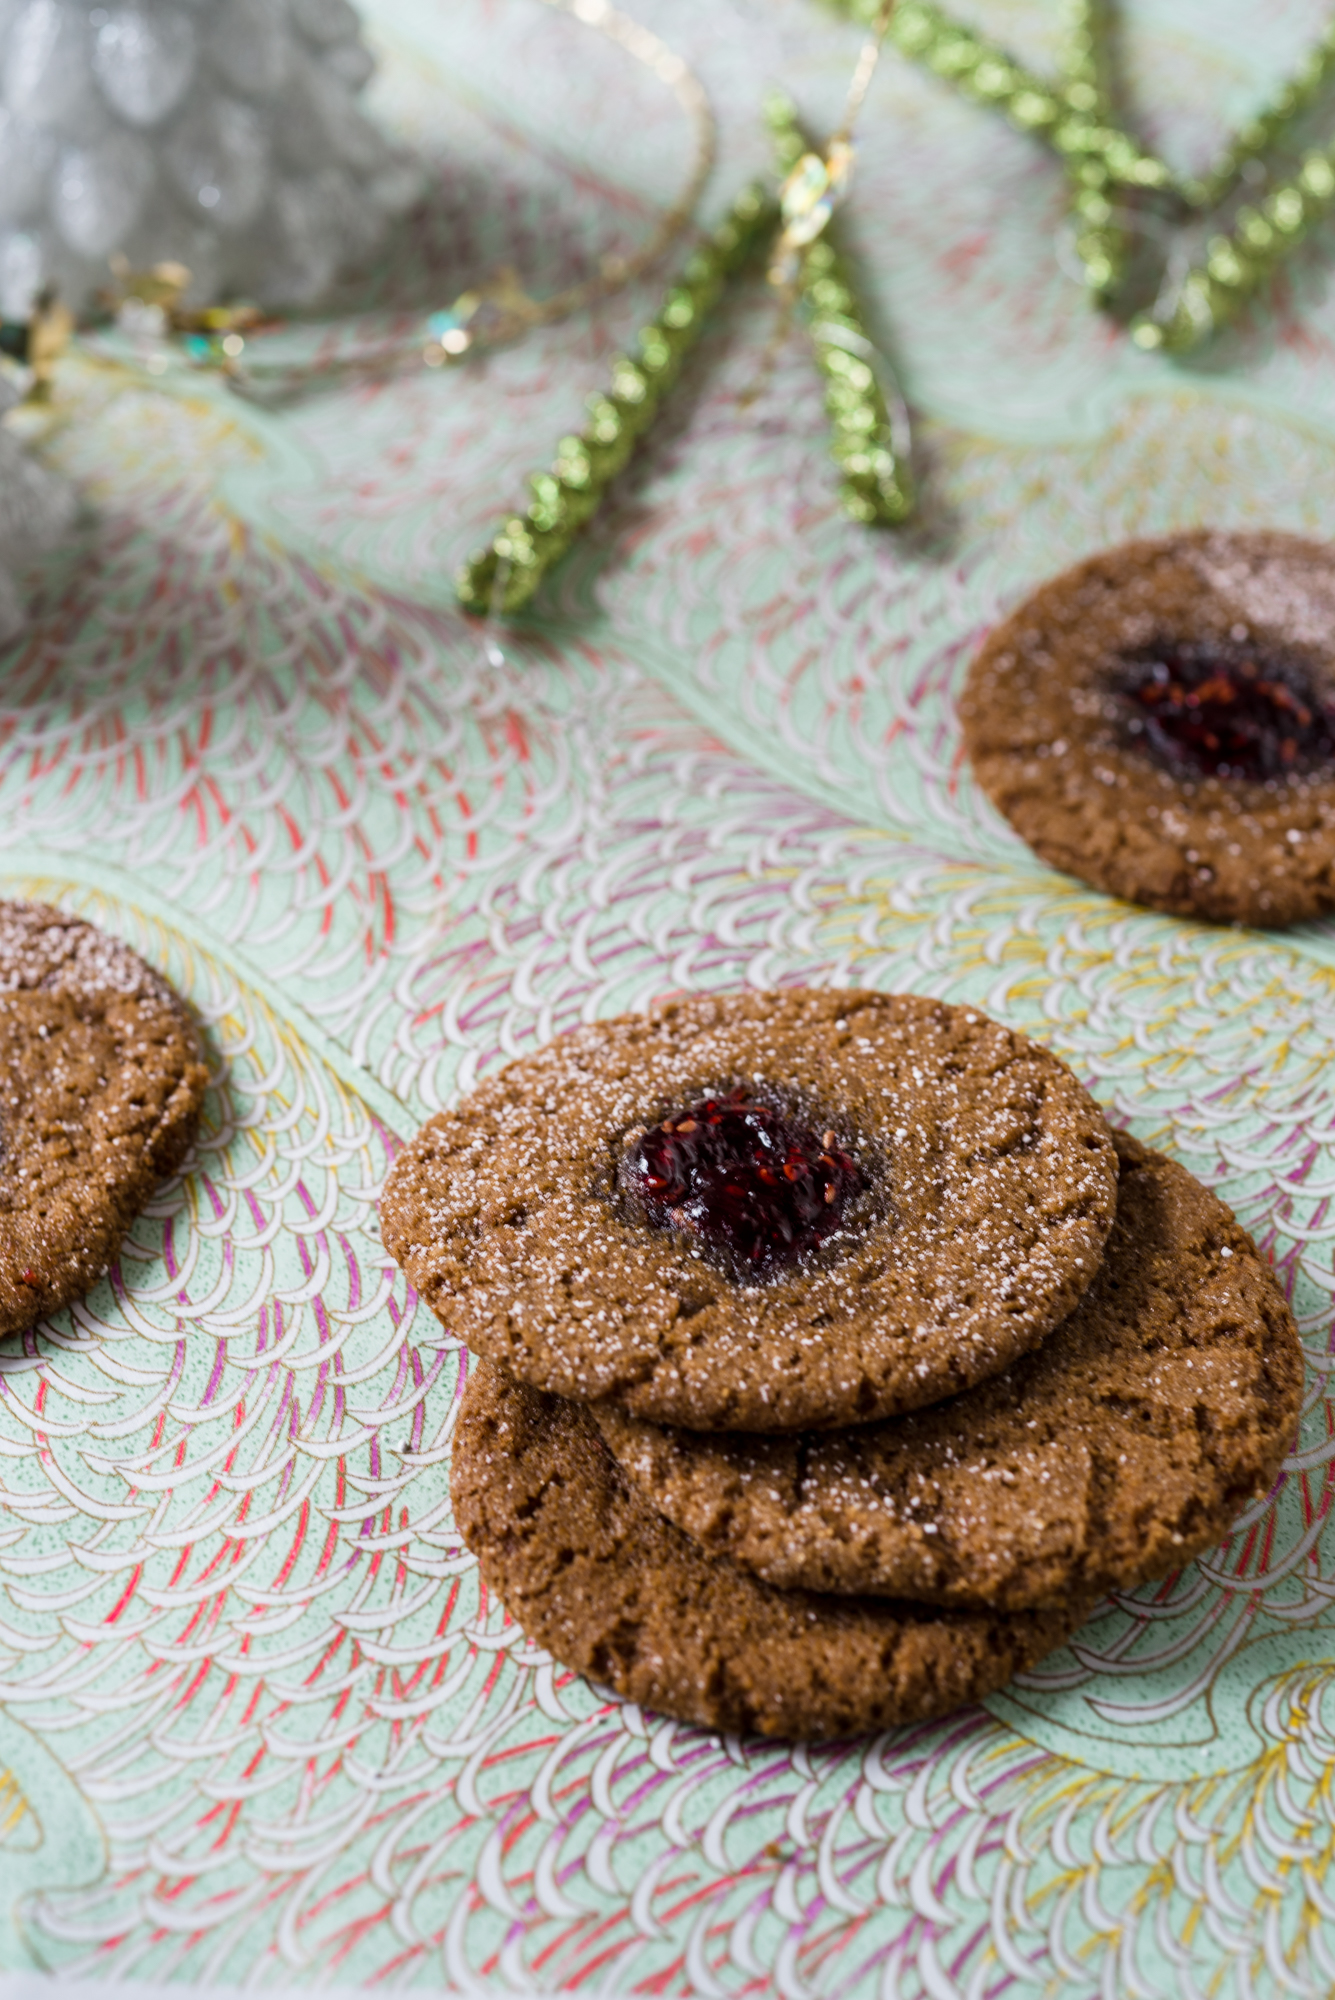
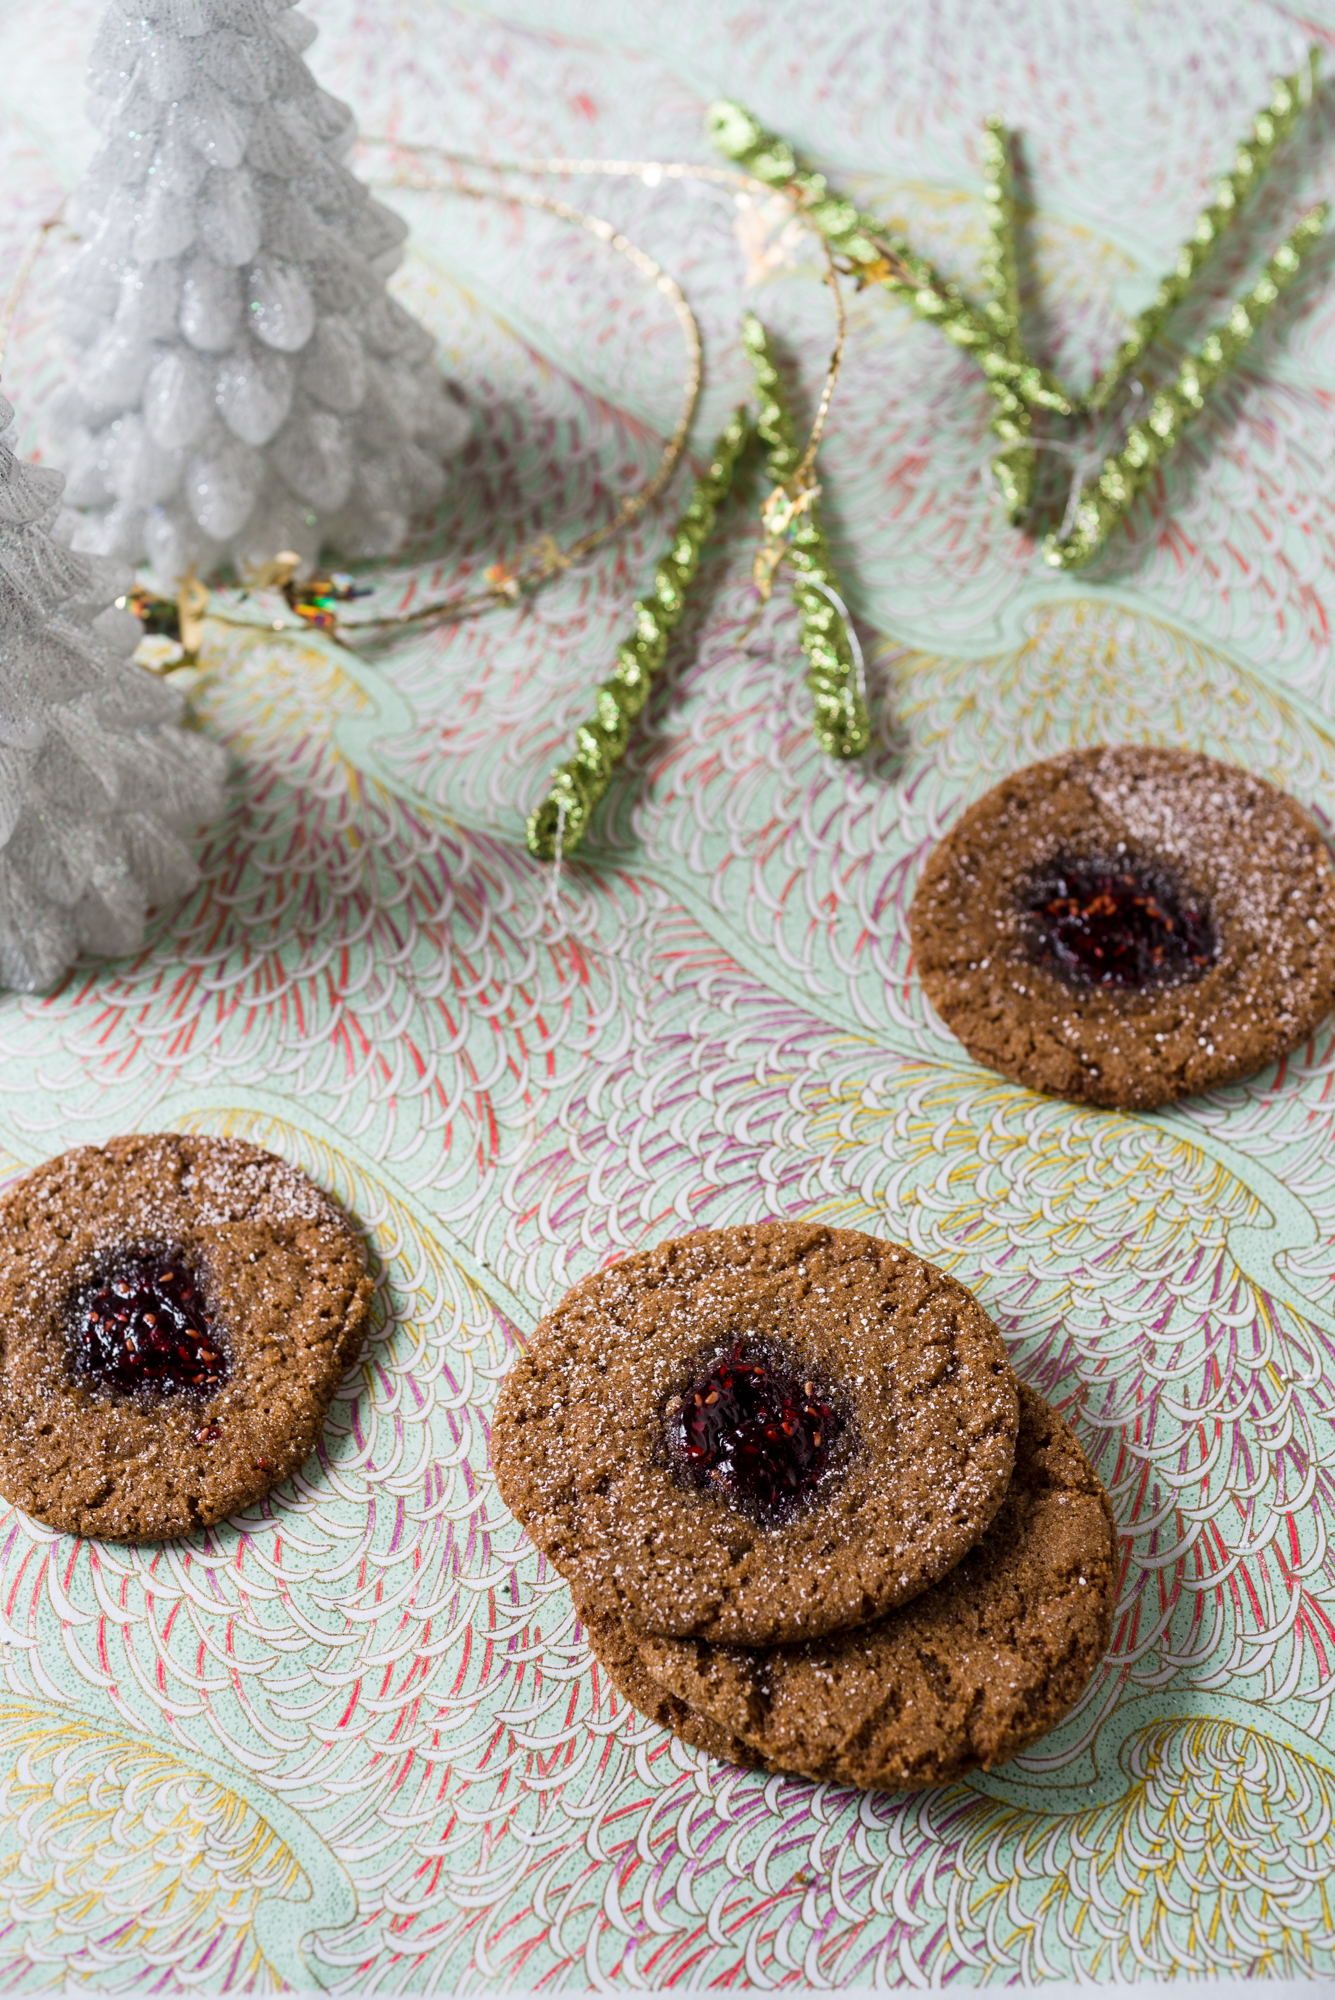
And as many of you know, there has never been a better time to be a Southern grandma than at Christmas. Glittery ribbon, sparkly Christmas sweaters, baked goods only they can make taste that fantastic- they rule the season with pizazz. Their love for celebrating all things life brings me a comfort that resonates with my spirit.
And speaking of spirit- this week has been a really sweet one for me. My precious mother in law gave me the She Reads Truth‘s advent calendar last month, and it has been my complete happy place. This study has kept me sane, praise the Lord!
But the coolest thing about the readings have been the constant reminder that this season happens because our Redeemer is indeed on His way. This promise fills my heart, and spirit, with joy. We celebrate Him- and the life He brings- above all else. That fact is truly miraculous and worth celebrating every moment.
And just as fate would have it, the holiday cookie recipe in the She Reads Truth study is called “Grandma Marlene’s Molasses Cookies.” So of course, I had to make them. And they were worth every minute (and baked and photographed for this post). They are so good, in fact, that a friend of mine said, and I quote, that “I can’t even tell you how much I loved them!”
Y’all. In this season, isn’t that what we are shooting for? To show people love on a day when the Ultimate Love was given? I leave you with this quote from She Reads Truth’s study I’ve been thinking a lot about:
“So now we pause. Still. Ponder. Hush. Wait…Wait for the coming of the God in the manger who makes Himself bread of run near starved. For the Savior in swaddlings who makes Himself the robe of righteousness for us worn out. For Jesus, who makes precisely what none of us can but all of us want: Christmas.”- Ann Voskamp
Y’all, it’s Thanksgiving week, and I don’t know about you, but I have work/life/blog details piling up in my mind like stacks of leftover turkey sandwiches.
How are you guys feeling? How is life this week for you? I hope it’s been smooth as pumpkin butterscotch trifle.
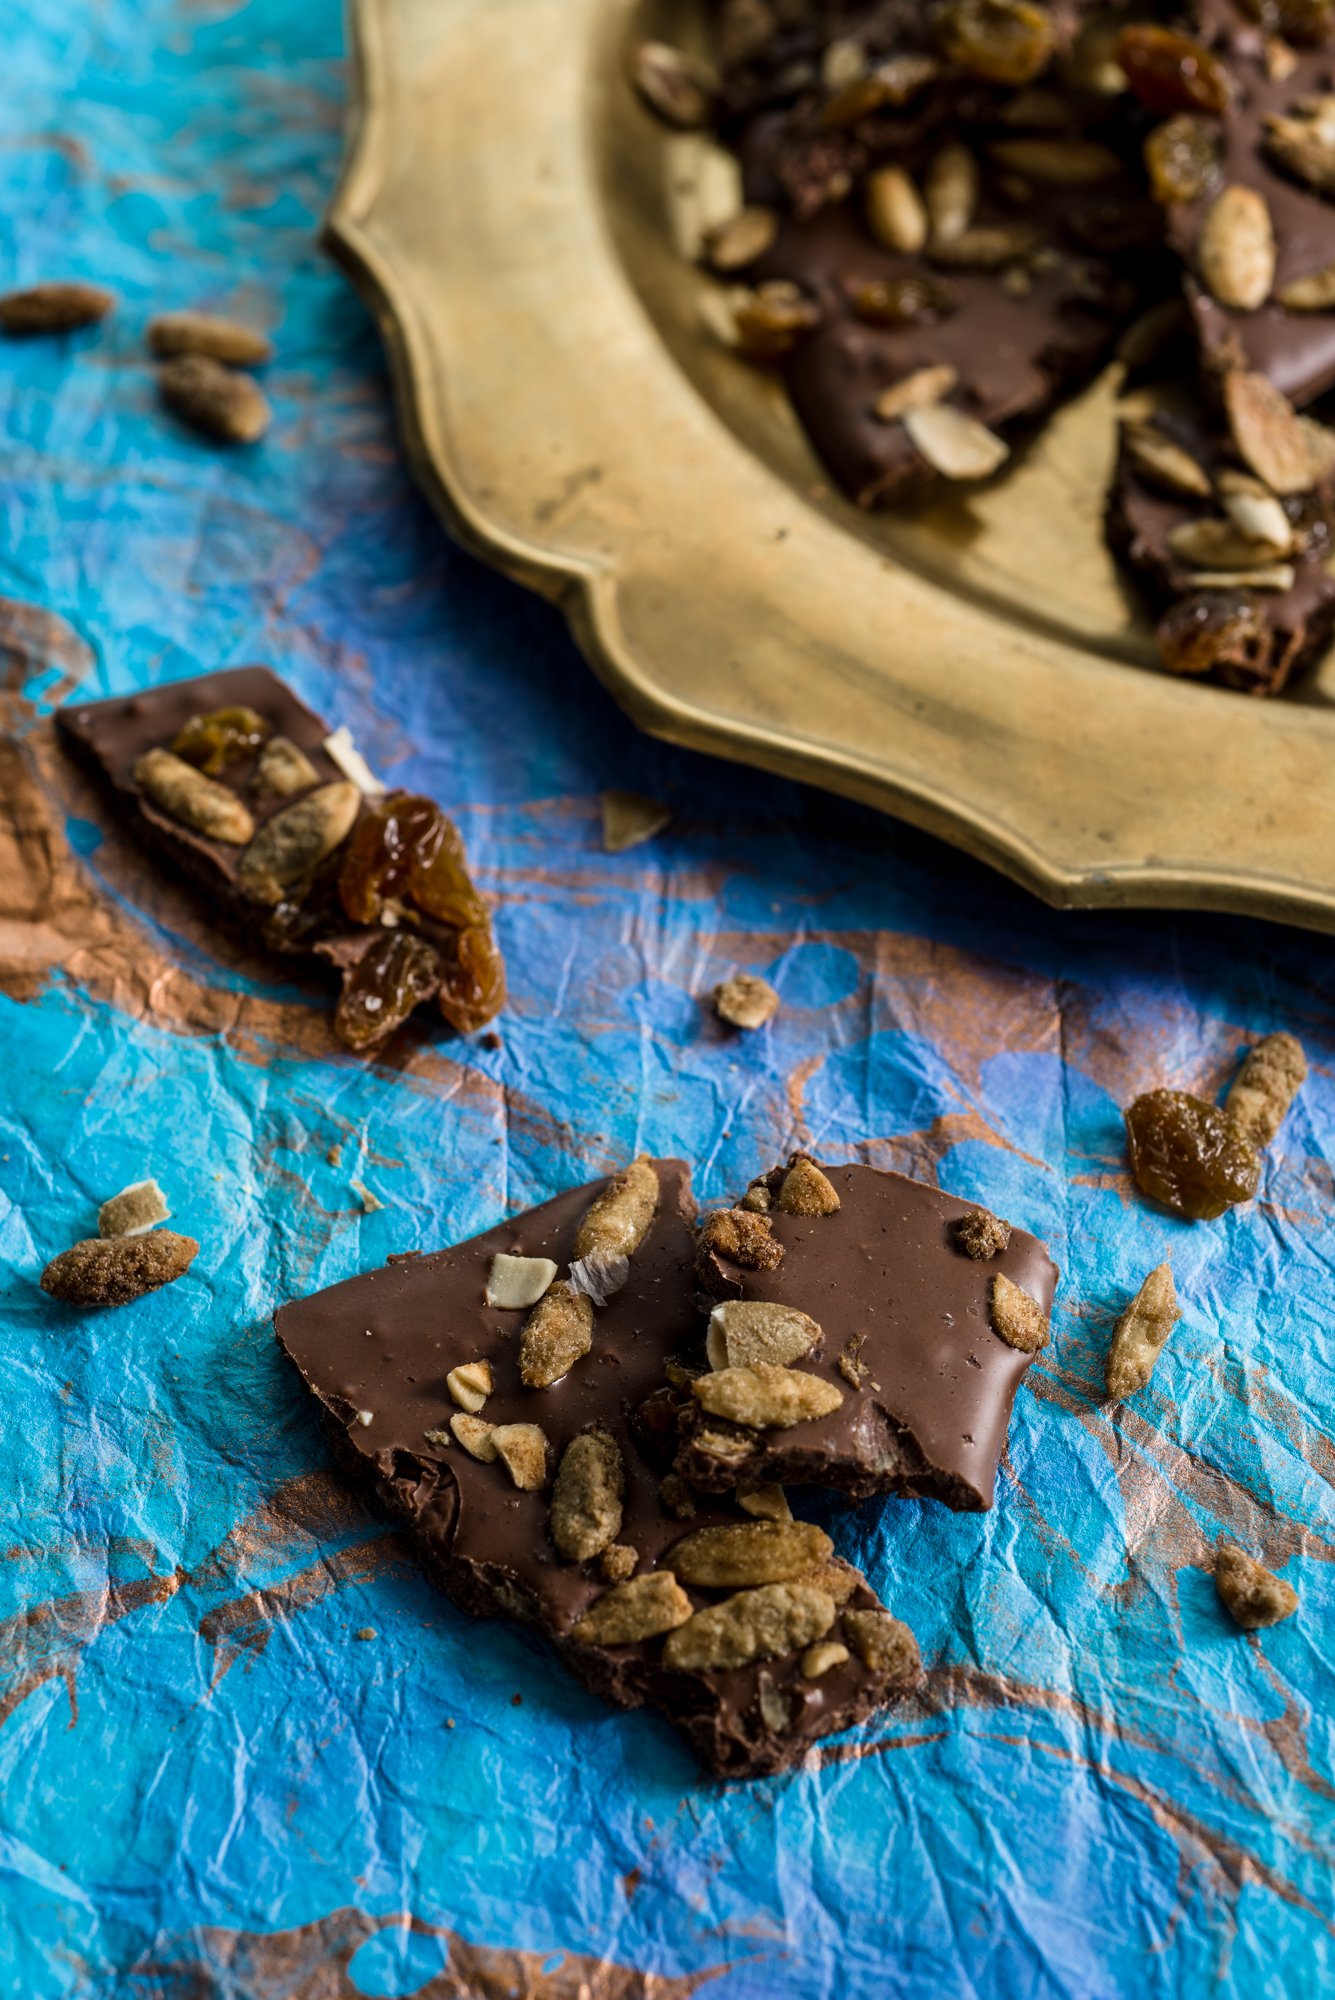
I think that this year, we should make recipe planning a bit easier for everyone. This week’s Thanksgiving-themed dessert is easy-peasey- and takes a total of max 10 minutes cook time. Also, due to my lack of energy brain cells, I could not figure out what to title this post. Pumpkin Spice Chocolate Bark? PSPS Bark? Yes, the bark is topped with pumpkin seeds, but the pumpkin seeds are pumpkin-spice flavored, which makes them even more delicious. There are also golden raisins involved, and Lord help trying to get all of that to fit in a name. But here we are, and trust me, this chocolate bark is going to be Thanksgiving hit.
This year, in my Southern family, I am in charge of desserts. And as much as I love to bake, I was eager to find a solution for the people, like me, who see a whole roasted turkey, sweet potato casserole with sugary pecans, buttered rolls and potato gratin and think- YES I WILL EAT ALL OF THOSE. And come back for seconds.
Have any of y’all taken this “Which TV Family Should You Eat Thanksgiving With?” quiz? You need to, find it here!: #gilmoregirls
So, by the time I get to dessert I am stuffed. To the brim. And despite my sister and I’s argument that yes, there is indeed such a thing as a completely separate dessert stomach, sometimes you need a breather. Or, maybe you want to space out your eating- and need something sweet to keep your energy up while you are baking your booty off for your loved ones.
I picked this recipe up from Food Networks’ awesome ratio for DIY chocolate bark. All you need is a pound of chocolate, a cup or so of toppings, and you are ready to sprinkle! Get creative, do what you feel, and I am pretty sure you will end up with a version of your own chocolate bark that will knock your guests’ socks off.
And, you only need about 45 minutes of chill time for the chocolate to set and be ready to eat (I highly recommend taking that opportunity to have someone else do your baking dishes).
Pumpkin Spice Pumpkin Seed Chocolate Bark
(Recipe adapted from this awesome post on mix-and-match chocolate bark from Food Network)
16 ounces chocolate (I used a mix of milk, white, and dark; feel free to one type of chocolate, or mix types and flavors as you see fit!)
1. Chop chocolate into 1/2 inch pieces and set one cup of chopped chocolate aside.
2. Line a large baking sheet with aluminum foil, shiny side facing up.
2. Put chopped chocolate (aside from one cup) into a large glass bowl. Microwave chocolate for 30 seconds, then stir with fork or rubber spatula. Microwave for another 3o seconds and stir again with fork or rubber spatula (it will be chunky and that is totally ok).
3. Now that the chocolate is slightly melted, microwave for one more minute. Remove from heat and stir quickly, attempting to dissolve any remaining chocolate pieces. Now, pour about 1/3 cup of chopped chocolate and stir to combine. Repeat with the rest of the chocolate, and stir quickly until the chocolate is completely melted and the surface is smooth and glossy.
4. Pour chocolate into foil-lined baking pan, spreading with rubber spatula until about 1/4 inch thick.
5. Sprinkle evenly with golden raisins, then seeds, then coarsely grated sea salt.
6. Put baking pan into fridge to cool for about 45 minutes. Or, if your room is cool, and you aren’t in a hurry to get your chocolate on, you can let it cool at room temperature. Break the chocolate into large pieces (it is the season of sharing after all) and enjoy!
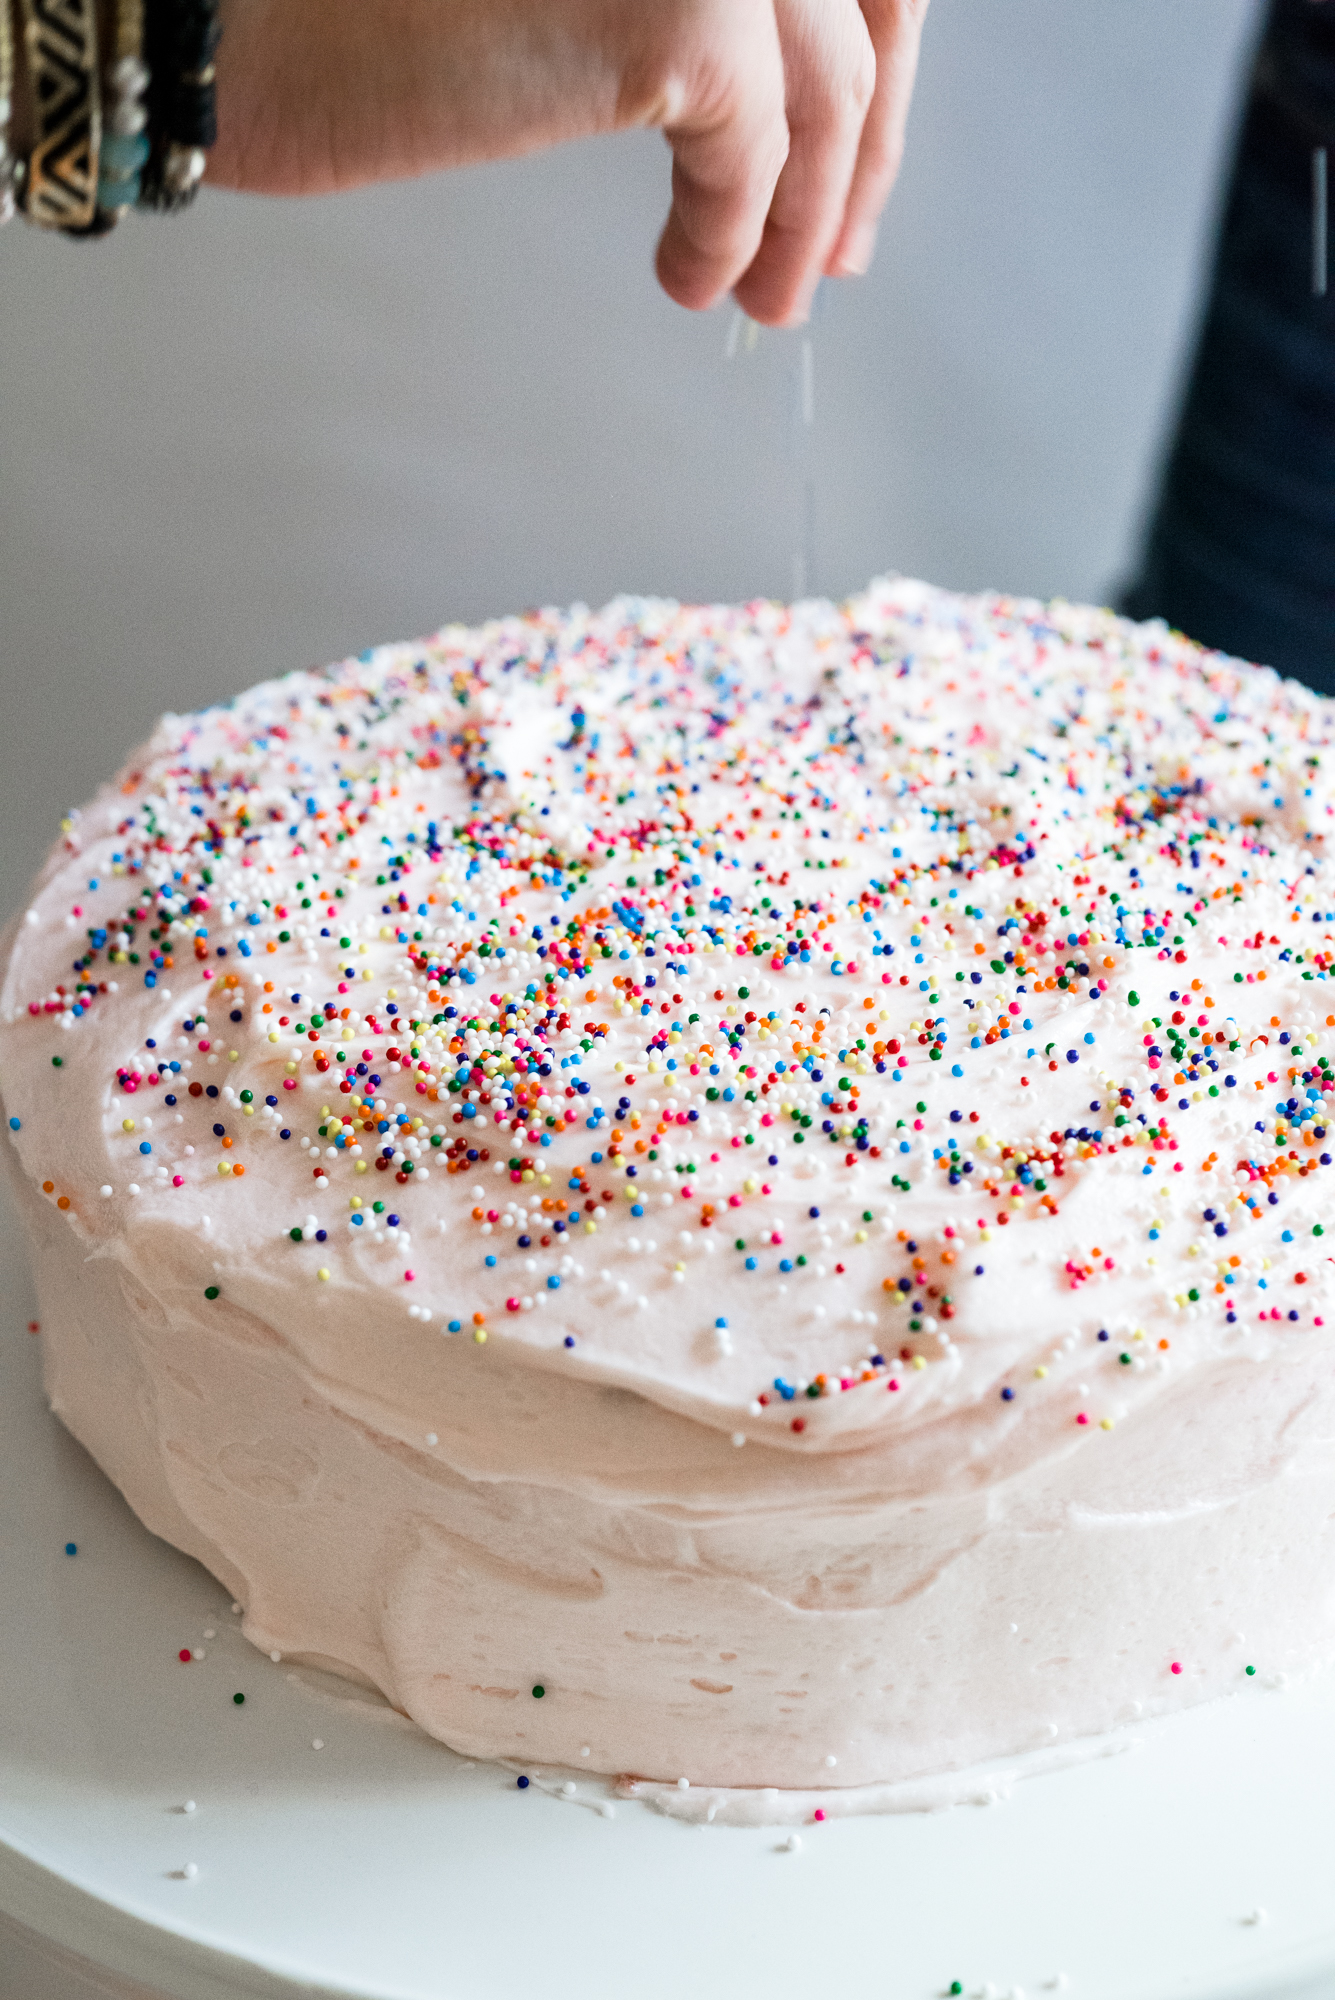
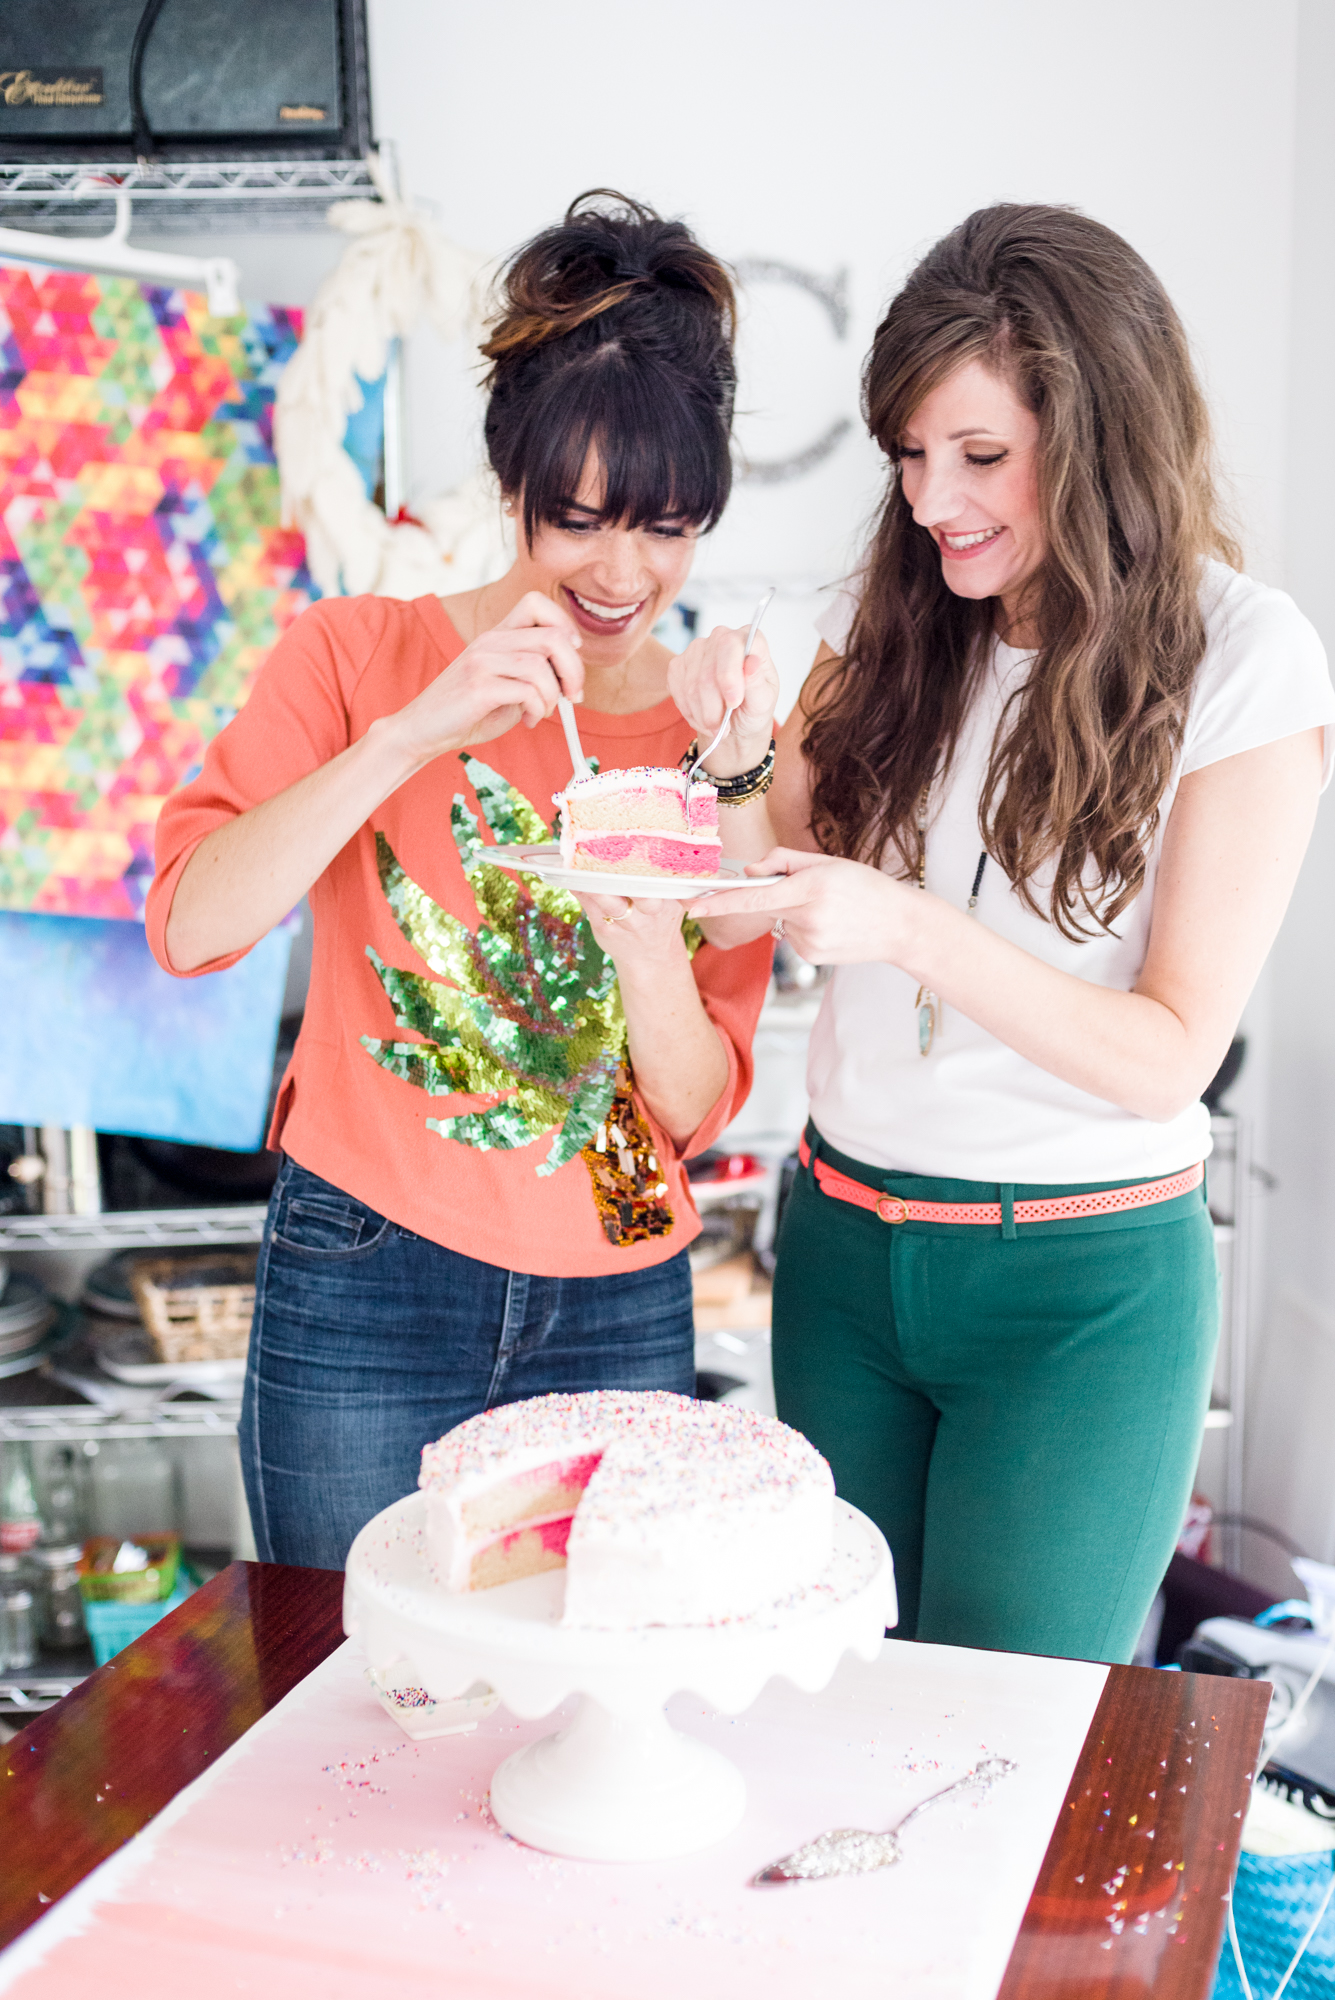
There are few things that bring me greater happiness than icing, cake, and sprinkles (in that order).
And even better than the cake, are the friendships that surround them. In my mind, cake=girlfriends. And, y’all, the hilarity that goes along with those moments! Cue the flashbacks….***
I think of the huge slices of cookie cake my best friend Anna Kat and I sought out in 2002 at the Bama Mall, buzzing around department stores high on sugar and Dr. Pepper. I think about Peggy’s DIVINE chocolate peanut butter cake in Montgomery, about the moment I officially knew I was in love with my mother-in-law, when she ordered me AN ENTIRE, ganache-laden one for my birthday. It’s the way my grandmother’s kitchen smelled like warm butter and cocoa as she cooked hot chocolate frosting on the stove, slowly poured over velvety, freshly baked chocolate cake. (And YES I consider grandmothers as girlfriends!)
Cake is my happy place, and it was the perfect ending to a sweet, four post series with my great friend Mattye of The Loving Kind. For those of you who have kept up with our posts, you know that she and I have been guest posting on each others’ blogs for the past year, sharing our must-have tools for the kitchen (me) and tips for connecting over the dinner table (Mattye). Mattye is my relational inspiration- she is such a great connector of people, but remembers logistics (like meeting times, birthdays, Setting goals!). Her friendship has been one of the sweetest I’ve had in Alabama- not only for the love she shows, but for the sweet treats we have experienced together (#krispykreme). She is, in so many ways, the friend I hope to be. And she is also the wonderful woman who realized what our final “kitchen tool” to highlight would be in this post: a celebratory heart.
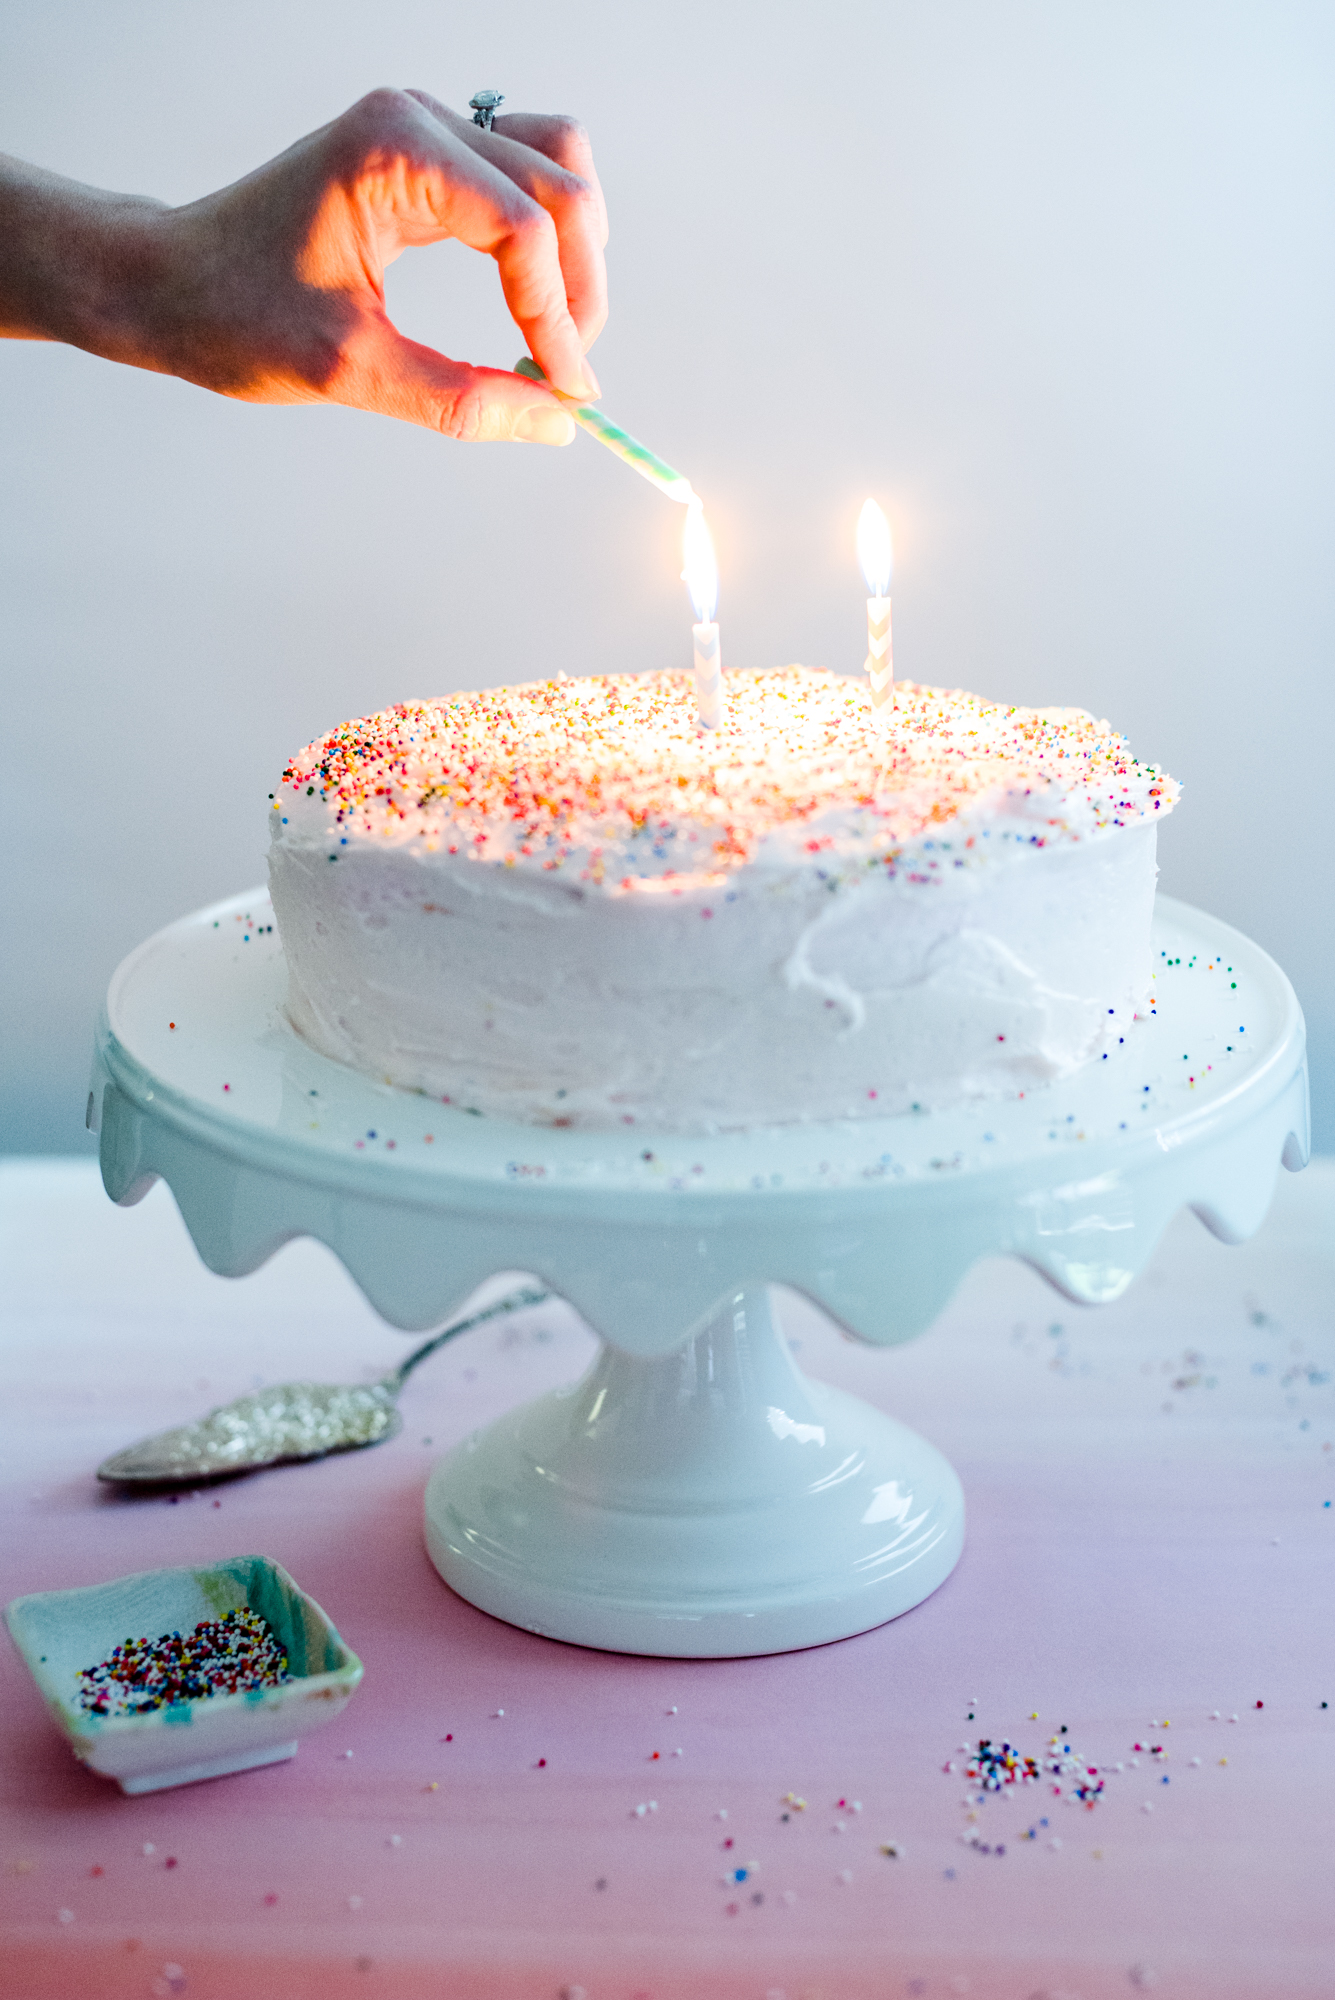
And speaking of celebration, this year is also the one where Mattye and I both turn 30. I know. I thought the day would never come, but hoped it always would. Mattye has already passed that threshold (with flying colors might I add- and one of the most FABULOUS birthday parties I’ve ever attended). I am about a month away. So, we thought it would be kind of awesome to post a Top 10 list about the JOYS of turning 30- of all we are looking forward to, want to happen, and think is pretty darn awesome.
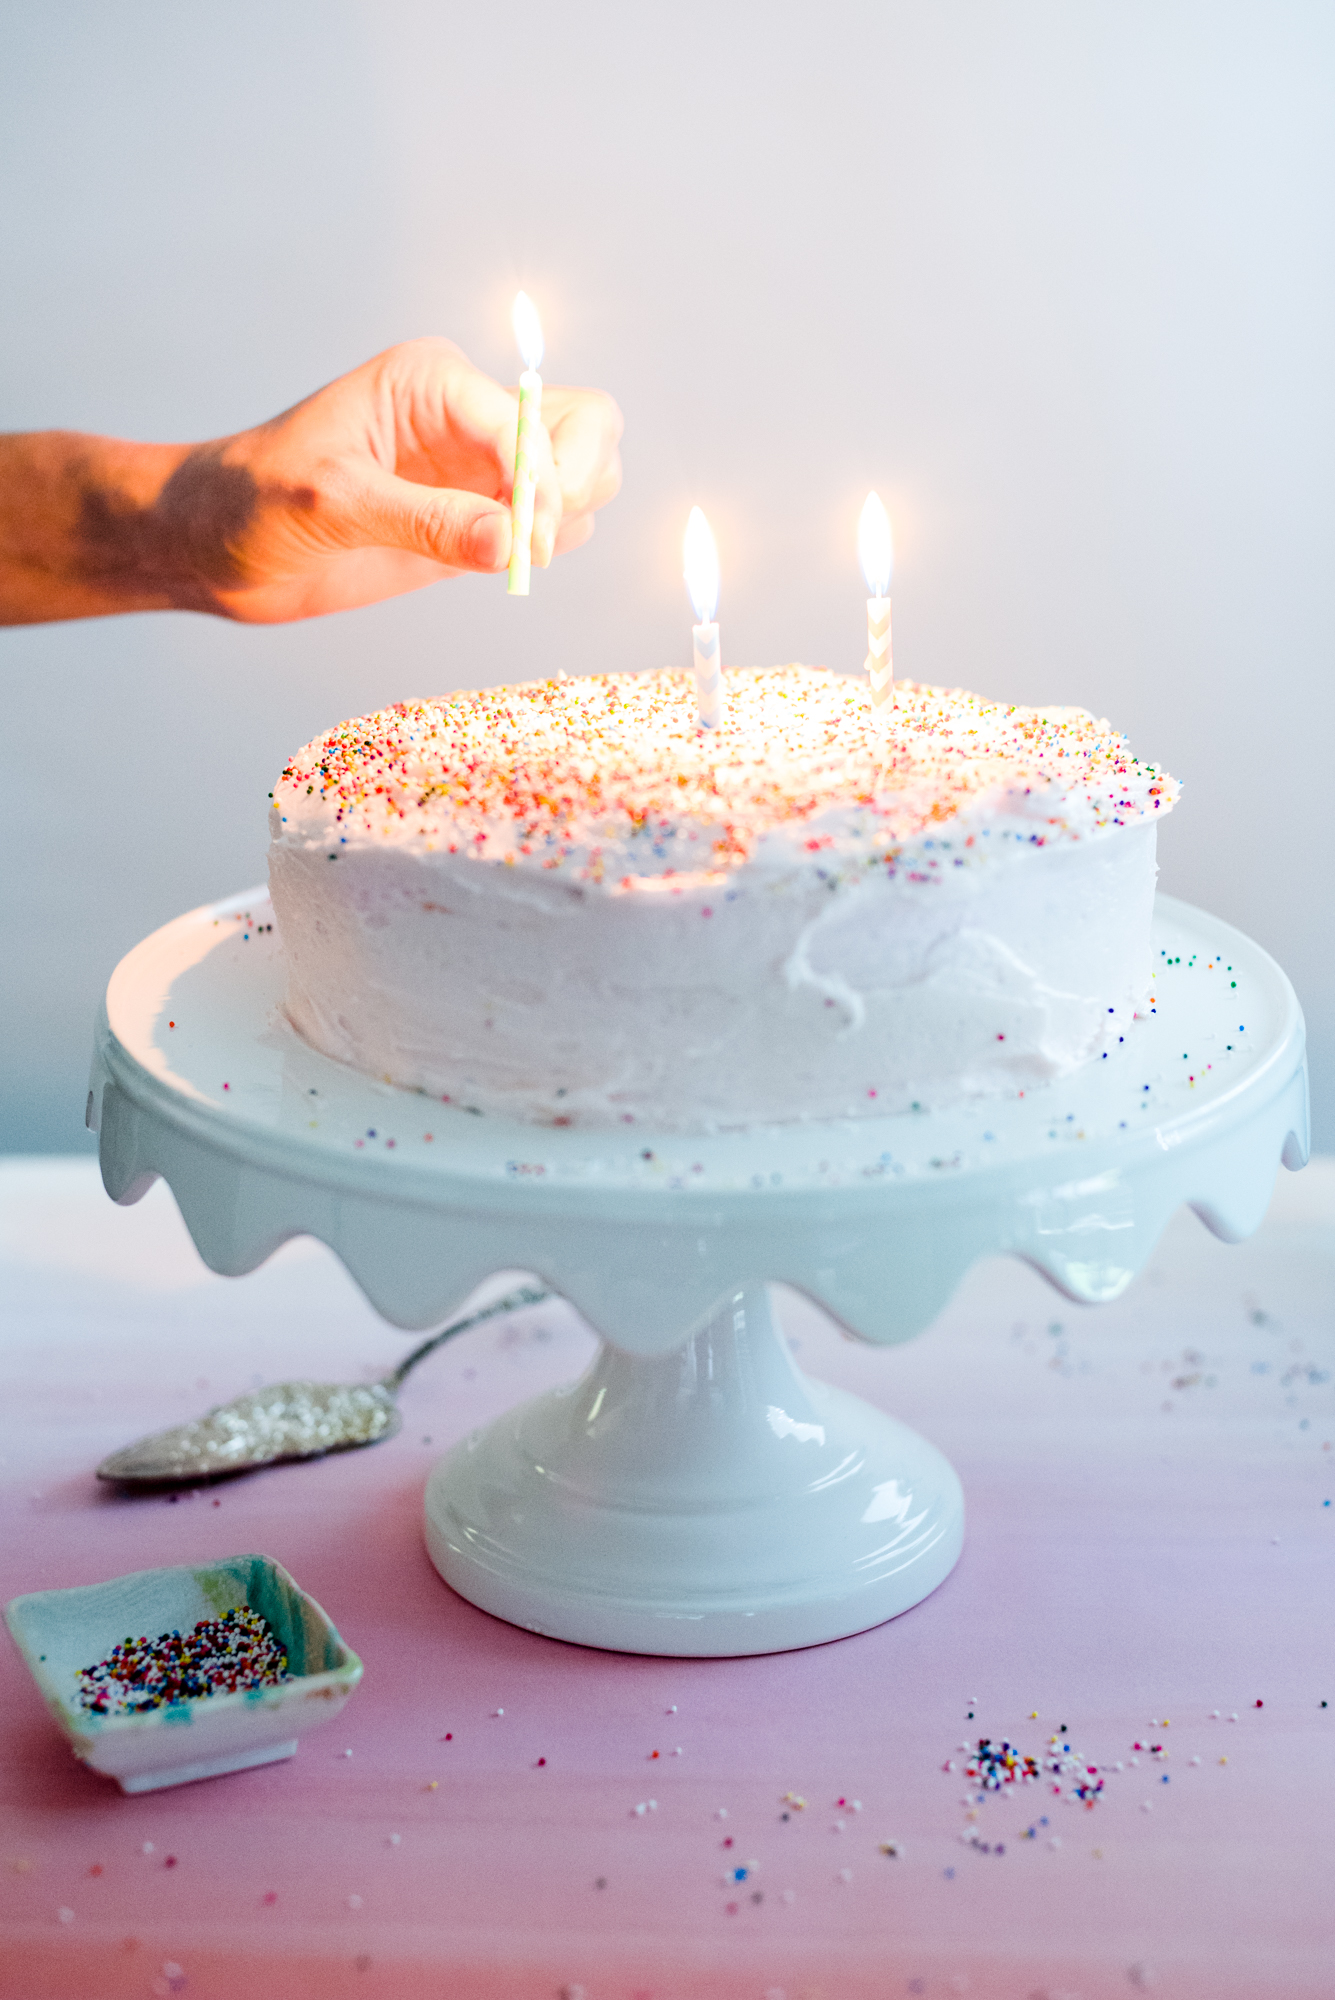
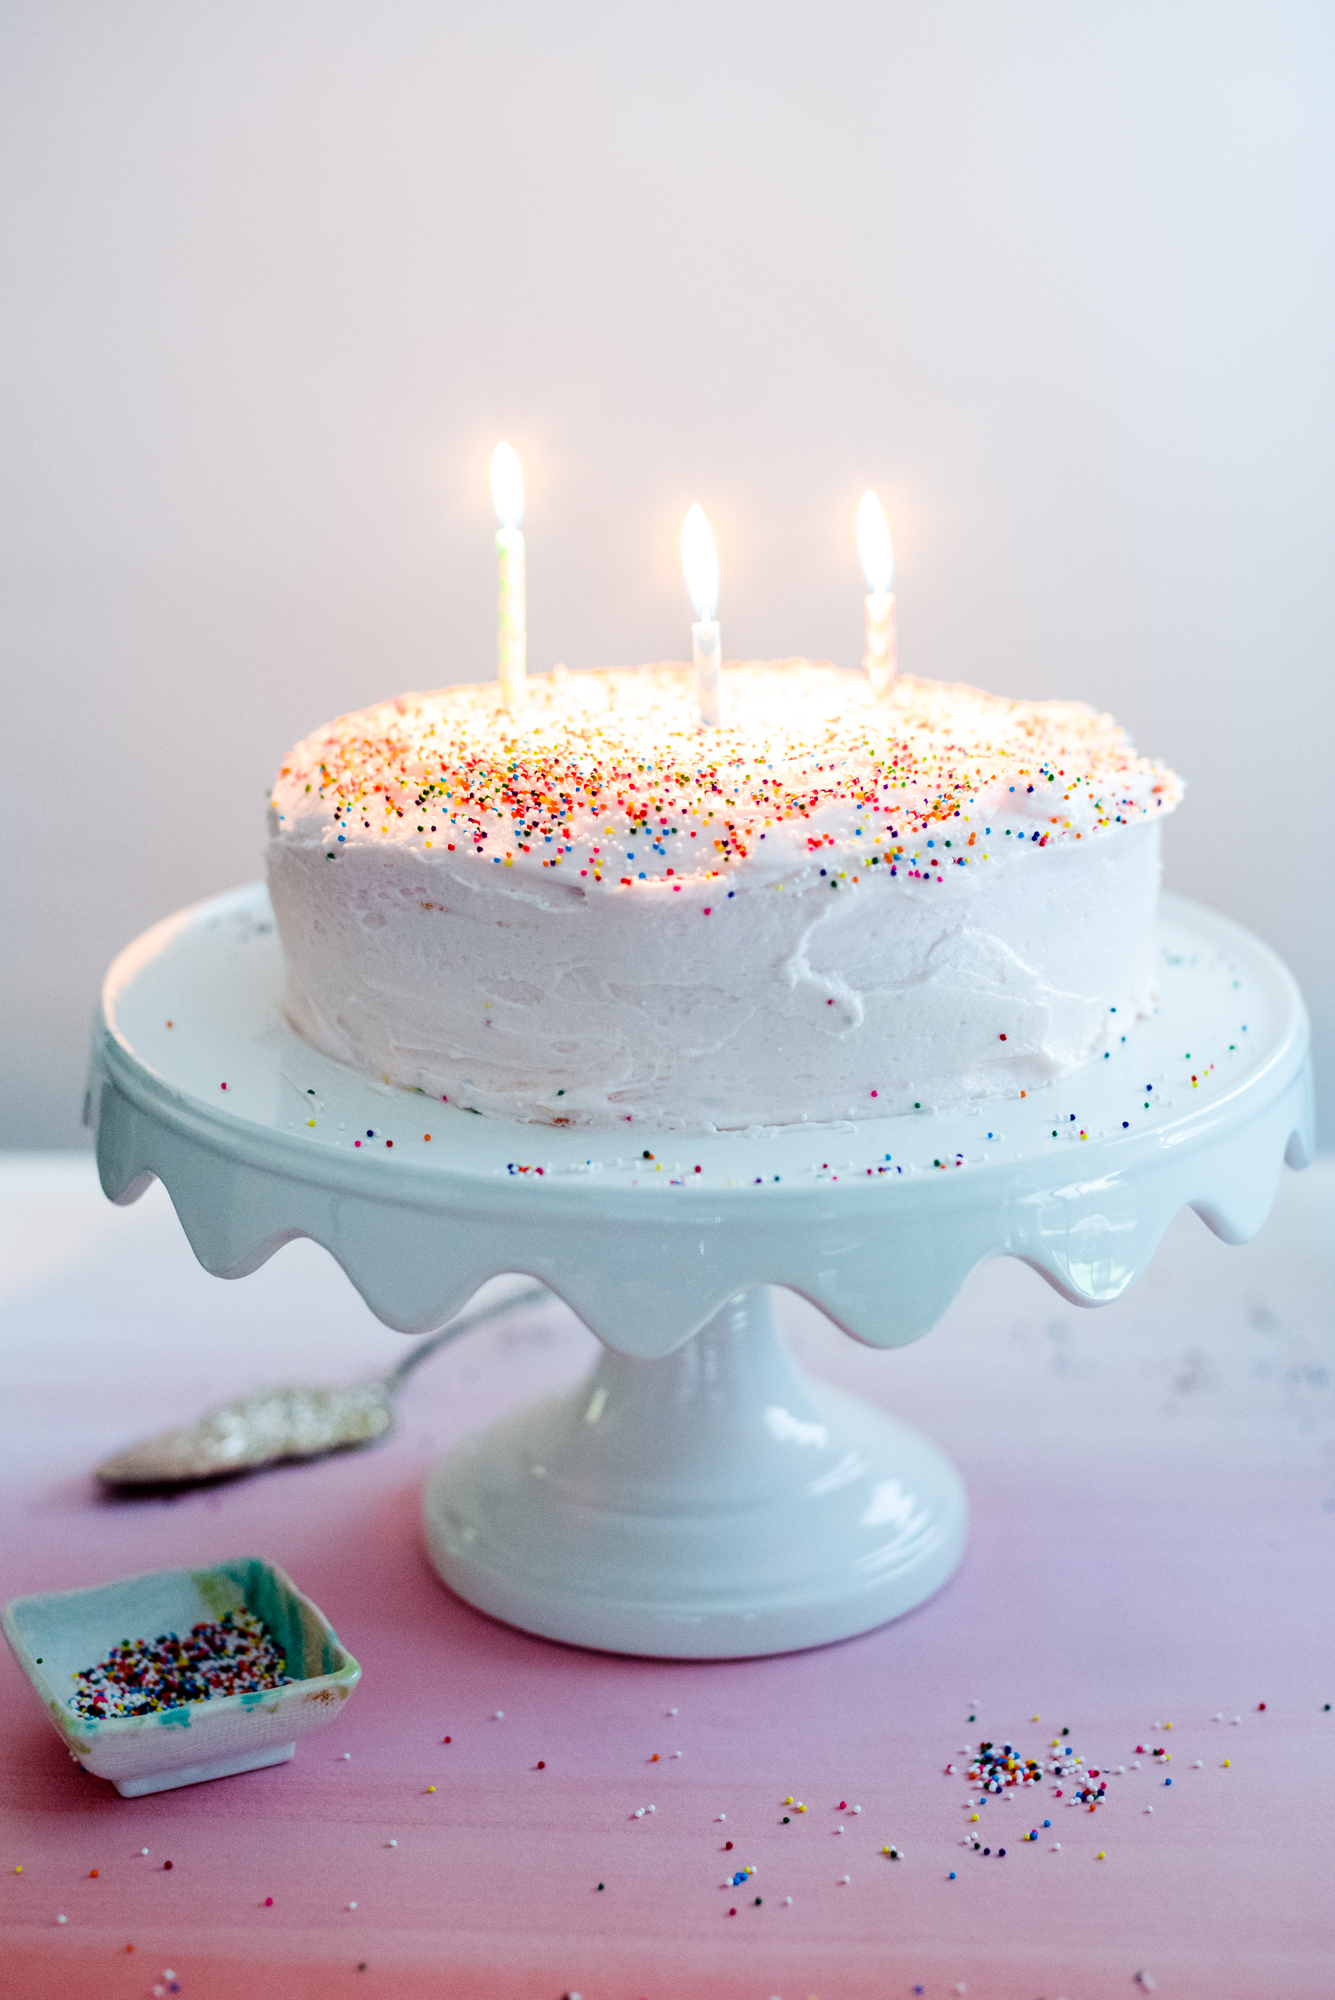
Three candles=thirty years
Everybody, everybody get your JOY on with our Top 10 Reasons Why Turning 30 Is Awesome:
See if you can guess which ones are Mattye’s and which ones are mine!
1. CONFIDENCE- Your thirties bring a new confidence in who you are, what you want, and the comfort to go out and get it.
2. FUN- I don’t know about y’all, but I am so ready to enter into one of the most fun seasons of my life. I am finally at the point where the things that used to stress me in my 20’s (ahem, frizz, breakouts, exams, breakups, setting dish towels on fire while cooking blue box macaroni and cheese) have finally loosened their grip and I am ready to go full-throttle into a life of joy, laughter, and FUN. Taylor Swift albums? Latest YouTube video about an owl and a cat who are BFF? Late night crafting with girlfriends? Listened. Watched. Sewed. You know why? B/c life is amazing and oh so fun.
3. GIVING BACK- At thirty you feel more grounded in your life experiences and like you have more to give back to others.
Does more cake count as a “30” reason?
4. SELF ACCEPTANCE- This point is similar to the FUN one, except a bit deeper. Alright foodies, go with me on this: I think as we grow up, we realize, and own the fact, that how we are made is uniquely wonderful. For years, I’ve struggled with feeling like too much and not enough at the same time. Finally, I am making peace with that feeling. I am who I am, and pray that I grow daily into the woman I am supposed to be. Can I get an amen everybody?!
5. SOPHISTICATION- Thirty is a sophisticated age. Just try saying, “Hello, I’m thirty.” and you’ll understand what we mean.
6. PURPOSE- I am SUCH a believer that everyone has a greater purpose in this life. Whether it’s baking for your neighbors down the street, saving lives, encouraging your friends- everything we do for other people matters. And I’m realizing that my purpose in life is much too important to let fear of failure and fear of other people’s opinions run the show. It’s time to rise on up, put your big girl pants on, and live out the way you were made to bless this earth.
Yes, that is the face I make when I eat cake.
7. CONTENTMENT- You no longer feel like you “should be out doing something fun” instead of what you really want to be doing, which is spending a Friday night in with pizza, ice cream and Netflix.
8. ADVENTURE- Travel has been on my bucket list for years, and it’s about time I start the journey. To be honest, life as a freelancer and blogger is not the most lucrative of careers, BUT this wanderlust has made me rethink how I spend my income. I think that’s part of turning 30 too; clarifying financial needs/wants. Because as much as I want that pumpkin spice latte every morning, is it really worth my eventual trip to Paris? Umm, no. Cafe and croissants here we come, amis!
9. BUILDING- After stepping out of the whirlwind that can often be your twenties, your thirties are a time where you get to really build upon the things that are important to you, whether that is your career, a family, creative outlets, a home, or a new adventure!
10. FRIENDSHIPS- And speaking of amis (French word for friends, I learned that this morning), it took me 29 years to realize just how important friends are. I want my 30th year to be one of renewed commitment to the ones I love; the ones who have stood by me, and the ones I couldn’t imagine my life without. They have become my family, and I want to not only treat them just as fabulously as they have treated me, but figure out small ways to show them I’m grateful for their kindness, prayers, love and bouts of unrestricted belly laughter.
Now, to the recipe!
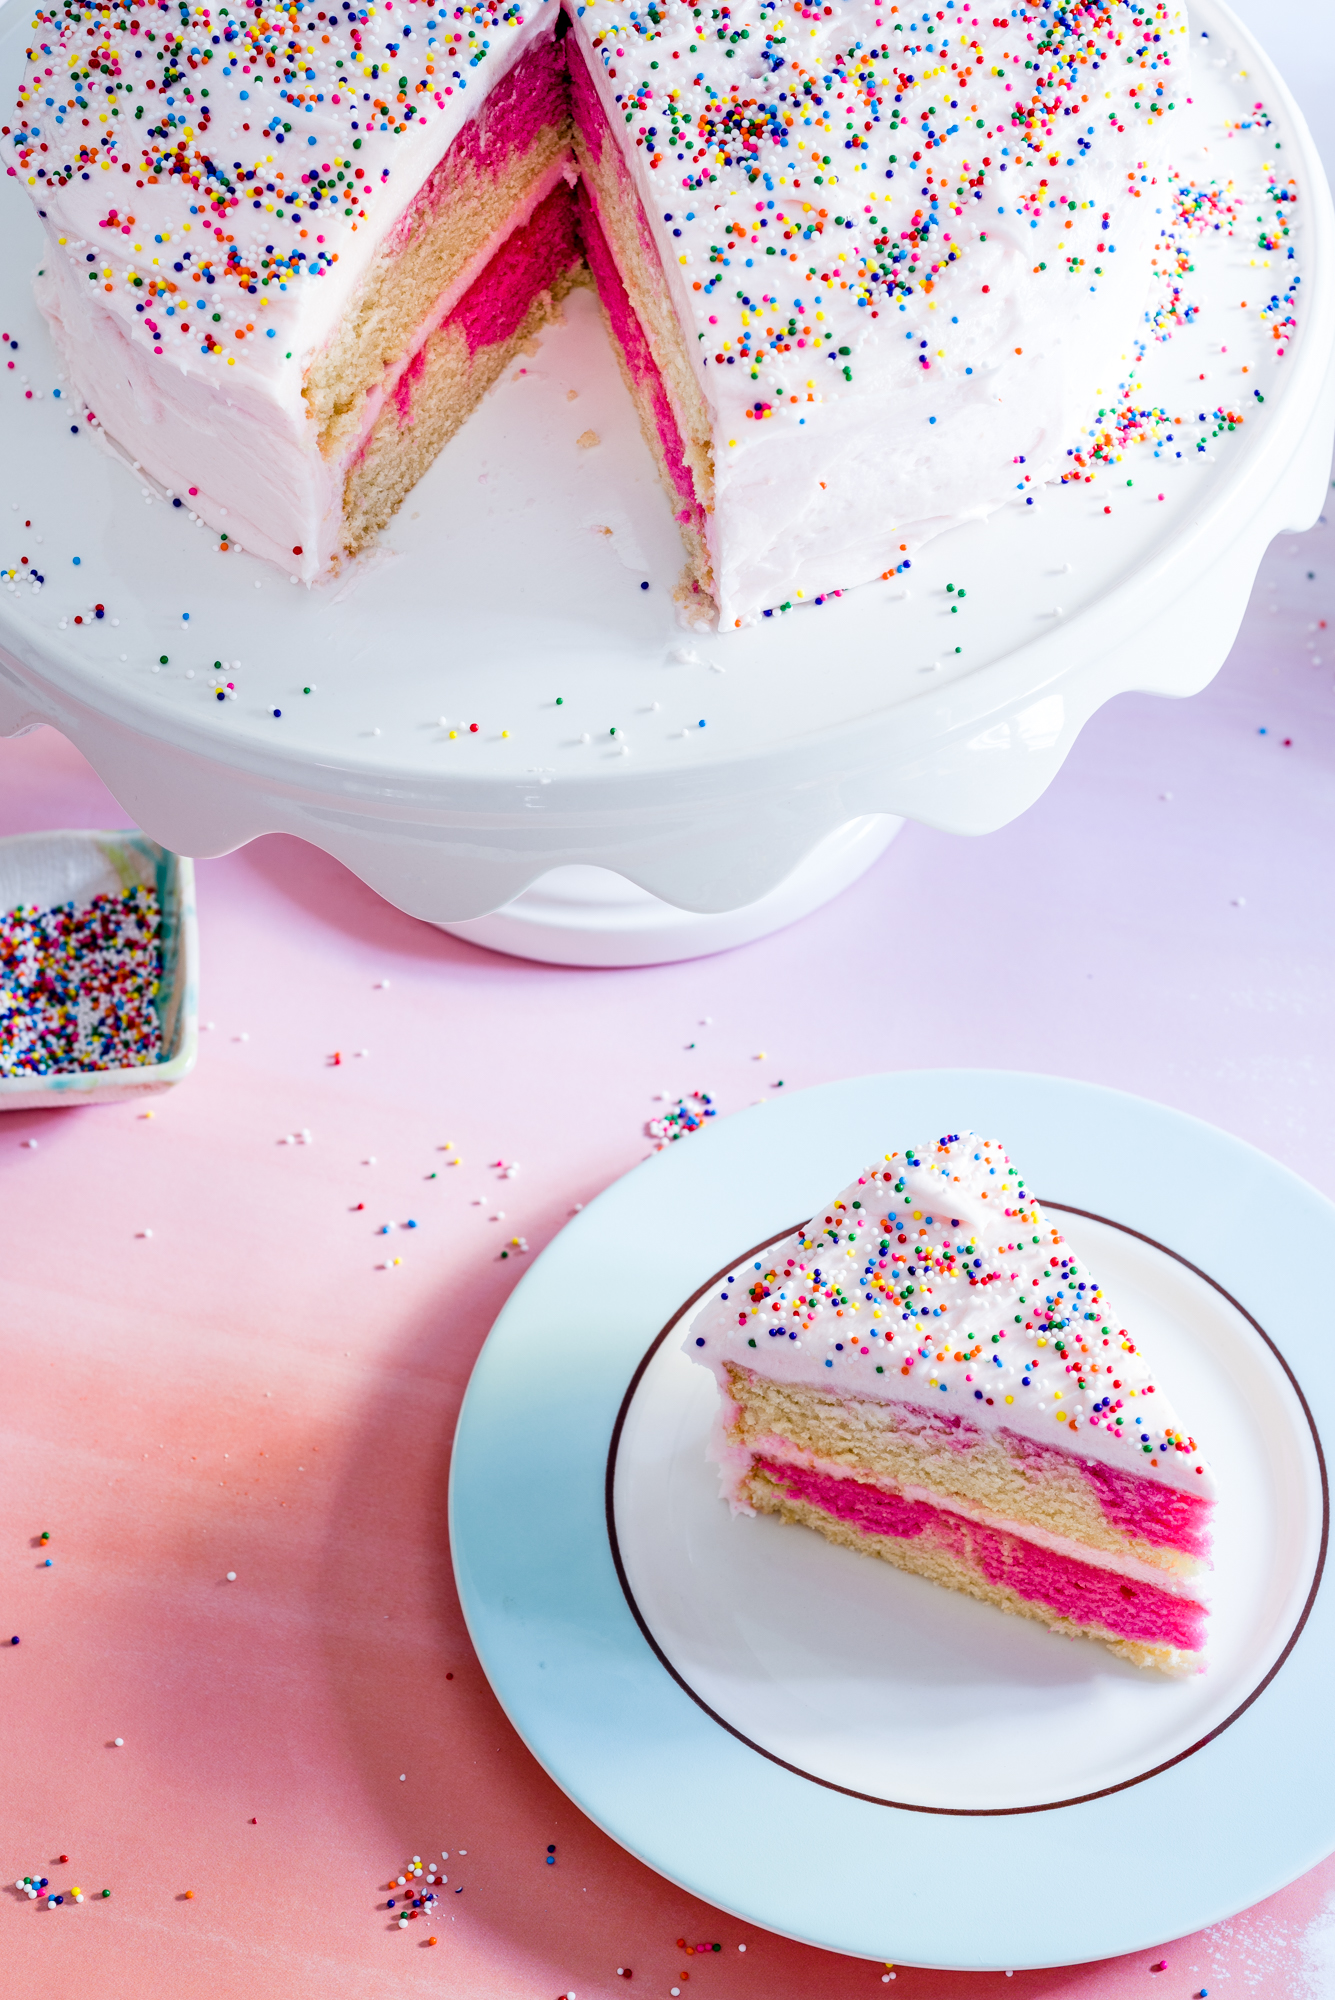
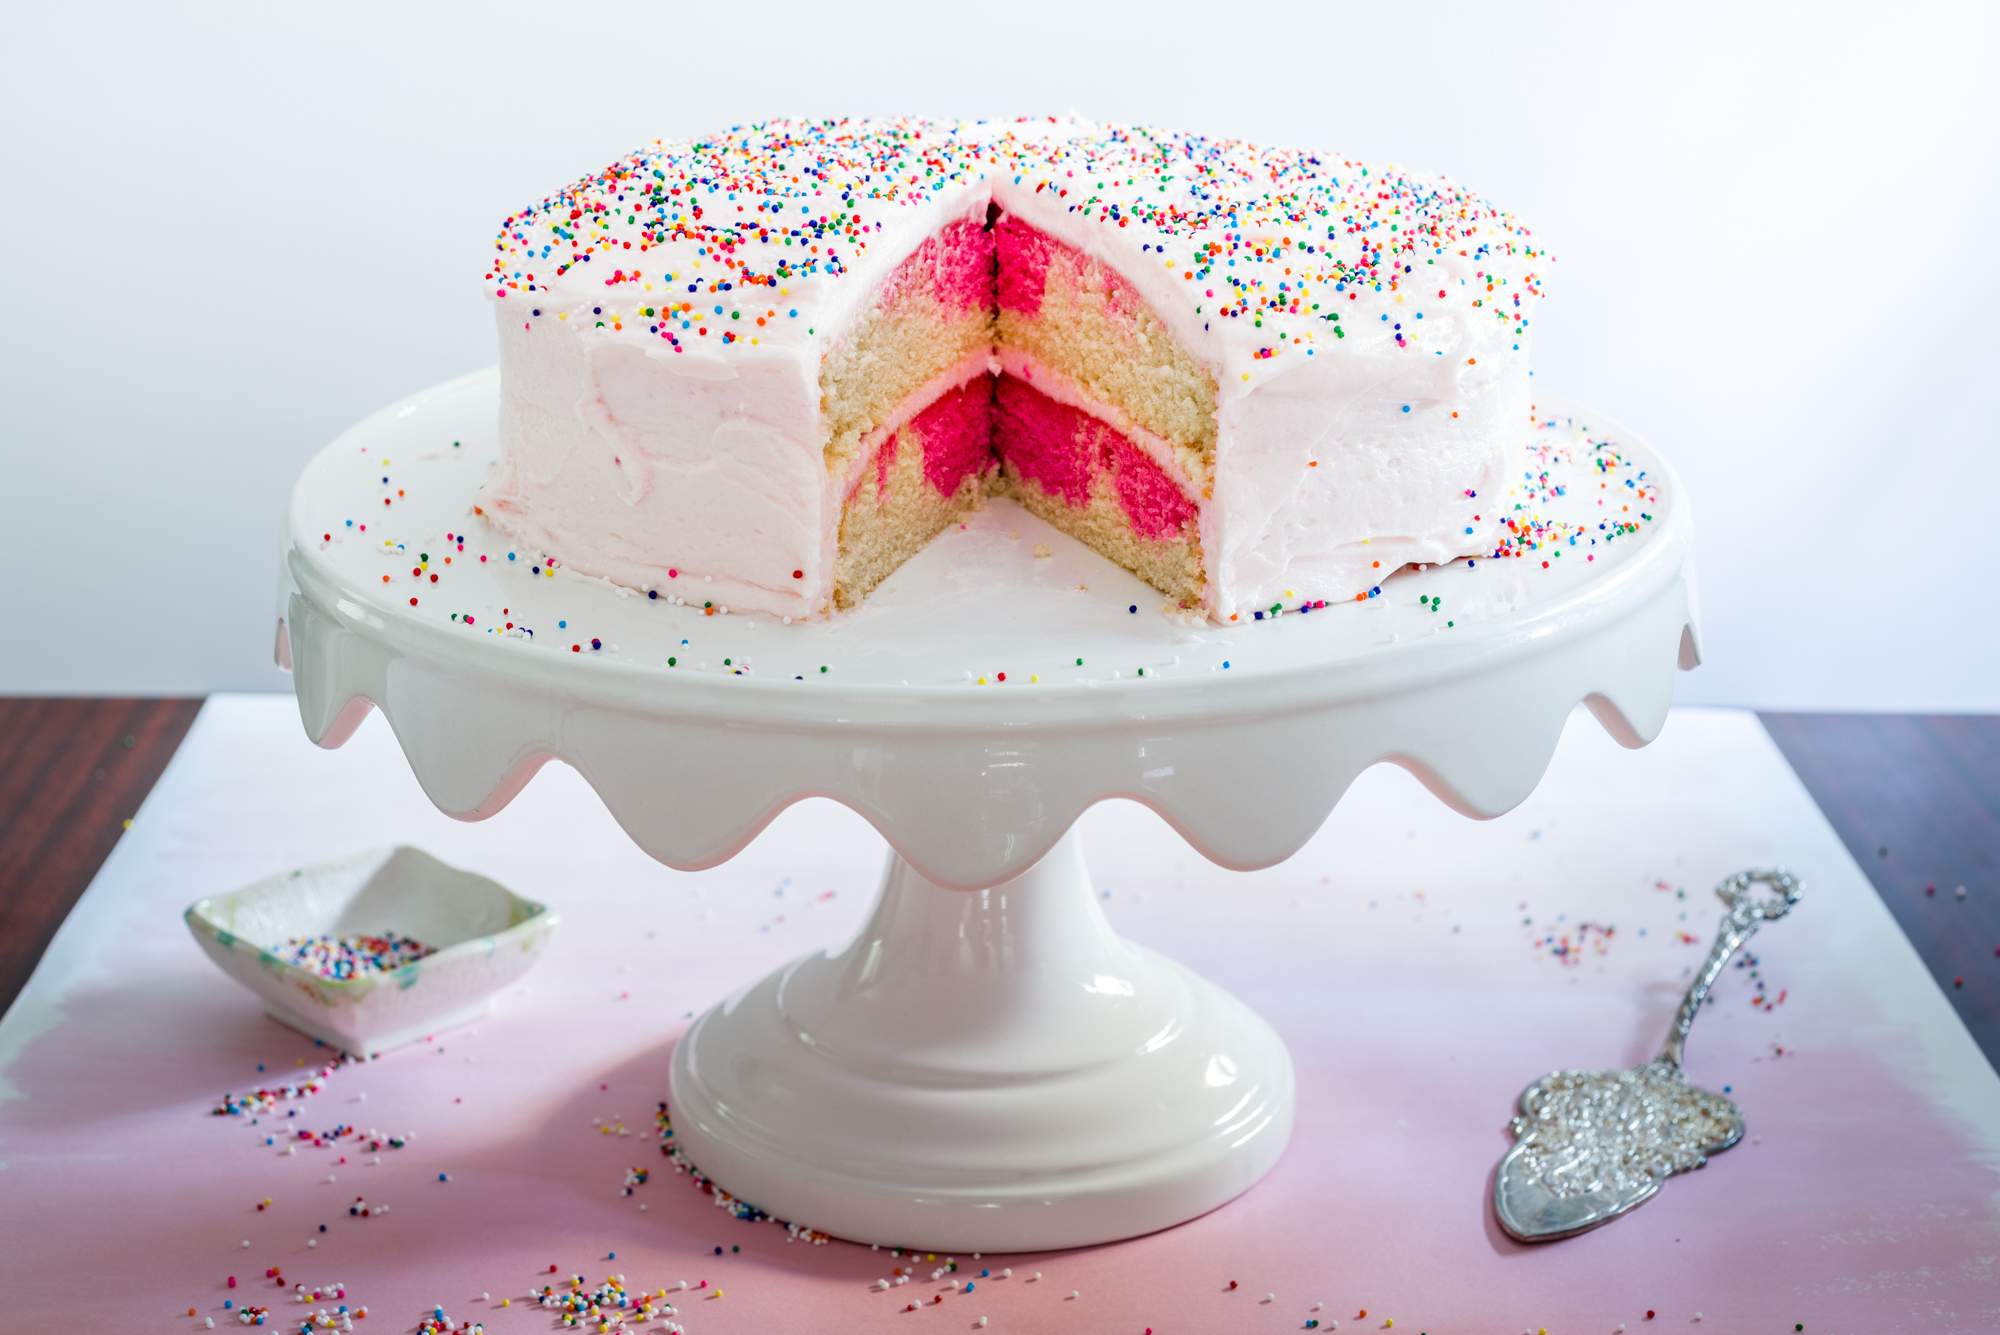
Pink Swirl Cake
This cake is easy to assemble, can totally be prepared ahead of time, and gives you that awesome wow factor of the pops of pink in the batter. Plus, the King Arthur flour really makes the cake moist and fluffy. Bon appetite!
For the cake (Recipe taken and adapted a bit from King Arthur Flour):
What You Will Need:
2 3/4 cups King Arthur Unbleached Cake Flour Blend
1) Preheat the oven to 350°F. Prepare two 8″ x 2″ or 9″ x 2″ round pans; by greasing and flouring; or lining with parchment, then greasing the parchment. Note: Make sure your 8″ round pans are at least 2″ deep.
2) Mix all of the dry ingredients on slow speed to blend. Add the soft butter and mix until evenly crumbly, like fine damp sand. It may form a paste, depending on the temperature of the butter, how much it’s mixed, and granulation of the sugar used.
3) Add the egg whites one at a time, then the whole egg, beating well after each addition to begin building the structure of the cake. Scrape down the sides and bottom of the bowl after each addition. Make sure and scrape here!
4) In a small bowl, whisk the almond milk with the vanilla and almond extracts. Add this mixture, 1/3 at a time, to the batter. Beat 1 to 2 minutes after each addition, until fluffy. Be sure to scrape down the sides and bottom of the bowl. Keep on scraping!
5) Pour the first half of the vanilla batter evenly into each cake pan. With the remaining batter, add a few drops of food coloring, and beat in the mixer until you reach your desired level of pinkness.
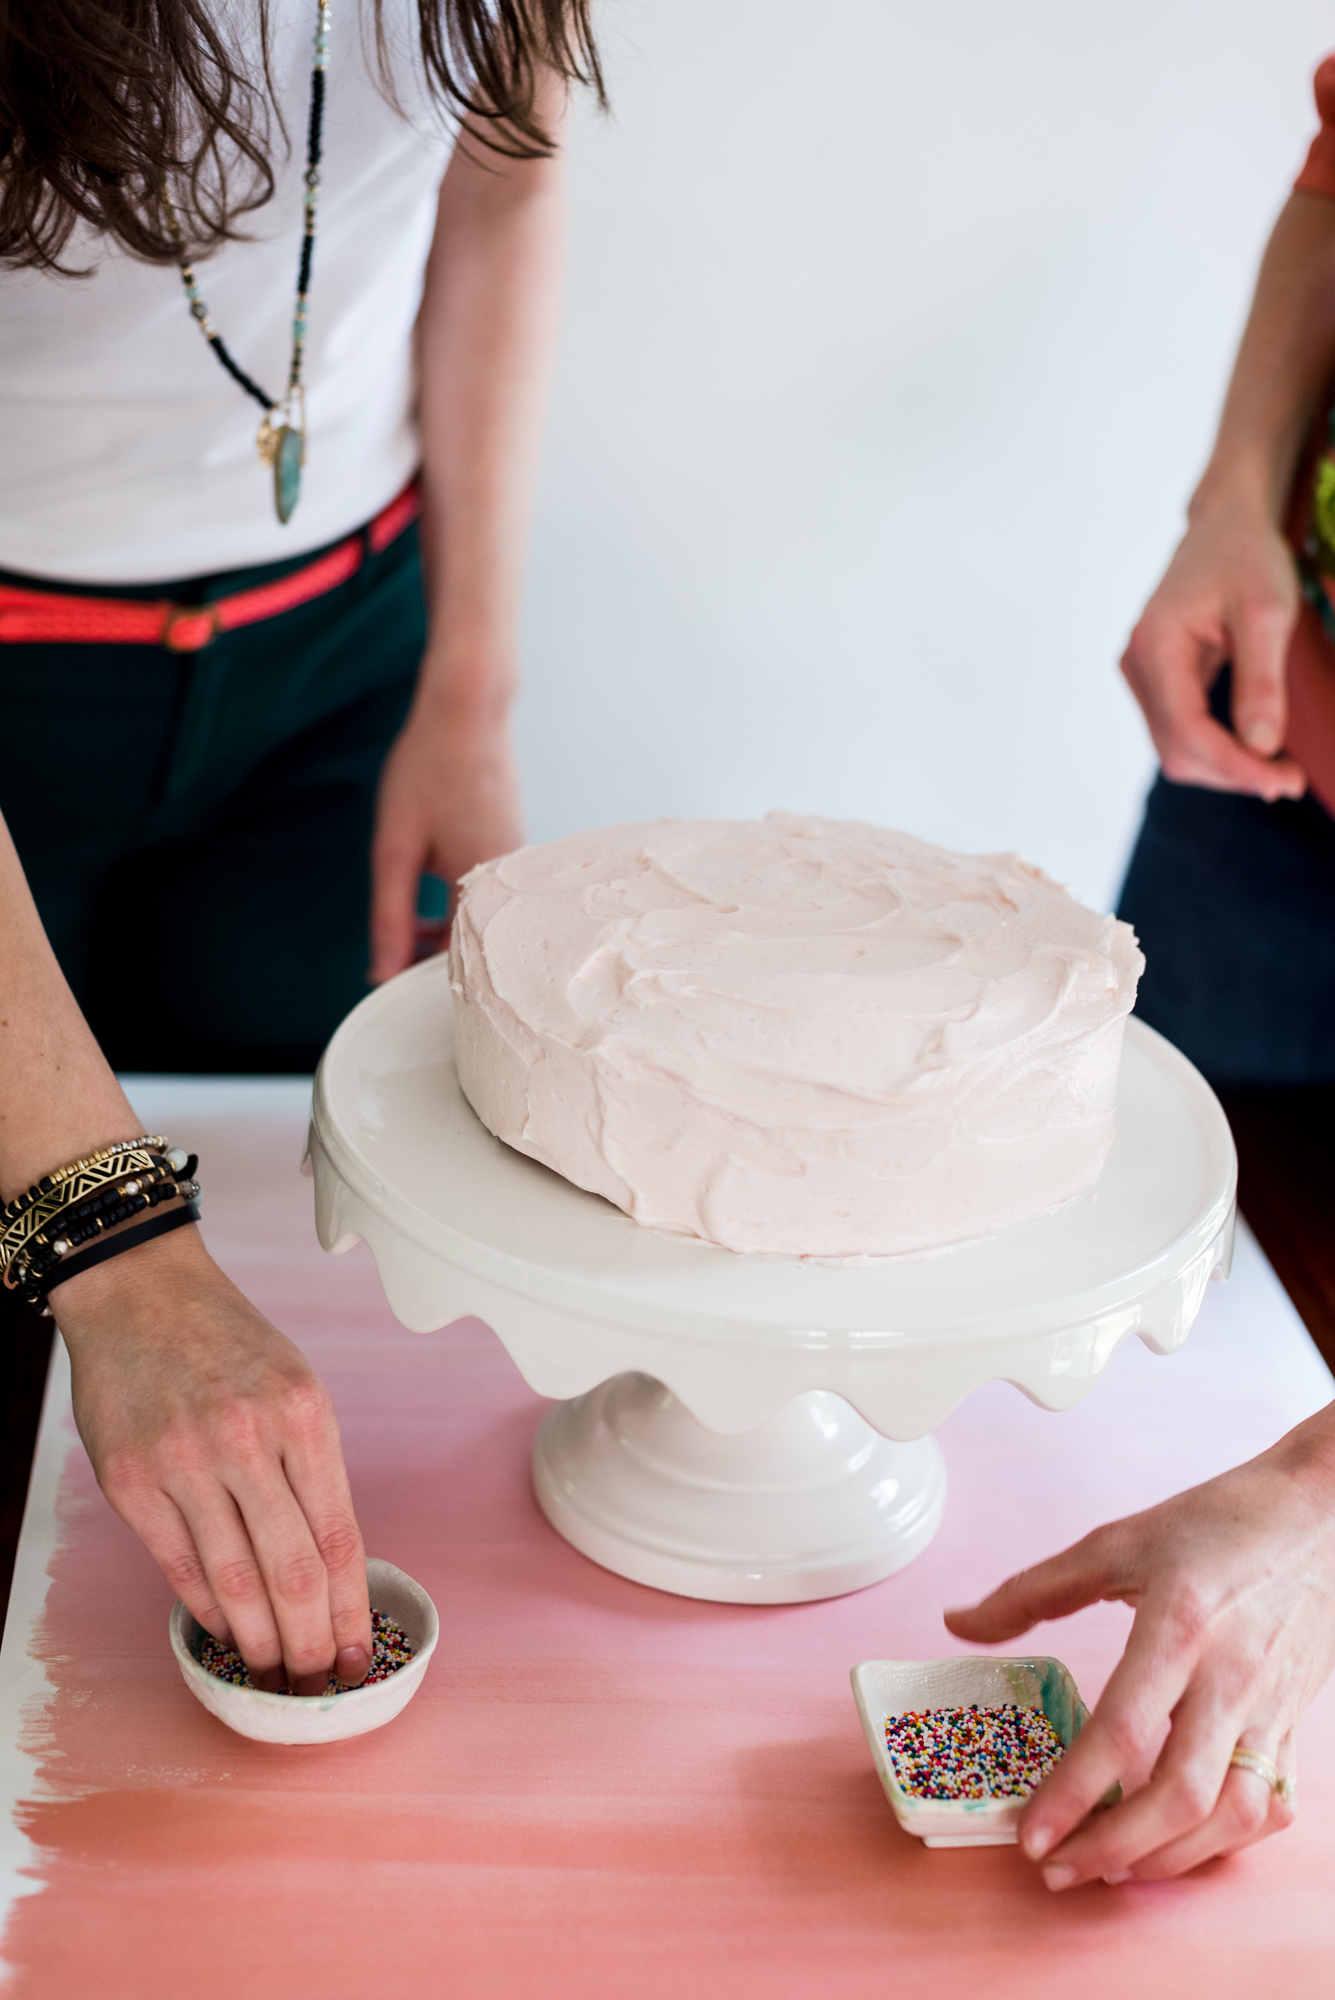
6) Now, using a spoon, drop dollops of the pink batter on top of the vanilla batter, in a circular pattern, using the same amount of large dollops (about two tablespoons) in each pan. Then, using a toothpick or wooden skewer, swirl the pink batter into the vanilla batter until it is well distributed (it took me about thirty seconds of swirling). So pretty!
7.) Pour the batter into the prepared pans. Bake for 25 to 30 minutes for 8″ or 9″ rounds. A toothpick or cake tester inserted into the center will come out clean when done. Remove from the oven, remove from the pan, (careful, the pans are hot!), cool on a rack, and frost.
For the frosting, I adapted this recipe a bit from All Recipes:
What You Will Need:
1/2 cup unsalted butter, softened
2 cups confectioner’s sugar
2 tablespoons almond milk
a few drops neon pink food coloring (depending on your level of pinkness here too)
What you Will Do:
Cream room temperature butter with the the paddle attachment of a stand mixer until smooth and fluffy. Gradually beat in confectioners’ sugar until fully incorporated.
Pour in almond milk and beat for an additional 3-4 minutes. Add food coloring, and beat for thirty seconds until smooth or until desired color is reached.
And finally, for those of you who made it to the bottom of this post, I reward you with this:
Mattye, as always, looks amazing. I look insane. #30’s
In my book, babies are absolutely precious. In fact some are so cute I actually feel like my heart might explode with joy and undeniable mushiness. Full of life, cooing at every glittery object dangled across their tiny little faces; arms outstretched to the object’s owner, inviting them to cuddle. My absolute favorite baby is one with what I like to call “Michelin” arms- a.k.a. the chubby rolls of skin that fold over their tiny elbows, waiting on the little one to grow a bit more before they unfold.
Now, I don’t actually have a baby, so I realize that my view of them is probably a bit romantic. Maybe they aren’t always cooing, maybe sometimes they cry. But in my mind, until this situation changes and reality hits, I will cling to the dreamy, giggly Gerber moments I see on Publix commercials.
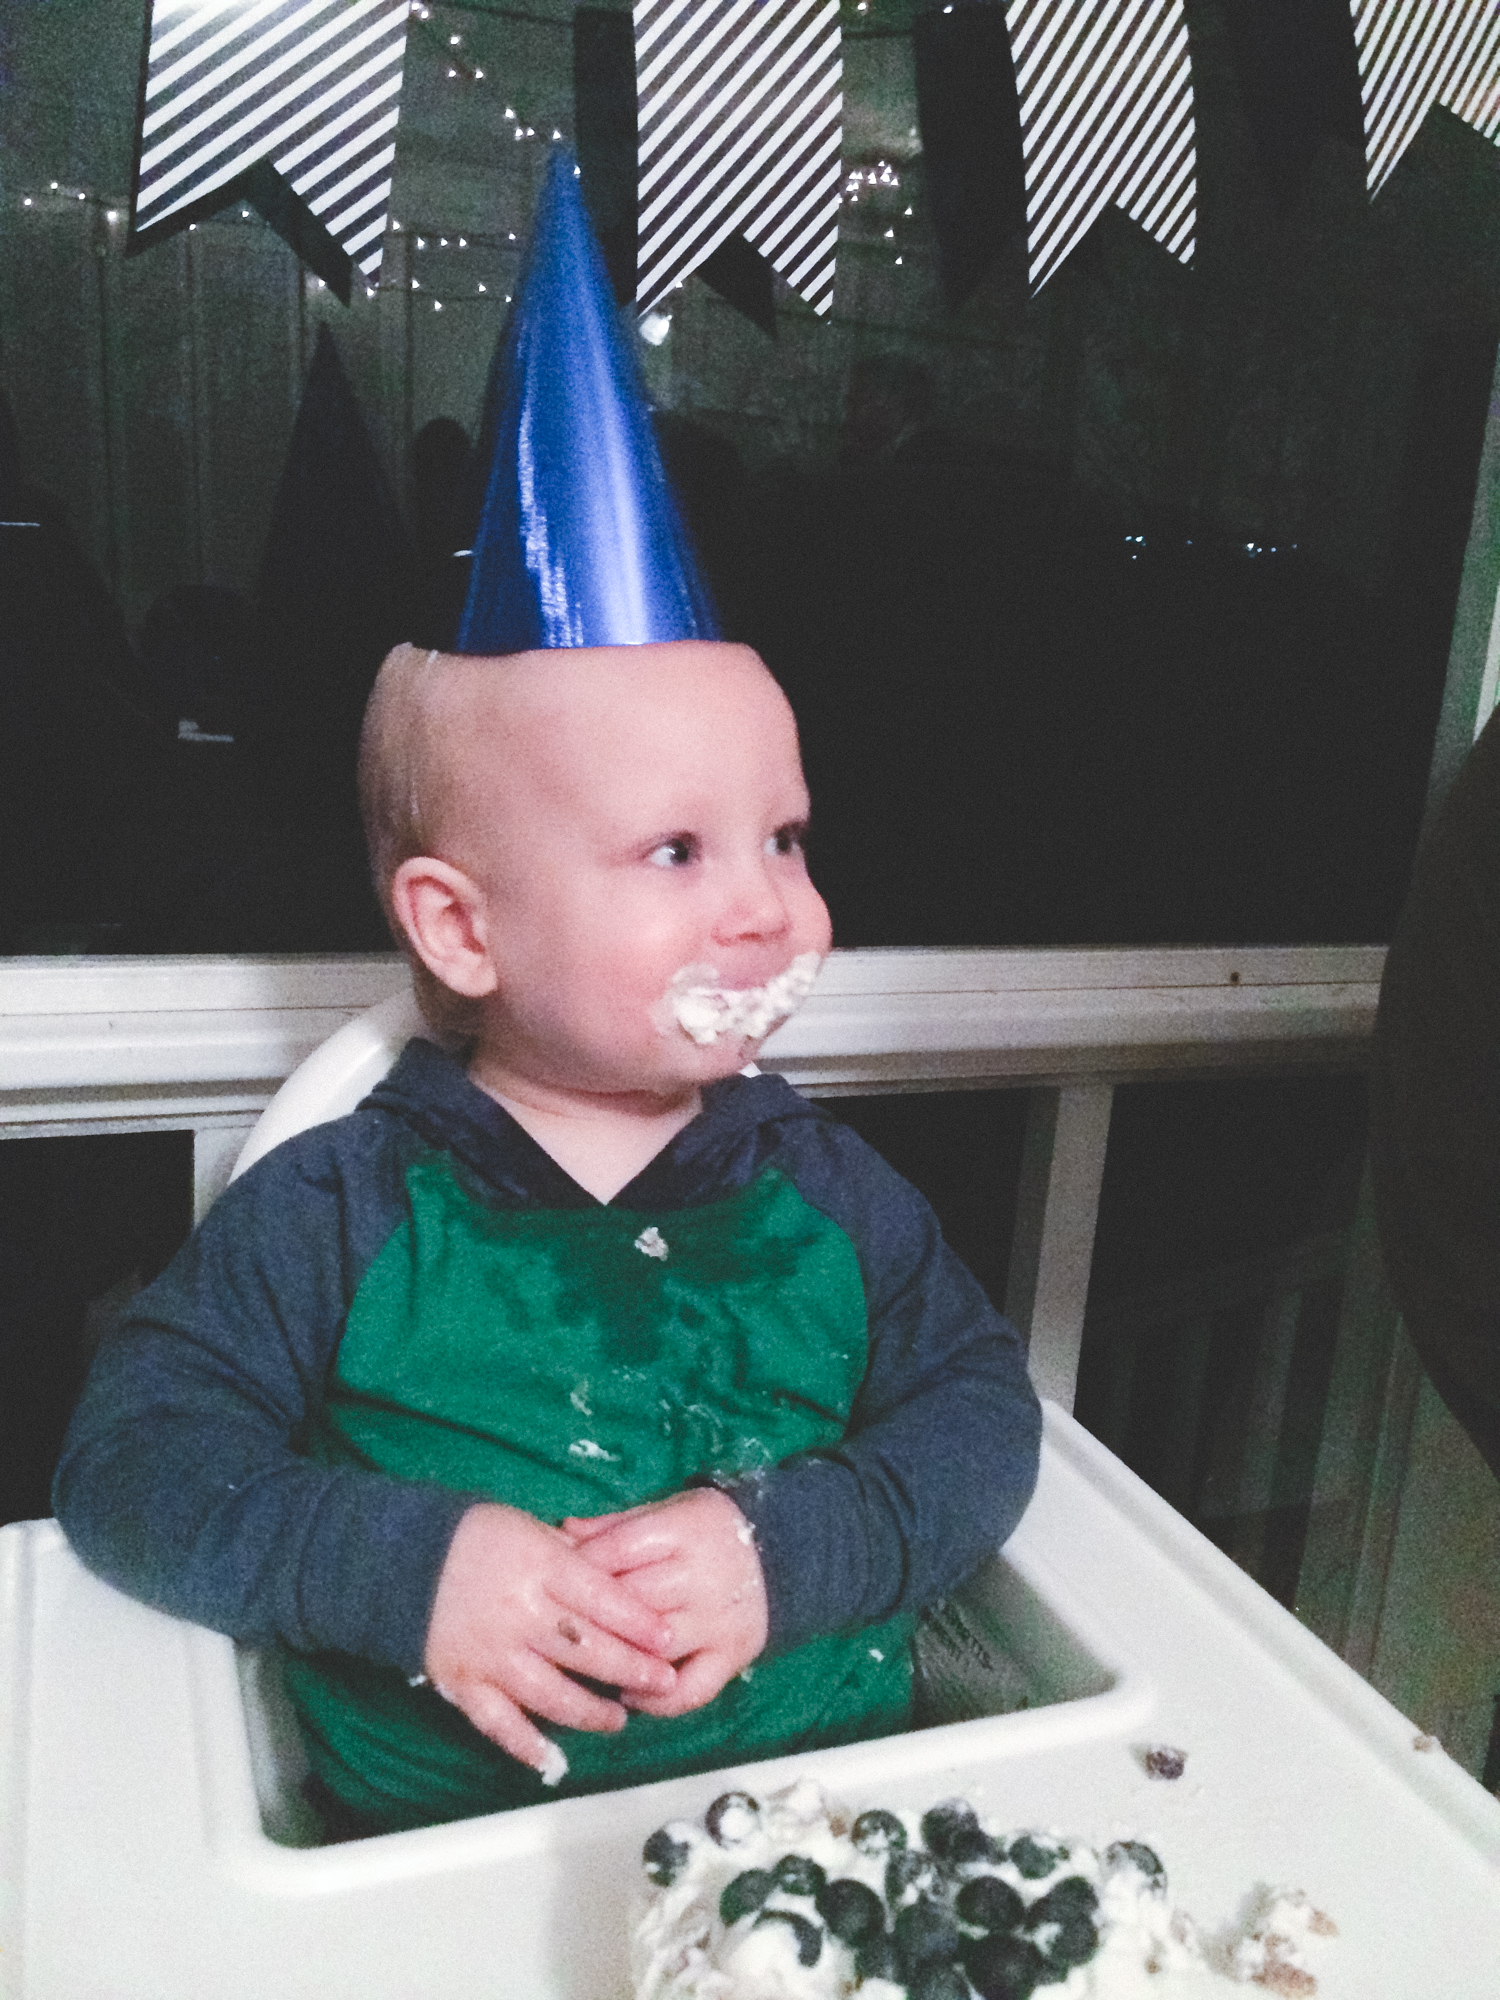
That being said, I was over-the-moon thrilled when my friend Celine asked me to make a low sugar baby smash cake for precious Pace’s first birthday. Pace has yet to eat sugar, and being new to the realm of whole foods nutrition, it was a challenge to find a recipe I felt good about. Some were so far left I had trouble, in my newbie mind, recalibrating the ratios to resemble something that might delight a little one. Others seemed more towards center, but their appearance resembled something close to play dough. (Which, by the way, who didn’t love play dough as a kid? I think I loved it so much I ate it.)
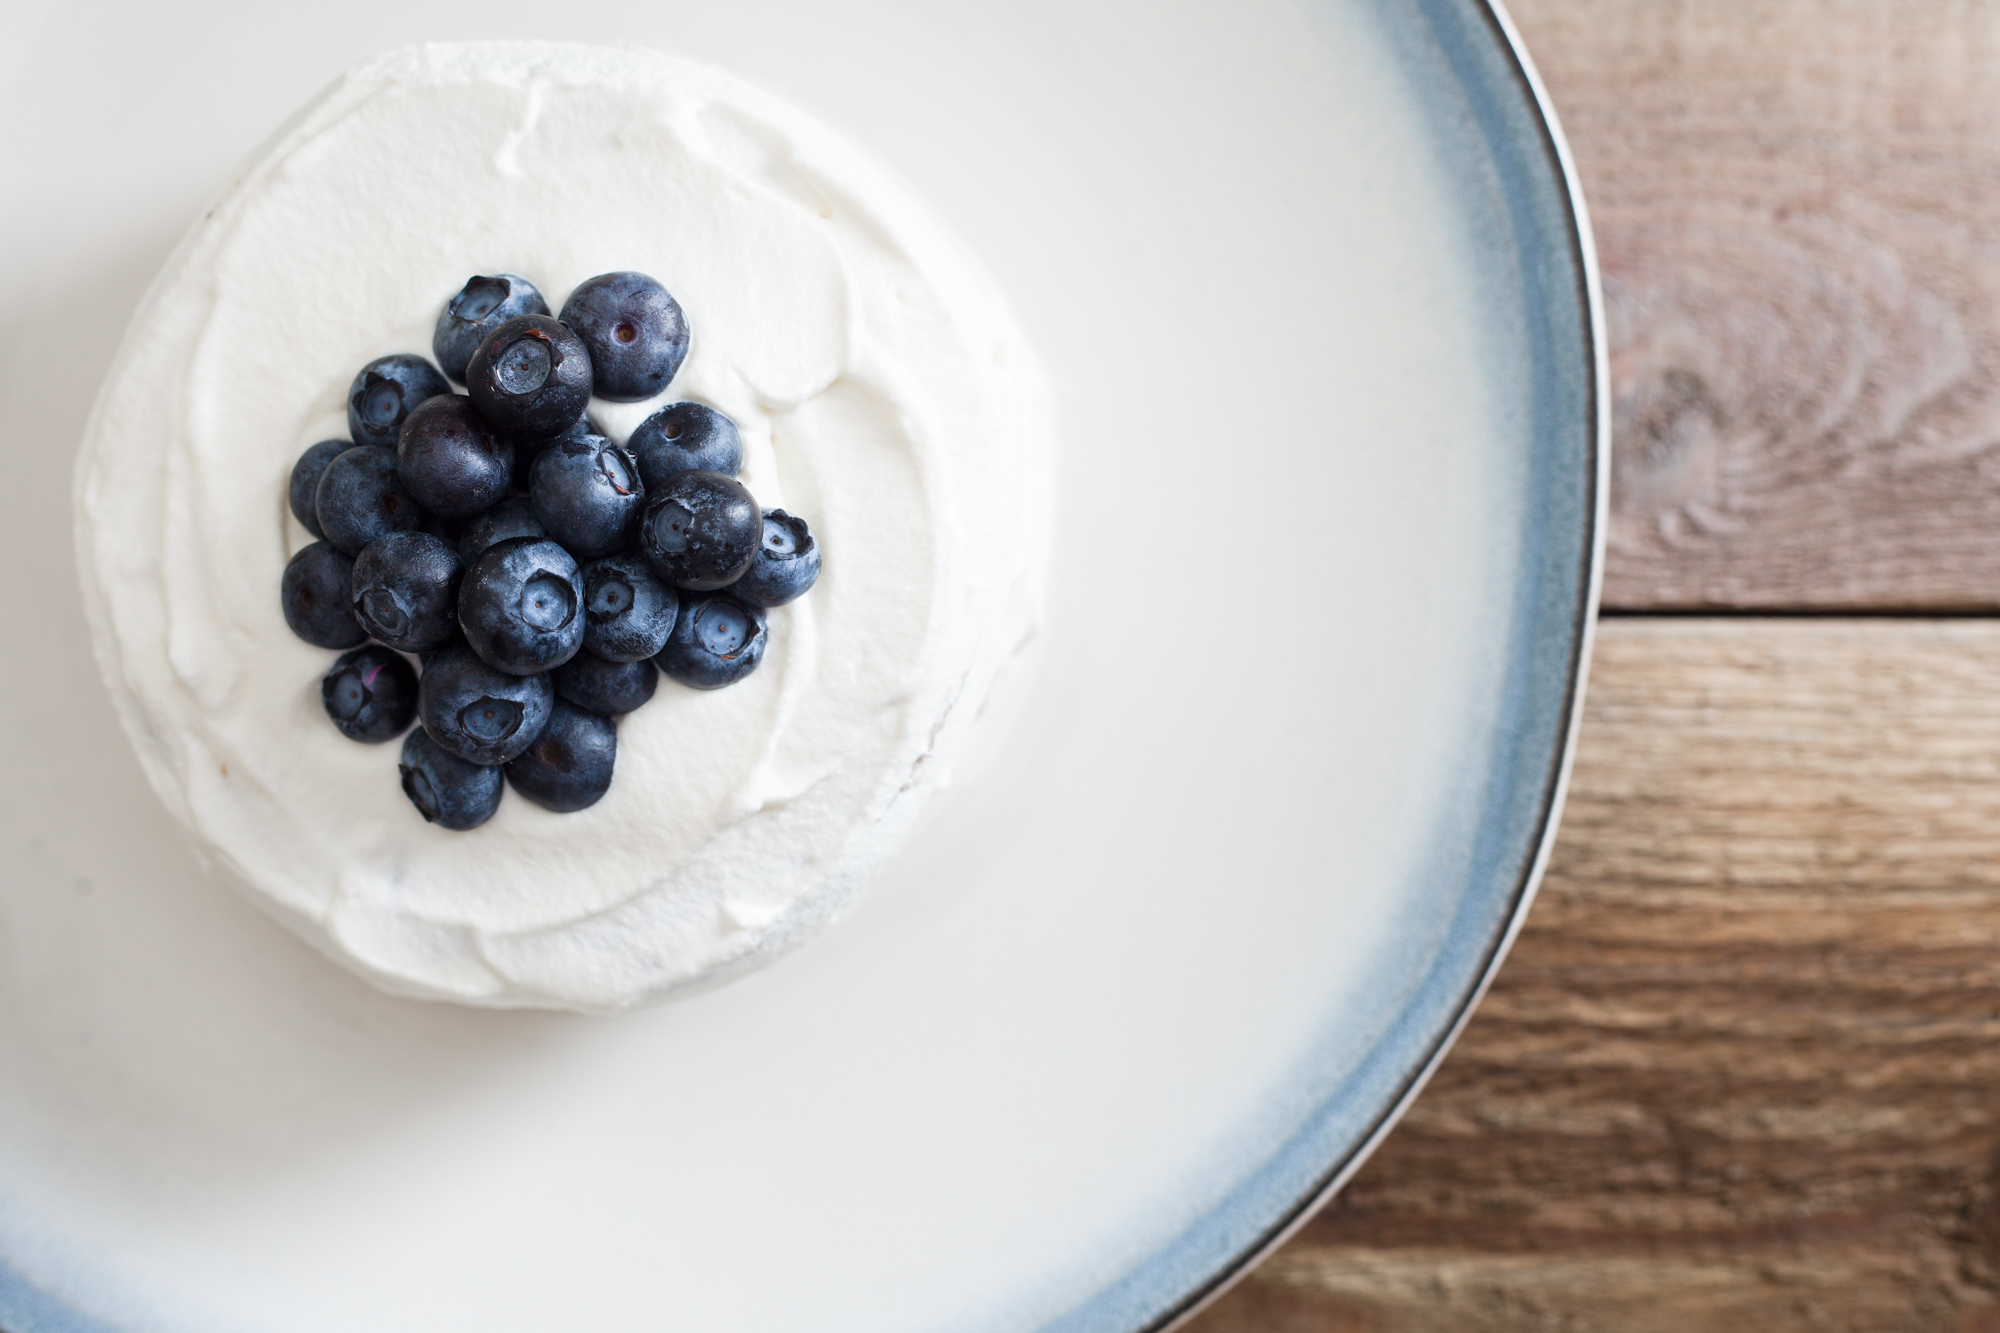
But this recipe, sent to me by Celine and found on Fit Mama Real Food was a blessing. I loved Heather’s take on real food for kids. Her recipes are right on target, nutritious, and I was pumped to find out about her site. Knowing Pace’s love for all things fruit, I thought blueberries would be a nice tie-in for him, since blue appears to be a good color for boys’ birthday parties and all.
Below is my spin on her awesome recipe. I hope you have time to make this for the precious, giggly munchkins in your life; I think they’ll love it. Bon appetit and happy smashing!
Low Sugar Banana Blueberry Smash Cake
What You Need
For the cake
5 ripe, medium sized bananas
3/4 cups whole wheat flour
3/4 cup oat flour (just grind rolled oats in a blender, then measure)
1 teaspoon cinnamon
1 teaspoon baking soda
1/2 teaspoon salt
1/2 cup natural no sugar added applesauce
3 tbsp coconut oil (melted), plus more for greasing cake pans
3 teaspoons vanilla extract
1/2 cup thawed frozen blueberries
For the frosting
8 ounces organic heavy cream
1/4 teaspoon vanilla extract
Additional fresh blueberries for topping
What You Will Do
1. Preheat your oven to 375, and use coconut oil to grease two 9-inch cake pans.
2. Mash bananas! This is somewhat tedious if you do it with a fork, but hey, gotta show the babies some luv!
3. Combine both flours, cinnamon, baking soda, and salt in a large bowl.
4. Add mashed bananas, applesauce, coconut oil, vanilla extract and mix until just combined.
5. Gently stir in blueberries, trying not to break the skins (this has the potential to turn the inside of your cake purple).
6. Making sure to distribute the batter evenly, pour it into each cake pan. My recipe took about 1 1/3 cup batter per pan.
7. Spread the batter into the edges of the pan. Use a butter knife to even out the top of the batter. This will help your cake layers lie flat when you stack them.
8. Bake at 375 for about 15 minutes, or until the cake is golden on the edges and a toothpick inserted in the center comes out clean.
9. Let the cake cool.
10. Once cooled, flip the cake out of the pans onto a cutting board. To make the cake baby size, I used the rim of a small bowl and cut two circles out of each layer. Save the scraps for an adult snack later on! It’s delicious. Now get ready to get your frost on!
For the frosting
1. Pour cream and vanilla extract into a chilled mixing bowl. Whip on high speed until stiff peaks form.
To frost the cake
1. Find a pretty platter, and put the base cake layer on the plate.
2. Using an offset spatula or butter knife, spread a generous amount of whipped cream onto the top of the base cake layer. Put next cake circle on top. Repeat the process until you reach the top of the cake.
3. Pile whipped cream on the top layer, then use your spatula to spread it downwards, covering the sides of the cake. Use extra whipped cream to cover any cake left uncovered.