Gluten Free Honey Butter Pretzels

Gluten Free Honey Butter Pretzels

Y’all, my life. It’s crazy.

I am getting married in one week.  Yes, that is o-n-e week. And it is the wedding of my dreams. My fiance- oh my gracious-he is amazing. I knew he was a winner from our first date, when he was picking out pieces for me of white chocolate Christmas mix with extra marshmallows. He’s so creative, even-keeled (for those of you not from the South, that means he doesn’t freak when confronted with a dry, over baked biscuit), talented, unconditionally loving, hilarious. Oh, and my in-laws are amazing too. His mom, like mine, is wonderful and loves to cook! #jackpot

Honestly, everything is coming together and feels just as it should be. The decor-white rose bouquets, greenery, Christmas wreaths, all wrapped in cranberry ribbon- is lovely. It’s going to be such a beautiful day.  I’ve always dreamed of getting married at Christmas, and this is it.

At the same time, in the world of reality I never considered that a Christmas wedding, though beautiful and romantic, also happens during Christmas. Like, a week after Thanksgiving and in the middle of the most busy season of the year for pretty much everyone. When gift shopping traffic at the Summit reaches a fever point and grown adults make grand “hand gestures” to offending Suburbans. So to say that my fiancé and I have been busy, stressed, had hard conversations about the guest list and wondered if we would ever make it unscathed to the altar, that would be an understatement.

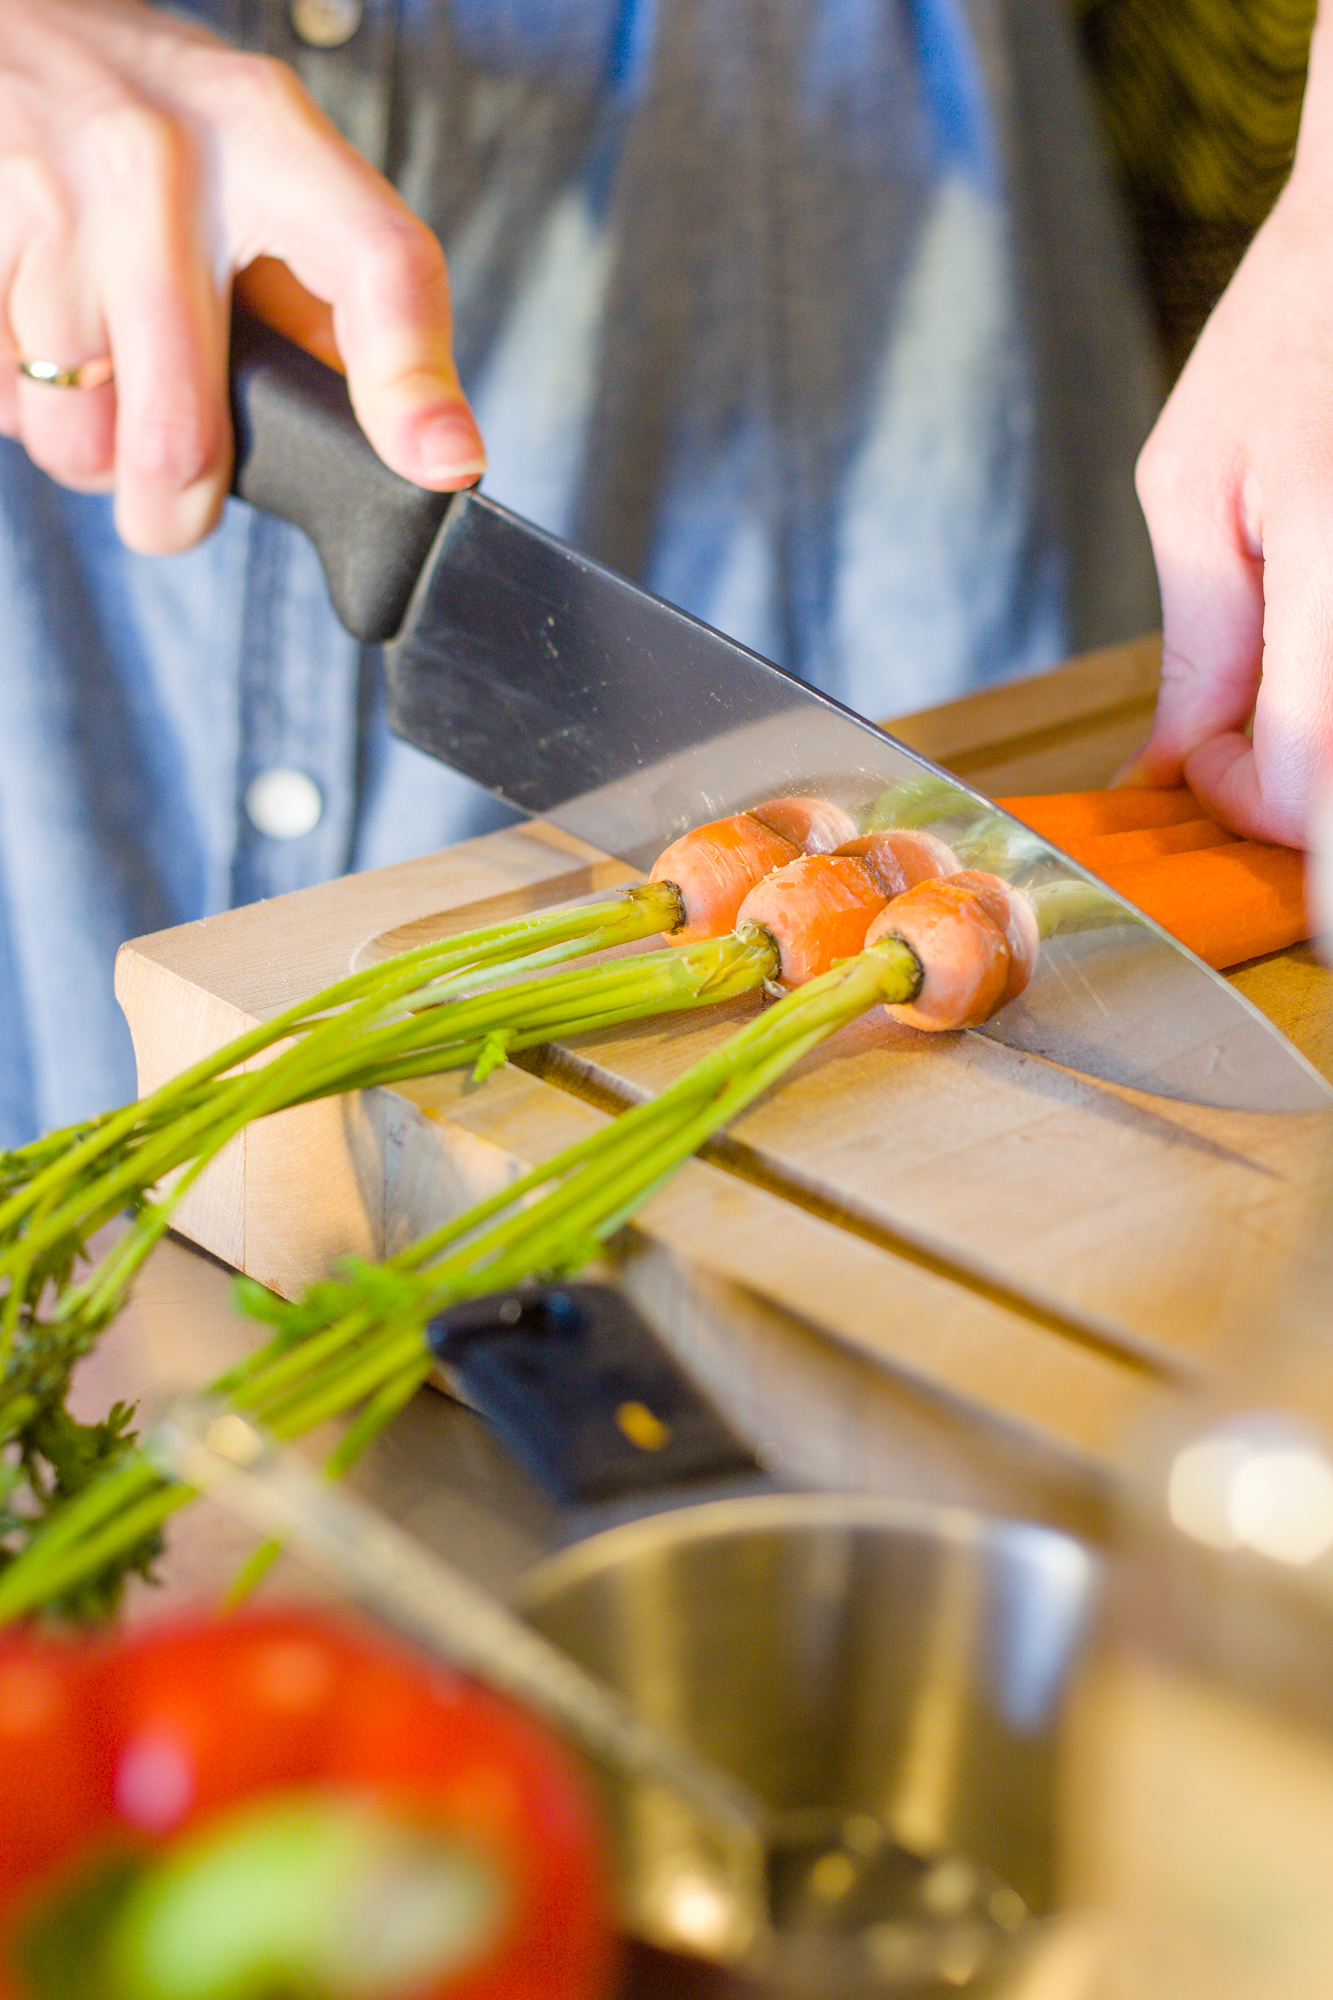
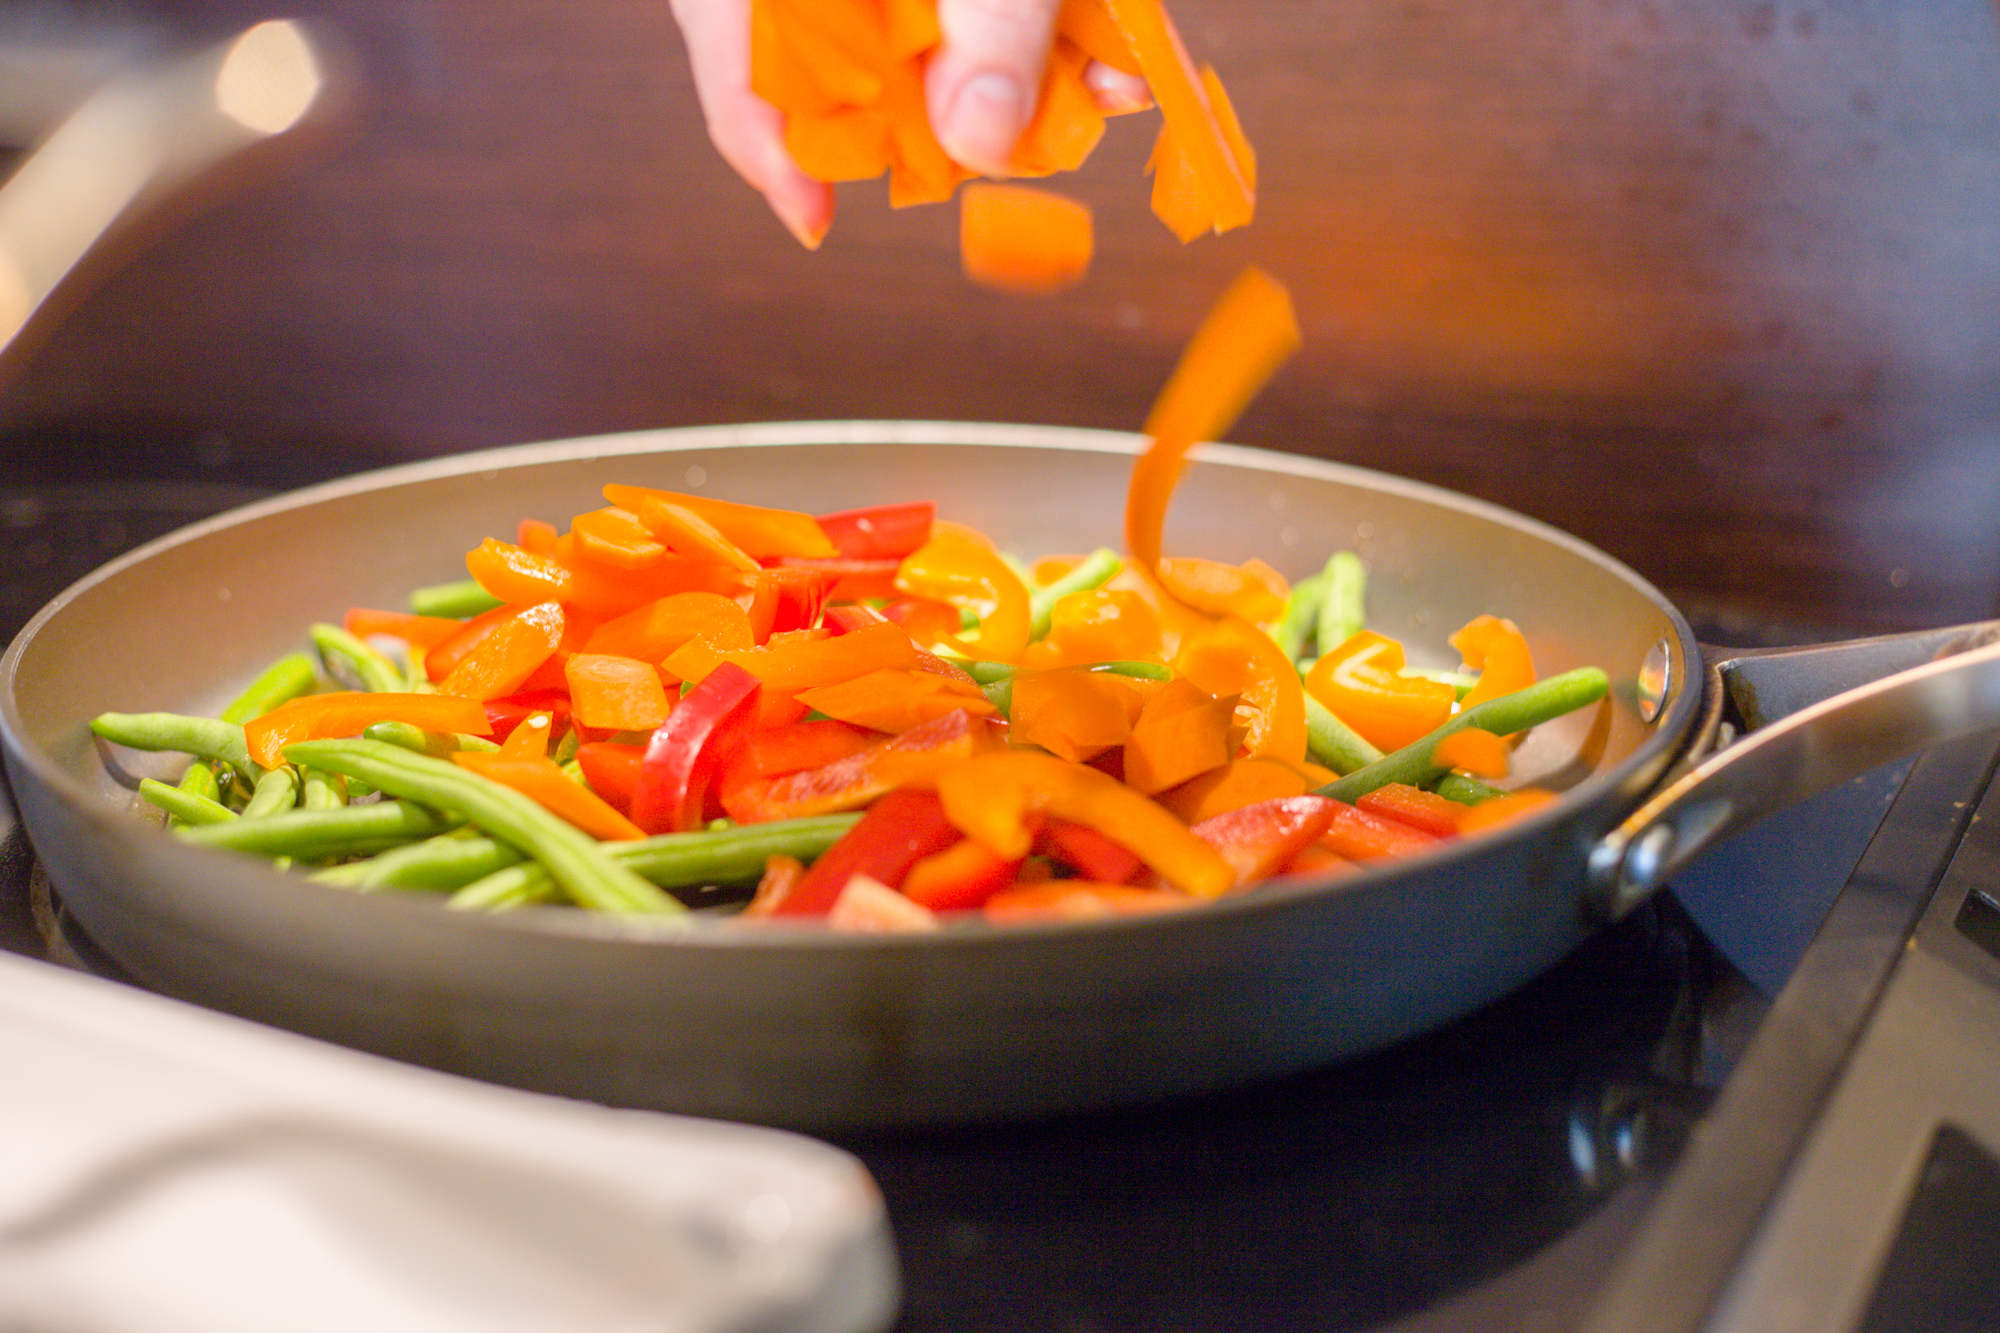
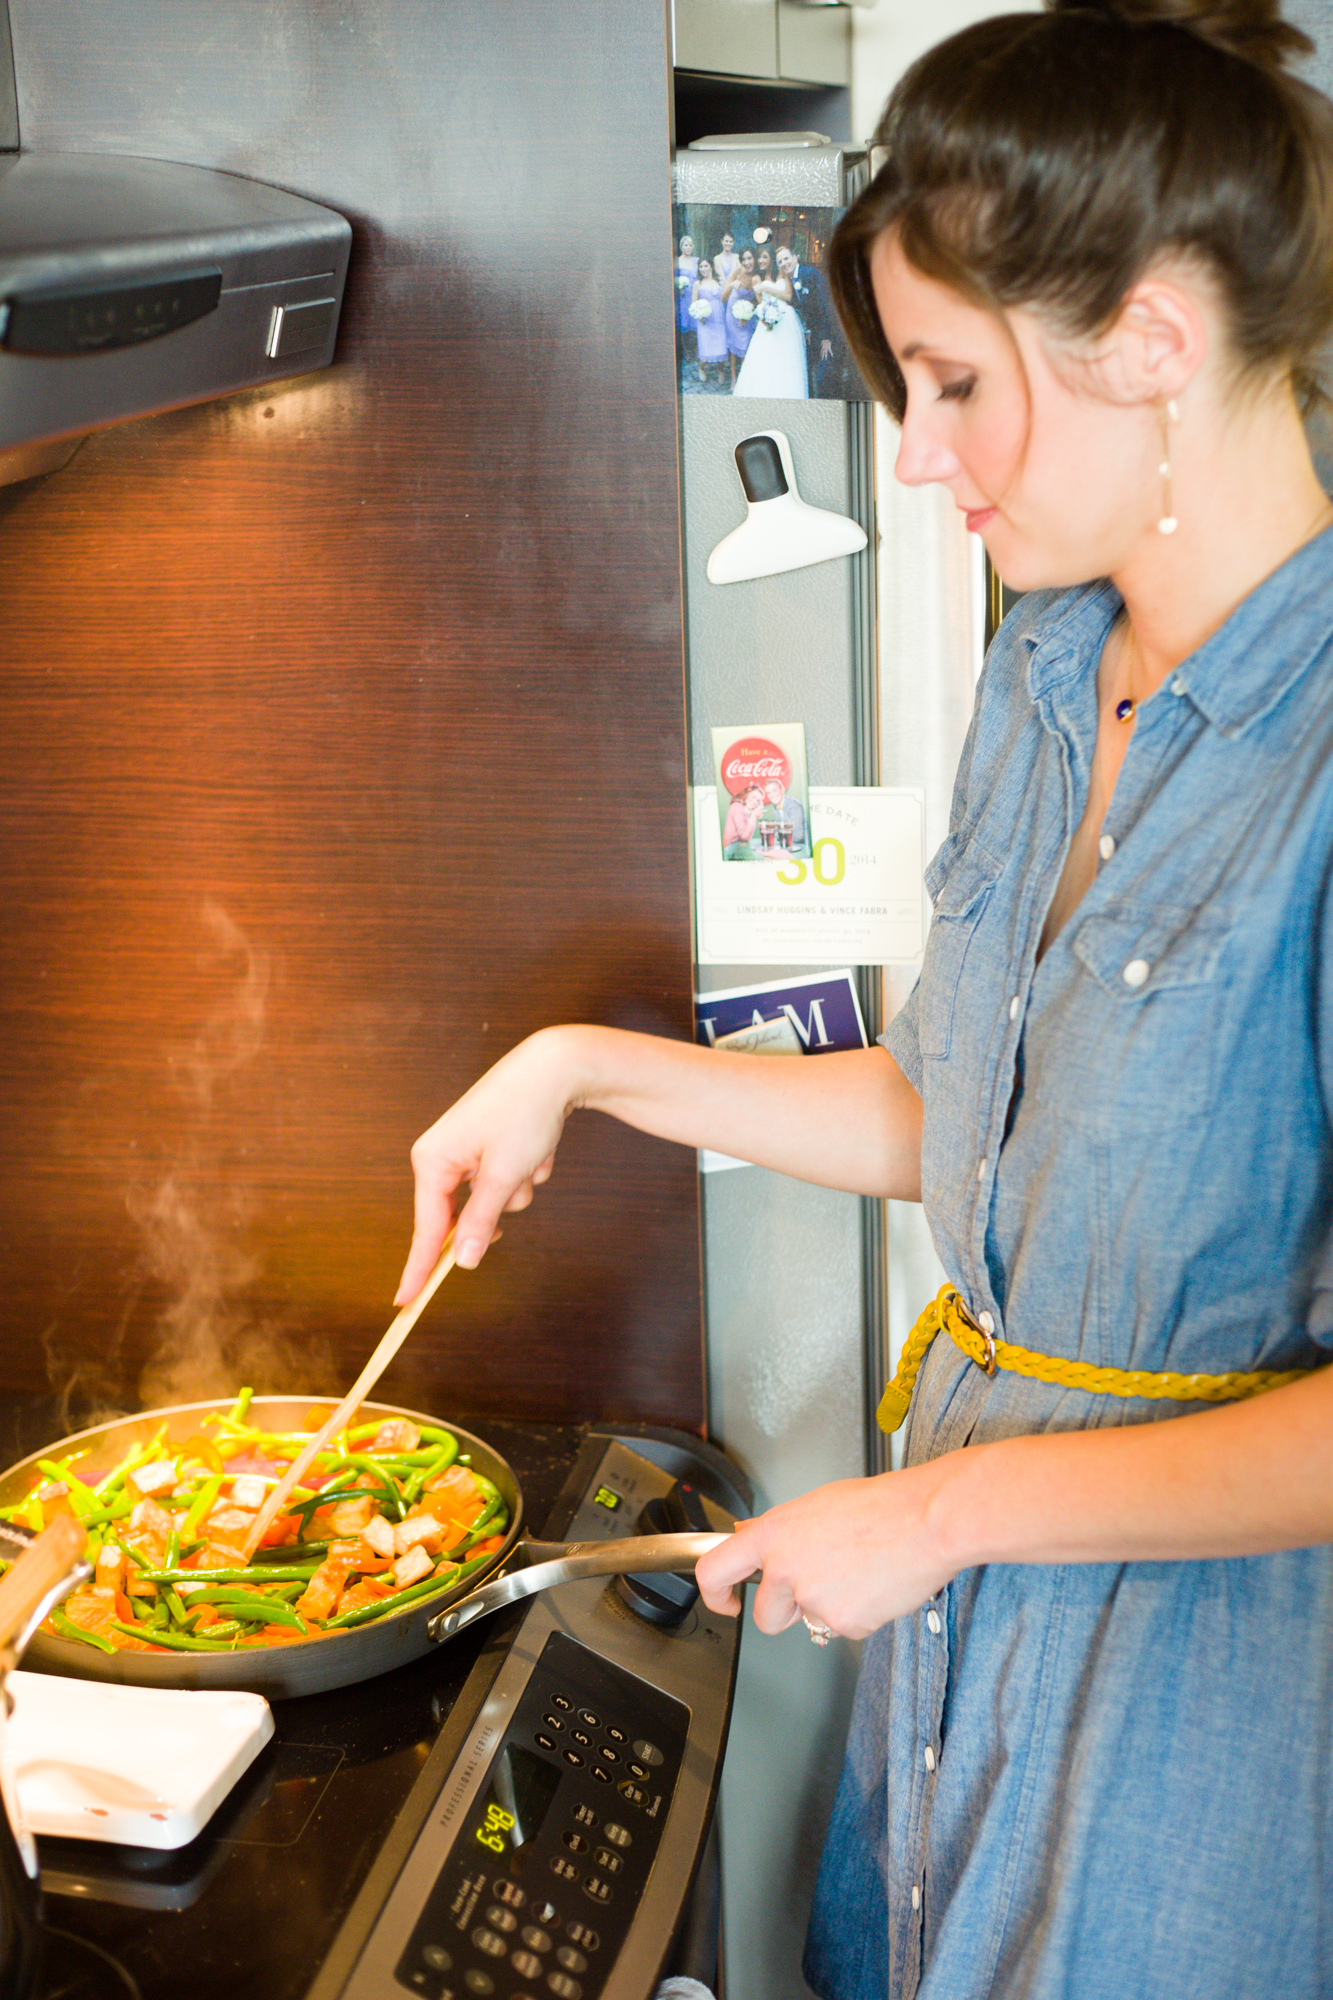
In the midst of the crazy, there is always one thing I can count on. It’s my kitchen. It’s the movement of sweeping a knife through a ripe pear, taking celery, combining it with onion and carrot and making a beautiful mirepoix for hot vegetable soup. It’s my safe place- a place of rest, renewal, and a way to calm the hunger pains caused by hours of wedding registry scanning and walking the aisles of Lowes looking at fashion bathroom accessories.

Gluten Free Honey Butter Pretzels

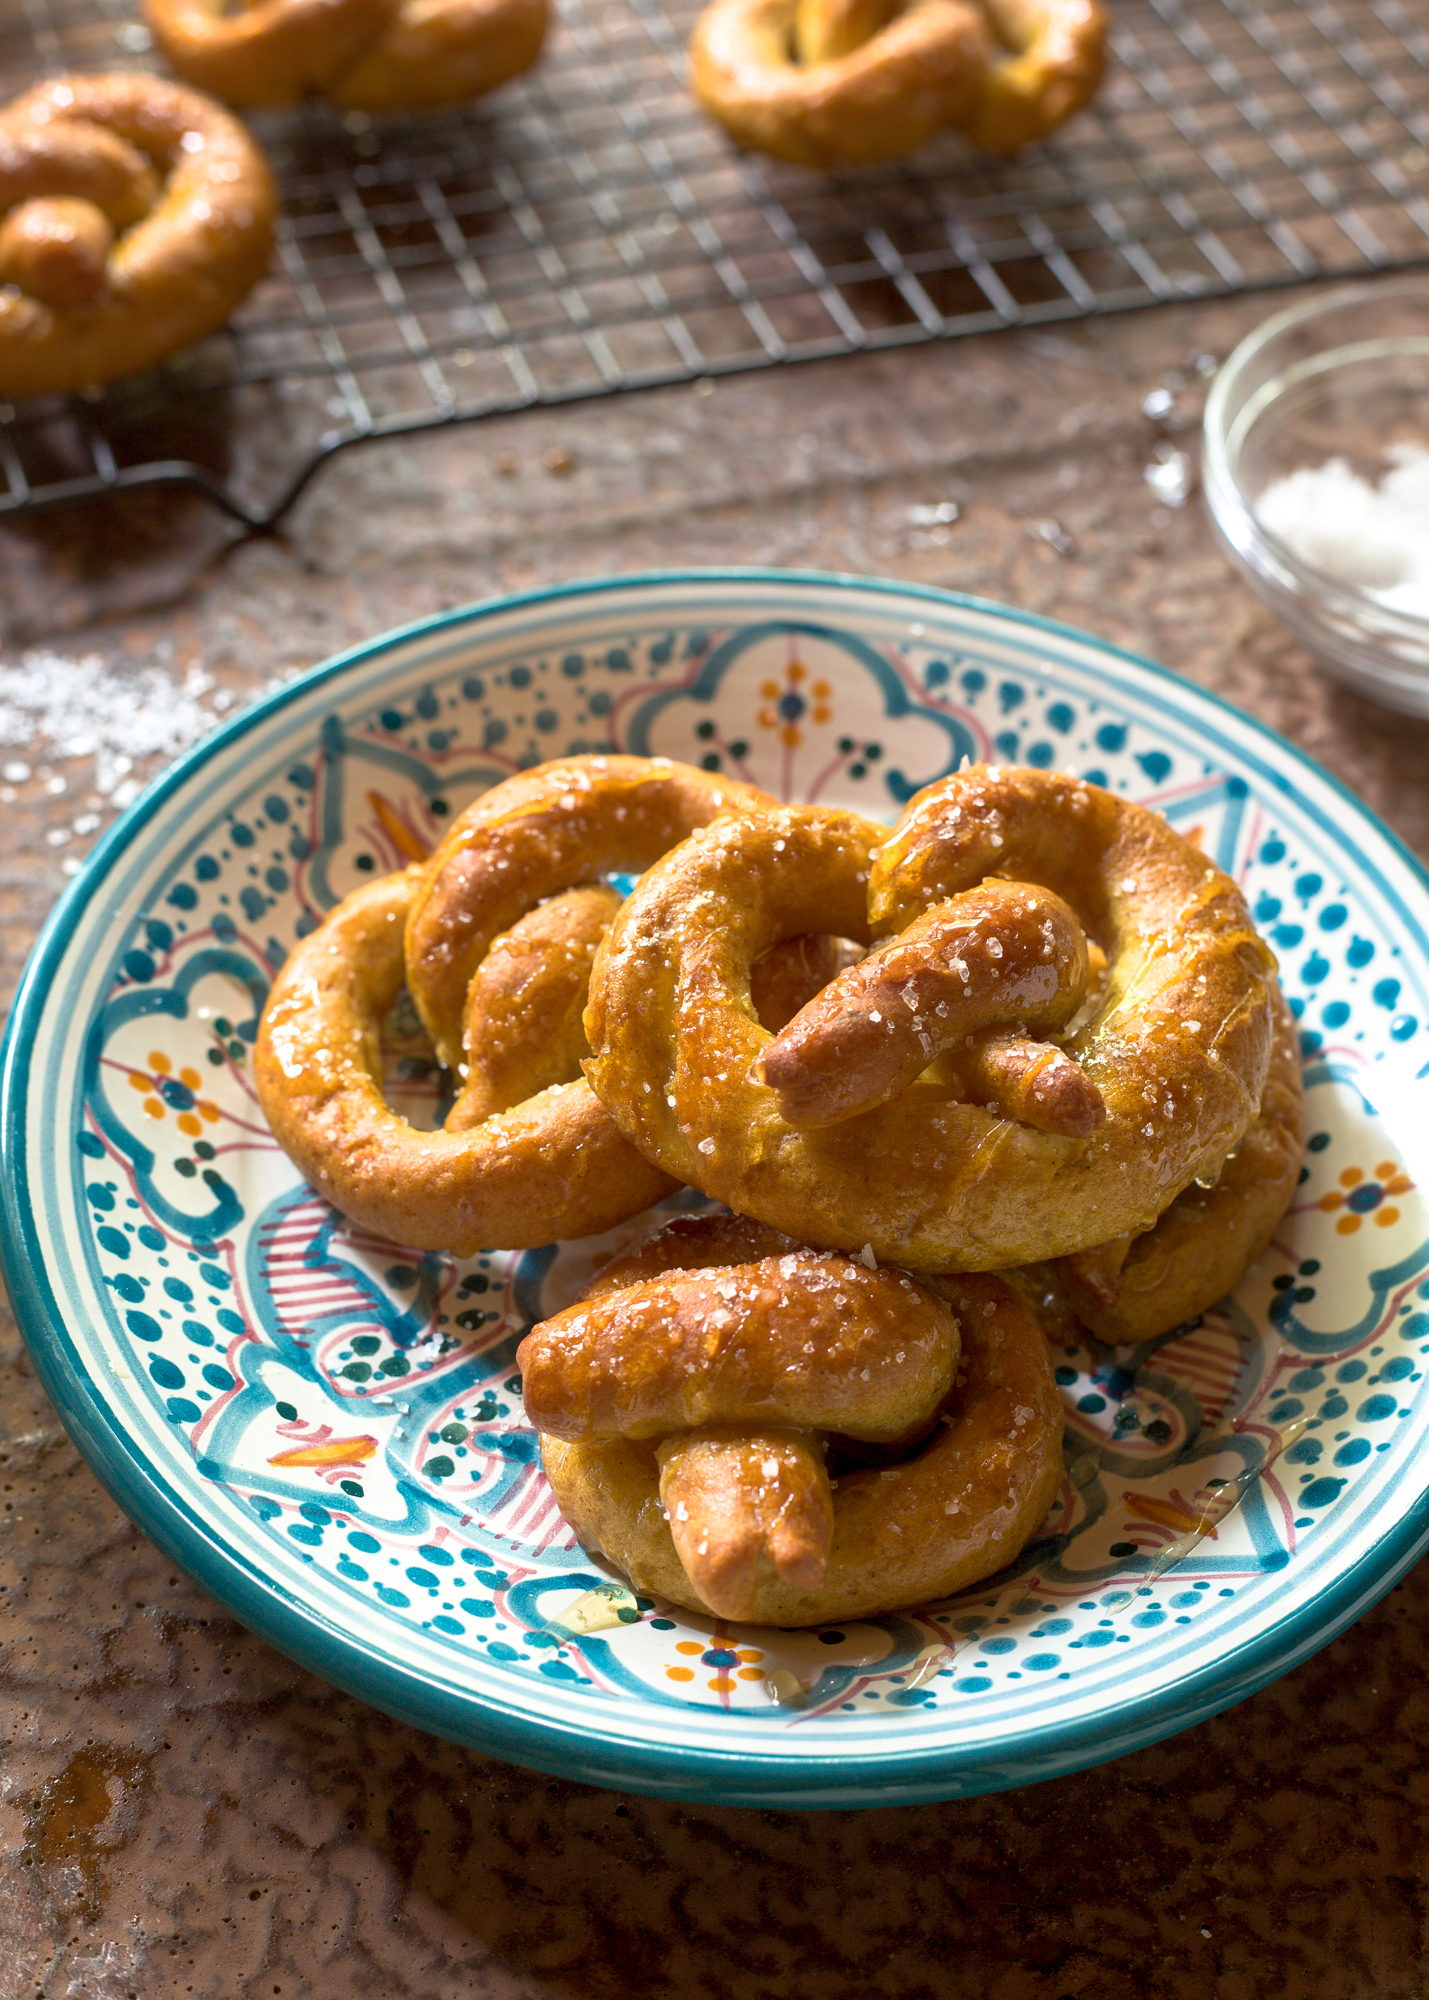
And for me, trying something new is just as therapeutic. It takes my mind off the to-dos and brings me back to rolling out pretzel dough with my hands and figuring out how to shape it into a knot. Dipping light, yeasty dough into boiling water topped with baking soda and watching it bubble over. And that’s why this recipe is perfect for right now. It’s worth the extra time it takes to make these by hand. They are so, so delicious and I will pit them against any you might find while shopping at the mall. Hot out of the oven, I presented them on a platter, and ate half of them by myself. I think at one point I started staring my family down when their hands reached toward the plate. It was that bad. And by bad I mean delicious.

So, if you are like me and in the middle of holiday craziness, take some time to get to your safe place. Let your mind reflect on all the good in your life and all we have to be grateful for. Then enjoy a great soft pretzel, throw on your warmest jacket, and go out there and tackle that to-do list. No hand gestures needed.

Gluten Free Honey Butter Pretzels

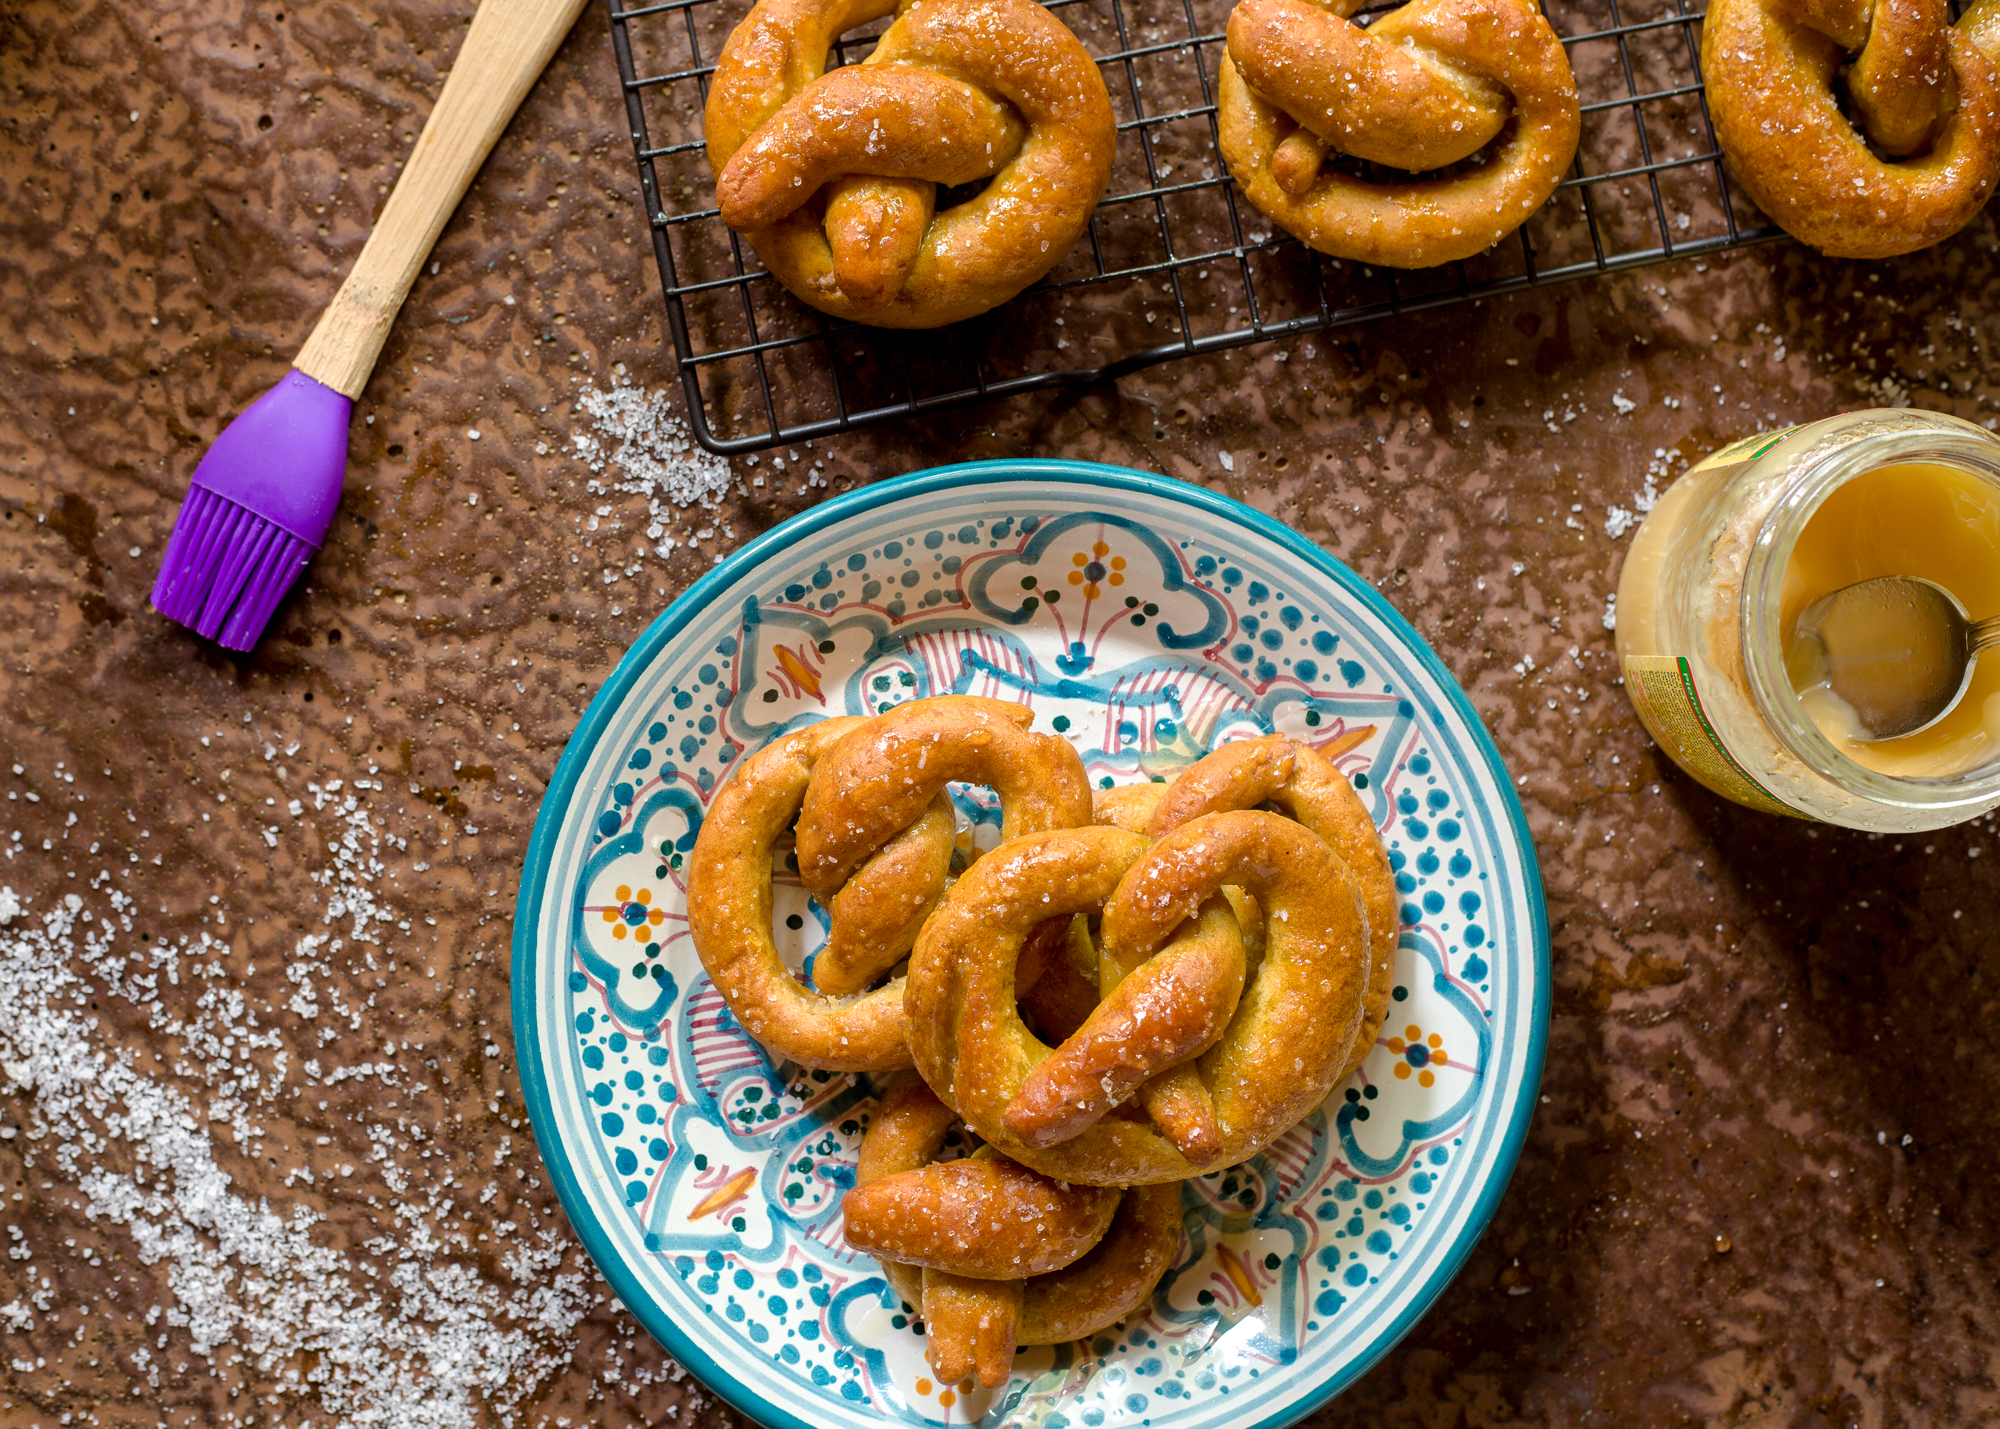
Gluten Free Honey Butter Pretzels (recipe taken from Kumquat blog, my favorite gluten free blog I have found! It’s absolutely wonderful!)

What You Will Need:

  • 1 package active dry yeast
  • 1 cup warm water (105° to 115°; I used a candy thermometer to measure my temp)
  • 1 tablespoon plus ½ teaspoon sugar, divided
  • 420 grams (about 3 cups) kumquat’s all-purpose gluten-free flour, divided (this is a great gf flour mix!)
  • 1 teaspoon salt
  • 1 teaspoon xanthan gum
  • 4 tablespoons unsalted butter, softened (plus extra melted butter for topping)
  • 4 cups water
  • 2 tablespoons baking soda
  • cooking spray
  • coarse salt
  • honey for drizzling (I love local honey if you can find it)

What You Will Do:

  1. Combine yeast, water, and ½ teaspoon sugar in a small bowl. Let sit for 5 minutes.
  2. Combine 1½ cups flour, 1 tablespoon sugar, 1 teaspoon salt, xanthan gum, and butter in a large mixing bowl. Cut in butter with pastry cutter or fingers until mixture resembles coarse meal. Add yeast mixture and stir until well combined. Add remaining 1½ cups flour and mix to combine.
  3. Pour out on a surface and knead a few times to make a smooth dough. Place dough in a large, well-greased bowl (I sprayed mine with cooking spray) and cover. Let rise in a warm place, free from drafts for 60 minutes.
  4. Preheat oven to 475° and spray your baking sheet with cooking spray. Divide dough into 5 or 6 pieces (or if you like, you can make the pretzels a bit smaller like I did; I think I ended up with 8-10 pieces).
  5. Knead pieces in your hands until nicely smooth. Roll each piece into a 16-18-inch length and form into a pretzel shape.*
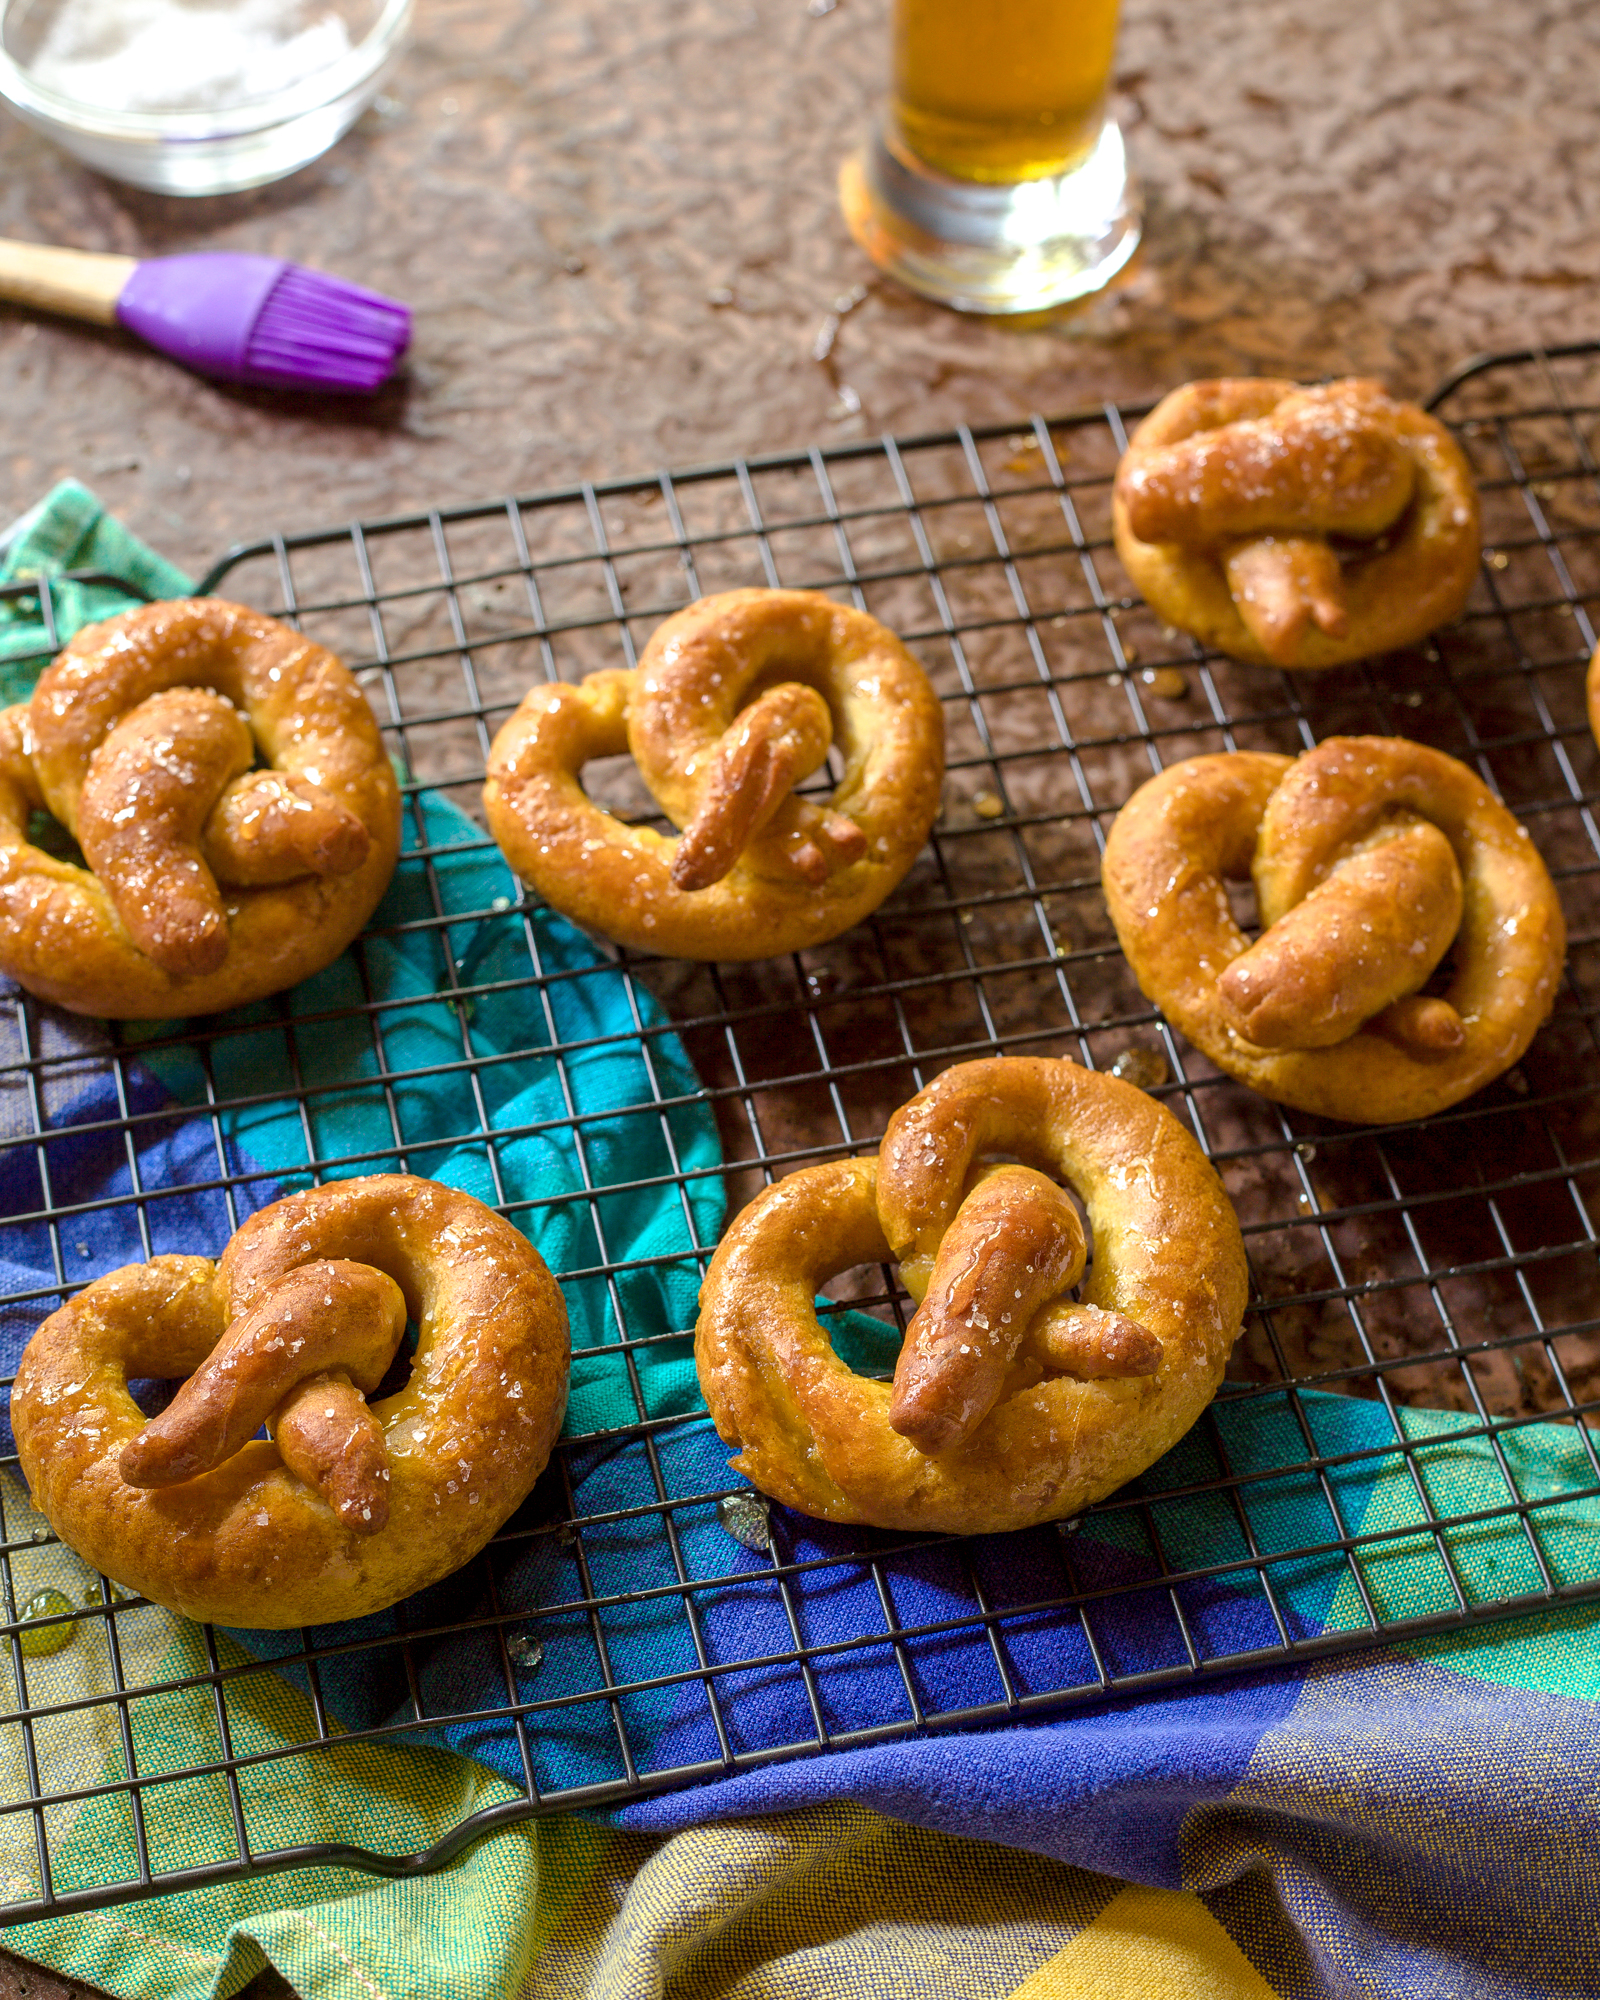
  6. In a non-aluminum pot, bring water to a boil with baking soda. Add pretzels, two at a time, and boil 1 minute. Use a slotted spoon to lift the pretzel out, and shake off excess water. Place pretzels on a baking sheet.
  7. Using a pastry brush, spread melted butter on the pretzels and top with coarse salt. Bake at 475° for 10 minutes or until golden brown. Once out of the oven, drizzle with honey. Voila! The perfect, gluten-free, honey butter pretzel!


*This it the best way I found to shape these pretzels!

1. I like to first make a horse shoe, “u” shape with the dough, facing away from you.

2. Cross the left piece under right piece, right piece under the left piece, then flip that criss cross up and over towards you to the top of the “u” and press to seal it.

3. Shape it a bit to even out the pretzel form and you are ready to go!

Gluten Free Banana Bread and My Life Well Loved

Gluten Free banana bread

Anyone who is familiar with Luv Cooks knows how much I adore banana bread. In my world, banana bread should probably have it’s own Saturday food group pyramid, stacked right above quality coffee and below fresh fruit, complete with a pajama-clad stick figure at the bottom advertising the importance of watching the Cooking Channel as exercise for your cooking muscles. Now this is something I could get behind!

And speaking of muscles, I am so excited to partner with my friend Heather Brown’s site My Life Well Loved for this post! Heather has a knack for succeeding at everything she puts her hand to; seriously, there is nothing she can’t do!; and her blog is NO exception. She is one of the most bubbly, kind-hearted, and energetic people I know, and her passion for life is one of my favorite things about her. She is also a social media wizard and the social media and blogger network director at e-meals.  So not only is she a fashionista, social media consultant, and Pure Barr instructor, she also has a passion for healthy eating.

So click here to visit My Life Well Loved, where you can check out Heather’s fabulous site and find an easy recipe for gluten-free banana bread I am so excited to share (with recipe by My Recipes) and photos by Magen Davis Photography. Enjoy and happy early Saturday!

Gluten Free Banana Bread

Chicken Divan and Making Dinner Time Count

Chicken Divine (Divan)

Y’all!

Fall is in the air; life is in full, golden swing; I am running like a crazy person all over town to assist on shoots and plan a wedding (feelings of glee, planning anxiety and squeal here!! AHH!!), and hopefully we are all eating peanut butter granola energy bars to keep us going.

I can’t think of a better person to share this sweet season with and learn from than the always beautiful, inviting, and relationally gifted Mattye from the lovingkind blog! She is back for our second, October installment together on making meal time matter. And I’m here to share one of the easiest, most deliciously warm recipes I can muster, chicken divan. I think you are going to love hearing from her and making this delicious casserole (and I don’t use the words delicious and casserole together lightly).

So put on some snuggly clothes, smell something pumpkiny and preheat your oven as we hear from Mattye on how we can make our fall meals- admits the wonderful busyness of our lives- even more intentional.

Chicken Divine (Divan)

Make Mealtime Matter

Hey y’all! I’m so excited to be back on the Luv Cooks blog to share some advice that will make your marriage as savory and sweet as your cooking! I promise that if you will purpose to make mealtime matter and cook this Chicken Divan recipe, it will be a happy night in your kitchen and your marriage!

I am not an incredible cook, but I do know something that can make your mealtime significantly better than the average American household. I’m not about to reveal a secret spice, perfected family recipe, or magical cooking tool. In fact, my advice is more about what you leave out than what you put in.

Chicken Divine (Divan)
Fresh broccoli pre-saucing

You can literally transform mealtime in your home with one simple step: remove cell phones from the dinner table! Eliminating this one distraction will give you the chance to look into each others eyes rather than stare at a screen and share about your day in a conversation rather than in a status update.

My husband Woody and I made it a rule that no cell phones are allowed at the table for the Woodcock family before we even got married. While dating, we spent months watching husbands and wives and moms and dads at restaurants ignoring each other or their children in favor of their cell phones. While we were not innocent of this ourselves, it was seeing it take place with other people that really grabbed our attention.

Mattye sprinkling cornflakes on top
Mattye sprinkling cheese on top

We realized that if we don’t want to one day ignore our children, then we need to start by not ignoring each other. Thus, “no cell phones at the table” was established.

We’re not perfect, and we occasionally slip, but we consistently hold each other accountable. On the occasion one of us starts to pull out our phone to look something up, check a message, or share a photo, the other is quick to give a knowing look and say, “What are you doing?” which is enough for the other to slip their phone back in its place and wait until after dinner to use it. As we hoped it would, this has become a healthy habit in our lives. In fact, having a cell phone present at a mealtime with Woody, or anyone else for that matter, just feels unnatural to me now, and it’s all because of a good habit we made a point to develop.

I love that pairing cell-phone-free, intentional time with your spouse alongside mealtime sets it into a part of your schedule that already happens every, single day—eating! Essentially, you don’t have to find extra time in your schedule, you just have to be more purposeful with the time you already have.

Mattye expertly smoothing out the top of our chicken divan

In our nearly two years of marriage, mealtime has become a gift to our relationship because we have chosen to make it matter. It is a consistent time we pause, connect and really see each other. Even on our busier days, a 20-minute meal can make a big difference for us simply by choosing to set aside our phones and other distractions and focus on one another.

When it comes down to it, this isn’t about living a life based on rules or restrictions; rather, it’s about taking a step back to look at your life, see what matters most to you, and find a way to prioritize it. You won’t always feel like making the extra effort to focus on what you really love most, which is exactly why deciding ahead of time is so important. Base your choice on the life you’re trying to build together, not on how you feel in the moment.

Need a snack while you bake? Bust out a box of cornflakes. Seriously, so good!
Chicken Divine (Divan)
Putting the final touches on our casserole

Friends, make mealtime matter. Make it a time where you don’t only refuel your body, but also your marriage. You can do it, and your future self will be thankful you did.

Chicken Divine (Divan)

Chicken Divan
What You Need:
For shredded chicken:
  • 10 frozen chicken tenders (I bought one 32-ounce bag of chicken tenders and took 10 out)
  • 1 tbl olive oil
  • 1 tsp kosher sea salt
  • 1/2 tsp curry powder
For homemade cream of chicken soup:
  • 2 1/2 cups milk (I like unsweetend original almond milk)
  • 7 tbl gluten free flour
  • 2 chicken boullion cubes
  • 2 tablespoons olive oil
  • dash of curry powder
For casserole assembly:
  • 2 lbs fresh broccoli heads, lightly steamed in microwave*
  • 1 cup mayonnaise (I prefer Duke’s)
  • 1 teaspoon fresh lemon juice
  • 1 tablespoon unsalted butter
  • 1 cup grated cheddar cheese (I like Cabot Extra Sharp Cheddar)
  • 1 cup cornflakes
What You Will Do
  1. Preheat oven to 350 and lightly grease a 13X9X2 pan.
  2. Place frozen chicken tenders in an oven safe pan and coat in tablespoon olive oil. Stir together sea salt and curry powder, then sprinkle the spice mixture over the chicken tenders and lightly stir with spatula to evenly coat the chicken.
  3. Once the oven is ready, bake chicken for 30 minutes. Let the chicken cool, then shred to equal two cups of chicken.**
  4. While the chicken is baking, make your cream of chicken soup: In a medium saucepan, whisk together milk and gluten free flour until combined.
  5. Now turn heat to medium, then add bouillon cubes and 2 tablespoons olive oil, whisking constantly until bouillon dissolves and mixture thickens. Turn heat to low and whisk for a minute or two more, until no lumps remain. Take off heat and add a dash of curry powder (a shake or two).
  6. Once the cream of chicken soup has cooled a bit, add mayonnaise, lemon juice, and unsalted butter. Stir to combine with spatula.
  7. Line the bottom of your 13X9X2 pan with the lightly steamed broccoli, making an even layer of veggies. Top with shredded chicken. Using a spatula, gently pour the creamy mixture on top, making sure to scrape the sides of the bowl to get all of that goodness on the chicken/broccoli layer.
  8. Smooth the creamy mixture with your spatula. Top with shredded cheese, then sprinkle on cornflakes.
  9. Bake in 350 degree oven for 25-30 minutes, until cheese is melted and cornflakes look golden brown and crispy. Enjoy!
*I like to put the broccoli in a glass pan, cover with Saran Wrap, and microwave for two to three minutes.
**Shred chicken using two forks or fork and knife into bite size chunks (stringy, too thinly pulled chicken is not good eats). I prefer the pieces to be  juicy and plump. You can also use pulled rotisserie chicken here, but I prefer the flavor combo of the curried chicken:)
Mattye and I enjoying our "chicken divine"
Mattye and I enjoying our “chicken divine”, a term affectionally coined by her neighbor who smelled it across the walkway

Peanut Butter Chocolate Energy Bars

Peanut Butter Chocolate Energy Bars

Ok everyone, it’s official: fall has arrived.

Not only is it fabulous news that summer is over, here in the South it is officially 70 degrees at night and our formerly green leaves are fading into a light shade of orange. However, if someone could please share this news with the mosquitos that continue to bite the tops of my feet and, at a football game last week, MY FACE, that would be awesome.

I don’t know about you, but not only does the greenery shift in fall, so does my schedule. Weekends are quickly filled with out-of-town football games and outdoor fun aimed to take advantage of every bit of beautiful sunshine you can; week days are just as packed with work and church/friend/family commitments. It’s become a season of lots going on but even more to enjoy.

And during such a busy time, everyone needs a good snack. That brings me to this week’s recipe- peanut butter chocolate energy bars. If you have spent any amount of time on Luv Cooks you are probably very familiar with my love of peanut butter and chocolate (see dark chocolate s’mores with salted peanut butter and peanut butter chocolate crunch granola).

When I came across the no bake energy bites on Gimme Some Oven‘s blog, I was immediately intrigued. Ali is so, so good at creating easy-to-make, easy-to-share recipes with friends and family. This one in particular caught my attention not only because it was a healthy way to incorporate more peanut butter and chocolate into my life, but also because it was just the snack I was looking for amidst all I/everyone has going on. And the toasted coconut stirred throughout brings the creamy, nutty flavors up a notch.

Here is my spin on her version; for me, bars make for a heartier serving, which equals a breakfast item on the go. And as a side note, I have a new peanut butter I love; I used it for these bars and it’s delicious. So enjoy the beginning of your fall season, and not to worry- peanut butter and chocolate energy is on it’s way.

Peanut Butter Chocolate Energy Bars

Peanut Butter Chocolate Energy Bars (From the No Bake Energy Bites recipe at Gimme Some Oven)

What You Will Need

  • 2/3 cup coconut flakes
  • 1/2 cup peanut butter
  • 1/3 cup honey
  • 1 cup oats (I like Bob’s Red Mill old fashioned oats)
  • 1/2 cup golden flaxseed meal
  • 1/2 cup dark chocolate chips (I like Whole Foods’ dark chocolate chunks); you could substitute dried fruit here too
  • 1 tsp vanilla extract
  • cooking spray

What You Will Do

1. Add coconut to a large skillet, then turn your burner on medium heat. Stir the coconut constantly with a wooden spoon until the it smells toasty and turns lightly golden. Make sure you watch this because it can burn quickly! Once toasted, transfer the coconut to a plate and let it cool.

2. Grease an 8 by 8 inch glass pan with cooking spray.

2. Next, spray a 1/2 and 1/3 cup measuring cup with cooking spray. Measure the peanut butter and honey into the cups, then add the pb and honey to a large mixing bowl. Add the cooled coconut flakes, oats, flaxseed meal, dark chocolate chips, and vanilla and mix until combined.

3. Using your spoon, pour your mixture into the greased pan. Press it gently with a spatula or your hands to form an even square (making sure to push the mixture into the edges) in the pan.

4. Chill for at least 30 minutes in the fridge, then use a sharp knife to cut into whatever size bars you desire. Enjoy!


White BBQ Sauce

Pure, saucy deliciousness

Y’all, if there ever was a sauce that is as loved or divisive in the South- maybe as much or more than how you take your tea, which football team you cheer for, or who you invited to your last get together- it’s white BBQ sauce.

Your standard BBQ sauce is essential for any proper barbecue, of course.  Whether it’s sweet, spicy, tomato-based or laced with vinegar, frankly, that’s up to you. But white BBQ sauce? I land on it’s side. To me, that sauce is the piece de resistance, the cherry on the sundae, the touch that brings all of the smoky, juicy flavors of barbecue to their pinnacle.

And the power of a good white BBQ sauce doesn’t just end with the meats. In fact, I am such a fan of this sauce that I feel it absolutey necessary that I list my top five favorite foods to douse it with:

1. Smoked chicken (specifically from here, Oh my Lord, is it goooood!)

2. Scrambled eggs

3. White sticky rice

4. Mashed potatoes

5. Sandwiches of any type (BLT, turkey, ham, roast beef, etc.)

The possibilities are endless, and this sauce is oh-so-easy to make. Therefore, I highly recommend you spreading the white BBQ luv and making some for Labor Day weekend.

Without further waxing of the bbq poetic, I give you a slightly tweaked version of the white bbq sauce from Southern Living. For those of you who don’t know about this magazine, their look is absolutely lovely and reminds me of home. Oh, and check out The Daily South for a daily dose of all things Southern and fabulous. It’s currently a standard site in my blog feed!

I hope each of you takes time to get away, love on those around you, and eat some delicious food this weekend. Topped with white BBQ sauce, of course.

White BBQ Sauce

White BBQ Sauce (This recipe is tweaked a bit from the version here from Southern Living)

What You Need:

  • 1 1/2 cups plus 1-2 tablespoons mayonnaise; I prefer Duke’s
  • 1/4 cup water
  • 1/4 cup apple cider vinegar
  • 1 tablespoon coarsely ground pepper
  • 1 tablespoon Creole mustard (I used Zatarain’s)
  • 1 teaspoon salt
  • 1 teaspoon white sugar
  • 2 garlic cloves, minced
  • 2 teaspoons prepared horseradish

What You Will Do:

1. Whisk together the 1 1/2 cups mayonnaise, water, vinegar, pepper, mustard, salt, sugar, garlic, and horseradish.

2. Taste your sauce and see what you think. I like mine a bit creamier, so I whisked in about 1 1/2 tablespoons more mayonnaise.

3. Enjoy and serve alongside anything you choose! Can’t wait to hear what your fellow tasters think.

Dinnertime Luv and Spicy Sweet Tofu Stir Fry

Spicy Tofu Stir Fry
Spicy Sweet Tofu Love

Ya’ll! I am so stoked to begin today a four-part series with the adorable, precious, oh-so-talented Mattye Woodcock of the lovingkind blog. Mattye and her blog are absolutely fabulous for many reasons, but one of the main ones I know you will be drawn to her is her passion for loving people. Whether it’s your spouse, your coworkers, your family- she cares about making our lives the best they can be. So, Mattye is going to take us on a journey of making dinnertime more intentional and fun in the relationship department, and I will be supplying the recipes and tips on the essentials tools every kitchen needs to her blog here. And in the weeks when we aren’t posting, make sure to check out her blog- it’s fantastic!

And here she is!

Mattye honing her chopping skills

Hi y’all! It’s Mattye Woodcock here from the lovingkind. I am so excited to partner with your very own Callie dearest of Luv Cooks for a love-filled kitchen collaboration! In this series of posts, Callie will be giving you great recipes for newlyweds and I have the honor of sharing my heart for marriage, love, and how to make mealtime about more than just good food. Thanks for having me as your dinner guest today!

Dinnertime has become one of my favorite times in our home. This isn’t because I’m an amazing cook—I’m not. It isn’t because I have the most lavish dining room—I don’t.

In our almost two years of marriage, dinnertime has often been topped with stress as a garnish and served with chaos for dessert. As I mentioned, my cooking skills are a work in progress, and for a gal who likes to be efficient and good at what she does, this regularly dishes me up a hefty helping of tension. Whether something burns because I’ve cooked it at the wrong temperature or I’ve convinced myself I’ve ruined the meat and it’s no longer safe for human consumption, there have been no shortage of near “come aparts” in my kitchen.

Spicy Tofu Stirfry-226
Excellent knife skills by Mattye

Spicy Tofu Stirfry-315 Spicy Tofu Stirfry-330

Why then, you may ask, is dinnertime even a candidate, much less a top contender, for a favorite time in our home? It’s quite simple, really. It’s because of the man who steps in to help me even when I tell him to (please) get out of my way. It’s the man who eats the “ruined” meat, ignoring my hypersensitivity to food safety. It’s him commenting, “this pizza is restaurant quality” after taking his first bite or “ do you like the placemats I set out for our dinner?” when he finishes preparing the table. That’s what makes me love dinnertime.

Spicy Tofu Stirfry-332
Mattye stirring the stir fry

When I think about it, the imperfections that initially drive me crazy are what end up making dinnertime endearing to me. There is something about it that is so authentically representative of our lives. We make a plan and it doesn’t always turn out like we thought. But even then, we move forward to experience it side by side and support each other through the last bite. The way it comes together is sweet, special and so real.

I think about our life in 20 years and I imagine we will look back on these dinnertimes in the early years of our marriage and smile at the simplicity of them. Our meals are mostly good, but all-around pretty basic, and we sit around our little dining room table, the first major piece of furniture we purchased as husband and wife (after weeks of deliberating no less). But the point is, we do all of this together week after week as we discuss our days, our evening plans, our concerns, our hopes, and a dozen random things in between. There is nothing elaborate or amazing about it, but it’s in these moments that we are writing our story and building the foundation of our life together that make it worth cherishing.

Spicy Tofu Stir Fry

So, in a couple decades, when our life has developed and we have a house and children and days full of things we currently know nothing about, I think we will chuckle as we reminisce on these times and maybe even have a twinge of longing to return, just for one moment, to a night when a ruined piece of dinner meat created waves that were quickly calmed with a little patience and a great, big dose of sweet luv.

Mattye and I loving the foodie moment


Spicy Sweet Tofu Stir Fry

**Recipe adapted from The Minimalist Baker, a fantastic husband-and-wife food blog.

What You Will Need

For the Stir Fry

  • 1 14-ounce package firm or extra firm tofu
  • Cooking spray
  • 2 cups roughly chopped green beans
  • 1 cup diagonally sliced carrots
  • 1 cup sliced red bell pepper
  • 1 cup sliced orange bell pepper
  • 2 Tbsp toasted sesame oil for sautéing (you can also use peanut or coconut)

For the sauce

  • 1/4 cup low-sodium soy sauce (I like tamari because it’s gluten-free)
  • 1/2 tsp dried ginger
  • 1/2 tsp Sriracha
  • 2 Tbsp white sugar
  • 1 Tbsp honey
  • 1 Tbsp corn starch

Optional: white rice; chopped peanuts or additional Sriracha for topping

What You Will Do

  1. Preheat oven to 400 degrees and begin drying your tofu. Remove it from the package, drain, and place it between two thick towels folded into the shape of the tofu. Then place it on a paper-towel lined plate or bowl and top it with something heavy like an iron skillet.
  2. Let it dry for about 15 minutes, changing your towels if they get too wet. Once dry, chop the tofu (with your awesome knife) into roughly 1-inch cubes or rectangles, whichever your heart desires.
  3. Spray a cookie sheet with cooking spray, and arrange chopped tofu on the pan. Bake for 15 minutes, flip over your tofu cubes to ensure even color, then bake for 15 more minutes. This will dry out the tofu and give it a more meat-like texture.
  4. Once the tofu is golden brown and a bit tough and firm, remove it from the oven and set it out to dry a bit more while you prep your vegetables. Ideally, it would set out another 45 minutes or maybe longer. I don’t recommend refrigerating it overnight; I tried this with Mattye and let’s just say it was cheeewwyyy.
  5. If serving over rice, start the rice at this point. I love Uncle Ben’s instant rice.
  6. In a small mixing bowl, whisk together all of the sauce ingredients, then set them aside.
  7. Heat a large skillet over medium-high heat, add oil and swirl to coat the bottom of your pan. Then add (your beautifully chopped) veggies and toss to coat. Cook for 5-7 minutes, stirring often. When the vegetables have some color and have softened a bit (just feel them with your spoon or spatula; they should have some give to them), add the sauce, and stir. It should bubble and thicken. Then add the tofu and stir to coat.
  8. Cook the mixture for 3-5 minutes, stirring often. Try your best to not overcook this; taste it every minute or so to make sure your veggies stay on the crisp side. When veggies are cooked to your preferred doneness, remove from heat.
  9. Serve your stir fry as is or over rice for a more filling meal. Enjoy and revel in your delicious, knife-wielding success. Bravo!
Taste-testing with the LovingKind

Honey Wheat Pizza with Sun Dried Tomato Sauce and Roasted Chicken

Honey Wheat Sun-dried Tomato Pizza with Roasted Chicken-3

I have a love/hate relationship with pizza.

There are many things to thrill to about pizza. Layers of baked cheese, herb-soaked tomato sauce and fresh meat and/or vegetables piled on top of a soft, but crispy-on-the-edges dough, is song-worthy. Other high points include its sweetly tomatoey flavor hit, satisfyingly warm bite of stringy cheese not quite softened to its base, and beautiful, lingering salt kick from thin slices of meat or seasoned veggies.

But, there are also many things to run from with generic pizza. Overly processed and spiced, bad pizza is too heavy on the dough and not heavy enough on the flavor. Kind of like a rectangle of thick, shellacked cardboard baked to crusty doneness, it leaves a one-note sensation of grease and blandness in its wake.

Needless to say, I am hesitant to try any pizza recipe because of my immediate fear of the untasty; and as you know, it is hard for me to hide my disappointment and displeasure with bad food (I know Mom, I know). However, if there ever was anyone to trust in this journey of facing my fears, it would be Rachel Van Egmond. Vowing from a young age never to leave home without a necklace, she is the one-woman owner and founder of Van Egmond Vintage (where she repurposes vintage jewelry into beautiful necklaces), mother of precious Ramsey, and wife of eighth-grade math teacher and musician Jeremy. To say that her life is busy is an understatement! But on a recent dinner at her home in Montgomery, I was wooed immediately by her take on- gasp!- pizza.

Rachel’s dough was different; sweet and hearty, but not too thick, softer in the center and  airier on the edges. I loved her southwestern-themed toppings- avocado, shredded chicken, bell peppers, lightly sprinkled cheese and tomato sauce. Like Rachel, it was light and fun and full of creative flavors.

Immediately inspired, I set about creating my own version, with her dough as my anchor. And I will tell you, this dish is my new, go-to weeknight dinner. Making the dough is easy, and you only have to be patient enough to let it rise for an hour. The sun dried tomato sauce is inspired by Budget Bytes and tastes just like the jarred variety, but super delicious and much less expensive. Roasting the chicken, doused in spices, skin on and bone in, keeps the flavor in without weighing down the crust. All in all, this version is a winner. And when it comes to pizza, I don’t use that term loosely.*

Honey Wheat Sun-dried Tomato Pizza with Roasted Chicken-5

*Also, please be advised  that you have not been to Body Pump in weeks (ok, let’s be honest, months) like myself, the hand-kneading of dough method will most likely count as your workout for the week and you may or may not be sore tomorrow. You have been sufficiently warned:)

Honey Wheat Pizza with Sun Dried Tomato Sauce and Roasted Chicken

What You Will Need

For the pizza

  • 1 or 2 batches of pizza dough (depending on how many people and/or singles you are feeding; 1 batch feeds 2 hungry people)
  • Sun dried tomato sauce (recipe below)
  • Shredded roasted chicken (recipe below)
  • Fresh spinach leaves
  • One avocado, diced
  • Colby jack cheese (Just make it as cheesy as you like)

For the dough*

  • 2/3 cup warm water
  • 1/2 tsp honey
  • 1 tsp sea salt
  • 1 tbsp extra virgin olive oil
  • 1 cup + 1 tbsp bread flour (plus extra if hand-kneading)
  • 1 cup + 1 tbsp whole wheat flour
  • 1 1/4 tsp active dry instant yeast

What You Will Do

1. By Hand: Go ahead and flour a large, clean surface on which to roll out your dough. Place all dough ingredients in a large bowl. Using a large wooden spoon, manually stir all of the ingredients until they just come together in a ball. Take the dough out of the bowl (it’s totally ok for there to be flour/dough shred pieces at the bottom of the bowl at this point; just scoop them out and add them back into your dough ball) and put it on your floured surface. Knead the dough, taking out all of your aggression from the week onto the now flattened loaf, until it’s warm, sticky, elastic, and it has a nice give when you press into it with your palm; about 10 minutes or as much as your biceps can stand.

OR

2. With a stand mixer. Place all ingredients in a stand mixer. Manually stir a couple of times with a dough hook, then attach dough hook and knead on low for about 2 minutes until a ball of dough forms. Then, increase speed to medium high and let knead for 8-10 minutes.

3. Cover dough bowl with damp washcloth (I used plastic wrap and a damp washcloth) and place in a warm place to rise for about 45 minutes. If you are making the chicken for this pizza, I would get that going now.

5. Preheat oven at 450. Go ahead and place a pizza stone in the oven to get hot.

4. Remove dough from the bowl and roll it out to form pizza crust(s) about 1/3 inch thick. I made three large pizzas with two batches of dough. Now top with sun dried tomato sauce, roasted chicken, spinach, avocado, and cheese.

5. (CAREFULLY! I almost burned my over-ambitious hand off here) slide your pizza onto a preheated stone. Seriously, please use extreme caution and don’t be a spaz and have to ask of help only after you burn yourself like I did. Bake for 10-12 minutes, or until cheese is melted, bubbly, and happily sizzling in the pan.

6. Let cool for a minute or two, then slice with a pizza cutter and serve.

For the sun dried tomato sauce:

  • 2/3 cup olive oil (Use the best quality you can here; it really makes a difference in the sauce!)
  • 2 cloves garlic, minced
  • 1 tsp dried oregano
  • 1 tsp dried basil
  • 1/2 tsp paprika
  • 1/2 tsp cumin
  • two pinches crushed red pepper
  • some freshly cracked pepper
  • 1 tsp salt
  • 6 oz. tomato paste (I like Hunts)
  • 1 tsp honey (Use local honey if you can here too)
 What You Will Do
  1. Add the olive oil, garlic, oregano, basil, paprika, cumin, crushed red pepper, salt, and some freshly cracked pepper to a small skillet.
  2. Stir continually, and heat the mixture over low heat for about 3-5 minutes. If this sizzles that’s totally ok; you just want it to smell aeromatic and try not to let the garlic burn.
  3. Add the tomato paste and honey, and continue to stir continually. The oil will most likely separate from the spices, and that’s great! It tastes good that way. I heated mine over low for about 4 minutes, or until the paste darkened a bit.
  4. This tasted great the day I made it, and the next day when I used it again. I think the spices develop flavor in the sauce over time!

For the roasted chicken

What You Will Need

  • 3 bone-in, skin on chicken thighs, patted dry
  • Some generous shakes of Jim N Nicks’ Chicken and Turkey seasoning

What You Will Do

1. Preheat your oven to 450 degrees.

2. Place your chicken thighs in a roasting pan. Cover generously with spice mix; flip pieces over and do the same thing on the other side.

3. Bake for about 28-30 minutes, or until a meat thermometer reaches 165 when inserted into your chicken.

4. Let cool, then shred into pieces for the pizza pizza.

For those of you who made it all the way to the end of this article, I love you and appreciate your tenacity. Not only will you be rewarded with great pizza, I also give you with the best restaurant pizza link in Alabama: Bettola

Sausage Fajitas with Red Beans and Sage Sour Cream

Sausage Fajitas

Y’all, 2013 was an incredible year; I learned a lot. But I have such high expectations for 2014 to be even better!

One of my resolutions for LuvCooks is to focus on the incredible culinary talent, resources, and ingredients we have around us. There are so many inspiring people in this world, and I want you to meet them and their recipes.

Granted, some of these people I do not personally know, but I want to (and may or may not have stalked them on the internet). Ree Drummond, Maggie (my former high school lunch lady who opened her own diner in my hometown and makes cinnamon rolls that are as big as your face) and John T. Edge, here we come! These are the people- new friends, old acquaintances, and like they say in the South- “your momma and them”- that I want you to know about.  My goal is to showcase their recipes, talent, and heart for the food we love.

Also (I will miiissss youuuu Oreoooooos) for the next three months, I am trying to eat as little processed food as possible. This stems from feeling a bit like I am spiting Mother Nature with the amount of wonderful produce we have in the South. ‘Nuff said.

I can’t think of a more fitting way to begin this culinary journey than to start with Deramus Family Sausage in Booth, Alabama. I have been eating Deramus sausage since I was a wee girl, dancing to Paula Abdul and waking up to the smell of savory sausage browning on the weekends. I will never forget the hand-written thank-you notes we received in the mail from Mrs. Deramus after ordering their product. The flavor and ingredients the Deramus family uses is unparalleled in the sausage business, and if you talk with the head of production, Herb Murray, he will tell you that their secret ingredient- the force that makes their sausage delicious, prevents heart burn and all around makes the sausage-eating wonderful- is a specially-grown sage that only they know about. In fact, when Mr. Deramus (Herb’s stepfather) first started making sausage, he was sent to Germany during World War II and put in charge of livestock. While there he discovered the secret ingredient to delicious German sausage (their blend of sage) and came back to the Southern States on a mission to find that herb and recreate it for himself.

Since Herb’s favorite way to eat his sausage is sautéed with bell peppers and onions, below is my own spin on the Deramus family tradition. Using Creole seasoning and liquid smoke instead of fajita seasoning ups the flavor ante to accompany the hot sausage. Red beans round out the Creole flavor line up, and the sage sour cream offers a welcome cool-down, using the Deramus’ signature ingredient to finish it off.

These fajitas are perfect for a warm night in, and while you are eating them, I suggest you go on over to Deramus’ website and order more. You will be greeted by Herb’s voice on the telephone- he handles all calls and customers- and I promise that you won’t be able to help but fall in love with him and his product (and a hand-written thank-you note or two).

Sausage Fajitas with Sage Sour Cream

What You Will Need

  • 2 links Deramus Family hot sausage, halved lengthwise and sliced into 1/2 inch half-moons
  • 1 onion, sliced
  • 2 green bell peppers, sliced
  • 3 cloves garlic, minced
  • 1 teaspoon creole seasoning
  • 1/2 teaspoon liquid smoke
  • salt and pepper to taste
  • 6 corn tortillas

What You Will Do

1. Heat a large cast iron skillet on medium heat for a minute or so.

2. In the cast iron skillet, add your sausage slices and brown sausage about one to two minutes each side, until they are lightly browned on each side. Make sure and watch these as they cook quickly and you want to keep them just a bit crisp.

3. Once your sausage is cooked, use a slotted spoon to place the pieces on a paper-towel lined plate. Pour out all but about 1 tablespoon of the sausage drippings. (Save the extra grease; this stuff is gold! I put mine in a container to use for future cornbread.)

4. Place your skillet with one tablespoon drippings back onto the heat and turn up to medium-high. Add sliced onion and pepper and cook for about five minutes, stirring occasionally; you want the veggies a bit softer than raw. Add creole seasoning and liquid smoke; cook about five minutes more. Watch your veggies to make sure they stay on the crisp-and not limp-side.

5. Once the veggies are cooked, transfer them to a plate and heat your tortillas. I prefer to put each tortilla back into the cast iron skillet for a minute or so on each side until they are warmed through and light brown on the edges. Or, you can spray cooking spray between each tortilla, pile them up, wrap them in aluminum foil, and heat them up in a 300 degree oven until warmed through.

6. Top each warmed tortilla with sausage, fajita mixture, red beans, and sage sour cream. Wrap up and dig-in!

For the Red Beans (This recipe is adapted from My Daily Moment) I always like homemade beans better than the canned variety.

What You Will Need

  • 1 lb. dry red beans
  • 2 qt. water
  • 1 large sweet onion, chopped
  • 1 cup celery, chopped
  • 4 bay leaves
  • 1 green bell pepper, chopped
  • 3 Tbsp. garlic, chopped (about 6-7 large cloves)
  • 2 tsp. dried thyme
  • 1 tsp. salt
  • 1 tsp. black pepper
  • Creole seasoning, to taste

What You Will Do

1. Pick through beans to remove the ones that look funky or broken.

2. Rinse the beans rinse thoroughly, and put them in a large Dutch oven pot with enough water to cover by about an inch. Bring them to a rolling boil for ten minutes, then drain and rinse the beans again.

3. Pour the old bean water out of your Dutch oven, rinse it, then add boiled beans, water, onion, celery, and bay leaves to the pan. Bring to a boil.

4. Reduce the heat, cover, and cook over low heat for about 1 1/2 hours or until beans are tender. Stir.

5. Mash some of the hot beans against the side of your pan. Add green pepper, garlic, thyme, salt, and black pepper.

6. Cook uncovered over low heat until creamy, about 30 minutes. Remove bay leaves.  Add a large dash of Creole seasoning to taste.

For the Sage Sour Cream

What You Will Need

  • 1/2 cup sour cream
  • 1 tsp dried sage (or to taste, depending on how sage-y you like things)

What You Will Do

1. In a small bowl, whisk sour cream with dried sage until combined.

Homemade Nutella and Gratitude

Chocolate and hazelnuts, beautifully blended

I am overwhelmingly grateful when anyone visits LuvCooks. I am blown away when someone sees a recipe and makes it (shout out to @laurietindol!) and astounded when another blogger mentions the site in one of their posts.

Recently Rachel at Derivative Dishes nominated LuvCooks for a Liebster award. Having no idea what a Liebster award was, I embarrassingly asked her about the stipulations for this prize. It turns out it’s a great way to welcome and highlight other blogs in our Creative world. As part of the process, I was also asked to respond to a list of questions Rachel sent, then nominate other blogs I follow that should recieve the award.

I have so many talented friends, I wish that I could gather them all up and introduce you; my friend Melissa, who loves cats and can bake like nobody’s business. Or Stephen, whose ability to light and capture food astounds me. Or my boyfriend Jake whose Creative talent truly knows no bounds. But alas, the inter webs separate us, and this will have to do for now (unless someone comes up with the aforementioned posted magic carpet).

And, you should follow all of these wonderful people! Feeling Full, Jacob Blount, Stephen Devries Photography, Kinora Films,  Emily Cooks Vegan, Twin Days, Chew Out Loud, Create and Place, The Dreamery

Rachel’s questions:

  1.  What inspires you? Beauty! In all of it’s forms. And fun, and dancing. Lots of it.
  2.  Anthony Bourdain or Mario Batali? I am obsessed with Anthony Bourdain. As in, a day without No Reservations/The Layover/Parts Unknown is no way to live.
  3. What’s the worst meal you’ve ever had? I have a complete inability to hide the face I make when things taste bad. So more than likely I have blocked this meal out of my mind.
  4. What’s your favorite cookbook of all time? I adore cookbooks! My top three: America’s Test Kitchen Family Cookbook , The Foothills Cuisine of Blackberry Farms, and for her hilarious story-telling and all-around fabulousness Miss Kay’s Duck Commander Kitchen
  5. What are you looking forward to right now? A Mexican fiesta tonight at Señor Taco with my sister.
  6. What do you think about when you’re cooking? I think about the people I am cooking for. I love anticipating how they will respond to the food, and the simple joy of spending time with them.
  7. What is your favorite thing to cook? Baking. Brownies. Chocolate anything.
  8. What is the last great meal you had? I had a fantastic six-course meal and wine-pairing at Veranda in Birmingham‎, hosted by their sommelier and head chef. Braised shot ribs, quail- it was a dream.
  9. What have you not tried to cook but think you need to make? I need to figure out how to make Ossobuco. Because it sounds both fancy and delicious.
  10. What about the kitchen intimidates you? Other people’s kitchens intimidate me. As weird as that sounds, I feel so at home in my own, I always feel a bit unnerved in another persons’ space.
  11. What’s the most embarrassing kitchen moment you’ve ever had? Oh gracious, there are too many to count! Probably the time I was making boxed macaroni and cheese and caught a dish towel on fire.

Questions for my blogger pals:

1. What is your go-to comfort food?

2. French roast, Keurig, Chemex, pour-over, Nespresso, or drip (coffee)?

3. Your favorite kitchen condiment, go!

4. If you could have dinner with three people dead or alive, who would you choose and why?

5. Bizarre Foods or Chopped?

6. Number #1 reason why Alton Brown would help you make better life choices.

7. Your favorite holiday movie?

8. What is your biggest challenge in food-blogging?

9. What are four of your favorite online recipe resources?

10. Name your favorite season and it’s accompanying ingredient.

And finally, back to gratefulness: I am also consistently grateful for food, friends, and family, and this homemade chocolate hazelnut spread (aka Nutella) recipe encompasses all of these things. Nutella is one of life’s pleasures, and this recipe by Giada at Food Network is SO delicious. By roasting the hazelnuts in the skins before you blend them, it adds a whole new dimension to the roasted flavor of the spread, and the addition of quality melted chocolate and honey sweetens the deal. I made this for a friend of mine and could not keep my spoon out of the food processor (don’t worry Court, #nodoubledipping).  This is also a great addition to any New Year’s Eve spread. Serve it with chocolate or honey graham crackers, apple slices, or hot chocolate, or blend it into a post- New Year’s bash smoothie.

Cheers to the best year yet, and to more amazing tastes, friendships, and adventures in the year to come.

Homemade Nutella (taken from Giada’s version here)

What You Will Need

  • 1/2 cup semisweet chocolate chips (3 ounces)
  • 3/4 cup skinned hazelnuts, toasted (about 4 ounces)
  • 2/3 cup sweetened condensed milk, such as Eagle Brand
  • 1 tablespoon honey
  • 1/8 teaspoon kosher salt

What You Will Do

1. To toast your hazelnuts: Preheat the oven to 350 degrees. Arrange the hazelnuts (skins on) in a single layer on a baking sheet.

2. Bake them for 15 to 18 minutes until lightly toasted. (Just watch these; I baked mine for a little less time because they got toasted pretty quickly.) Cool completely, then rub the skins off with your fingers.

3. Place the chocolate chips in a microwave-safe bowl and cook on high for 45 seconds. Stir. Put the bowl back in for 10-15 second intervals, stirring after every trip in the microwave, until smooth. Be careful to not overheat your chocolate; it can get angry and seize up on ya. Let the chocolate cool to room temperature.

4. Grind the nuts in a food processor until pasty (the nuts will be stuck to the sides of work bowl), 1 minute. Scrape down the bowl with a rubber spatula.

5. Add the condensed milk, honey and salt. Blend well, scraping down the bowl as needed. Add the cooled chocolate and pulse until combined. Transfer the spread to a small bowl.

6. Now try not to eat all of this in one sitting. Enjoy and Happy New Year!!


Chocolate Spice Cake with White Wine Berry Glaze

White Wine Cake

It’s holiday time! And you know what that means. Dust off that Kool and the Gang record, put on a Christmas scarf, and sing it with me, “Ce-le-brate good times, come on!” Now in your deepest Alto, “It’s a Celebration!”

And really, is there anything better than sparkly Christmas lights, fur trees loaded with ornaments, Elvis singing “Blue Christmas,” and drinking egg nog and/or hot chocolate like it’s your job? Truly, one of the most special times of the year.

And in that state of Christmas joy, I wanted to bake a chocolate cake that tasted like all of those wonderful Christmas feelings: warm and rich, with an unexpected flavor gift in the mix. And who better to parter with in this creative endeavor than uproot? Their Sauvignon Blanc is so versatile, it gave a bright flavor profile to chicken soup and this dessert. Especially perfect for the cinnamon-laced cake is the element of passion fruit the Sauvignon Blanc features- a perfect compliment to the blueberries and raspberries in the berry glaze.

Alright everybody, raise your eggnog-or uproot-glasses high to the best time of the year!

A slice of Christmas cheer

A slice of Christmas cheer

Chocolate Spice Cake with White Wine Berry Glaze

Another great thing about uproot wines is their partnership with Food52– one of my favorite recipe resources- where I went for inspiration in the cake realm. I just added a Christmas spin with a few extra holiday ingredients.

For the Glaze (I listed this first because I suggest you make it first, due to the double-glazing effect we use on this cake.)

What You Will Need

3/4 cup uproot Sauvignon Blanc 

6 ounces fresh blueberries

6 ounces fresh raspberries

1 teaspoon vanilla extract

3/4 cup sugar

What You Will Do

1. In a medium saucepan (make sure you use a larger one than you think you need- your liquid mixture will expand like an over-stuffed Santa when it boils), combine white wine, blueberries, raspberries, vanilla extract, and sugar.

2. Bring the mixture to a rolling boil, and let it cook at high heat for at most five minutes. Watch the mixture to make sure it doesn’t overflow the pan. If things get too crazy and you are afraid it is going to bubble over, just go ahead and turn the heat back down to medium or medium-low.

3. Cook on medium heat for about 24 minutes. Make sure and watch your mixture towards the end, stirring frequently to make sure the sugar and berries don’t burn.*

4. Let your glaze cool as you bake the cake.

* To be honest, this cooking time really depends on how thick you would like your glaze to be. I like mine a bit more like jelly so it gives the cake texture and shine; but, if you would like for it to be thinner, cook it on medium-low heat for up to 45 minutes. I also cooked this twice and had different cooking times for the glaze, so really just watch your mixture to see that it cooks to where you want it to be. When it comes to working with liquid sugar, it’s always better to go slowly so you don’t burn off your holiday fingers, as these are vital to your continued recipe success.

For the Cake

  • 1  1/2 cup all-purpose flour
  • 1/3 cup unsweetened cocoa
  • 1 teaspoon baking soda
  • 1 cup sugar
  • 1/2 teaspoon salt
  • 5 tablespoons neutral oil (like corn, canola, or vegetable)
  • 1 cup cold water
  • 1 1/2 teaspoon vanilla
  • 1 tablespoon cider or white vinegar
  • 1/2 teaspoon cinnamon
  • Freshly grated nutmeg (about 1/4 teaspoon, but up to your preference)
  • 2 ounces semisweet chocolate, chopped (I used this brand)
  • Confectioners’ sugar (optional, for dusting)

What You Will Do

  1. Heat the oven to 350° F and spray a 9-inch cake pan with cooking spray.
  2. Sift together the flour, cocoa, baking soda, sugar, and salt in a bowl. In a separate bowl, whisk together the water, oil, vanilla, and vinegar.
  3. Whisk together the wet and dry mixtures. If lumpy, whisk the mixture until it is smooth.
  4. Add the cinnamon, nutmeg, and chocolate. Whisk together to combine.
  5. Pour the batter into a greased 9-inch round cake pan. Tap the edge of the pan against the edge of the counter, or drop from 6 inches to the floor several times to pop air bubbles. Please do not miss this step, as it is really entertaining and will hopefully make your cake hole-less! Bake for 25 to 30 minutes (mine took 28 minutes), or until the top springs back when pressed gently.
  6. Your cake may have a darker brown ring around the edges; that’s ok. That’s what we have that gorgeous glaze for!
  7. Once the cake is removed from the oven, place it on a cooling rack. Poke tiny holes throughout the cake with a toothpick or fork, going about 3/4 of the way to the bottom.
  8. Spread a thin glaze of white wine berry mixture over the cake, making sure to cover the entire cake surface. This will help infuse some of the berry flavor inside of the cake as it cools.
  9. Once your cake has cooled completely, turn it out onto your serving platter.
  10. Spread the rest of your berry glaze on the top of the cake, working from the center out. Sift confectioners sugar on top if desired for extra celebratory pizazz.