Chocolate Reishi Nut Butter Balls


My lovelies!!

It’s time!! I could not be more excited to share with you this week’s video- and recipe. It’s been months of brainstorming, pairing down and getting to what I feel is the best next chapter for Luv Cooks, and how I can bless YOU. You guys are the reason I write, I post, I create- and here’s the DEBUT video of what I am soo excited for us to walk into in this new summer season!

I’ve decided to move my content on YouTube to EASY and family-friendly recipes. Recipes that are healthy, quick, don’t require a ton of ingredients and will more than likely make everyone you are feeding very happy.

Also- this is my favorite brand of reishi powder and raw cacao powder if you are interested!

Let me know what you think- I can’t wait to hear your input!

Jake and I’s FOOD trip to Asheville!

You guys!!

Jake and I went on a much-needed getaway to Asheville a few weeks ago, and I couldn’t wait to share this footage with you! Asheville was a beautiful city, and I wanted to share all we LOVED doing with you!

Here are the highlights of our trip:

White Duck Taco Shop: FABULOUS pork belly taco!! We also dug the classic steak and cheese. Check out their menu here: 

French Broad Chocolate Lounge: I can’t say enough good things about this spot. We had such a FAB time there and literally went back twice during our 3-day trip! We ordered the dark chocolate ginger cookie, salted peanut butter cup, dark chocolate hot chocolate (not drinking chocolate), bought two chocolate bars and came back for the BEST VEGAN ICE CREAM I’ve ever had!! I was ALL about that Buddha flavor and the toasted coconut. The two chocolate bars we got were a Vietnamese one (marouchocolate.com) and the special edition of French Broad’s Peru dark chocolate 85% that raises money for the rainforest! They were the sweetest, most helpful people, especially the girl we met who worked at the chocolate bar! Check them out here:

Three Dog Bakery– We got Bigbsy the peanut butter treats and he LOVES them!
Rocket Fizz– Jake and I got authentic Cheerwine, and some super fun taffy flavors (s’mores and chocolate chip cookie dough anyone?) 

Spice and Tea Exchange of Asheville– Jake got the coolest black tea that dates back to colonial days!

Vegan food at Rosetta’s Kitchen– I ordered a buddha bowl with a side of vegan cheese and J got a tempeh reuben with slaw. We also shared a peanut butter chocolate vegan cookie and an Earth kombucha, which was YUMMY! I highly recommend the kombucha.

-All Souls Pizza– Do not miss out on the fermented veggies plate with homemade bread and olive oil, OR the pepperoni pizza! It was so tasty!

The MAGNIFICENT Grove Park Inn is NOT to be missed! Jake and I went at sunset and had a glass of wine as the sun went down. It is a memory I will always treasure!

Music PROPS to Tennessee Hayride by Audionautix is licensed under a Creative Commons Attribution license (https://creativecommons.org/licenses/by/4.0/)
Artist: http://audionautix.com/


Your Best Smoothie EVER (TIPS+VIDEO) + Easy Greens Smoothie

Fresh green asparagus!

It’s JANUARY!! I don’t know about y’all, but I could not be more excited about a fresh start to the year. As we have talked about on the blog, 2016 had a lot of highs and lows, so I am setting my intentions on a steady, thriving year ahead.

You know what else that means? Adding things to our lives that make it easier and more enjoyable. Ways to help us all feel better and live abundantly. And for me, that is- SMOOTHIES! As my friends will tell you, I am a smoothie fiend. I am also a chocoholic and lover of anything that involves candy. However, as I have learned, all that energy (some may refer to this as sugar) is not so awesome to eat for breakfast every day so here is my solution: smoothies.

And in my effort to share with you guys the cooking tips that have worked, and haven’t, here is what we are focusing on in January- smoothies! Smoothie tips, favorite smoothie recipes, and favorite smoothie add-ins will be our topics of interest. This week’s recipe- a greens smoothie.

Did I mention I also don’t love leafy greens? Well, unless they are of the collard variety, bathed in glorious pork fat and served with cornbread.

I’ve tried lots of recipes to get myself to eat more kale, turnip greens, collards, all of those “bitter is better for your liver” plants- those just don’t make my taste buds to a happy dance. BUT what I’ve figured out is that smoothies do- so what if I froze the greens and blended them in with other yummy things? Sold.

So, in an effort to bless you guys with what I’ve learned and get YOU pumped about making your own smoothie creations, here are my Top 4 Smoothie Tips!

  1. ORDER is important: I didn’t realize this until I started making smoothies  daily that there is a rhythm to it all! Steps:
    1. Dry ingredients + liquid: Blend together, on low, your liquid of choice (milk, non-dairy milk, water, juice, coffee) with your dry ingredients (cinnamon, protein powder, peanut butter).
    2. Add frozen ingredients next: It’s helpful if your frozen goodies are in smaller chunks so your blender doesn’t explode (Hah! Several times mine had a distinct burnt metal smell. Probably not so good). So, I like to break my bananas in half, slice my strawberries, pick smaller ice cubes, etc.
    3. Set speed from low to high: After you have added your frozen ingredients, put the blender on low speed until no more large chunks appear. Move to a medium speed setting until you no longer see any fruit/veggie pieces. Then, blast that sucker on high for about 10-15 seconds, or until your smoothie is frothy and ready-to-drink!
  2. Freeze ALL THE THINGS: Texture is so important in a good smoothie! I want mine to be thick and frothy. So, I freeze pretty much every ingredient I put in my smoothies and stash them in large ziplock bags in the freezer. So- kale, bananas, berries, coffee in ice cube trays- ***Tip, frozen coffee cubes cab make your smoothie taste like a Frappucino!***– all of it goes in the freezer box.
  3. Bring the FLAVOR: Check in and see what your taste buds are in the mood for. Is it spiciness? Try cinnamon, chili powder, pumpkin pie spice. Something creamy? Vanilla or almond extract. Sweetness? Try stevia, coconut sugar or honey.
  4. Prep Yo’self. Making breakfast in the morning can be overwhelming, so let’s make it easy!
    1. Make individual baggies of your frozen ingredients. Just put your frozen veggies and fruits for the day in a pre-measured plastic bag and throw that in the freezer.
    2. Measure out your dry ingredients and put them in a small bowl by your blender.
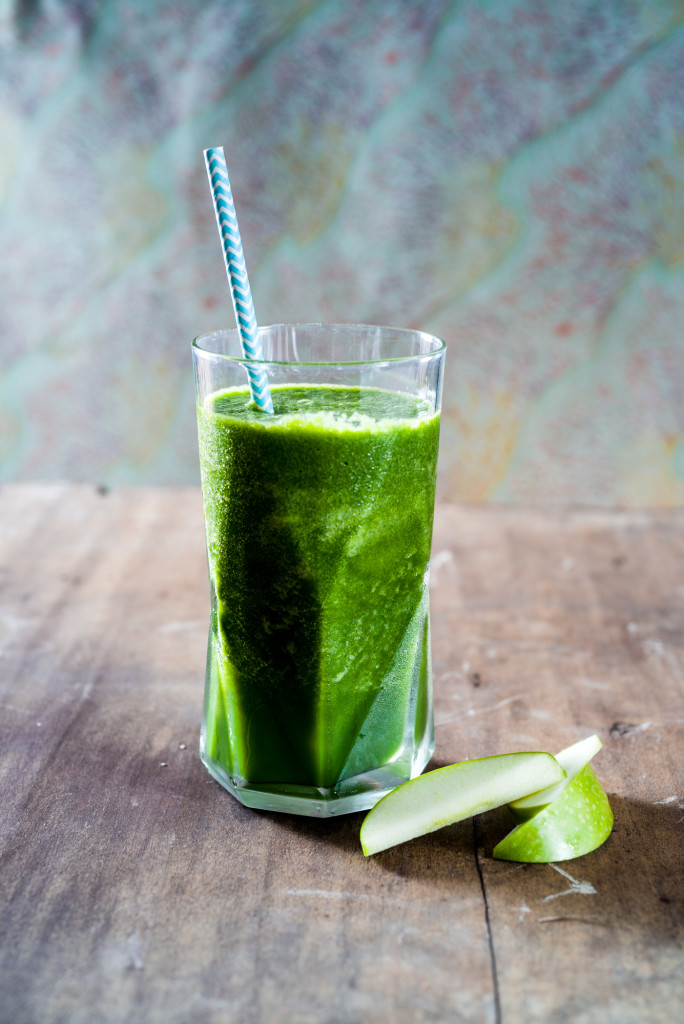
Easy green's smoothie!
Easy green’s smoothie!

Alright, let’s use those tips to make our Easy Greens Smoothie!

What You Will Need:

  • 1/4 cup filtered water*
  • 1/2 cup orange juice*
  • 2 cups frozen kale
  • 1/2 large banana, frozen
  • 1/2 green apple, chopped
  • 1/2 cup filtered water ice cubes
  • Powdered stevia, to taste

What You Will Do:

  1. On low speed, pour juice and water into blender and blend together until combined.
  2. Switch off blender. Next, add kale, banana, green apple, and ice cubes. Blend on low until no large chunks appear. Move to medium speed, and blend until no pieces remain and a uniform color is achieved.
  3. Now, blast that baby on high for 10 seconds until nice and frothy. Taste; if you want it sweeter, add in some powdered stevia. Stick a straw in and enjoy!!

**You can reverse the ratios on your orange juice and water (1/2 cup water, 1/4 cup OJ) if you like things less sweet. In that case, I would add more stevia, to taste.

To Paris with Luv + Pumpkin Oatmeal Cookies

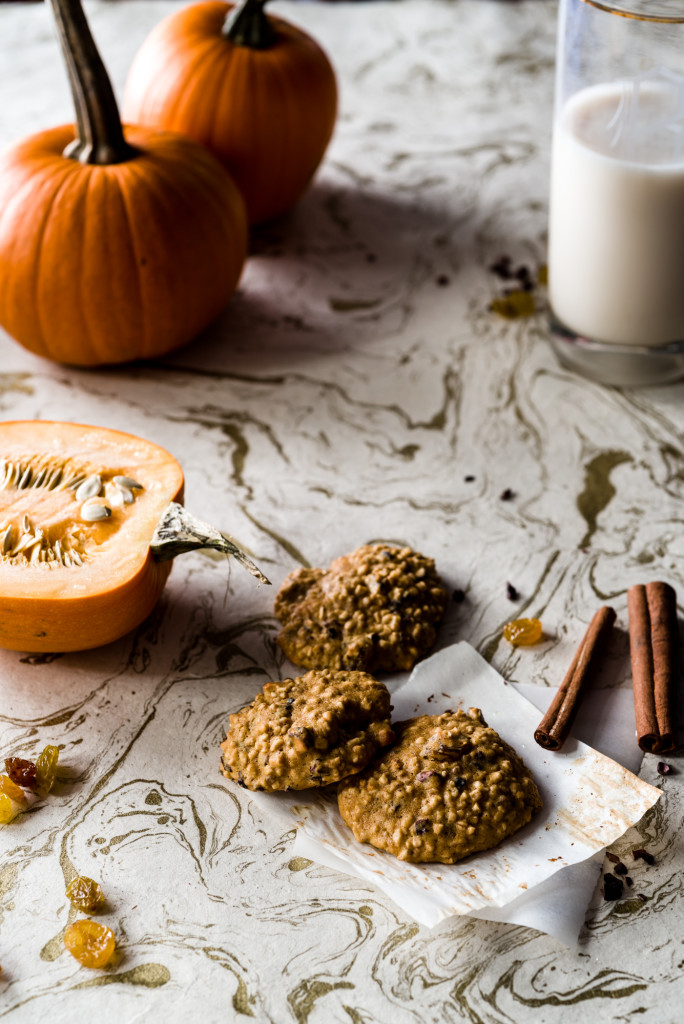
Pumpkin-Steelcut-Oat-Cookies-012


Paris is on my mind a lot today.

I know it is for a lot of people. I can’t imagine the pain and heartache those precious Parisians, Americans, really everyone in the city- are going through. And my spirit is heavy. I mourn for the loss of life. I am angered, to put it mildly, at the way fear has attempted to embed itself in our culture. And it hits close to home, not only because a friend of our family’s was in Paris during the attacks, but also because I have had a passionate love for the city since I was 16 years old. You see, Paris is where my love of food and beauty ignited.

Paris is a gloriously cultured, epicurean city. It’s hustle, it’s sounds, it’s smells- revolve around a lifestyle of perfect taste and high expectations. It is a city of textured pastry, divine fillings, buttery croissant and dark chocolate pot de creme. It is light meringue and mise en place. It embodies transcendent beauty and architecture and style- beauty at a height that steals your breath away.

Paris in the Afternoon

DSC06214
Notre Dame in the morning light

I’ve been to Paris twice, once as a sophomore in high school, and another as a sophomore in college. In fact, the second time I went, I was so swept up by the Eiffel Tower, alight and glittering in the cool of the evening, that I vowed to take my husband there. The romance of the city wooed my heart and at the same time opened me up to possibility. I knew from that moment on that I was made to be a lover and defender of the arts, of beauty, and of a crusty French baguette with salty ham and creamed fresh butter.

The Parisian ham sandwich turned how I thought about convenience and eating on its axis. It was the best sandwich, and one of the best foods, I had ever tasted; classic in it’s simplicity and sublimely rich and salty. It was awakening and made me feel like a true Parisian; I yearned for more.

Young ZTAs in Paris
My young self in college, with my friend Maeci, on top of the Eiffel Tower.

This yearning- this longing to experience food, and really taste it, how do you put that moment into words? I wasn’t eating this bread and butter and ham like I was used to- in a hurried American way, with a sinking suspicion about calories or how knocking back four of them would make my jeans fit. It transcended that. It was about the way the Lord uses food to nourish and comfort and sustain us. And I will always, always be grateful to Paris for that. For making me feel like it was ok to be who I was and fully enjoy it.

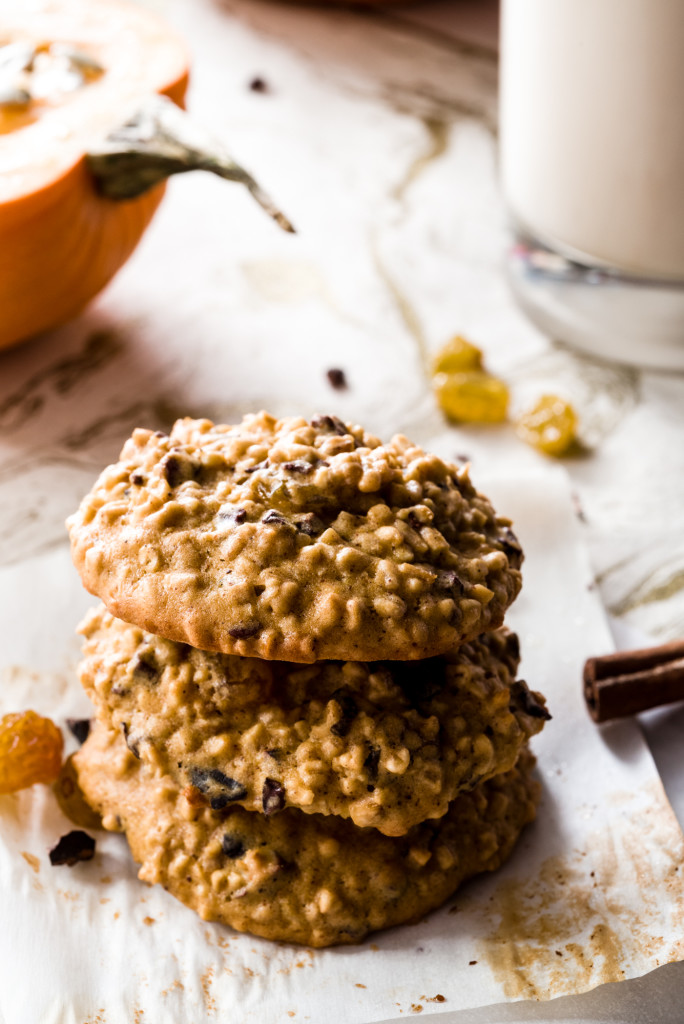
Which brings me to this week’s cookies. To be honest, I aimed to post them a few weeks ago, right when pumpkins were hitting their peak. But I’m so glad I waited; the timing is right now. They are epitome of fall comfort. Hearty but healthy, with a nice chew from the oats; warm, with pumpkin and cinnamon for flavor. And slightly sweet with the hit of cacao nibs or semi sweet chocolate chips. They are perfect for breakfast with a warm cafe au lait (a favorite of mine in Paris, made with dark French roast coffee) or an afternoon tea. Or even dessert after an indulgent main course.

At the end of the day, like I told a friend of mine recently- sometimes all I know to do when people are hurting, or are in need, is to bring them something to eat. I rack my brain to find a solution-the perfect healing answer-but this is always where I land. Food is where my passion is and this is where I can contribute. This is where we all can contribute.

So, I send this recipe with love to the city where beauty and food are held in high esteem. To where my creative heart began to beat deeply. To Paris with luv, always.


Pumpkin-Steelcut-Oat-Cookies-021

Pumpkin Oatmeal Cookies with Cacao Nibs (Recipe adapted from Food.com and Scone head’s substitutions)

These cookies smell lovely, bake up nice and fluffy, have less butter than those of their same type and are also delicious topped with peanut butter. This recipe yields about 28 cookies.

What You Will Need

  • 1/4 cup butter, softened at room temperature
  • 1/2 cup canned pumpkin
  • 3/4 cup brown sugar
  • 1/4 cup white sugar
  • 1 teaspoon baking powder
  • 1⁄4 teaspoon baking soda
  • 1 3⁄4 cups all-purpose flour
  • 1⁄4 teaspoon salt
  • 2 teaspoons ground cinnamon
  • 2 eggs
  • 2 teaspoons vanilla extract
  • 2 cups old fashioned oats
  • 3⁄4 cup cacao nibs or semi sweet chocolate chips
  • 3⁄4 cup golden raisins

What You Will Do:

  1. Preheat the oven to 375 degrees.
  2. Beat softened butter in the bowl of a stand mixer until light and fluffy (about a minute or two).
  3. Add pumpkin puree and beat for one minute more. Use a spatula to wipe the bowl to make sure both butter and pumpkin are beating together. It’s ok for there to still be lumps of butter in the pumpkin (totally normal!)
  4. Add both sugars, baking powder, baking soda, and salt. Mix lightly to combine.
  5. Add cinnamon; then eggs, one at a time. Wipe the bowl with a spatula to make sure again that no ingredients are building up at the bottom of the bowl. Finally, add vanilla extract until mixed in.
  6. Add one cup of the flour. Beat to combine.
  7. Beat in the remaining 3/4 cup flour until combined. Wipe the sides of the bowl to stir all of the flour in.
  8. Add pre-soaked oats, cacao nibs or chocolate chips, and golden raisins and gently mix together until a dough-like consistency forms.
  9. Drop by rounded tablespoon on a parchment-lined baking sheet.
  10. Bake at 375 degrees for 14-15 minutes or until edges of the cookies are golden brown. Cool on wire rack.


Veggie Empanadas and Periscope

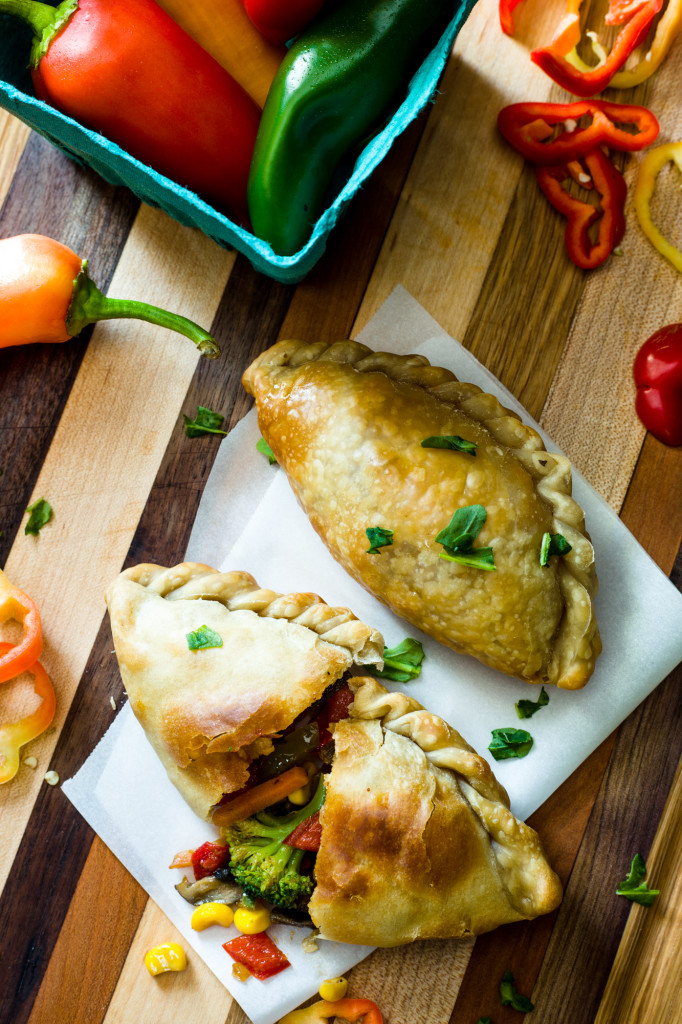
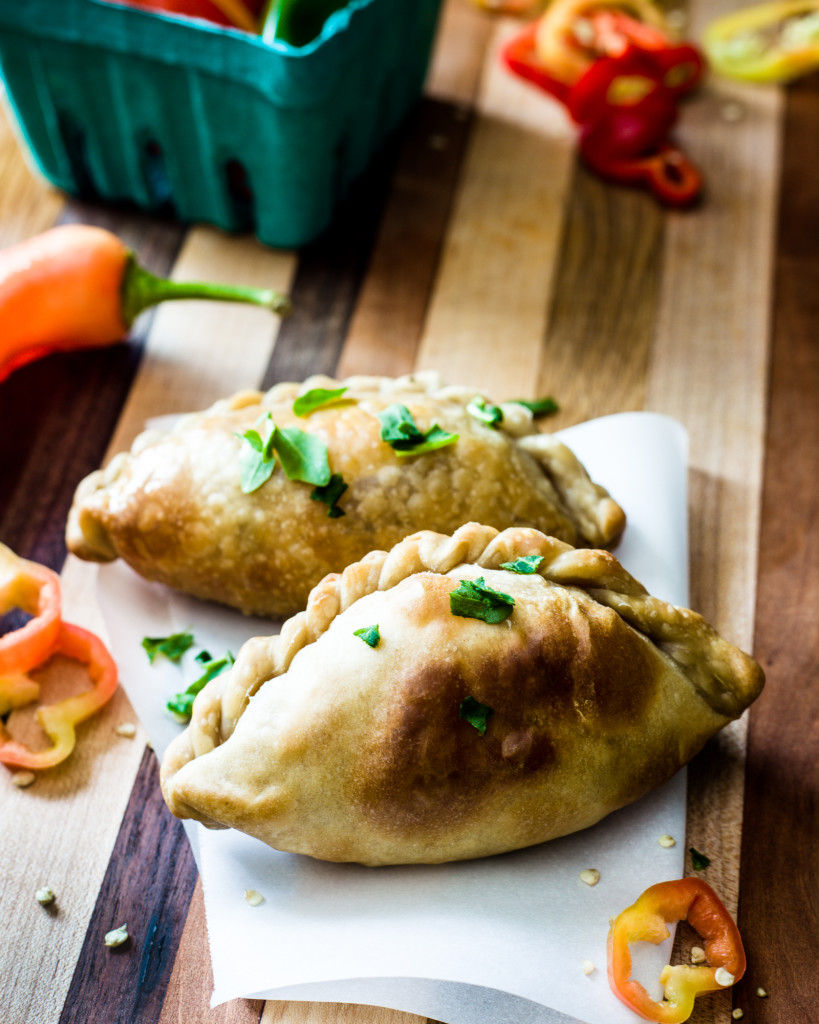
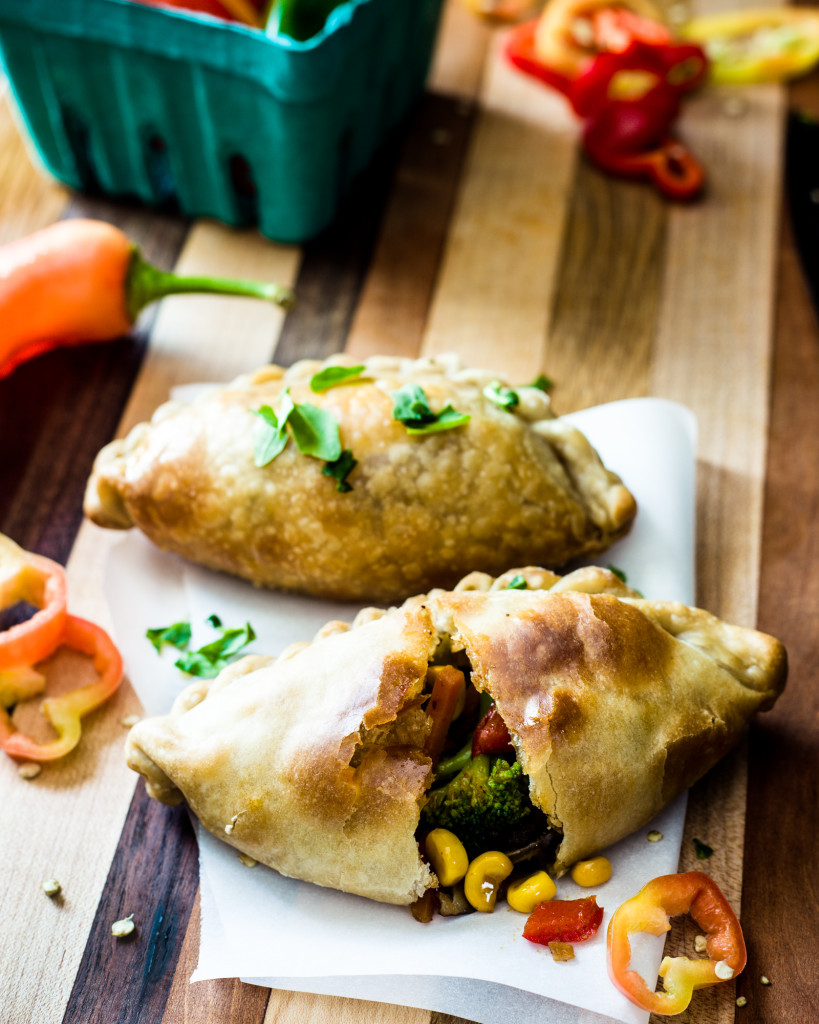
Veggie Empanadas

It was one of those days. Those hot, hot, hot summer days that start off at a blistering 90 degrees by 9 a.m. The days when your hair starts to wilt before you walk out the door, and keeping your mascara from smudging down your face is about as realistic as keeping your elbows from sweating.

And there I was, at a local farmer’s market, in a booth solely decorated with the white tray I brought, trying to convince people to eat baked empanadas. I realized that shortly after beginning my hope-filled empanada-folding demo, all the passersbys to my booth wanted was ice and a bucket of water poured on their head. They wanted to grab a few sun-ripened tomatoes, warmed already in wicker baskets, and bounce. They definitely were not hanging around for a lukewarm pastry.

Yet I was there, and I was sweating, and I wanted to follow them back to their cars and blast the A/C. It was then that it hit me. Empanadas are delicious. Vegetables are delicious- and as much as this will please my mom to say, I think I am growing to like them even more as an adult. But warm empanadas on a hot summer morning are not high priority to shoppers already drenched in sweat. Also, hello, I needed a Luv Cooks sign. Or a name tag. Or something that would assure people I could indeed be trusted with pastries.

Veggie Empanadas

Which leads me to Periscope. Have you guys heard of this app? It’s pretty amazing- and I think is going to make my job as a blogger much easier. In fact, I think it’s going to be a great way for all of us to connect about food, life, and other fun things. I actually tried it out today, which led to a video of me below geeking out over my new fall planner. Get it done, not perfect, people- as my friend Rachel Coffey says:


Also, if you feel so inclined, I would LOVE for you to search for me on Periscope- luvcooks- and tune in to share with me what you want to see more of on the blog.

Ok, now that we have successfully navigated a social media trend, and as it is FINALLY feeling cooler (and you may be attending outdoor activities where you need an easy, portable snack or treat for a crowd)- make these. Using the premade empanada dough makes your life even easier. Plus, you can do endless varieties with this recipe- add cheese, and it becomes melty and the flavors rich. Or add shredded chicken for a meatier treat. Use your imagination and the possibilities are endless! I even found this to get your creativity flowing: A list of 24 variations on an empanada.

Just scroll on down for my veggie version. Kick back, relax, make a glass of iced something, and chow down on a fresh empanada. Maybe even Persicope about it all. Because summer is almost over and a fiesta is in order!

Veggie Empanadas

Veggie Empanadas

Make sure you remove your empanada dough from the fridge, or the freezer if  it’s frozen, before you begin your filling. This recipe is easy, and I promise your creative use of leftover veggies, and chopping skills, will pay off!

What You Will Need:
  • 1-2 tablespoons olive oil
  • 1 medium onion, chopped
  • 2 cloves garlic, minced
  • 1/2 red bell pepper, chopped
  • 1/2 green bell pepper, chopped
  • 1/2 jalapeno pepper (remove seeds for less spice), finely diced
  • 1/2 teaspoon red chili flakes
  • 1/2 teaspoon Mexican oregano (if you don’t have Mexican you can use regular)
  • 1/2 teaspoon paprika
  • 1 teaspoon cumin
  • 2 generous tablespoons sofrito
  • 2 generous tablespoons pitted olives, cut in halves
  • 1 bay leaf
  • 1 cup veggie or chicken stock
  • 1 cup frozen butternut squash**
  • 1 cup frozen peas**
  • 10 empanada discs (I used Goya Emapanda Dough)

What You Will Do:

  1. Heat olive oil in large saute pan to medium heat.
  2. Sauté onion, garlic, bell peppers, and 1/2 jalapeno until onions soften on medium heat.
  3. Add red chili flakes, Mexican oregano, paprika, cumin, sofrito, pitted olives (cut in halves), bay leaf, veggie or chicken stock, squash, and peas.
  4. Bring mixture to a simmer, stirring occasionally, and cook until the peas and squash are softened and the majority of the liquid is absorbed, about 5 minutes. Take pan off the heat, and carefully remove the bay leaf.
  5. Move your empanada discs close to you on a cutting board or clean surface.
  6.  Spoon 2 tablespoons filling into half of the empanada disc. Fold the other half of the disc over on itself, forming a half-moon. Seal the edges by pressing down around the rim of the empanada with your fingers.* You can either use this empanada technique to make the edges twisty or just use a fork to lightly press down on the edges for a ribbed look.
  7. Move the empanadas to a large baking sheet lined in parchment paper.
  8. Bake at 400 degrees for 10 minutes; flip, bake 10 more minutes, or until golden brown on the edges.

Comemos amigos! Enjoy!

*You can dip your fingers in water before you close the empanadas if this helps you get a better seal. Mine were fine without it.

**For the recipe in the photo, as you can see, I substituted frozen corn and a broccoli medley mix for the squash and peas. You can totally be creative and use whatever frozen veggies you have in your freezer!


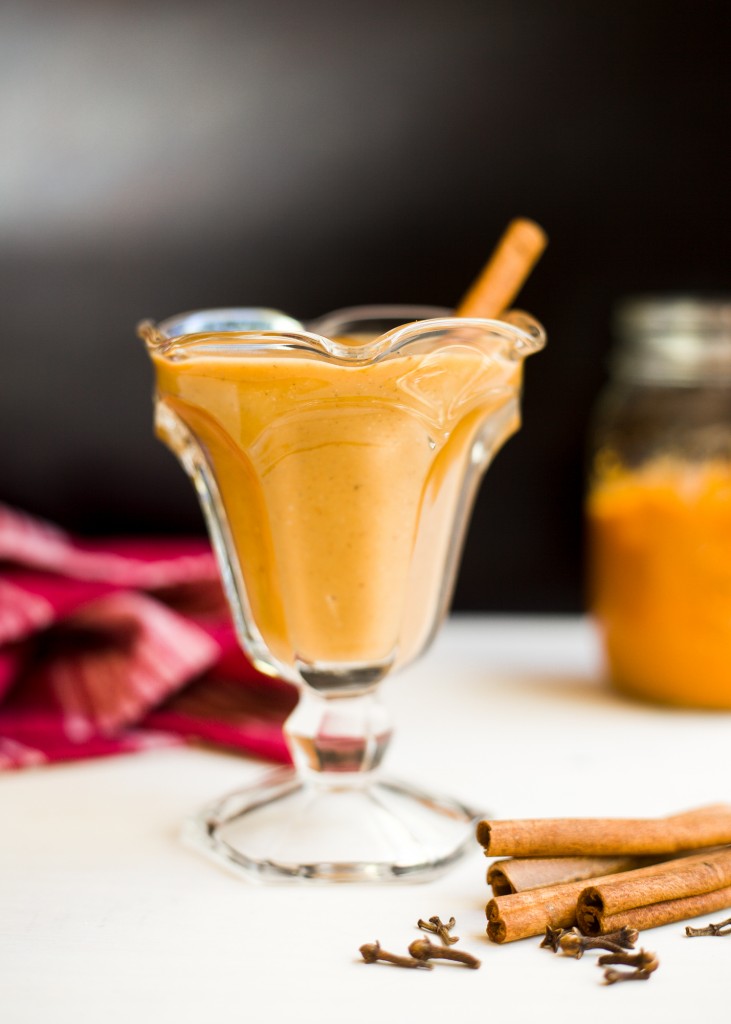
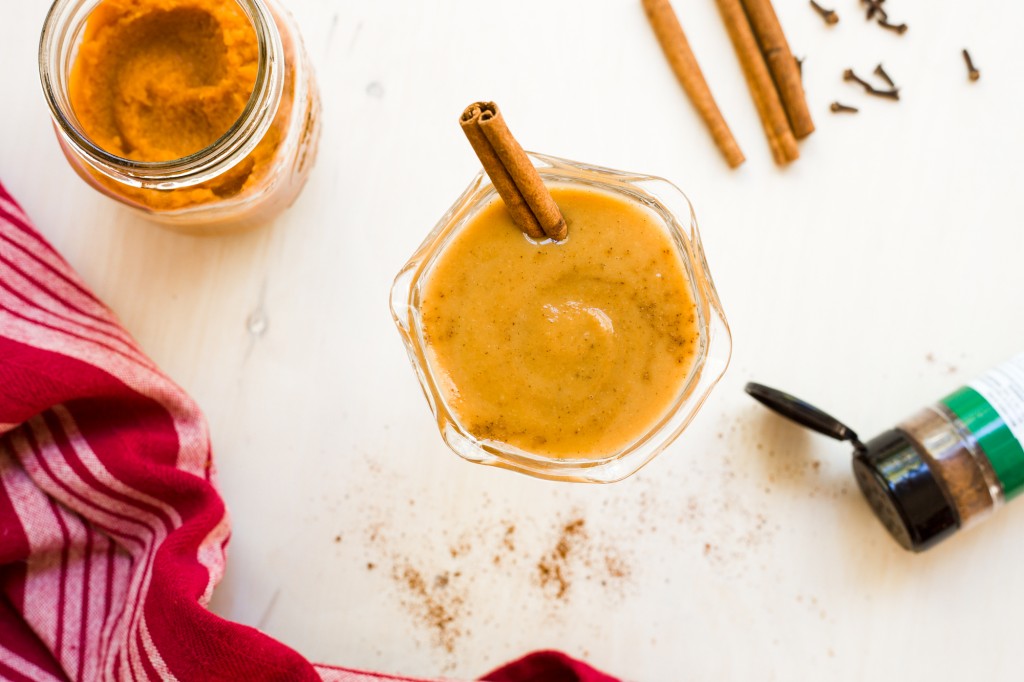
Pumpkin Spice Smoothie

Pumpkin Spice Smoothie

I am not a summer-lovin’ kind of girl.

The idea of a beautifully windblown, laid back lady with beachy waves, a flawless tan, and perfectly cut-off shorts does not describe me on my best of days. Most often I feel like a sweat-soaked*, frizzy-haired cat dramatically lounging on the sofa, looking wistfully out of my window for a sign- ANY sign- that summer in the South has ended.  And the breeze coming from my 36-inch, poorly overworked fan does not count.

I understand that summer’s bountiful produce is a gift. Any one who has tasted a ripe tomato or slice of cold, juice-soaked watermelon in July knows this. But y’all- I think I have eaten enough tomatoes, salads, melon, more salad, and more melon to hold me over for at least another two years.

And to those who claim that fall doesn’t officially start until September 23, please forgive me for ignoring you.  I must cling to the fact that surely fall will be here tomorrow, or I might have a come apart. Wait-was that a leaf I saw falling outside my window?

In an effort to convince myself that the season of all things wonderful- crisp breezes, bonfires, football games, toasted marshmallows, and of course, the pumpkin spice latte– is upon us, here is my first ode-to-fall recipe. It comes in a healthy form because fall is also the time I personally excuse eating 17 Reese’s Halloween pumpkins and microwaved Rotel and Velveeta as meals.

So dive in and get ready for fall. I think I feel a breeze moving already….

Pumpkin Spice Smoothie

Pumpkin Spice Smoothies adapted a bit from Skinny Mom

What You Will Need:

  • ½ cup canned pumpkin
  • ½ frozen banana
  • ½ cup unsweetened almond milk
  • ¼ tsp pumpkin pie spice
  • 1 tablespoon brown sugar
  • Dash of cinnamon
  • ¼ tsp vanilla extract
  • Crushed ice (if you like your smoothie extra thick)

What You Will Do:

1. Put the above ingredients in a blender and whirl away! Add more ice if you like your smoothies slushier, and more milk if you like it less so. Enjoy!

*Some also refer to this condition as “glowing;” i.e., “we don’t sweat, we glow.”  I wish this applied to me.

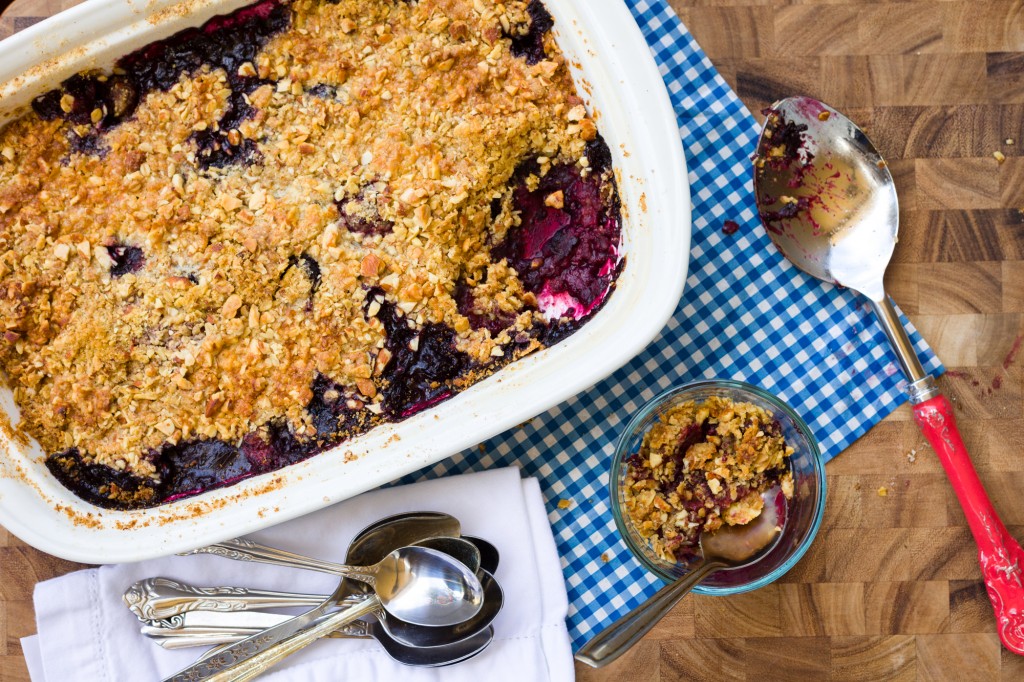
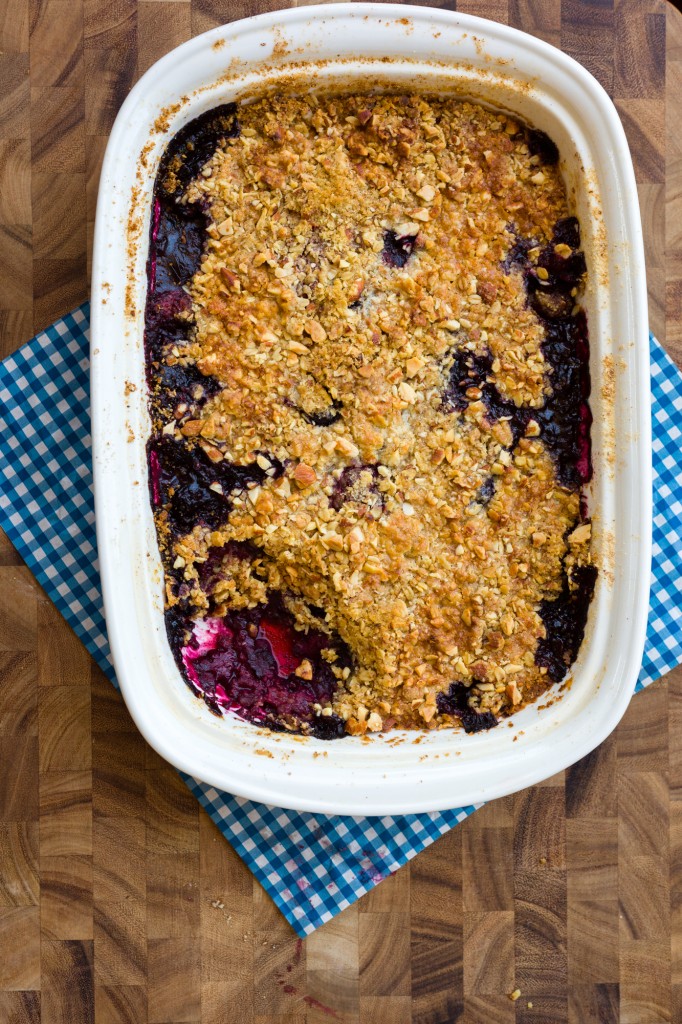
Gluten Free Mixed Berry Crumble

Gluten Free Mixed Berry Cobbler-196

Of all summer holidays, the Fourth of July is by far my favorite.

American independence is a beautiful thing and there is such a sense of nostalgia in this holiday- memories of flags waving proudly from wrap-around front porches; Dreamland ribs so smothered in sauce I had to reach for white bread to sop up the leftovers; my sister and I whizzing through a plastic sprinkler in the mind-numbing sunshine and heat of July.

Gluten Free Mixed Berry Cobbler-183


In the South the Fourth is a proud holiday- pride in our traditions,  pride in the people (aka “company”) attending our Fourth of July parties; and an even more stalwart pride in the power of barbecue and coleslaw to bring people together.

But the piece de resistance to any Fourth of July extravaganza is a dessert carrying the theme-red, white, and blue deliciousness. This mixed berry crumble is a warm, golden treat aside a blast of cold vanilla ice cream; a welcome addition any post-barbecue cool-down.

And I couldn’t be prouder of where my recipe inspiration came from- Courtney Bryant of Kinora Films in Birmingham, Alabama. She is a true Nothern/Westerner turned Southern Belle (but, I believe, was always meant to be a Steel Magnolia). Her grace under pressure, faith, love, and strength of character qualify her for the hospitality pineapple at any Southern soiree.

Friends, I hope y’all have the best, freedom-filled holiday and join me in celebrating our wonderful, inspiring country- and, of course, the American treat that is berries and a crumble.

Gluten Free Mixed Berry Cobbler-176

Gluten Free Mixed Berry Crumble

What You Need

  • 2 12-oz. bags frozen mixed berries
  • 1 cup gluten-free flour (1/2 brown rice, 1/4 sweet white sorghum, 1/4 tapioca or Bob’s Red Mill )
  • 1/2 cup gluten-free oats
  • 1 cup natural almonds
  • 1/3 cup sugar
  • 1/2 teaspoon vanilla
  • 1 teaspoon vanilla extract
  • 12 tablespoons cold butter, cubed into 1/4 inch pieces, and divided into 8 tablespoons and 4 tablespoons

What You Will Do

1. Preheat the oven to 350 degrees and butter or spray with cooking spray a 9X13 inch casserole dish.

2. In a food processor, pulse nuts, flour and oats together until the almonds are in small pieces. Add the sugar, cinnamon, and vanilla extract and mix well.

3. Add 8 tablespoons cold cubed butter and pulse until just combined. The butter should be roughly the size of small peas.

4. Place the frozen berries in buttered casserole dish. Cover all of the berries with your topping, and distribute the rest of your cubed butter evenly on top.

5. Bake for about 50-60 minutes or until golden brown on top.

6. Relax and enjoy hot out of the oven! Also, this would be delicious served with cold vanilla (or chocolate) ice cream.


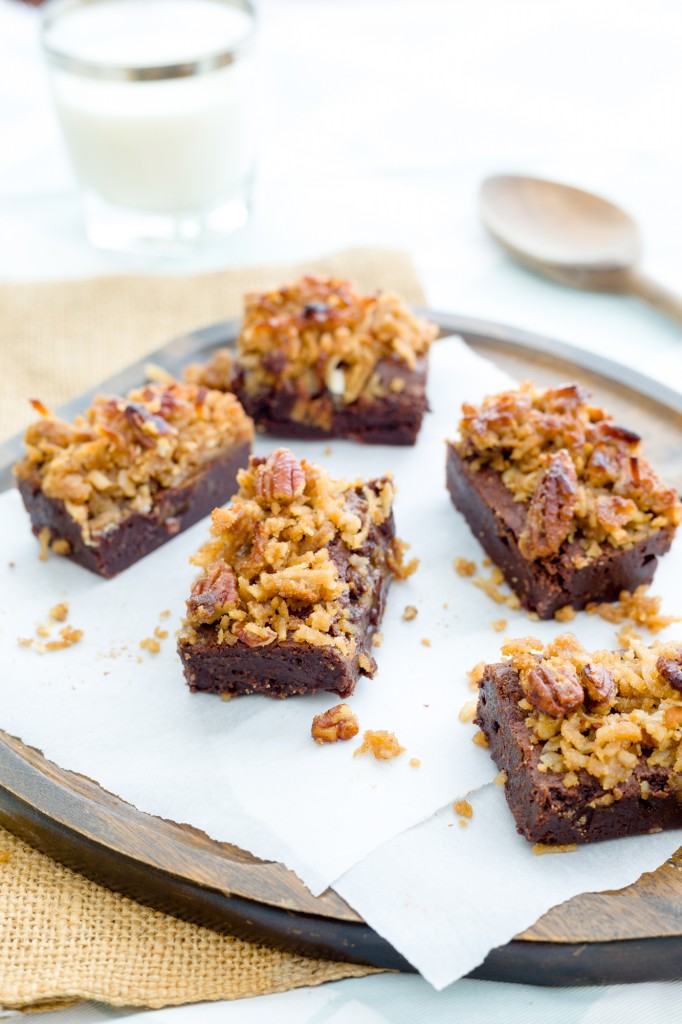
Gluten Free Toasted Pecan and Coconut Caramel Brownies

Coconut Pecan Brownies Gluten Free-114


People who bake know that there are certain things you just do. One, you use flour- sifting it with baking powder for cakes, sprinkling generous amounts of it on a board before kneading dough,  stirring fluffy white batches in for cookies. Second, you use an oven; prepping it until it is blazingly hot and then lovingly pushing your doughy creation into the heat box.

However, baking in the South is a bit of a different story. One, it’s ALMOST SUMMER and no one south of the Mason Dixon line should turn on their ovens. This general rule applies from the months of June until at October. The high outdoor temperature combined with additional indoor blasts of heat equals hair frizziness, a higher likelihood of swear-word-slippage and all-around moodiness.

But the second rule- always using flour- I thought was inescapable. What good cook makes biscuits without White Lily? I can’t bring a banana bread made with millet to a bridesmaids brunch! Where I grew up, it’s about like going to Publix without your makeup on and running into your former high school guidance counselor- nightmare! In so many ways in my life, it’s hard to escape that good ol’ Southern upbringing.

Recently, though, my pride hit the fan when I realized my stomach wasn’t bouncing back from a (let’s say, ahem, “international stomach incident”) like I had in the past. After doing some research, I realized that gluten can be a culprit in stomach uneasiness. And Lord a livin’, how this move from wheat has changed my life!
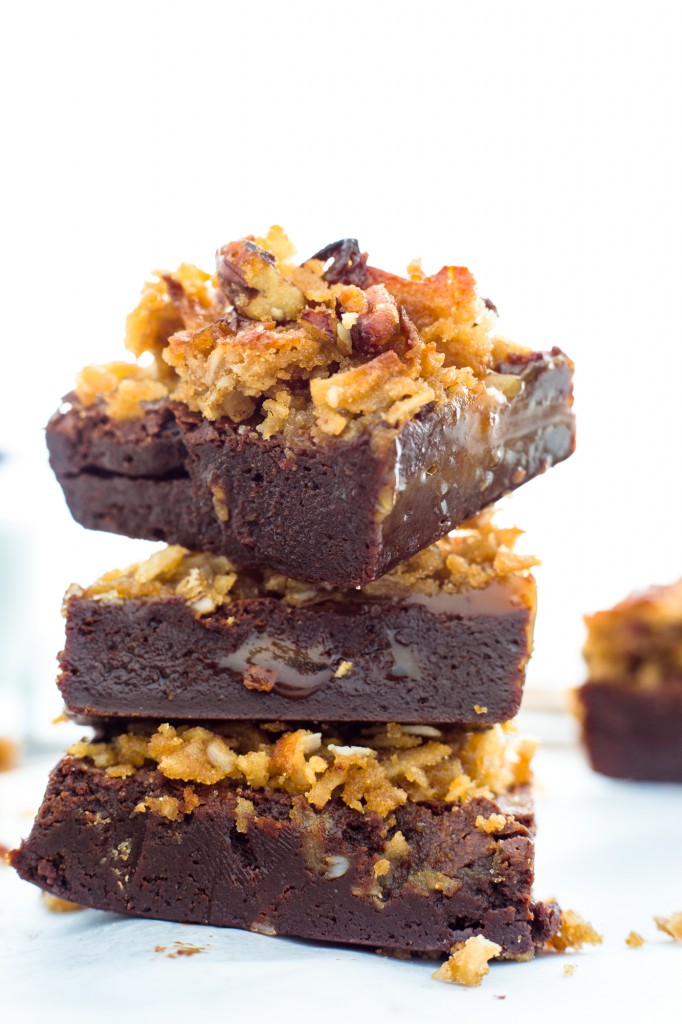
Coconut Pecan Brownies Gluten Free-123

Y’all- I feel so much better, my head feels clearer, and there is an all-around feel-good to my eating that I haven’t had for a long while. But it doesn’t change the fact that I still loooove sweets, and you know, brownies. So here is my attempt at baking a gluten-free recipe from the wonderful, beautiful, inspiring blog The Little White Kitchen. Because you can take the gluten out of the girl, but you can’t take the biscuits out of her psyche. Or the brownies.**
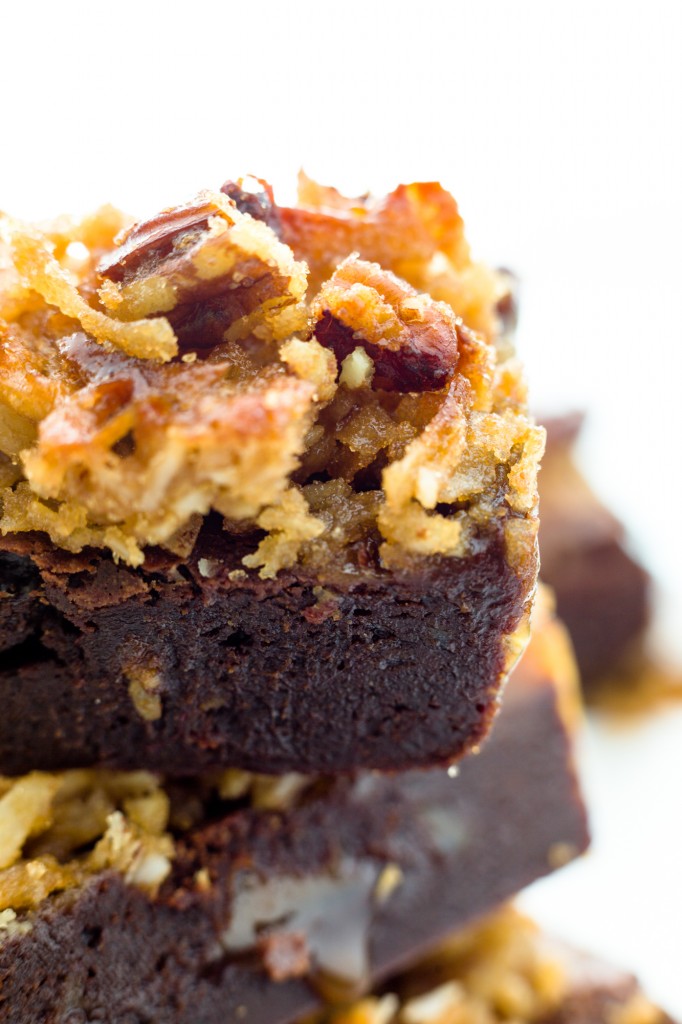
Coconut Pecan Brownies Gluten Free-139

**I’m still working on standing tall when buying gluten-free rice crackers in the aisle at Fresh Market.  If anyone out there has any additional confidence builders, please share.

Toasted Pecan and Coconut Gluten-Free Brownies (from The Little White Kitchen )

What You Need

One batch of brownie dough (recipe below)

One batch of caramel sauce (recipe below)

One batch of pecan coconut topping (recipe to follow)

What You Will Do

STEP A: Make the caramel sauce. Recipe is below:

Caramel Sauce

What You Need

  • 3/4 cup sugar
  • 2 tbsp. corn syrup
  • 1 1/2 tsp water
  • 3 tbsp. unsalted butter
  • 1/4 cup heavy cream
  • pinch salt

What You Will Do

1. Put the sugar, corn syrup and water in a small saucepan. Cook the sugar mixture over medium heat without stirring. With a pastry brush and some water, rinse off any sugar crystals that may form on the sides of the pan.

2. Gently swirl the pot as the sugar melts, but don’t stir (that could crystallize the sugar again). Just keep on swirling it, especially if one side of the pan starts to melt more quickly than the other.

3. Once the caramel reaches a medium amber colour, remove it from the heat and stir in the butter. Whisk in the cream and salt.

4. Set the caramel aside until the first layer of brownie batter has been baked. Keep at room temperature.

STEP B: Bake the brownies.

What You Will Need

  • 10 tbsp. unsalted butter
  • 1 1/4 cups sugar
  • 3/4 cup + 2 tbsp unsweetened cocoa
  • 1/4 tsp. salt
  • 1 tsp. vanilla extract
  • 2 large cold eggs
  • 1/2 cup gluten-free flour blend (I used Bob’s Red Mill)

What You Will Do

1. Preheat the oven to 325 F.

2. Line an 8-inch square pan with parchment paper or spray thoroughly with cooking spray.

3. Combine butter, sugar, cocoa and salt in a medium bowl. Microwave on high for 1 minute and 30 seconds. Whisk until smooth and well-combined (It won’t be completely smooth here, but that’s ok).

4. Whisk in the vanilla, then whisk the eggs one at a time, stirring well until each egg is combined.

5. When the batter looks thick, shiny and well-blended, switch to a wooden spoon, add the flour, and stir until you cannot see anymore flour. Beat vigorously for 40 strokes more with your spoon.

6. Spread half of the brownie batter into the prepared pan and bake for 10 minutes.

7. Remove the pan from the oven and pour the caramel sauce carefully over the baked batter. Spoon the remaining batter onto the caramel and spread it out as evenly as you can with a spatula, making sure to leave lots of undisturbed caramel. Bake the brownies for another 18 minutes, then take them out to let cool (you can insert a knife or toothpick here to make sure they are done; there should be no crumbs left on your utensil).

STEP C: Make the Pecan Coconut topping.

What You Will Need

  • 1/4 cup butter
  • 1 cup shredded sweetened coconut
  • 2/3 cup packed brown sugar
  • 1/2 cup chopped toasted pecans or walnuts

What You Will Do

1. In a small saucepan, melt the butter.

2. Add the remaining ingredients and stir until combined.

STEP D: Top yo’ brownies.

What You Will Do

1. Spread the coconut topping evenly over the baked brownies.

2. Set your oven to broil and make sure the rack is about 6 inches from the top of the oven.

3. Return the brownie pan to the oven and broil the topping until it starts to bubble and turns a nice golden brown. Make sure to keep an eye on it. Mine took a few minutes; I just kept on opening the oven door to make sure it didn’t burn. Once the tops of the pecans turn dark brown pull them out, they can burn before you know it!

4. Once they are ready, cool your brownies on a baking rack and then slice.

ENJOY YOUR GLUTEN-FREE DELICIOUSNESS! Also, these brownies will cut more easily if you can wait on them to cool, then leave them in the fridge for a bit (due to the incredible levels of carmel inside). #yumm



Easy Spiced Tortillas

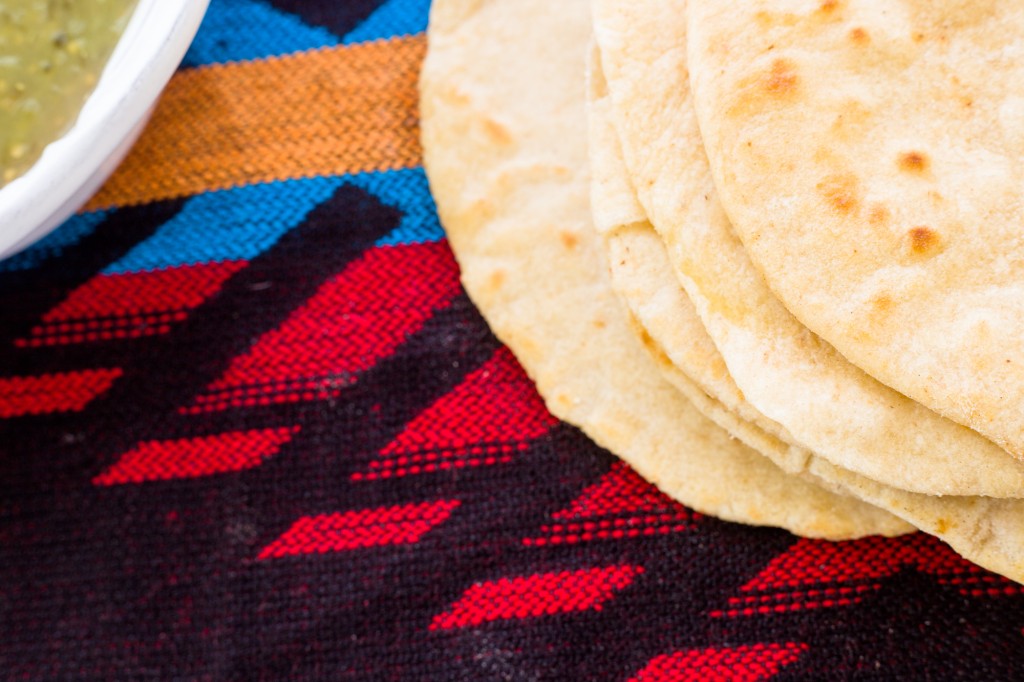
Homemade Tortillas

I have fallen for tortillas.

About a week ago I took an incredible, life-changing trip to Honduras with She Dances– an organization based in my hometown that works to provide holistic rehabilitation to young women that have been victims of sex trafficking.

Having been surrounded by people who loved and took care of me since I was a child, I really can’t wrap my mind around the life experiences these young women have endured. But y’all- the love in the She Dances house! It blew me away to see all that these young women have supernaturally overcome. They danced, they dreamed, they sang, they laughed- their spirit was contagious, and I left the country speechless with gratitude, blessings beyond measure, and an overwhelming desire to return. I miss each one of them already.

But one of the best things about Honduran culture is the generosity that permeates all they do- regardless of how many people show up, there will be enough food for everyone. I watched in amazement as two pineapples fed almost twenty small children at a friend’s countryside home, and as I learned more about the areas we visited, I realized that the majority of micro businesses revolved around food, and namely, tortillas.

Easy tortillas

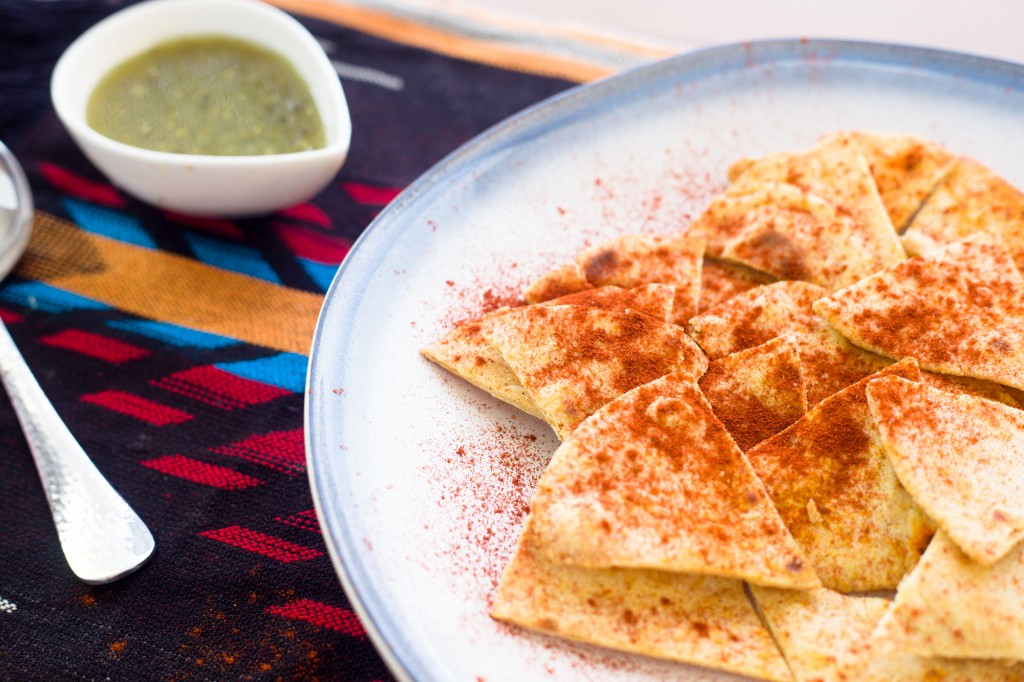
Latin American tortillas are an authentic original; set apart from what we find on the grocery shelves in America. They are sweet, light but thick, and almost wafery in their construction.  We ate them for breakfast with scrambled eggs, salsa, and fried ham, and used them to soak up the last juices from pulled pork for dinner. I did not attempt to recreate that experience here. Instead, I took a somewhat American tortilla recipe (wheat flour, vegetable oil) and added the spices and tastes that bring me back to Honduras. And trust me- these could not be easier to make. It’s absolutely worth the pass-by on the grocery shelf, and these would make phenomenal tortilla chips too. Just toss them in olive oil, add some flaky salt and smoky spices, and bake for a bit in a hot oven.

Tortillas baked and sprinkled with paprika!

Alright amigos; get out the guacamole and shredded pork, gather around the table, and pass the tortillas! Vamanos!

Easy Spiced Tortillas (This recipe is adapted from the inspiring Cafe Sucrine Farine blog)

What You Will Need:

  • 3 cups flour
  • 1 teaspoon salt
  • 1 teaspoon baking powder
  • 3/4 teaspoon ground cumin
  • 1/4 teaspoon onion powder
  • 1/4 teaspoon chili powder
  • 1/8 teaspoon smoked paprika
  • ⅓ cup vegetable oil
  • 1 cup warm water

What You Will Do:

  1. Combine flour, salt, baking powder, and spices in the bowl of a stand mixer. With the dough hook attached mix dry ingredients until well combined. I had to scrape the side of my bowl a few times to make sure the spices were incorporated.
  2. Add the oil and warm water with the mixer running at a medium speed. Mix for 1 minute, stopping occasionally to scrape the sides of the bowl. After about 1 minute, or when the mixture comes together and begins to form a ball, decrease the mixing speed to low. Continue to mix it for 1 minute or until dough is smooth. It will be begin to look like a big, fun, smooth ball. 
  3. Transfer the dough from the mixing bowl to a well-floured work surface. Divide the dough in half, then in half again. Continue until you have 16 fairly equal portions.
  4. Form each piece into a ball and flatten each one with the palm of your hand as much as you can. If the dough is sticky, use a bit more flour.
  5. Cover the flattened balls of dough with a clean kitchen towel and allow them to rest for 15 minutes (before getting your fry-on).
  6. After the rest period, heat a large pan over medium-high heat. Mine ended up cooked on about medium because the higher heat made them a bit, uh hmm, dark and smoky:)
  7. Using a large rolling pin, roll each dough piece into a rough circle, about 6-7 inches in diameter, keeping your work surface and rolling pin lightly floured. Don’t stack uncooked tortillas on top of each other or they will get soggy.
  8. When your pan is  hot, place one dough circle into pan and allow to cook about 1 minute or until bottom surface is lightly browned in places and starting to bubble a bit. Mine started to get tiny bubbles on top when they were ready to flip. If you start getting huge bubbles, like what happens when you make homemade pizzas, the tortilla might be cooking too much on one side.
  9. If your tortilla is browning too fast, which mine did, just take your pan off of the heat and lower it a bit before you put it back on. If it’s taking longer than a minute to see golden brown spots on underside of tortillas, increase the heat a bit. Flip to the other side and cook for about 30 seconds. You want the tortilla to be soft but have small golden brown spots on the surface.
  10. Remove the cooked tortilla from the pan with tongs and stack on a plate until all of your beautiful tortillas are cooked. Allow them to cool completely if not using right away.
  11. When cool, tortillas can be placed in a large zippered bag or plastic container. They will keep well at at room temperature for 24 hours or can be frozen indefinitely (If you can last that long; these things are addictively delicious!)


Starting with Austin


Original antlers at Uncommon Objects in Austin

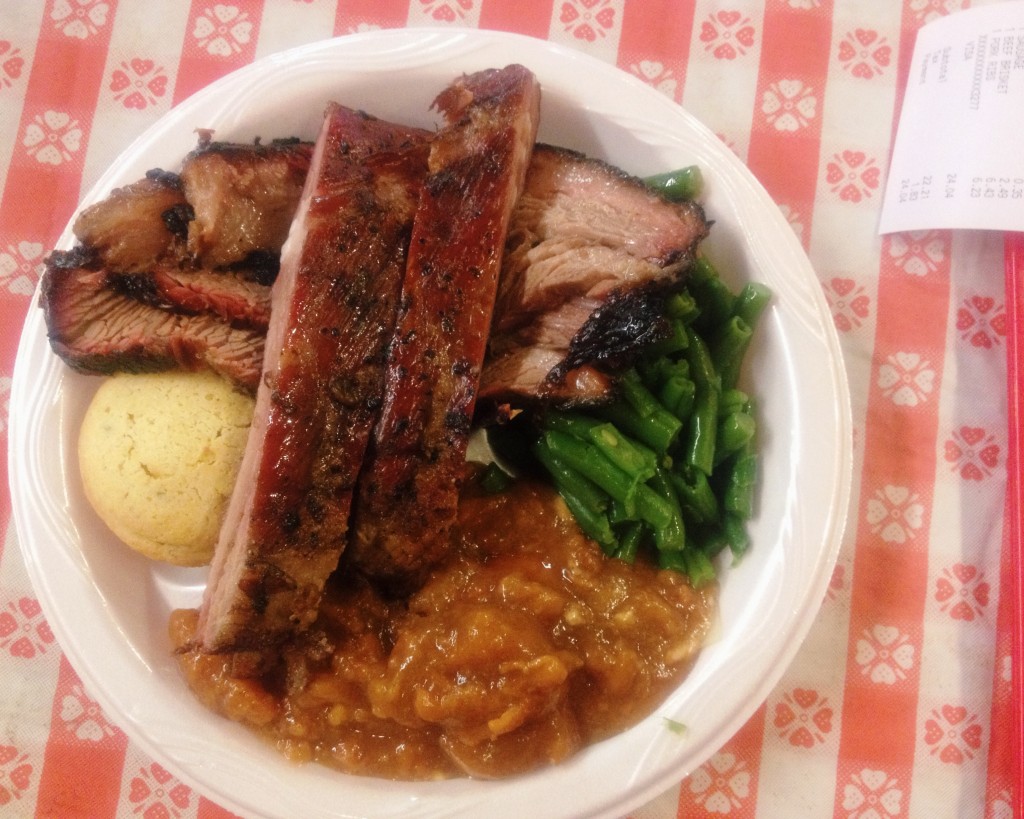
Picture this. A log cabin the size of a mini-mall looms amidst a gigantic parking lot the expanse of two football fields. Roasty gray smoke billows from the restaurant’s chimneys and wafts towards your nose. You look ahead towards a line of blinking taillights and a large, unshaven man stumbling from the back of a faded brown party bus. A security guard approaches your Prius and announces a 2-hour minimum wait for barbecue, while the oncoming rush of fellow meat lovers towards the check-in point is about like that of me stalking Kerry Washington and/or John Besh on a street corner.

This is the passion of the eaters in Austin, Texas.  It is the city- inspiring, challenging, beautiful, original and unexpected. And Austin changed me.

The change was subtle and slow. It was an initial shift that grew over the following days into a reminder of who I am, what I want this blog to be, and who I hope you find that this blog is. What I realized is this: Luv Cooks is for you, it’s for me, and it’s on a journey.

Without boring you with the details of my inner psyche, I’ve felt lately like I am on the edge of a growth spurt- feeling the ache in my bones for height, but not exactly sure what the final product will end up looking like. Austin clarified for me what I want to grow into. Y’all- just ok isn’t good enough anymore- and while there were some good food moments, I realized how important great food is to me. Not just for taste, but for nourishment- physically, spiritually, emotionally. And the growth spurt has made me hungry. Hungry for better recipes, better food, better health.

So I offer to you a new commitment. I want Luv Cooks to be a place of beauty and well-being. Not in an over-the-top, health-crazed, helicopter-parent kind of way. In an oasis, come here for refreshment and rest and renewal kind of way. I want you to be renewed by the beauty of food and all it has to offer to your life.

So in lieu of a recipe this time, I leave you with food and Austin-spiration. I can’t wait to see where our creativity goes next.


Beef brisket at it's finest, Black's BBQ
Beef brisket at it’s finest, Black’s BBQ
The best root beer in town
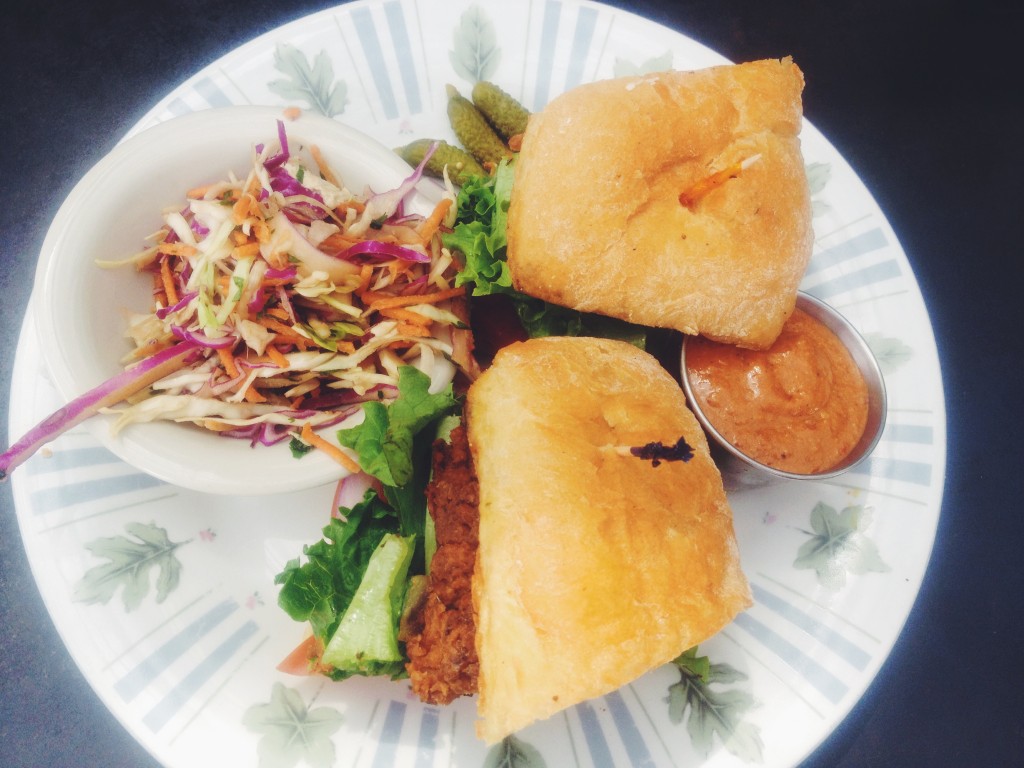
Veggie burger with chipotle-pecan pesto at Bouldin Creek Cafe
The line at 9 a.m. Friday, Franklin's bbq
The line at 9 a.m. Friday, Franklin’s bbq


The infamous Austin Hotel


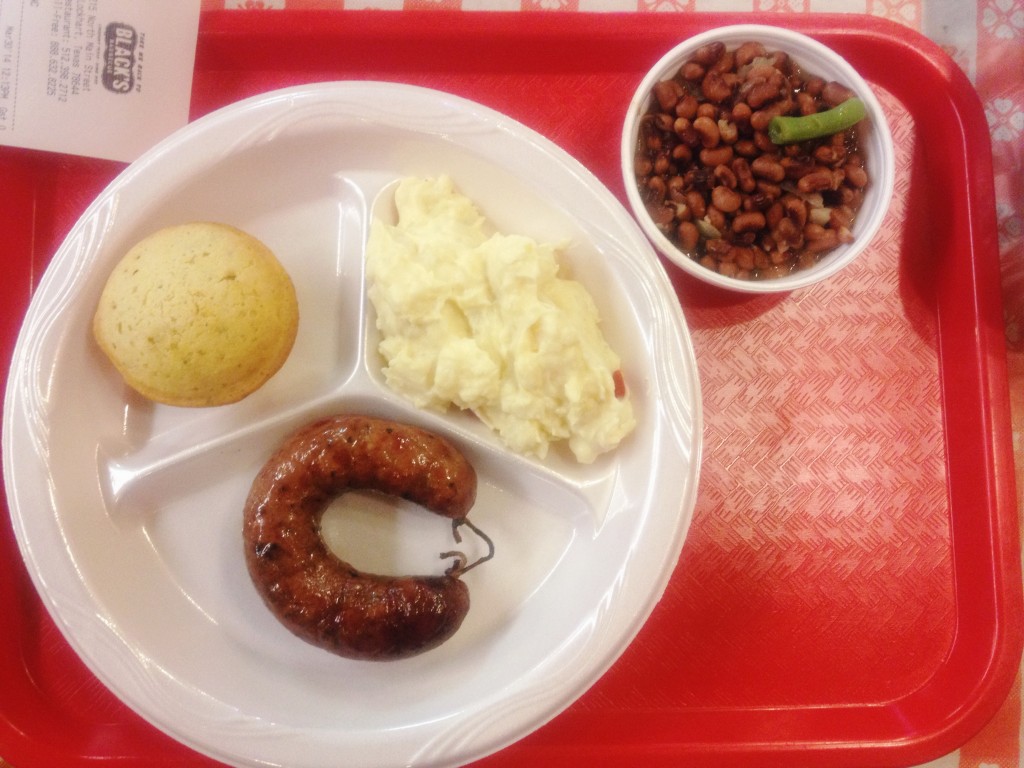
Smoked sausage, divine field peas and jalapeño cornbread at Black's
Smoked sausage, divine field peas and jalapeño cornbread at Black’s
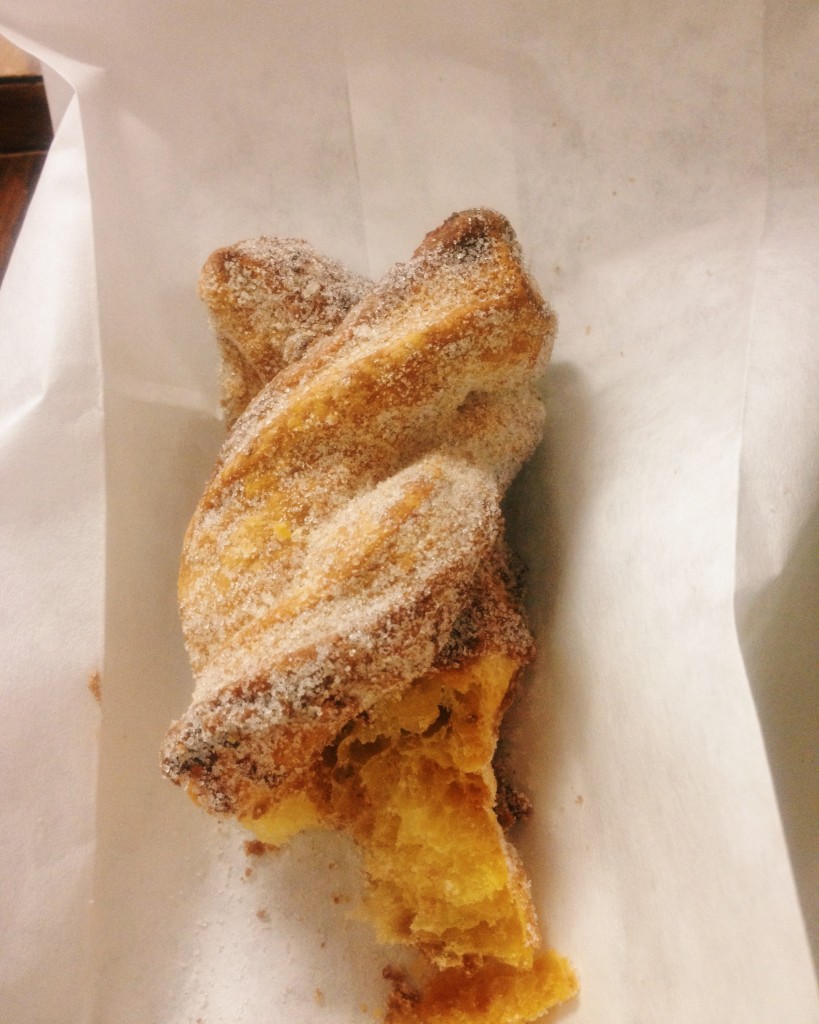
A Mexican twist on a cinnamon twist, delicious


Vintage finds at Uncommon Objects
View from the top of Mount Bonnell