Pumpkin Spice Pumpkin Seed Chocolate Bark

Chocolate Pumpkinseed Bark-3398

Y’all, it’s Thanksgiving week, and I don’t know about you, but I have work/life/blog details piling up in my mind like stacks of leftover turkey sandwiches.

How are you guys feeling? How is life this week for you? I hope it’s been smooth as pumpkin butterscotch trifle.

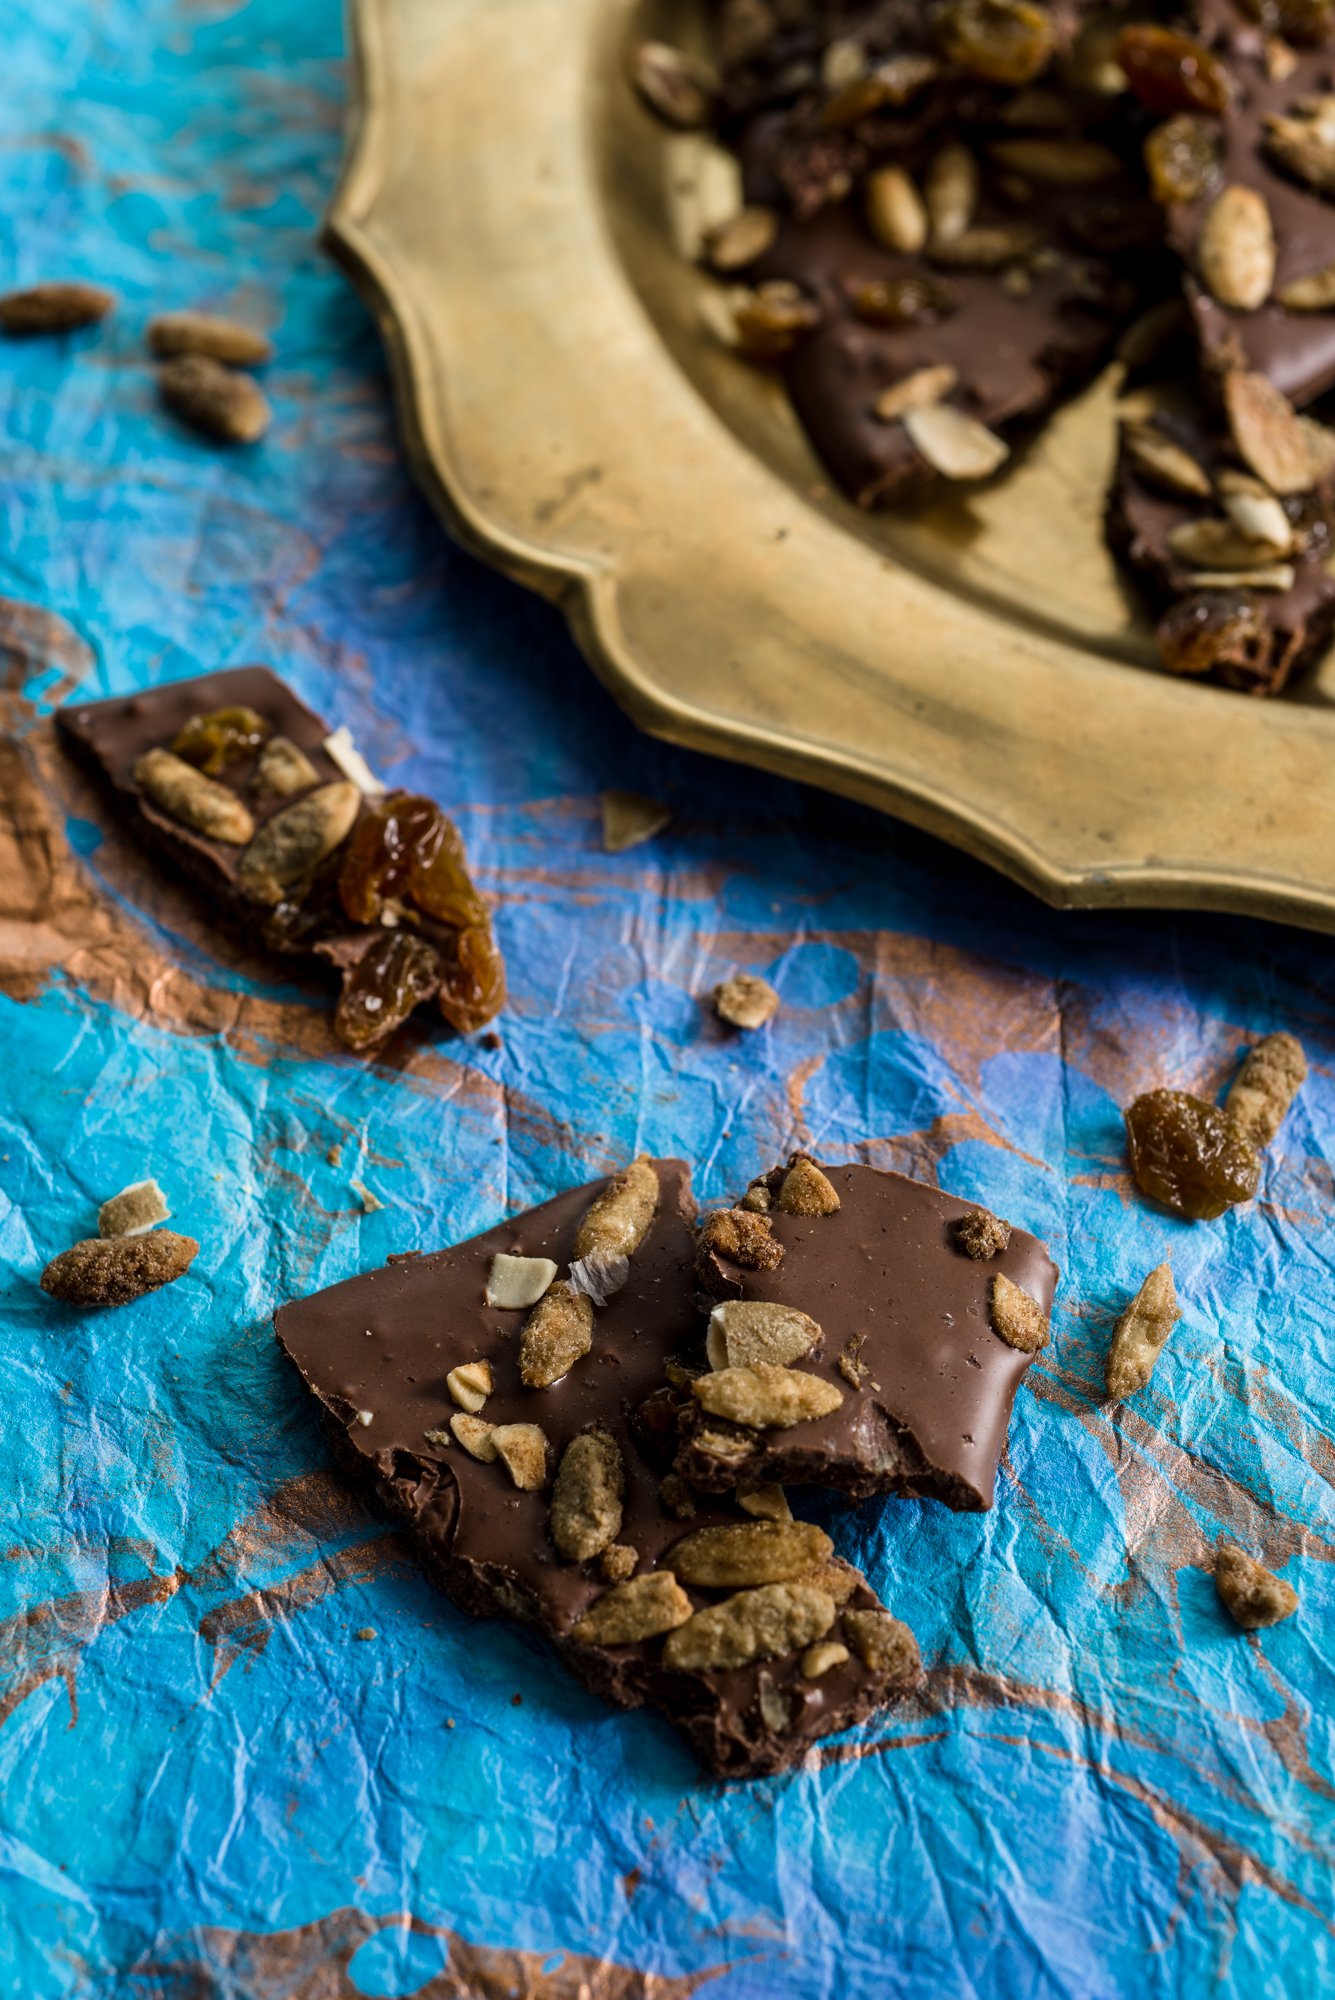
I think that this year, we should make recipe planning a bit easier for everyone. This week’s Thanksgiving-themed dessert is easy-peasey- and takes a total of max 10 minutes cook time. Also, due to my lack of energy brain cells, I could not figure out what to title this post.  Pumpkin Spice Chocolate Bark? PSPS Bark? Yes, the bark is topped with pumpkin seeds, but the pumpkin seeds are pumpkin-spice flavored, which makes them even more delicious. There are also golden raisins involved, and Lord help trying to get all of that to fit in a name. But here we are, and trust me, this chocolate bark is going to be Thanksgiving hit.

This year, in my Southern family, I am in charge of desserts. And as much as I love to bake, I was eager to find a solution for the people, like me, who see a whole roasted turkey, sweet potato casserole with sugary pecans, buttered rolls and potato gratin and think- YES I WILL EAT ALL OF THOSE. And come back for seconds.

Have any of y’all taken this “Which TV Family Should You Eat Thanksgiving With?” quiz? You need to, find it here!: #gilmoregirls

So, by the time I get to dessert I am stuffed. To the brim. And despite my sister and I’s argument that yes, there is indeed such a thing as a completely separate dessert stomach, sometimes you need a breather. Or, maybe you want to space out your eating- and need something sweet to keep your energy up while you are baking your booty off for your loved ones.

I picked this recipe up from Food Networks’ awesome ratio for DIY chocolate bark. All you need is a pound of chocolate, a cup or so of toppings, and you are ready to sprinkle! Get creative, do what you feel, and I am pretty sure you will end up with a version of your own chocolate bark that will knock your guests’ socks off.

And, you only need about 45 minutes of chill time for the chocolate to set and be ready to eat (I highly recommend taking that opportunity to have someone else do your baking dishes).

Chocolate Pumpkinseed Bark-3391

Pumpkin Spice Pumpkin Seed Chocolate Bark

(Recipe adapted from this awesome post on mix-and-match chocolate bark from Food Network)

  • 16 ounces chocolate (I used a mix of milk, white, and dark; feel free to one type of chocolate, or mix types and flavors as you see fit!)
  • 1/2 cup Trader Joe’s pumpkin spice pumpkin seeds
  • 1/2 cup golden raisins
  • Coarsely grated sea salt

1. Chop chocolate into 1/2 inch pieces and set one cup of chopped chocolate aside.

2. Line a large baking sheet with aluminum foil, shiny side facing up.

2. Put chopped chocolate (aside from one cup) into a large glass bowl. Microwave chocolate for 30 seconds, then stir with fork or rubber spatula. Microwave for another 3o seconds and stir again with fork or rubber spatula (it will be chunky and that is totally ok).

3. Now that the chocolate is slightly melted, microwave for one more minute. Remove from heat and stir quickly, attempting to dissolve any remaining chocolate pieces. Now, pour about 1/3 cup of chopped chocolate and stir to combine. Repeat with the rest of the chocolate, and stir quickly until the chocolate is completely melted and the surface is smooth and glossy.

4. Pour chocolate into foil-lined baking pan, spreading with rubber spatula until about 1/4 inch thick.

5. Sprinkle evenly with golden raisins, then seeds, then coarsely grated sea salt.

6. Put baking pan into fridge to cool for about 45 minutes. Or, if your room is cool, and you aren’t in a hurry to get your chocolate on, you can let it cool at room temperature. Break the chocolate into large pieces (it is the season of sharing after all) and enjoy!

Chocolate Spice Cake with White Wine Berry Glaze

White Wine Cake

It’s holiday time! And you know what that means. Dust off that Kool and the Gang record, put on a Christmas scarf, and sing it with me, “Ce-le-brate good times, come on!” Now in your deepest Alto, “It’s a Celebration!”

And really, is there anything better than sparkly Christmas lights, fur trees loaded with ornaments, Elvis singing “Blue Christmas,” and drinking egg nog and/or hot chocolate like it’s your job? Truly, one of the most special times of the year.

And in that state of Christmas joy, I wanted to bake a chocolate cake that tasted like all of those wonderful Christmas feelings: warm and rich, with an unexpected flavor gift in the mix. And who better to parter with in this creative endeavor than uproot? Their Sauvignon Blanc is so versatile, it gave a bright flavor profile to chicken soup and this dessert. Especially perfect for the cinnamon-laced cake is the element of passion fruit the Sauvignon Blanc features- a perfect compliment to the blueberries and raspberries in the berry glaze.

Alright everybody, raise your eggnog-or uproot-glasses high to the best time of the year!

A slice of Christmas cheer

A slice of Christmas cheer

Chocolate Spice Cake with White Wine Berry Glaze

Another great thing about uproot wines is their partnership with Food52– one of my favorite recipe resources- where I went for inspiration in the cake realm. I just added a Christmas spin with a few extra holiday ingredients.

For the Glaze (I listed this first because I suggest you make it first, due to the double-glazing effect we use on this cake.)

What You Will Need

3/4 cup uproot Sauvignon Blanc 

6 ounces fresh blueberries

6 ounces fresh raspberries

1 teaspoon vanilla extract

3/4 cup sugar

What You Will Do

1. In a medium saucepan (make sure you use a larger one than you think you need- your liquid mixture will expand like an over-stuffed Santa when it boils), combine white wine, blueberries, raspberries, vanilla extract, and sugar.

2. Bring the mixture to a rolling boil, and let it cook at high heat for at most five minutes. Watch the mixture to make sure it doesn’t overflow the pan. If things get too crazy and you are afraid it is going to bubble over, just go ahead and turn the heat back down to medium or medium-low.

3. Cook on medium heat for about 24 minutes. Make sure and watch your mixture towards the end, stirring frequently to make sure the sugar and berries don’t burn.*

4. Let your glaze cool as you bake the cake.

* To be honest, this cooking time really depends on how thick you would like your glaze to be. I like mine a bit more like jelly so it gives the cake texture and shine; but, if you would like for it to be thinner, cook it on medium-low heat for up to 45 minutes. I also cooked this twice and had different cooking times for the glaze, so really just watch your mixture to see that it cooks to where you want it to be. When it comes to working with liquid sugar, it’s always better to go slowly so you don’t burn off your holiday fingers, as these are vital to your continued recipe success.

For the Cake

  • 1  1/2 cup all-purpose flour
  • 1/3 cup unsweetened cocoa
  • 1 teaspoon baking soda
  • 1 cup sugar
  • 1/2 teaspoon salt
  • 5 tablespoons neutral oil (like corn, canola, or vegetable)
  • 1 cup cold water
  • 1 1/2 teaspoon vanilla
  • 1 tablespoon cider or white vinegar
  • 1/2 teaspoon cinnamon
  • Freshly grated nutmeg (about 1/4 teaspoon, but up to your preference)
  • 2 ounces semisweet chocolate, chopped (I used this brand)
  • Confectioners’ sugar (optional, for dusting)

What You Will Do

  1. Heat the oven to 350° F and spray a 9-inch cake pan with cooking spray.
  2. Sift together the flour, cocoa, baking soda, sugar, and salt in a bowl. In a separate bowl, whisk together the water, oil, vanilla, and vinegar.
  3. Whisk together the wet and dry mixtures. If lumpy, whisk the mixture until it is smooth.
  4. Add the cinnamon, nutmeg, and chocolate. Whisk together to combine.
  5. Pour the batter into a greased 9-inch round cake pan. Tap the edge of the pan against the edge of the counter, or drop from 6 inches to the floor several times to pop air bubbles. Please do not miss this step, as it is really entertaining and will hopefully make your cake hole-less! Bake for 25 to 30 minutes (mine took 28 minutes), or until the top springs back when pressed gently.
  6. Your cake may have a darker brown ring around the edges; that’s ok. That’s what we have that gorgeous glaze for!
  7. Once the cake is removed from the oven, place it on a cooling rack. Poke tiny holes throughout the cake with a toothpick or fork, going about 3/4 of the way to the bottom.
  8. Spread a thin glaze of white wine berry mixture over the cake, making sure to cover the entire cake surface. This will help infuse some of the berry flavor inside of the cake as it cools.
  9. Once your cake has cooled completely, turn it out onto your serving platter.
  10. Spread the rest of your berry glaze on the top of the cake, working from the center out. Sift confectioners sugar on top if desired for extra celebratory pizazz.