Umm- are you guys busy these days? I mean- is your holiday season flying by like Santa on a jet ski? Yep, #sameboat. I actually just had to practice some deep breathing a bit ago to calm down about ALL that awaits me on my to-do list between now and December 25.
But you know what? There is HOPE. That’s right, there is a beacon of light that lies across that sea of gift wrap on your living room floor. It’s going to simplify your life, take one MAJOR requirement off of your shopping-bag laden shoulders, and allow you to breeze through the most pressure-filled of Christmas feats- the holiday dinner.
That’s right. The once-a-year celebration that involves your family, your friends, and those relatives that you haven’t seen in years but somehow arrive at your doorstep hungry and ready for ALL the egg nog. The people that you truly love and want to feel special around your table. The people you text on the daily. That dinner. The solution? Hormel is here to save the day- and help you feed everyone on your gift list with no host-stress. Pun intended:)
This season I had the chance to partner with Hormel for these easy holiday dinner tips to utilize all I’ve gleaned from my work as a food and prop stylist to create a holiday menu that is both easy to do and will formally establish you as the Holiday Hosting Queen or King. These dishes make simple, fresh tweaks to Hormel foods that are sure to please your fave people. It’s a menu that includes:
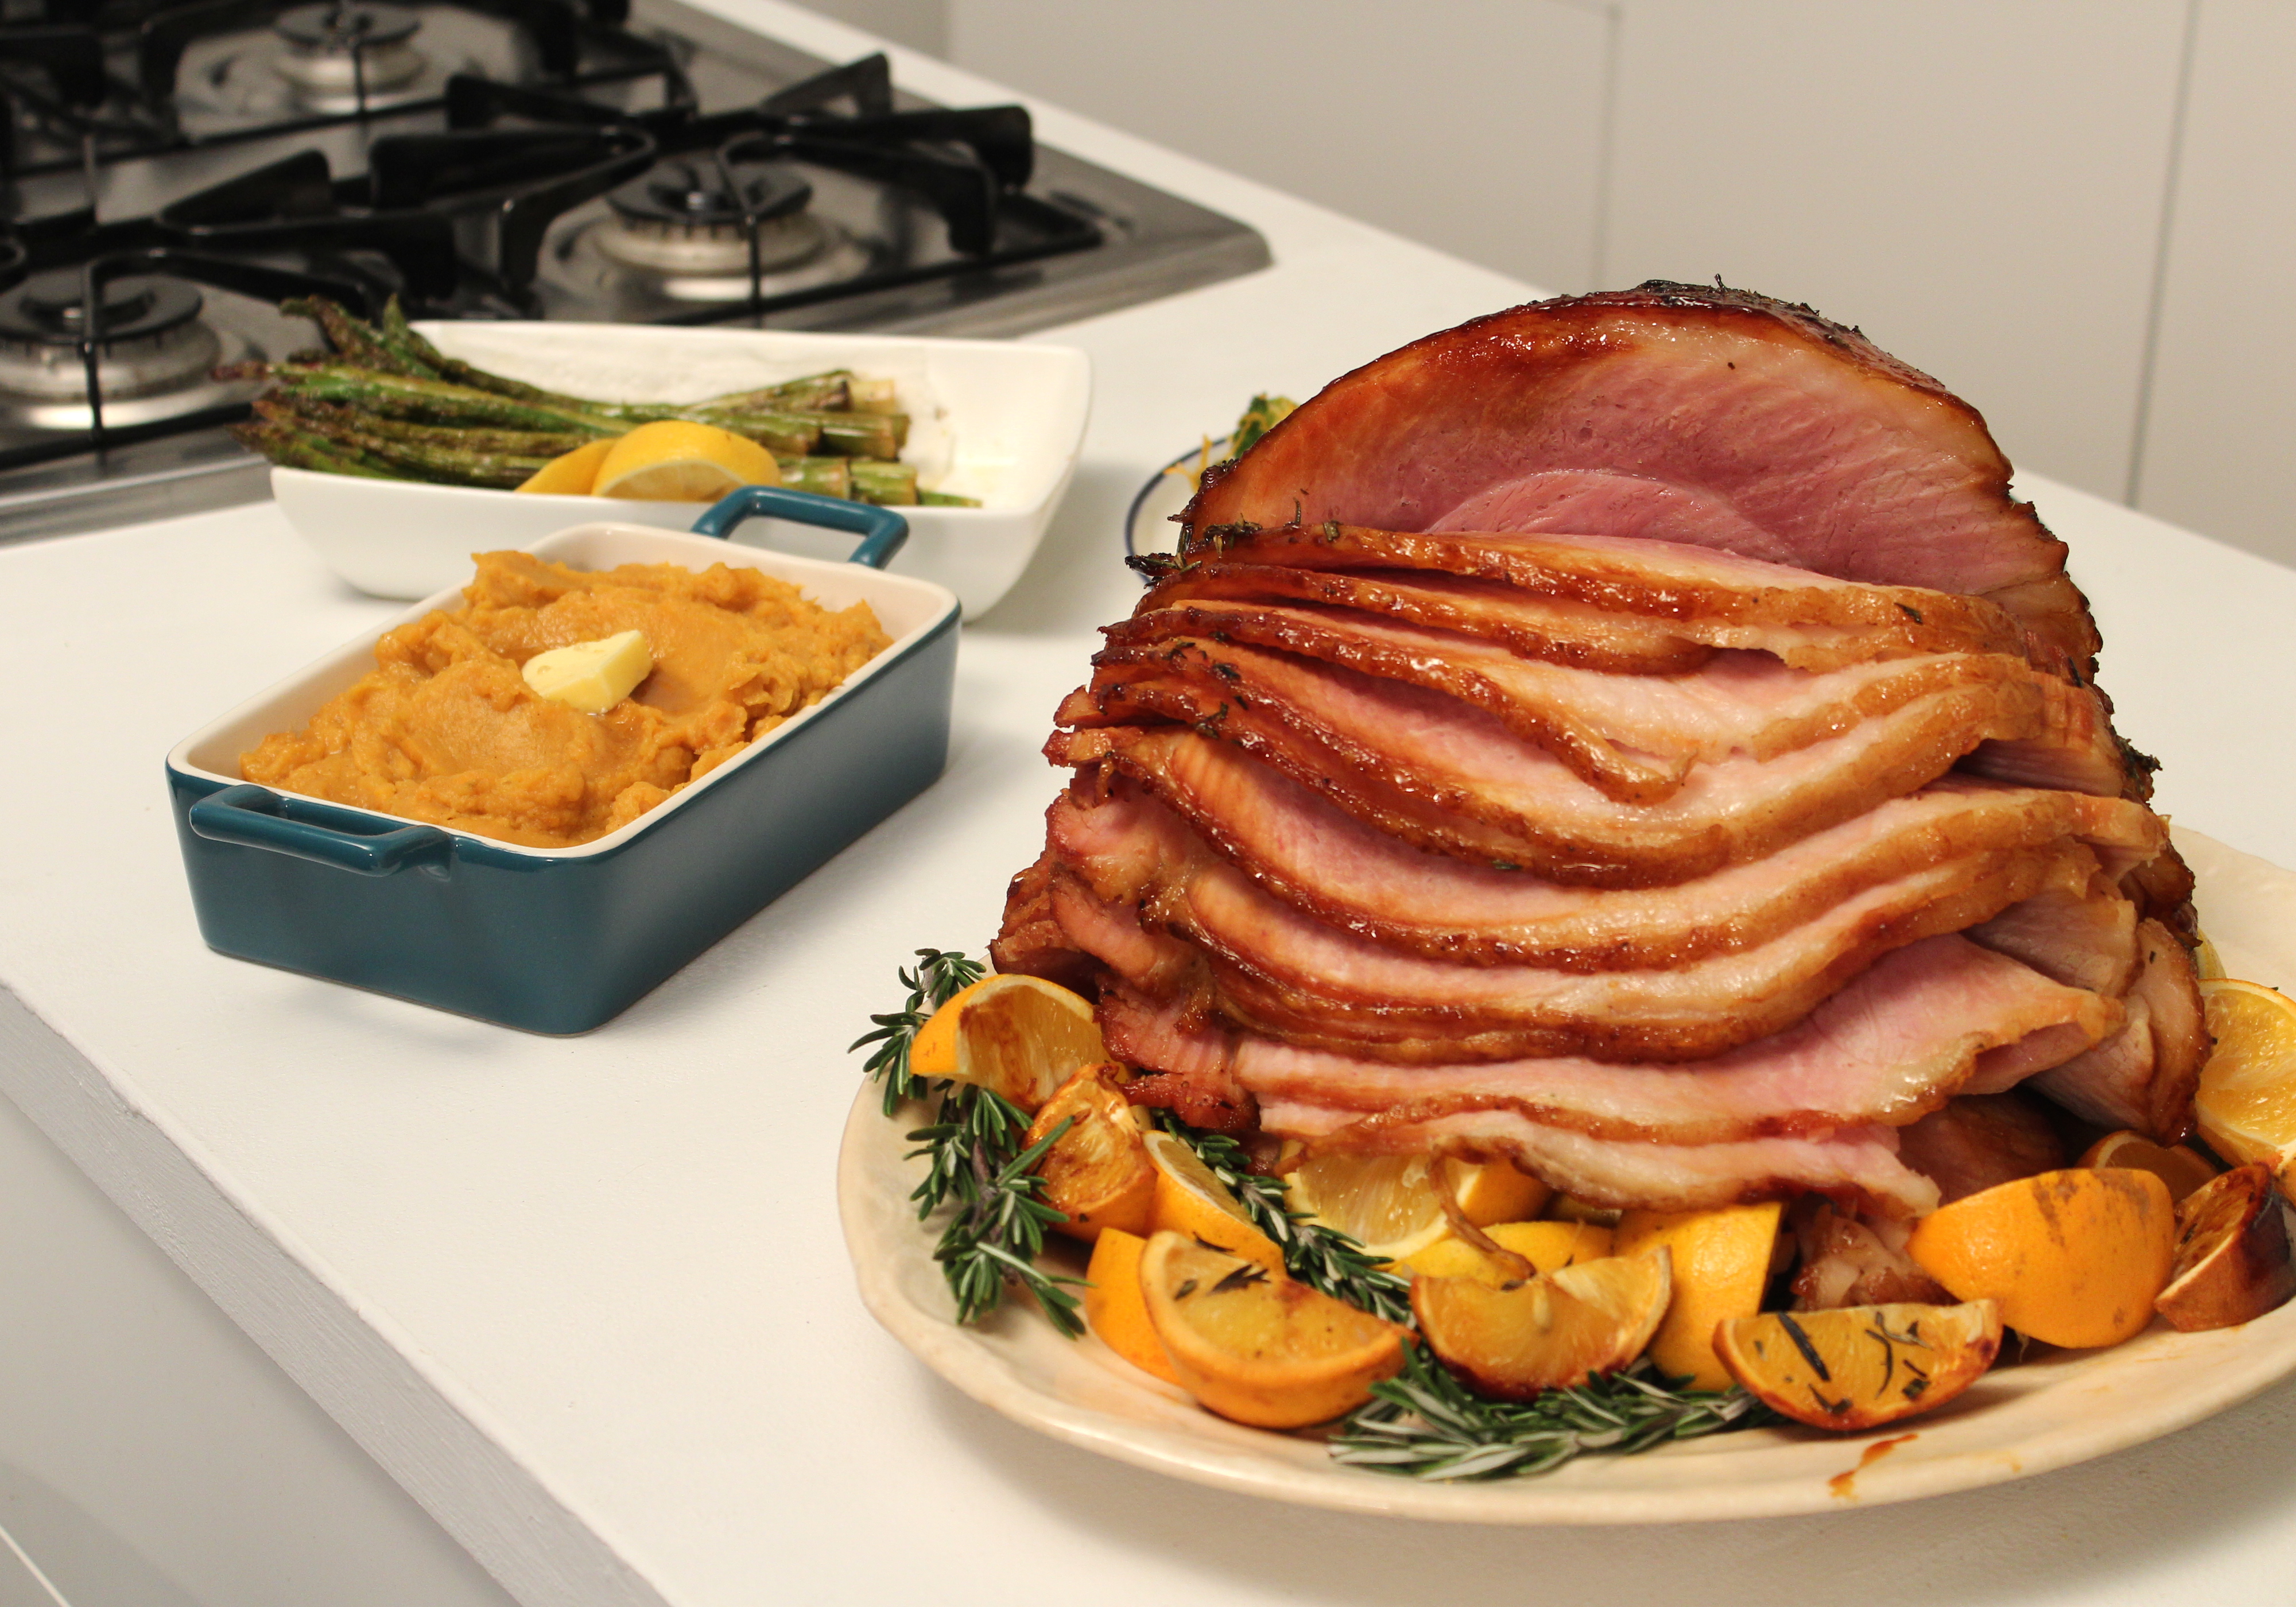
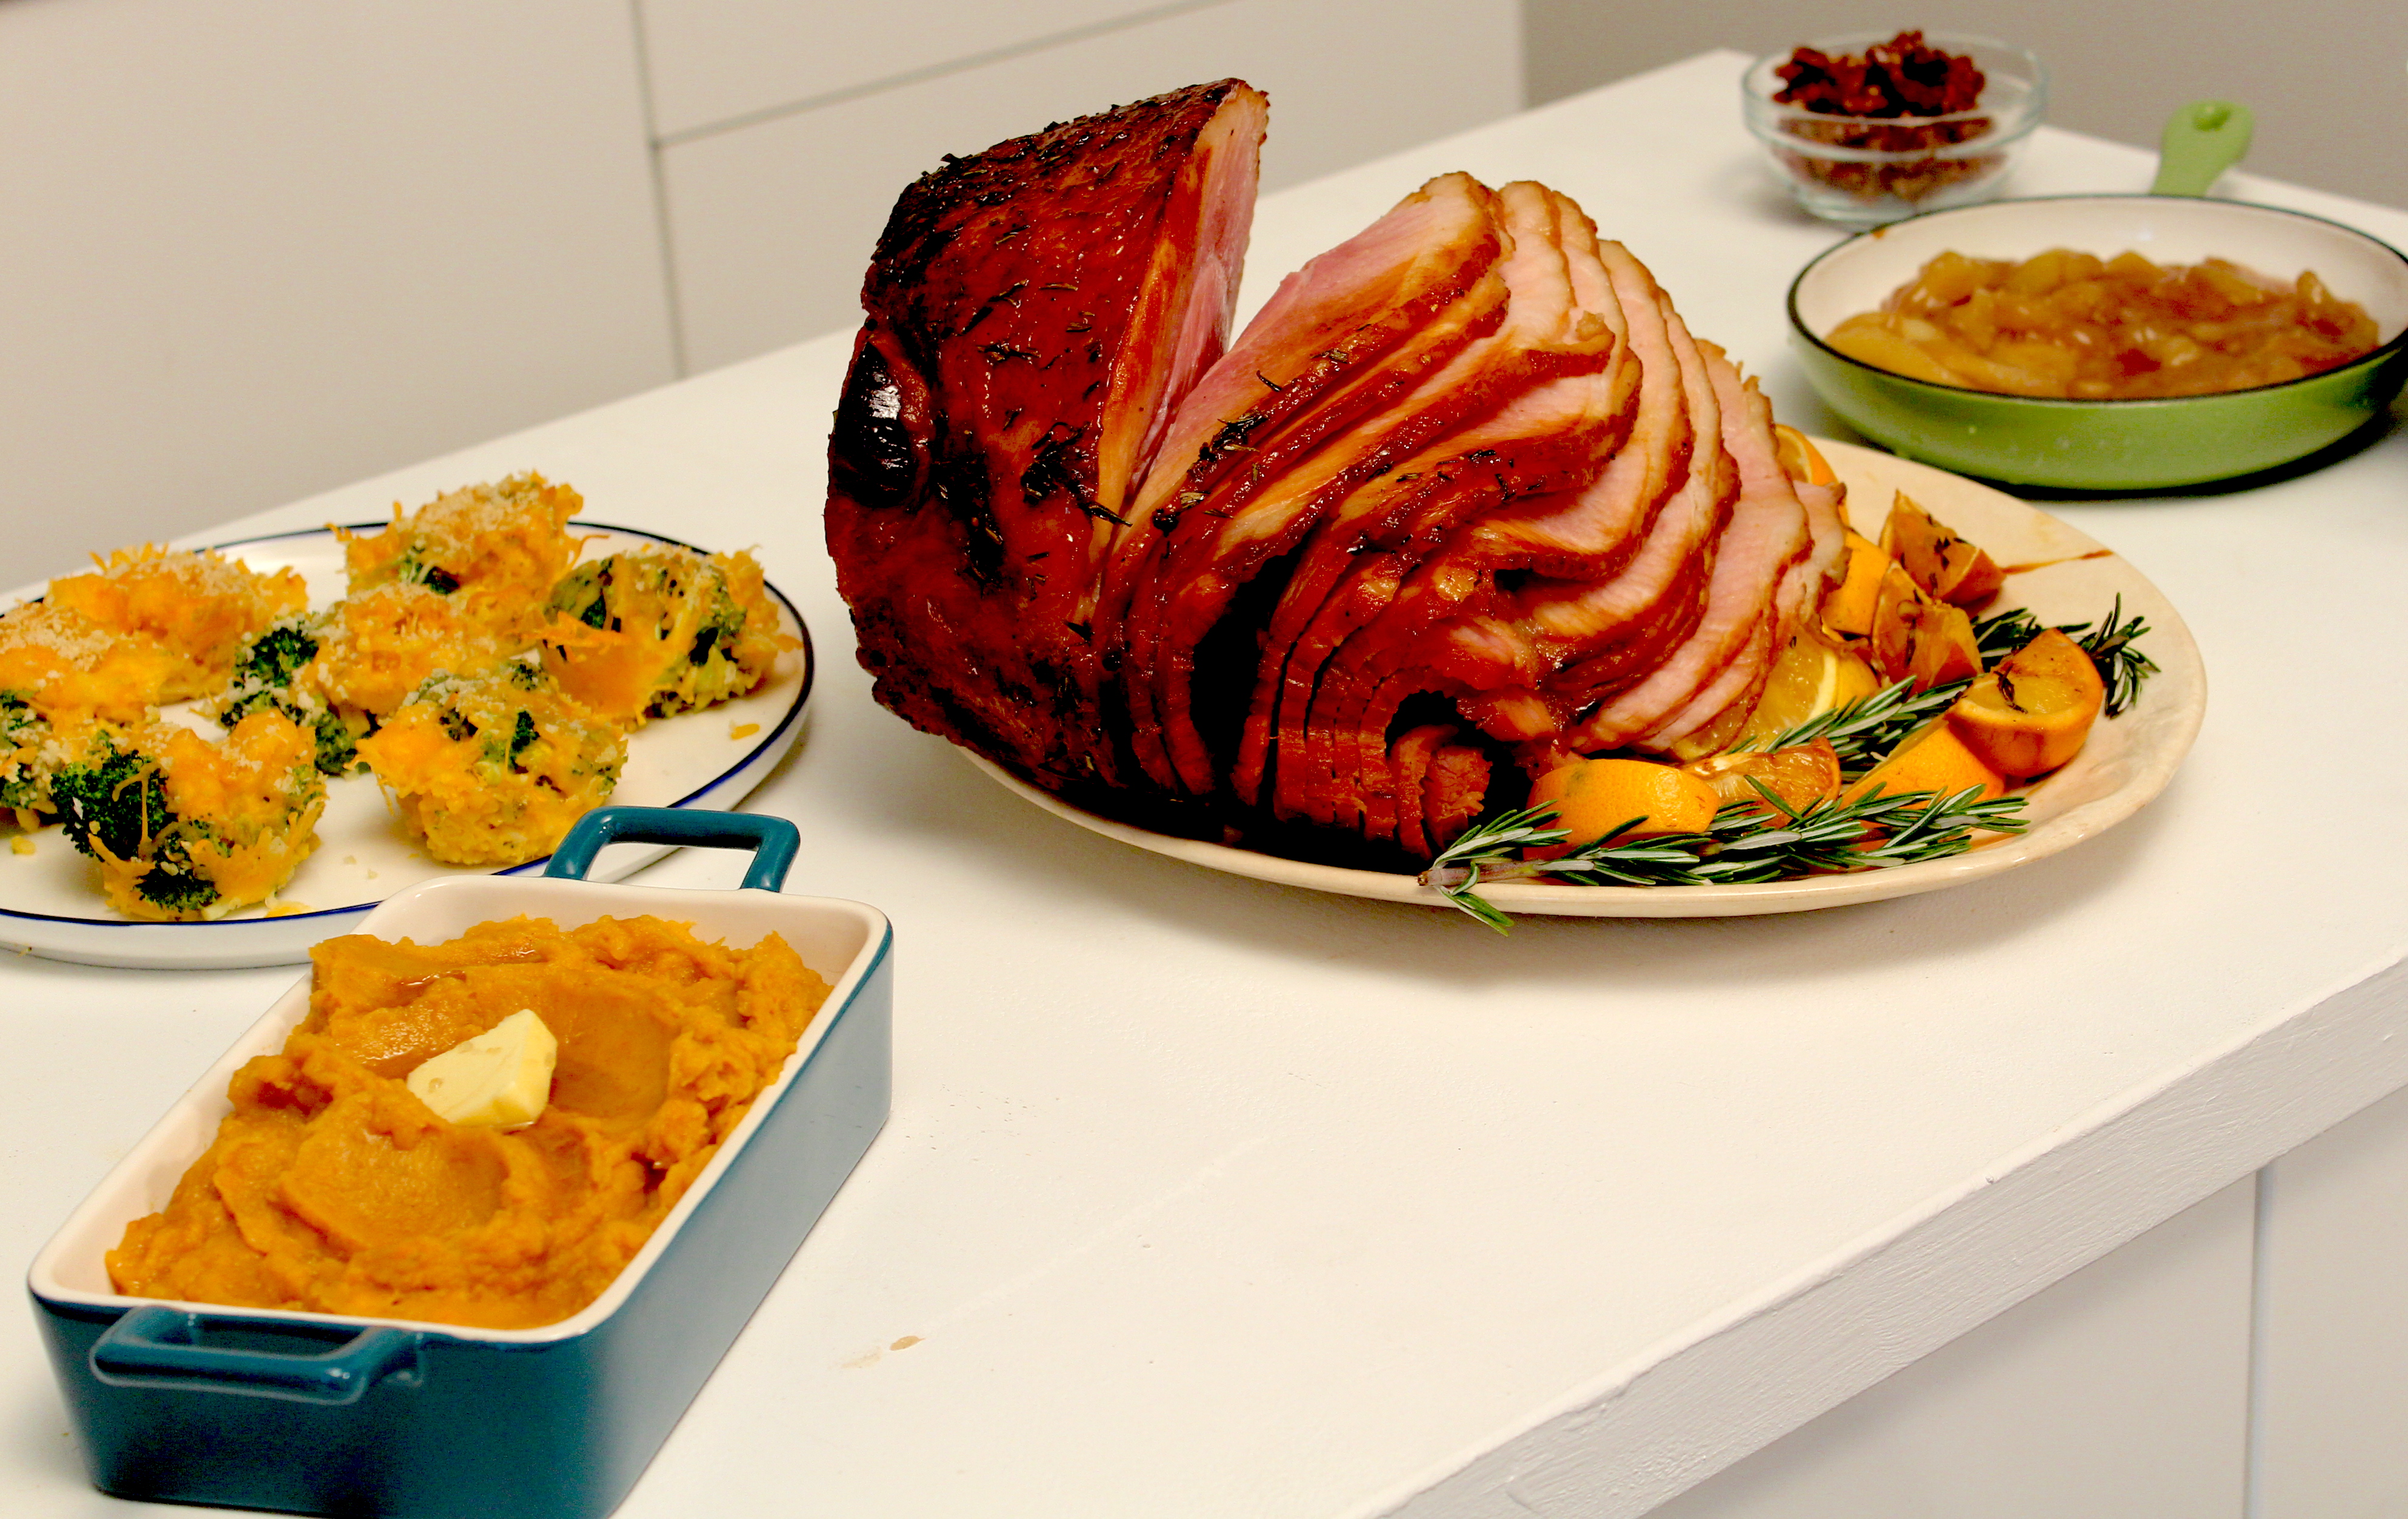
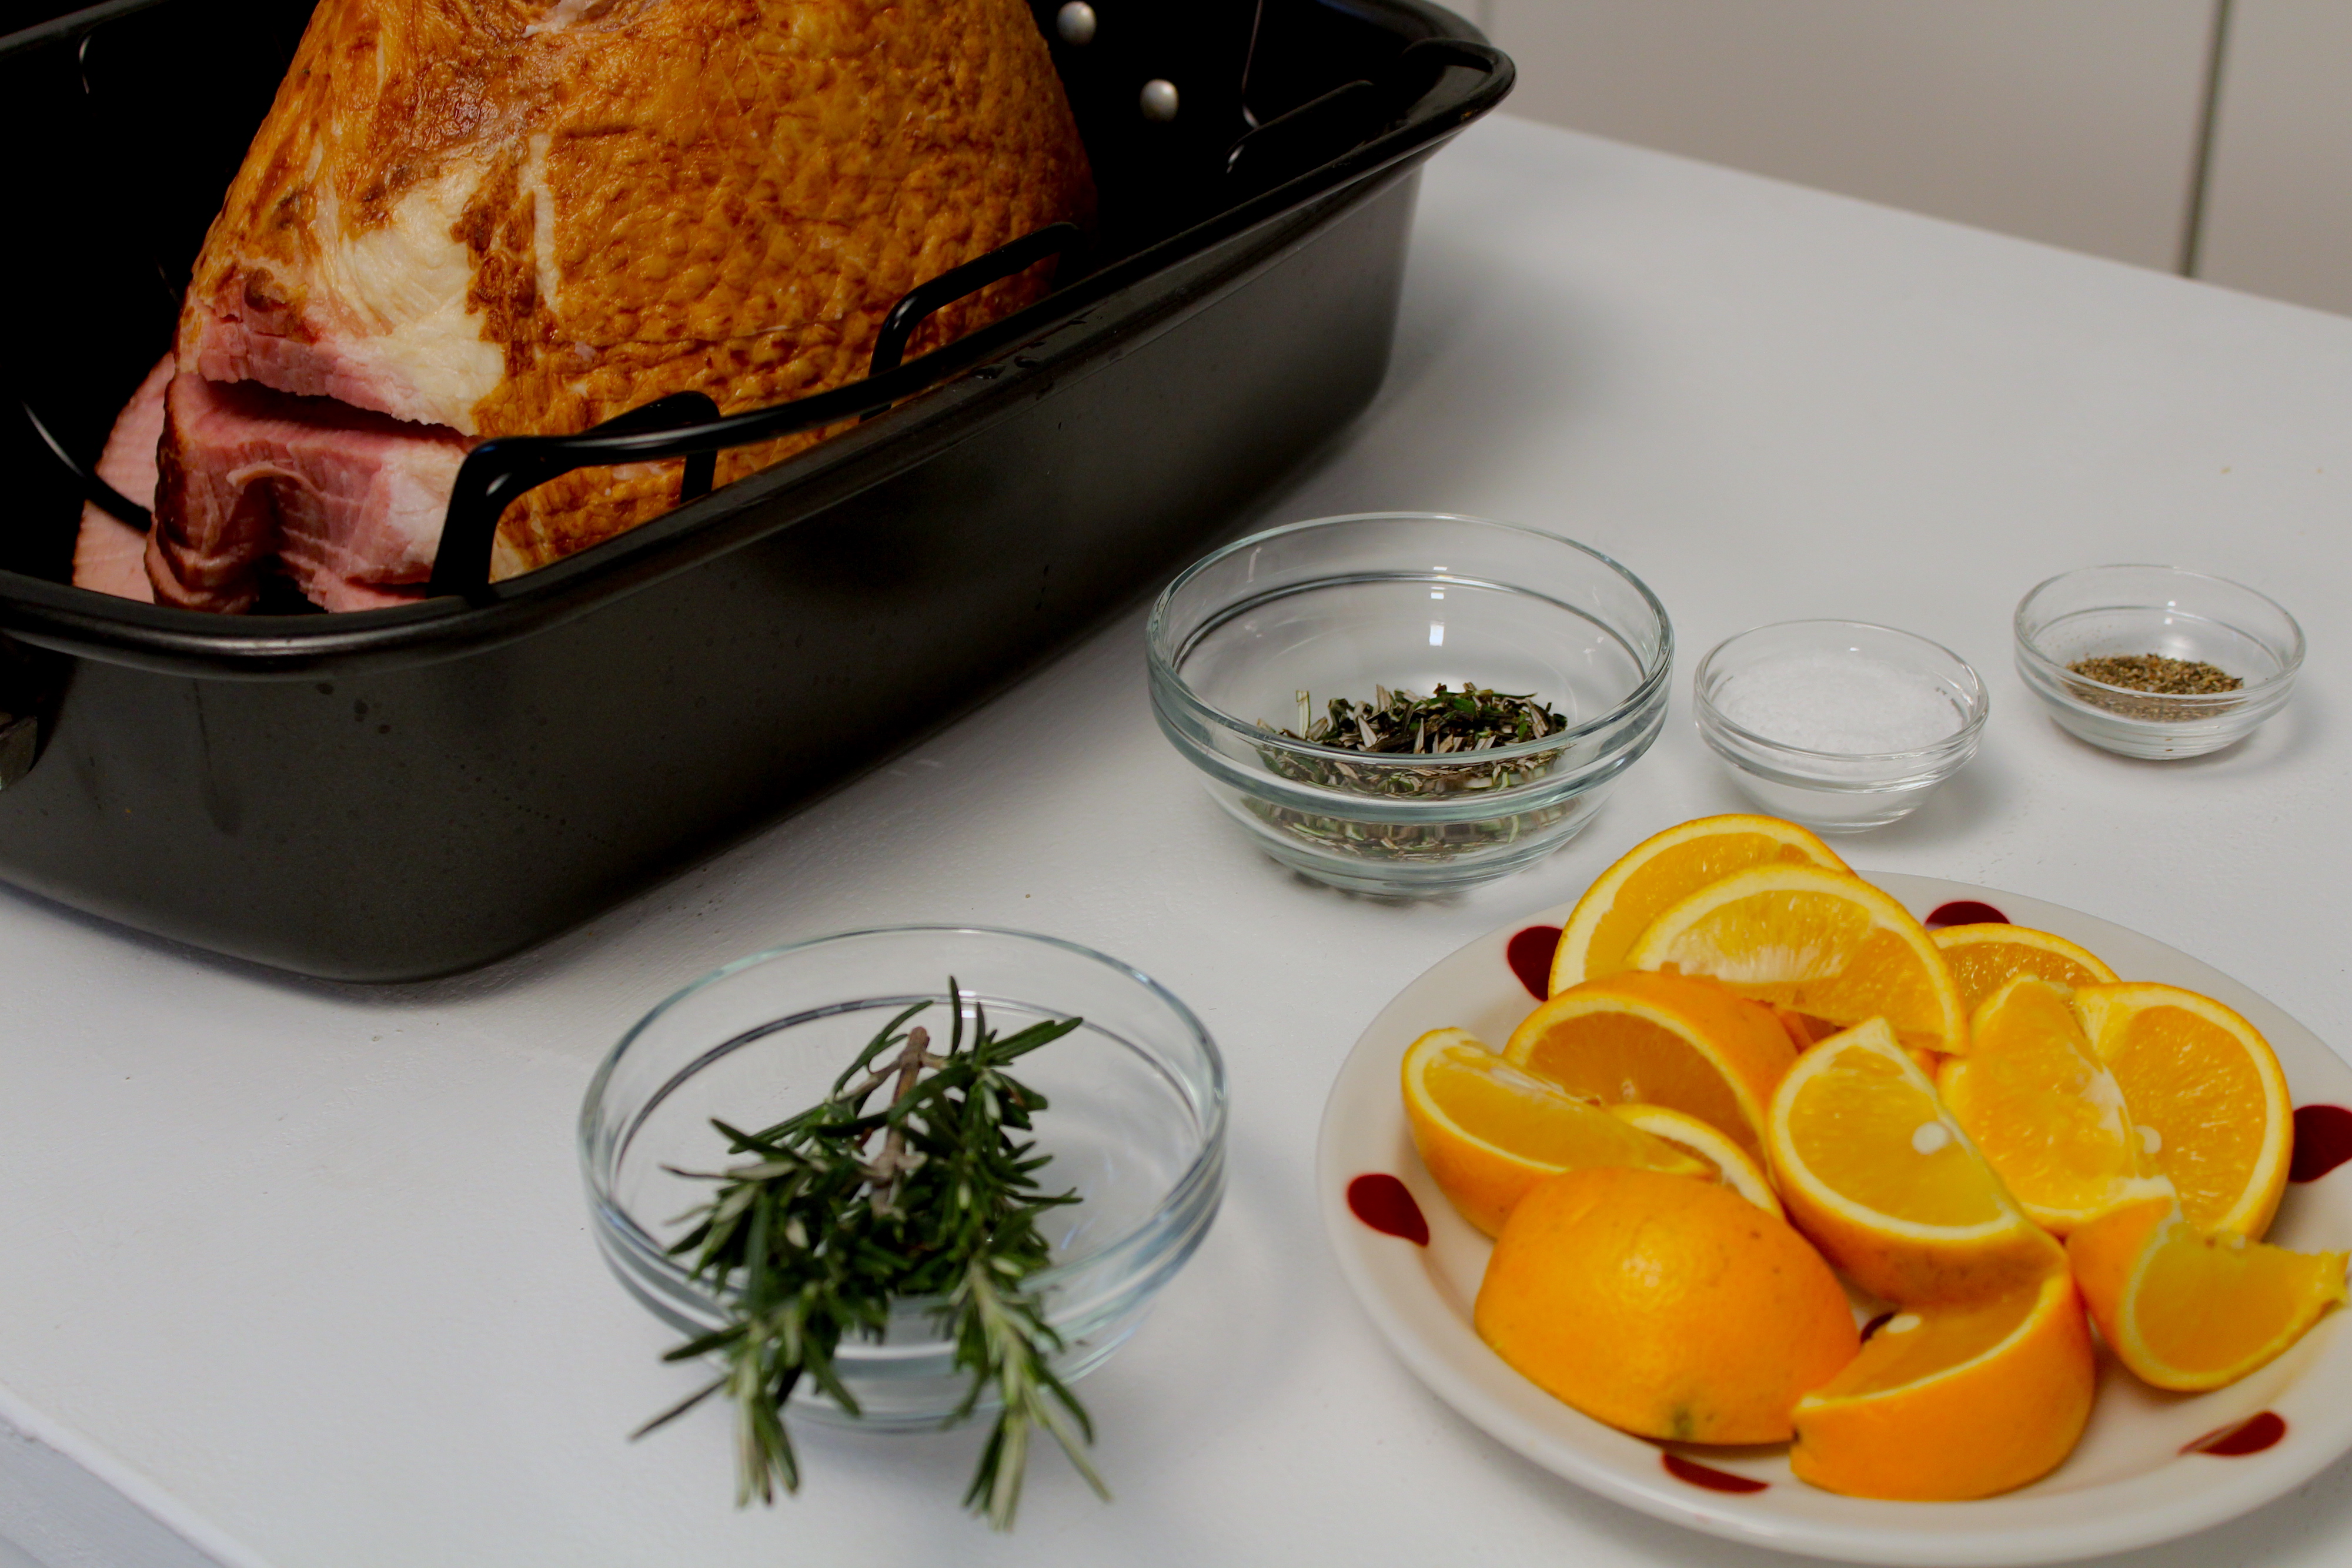
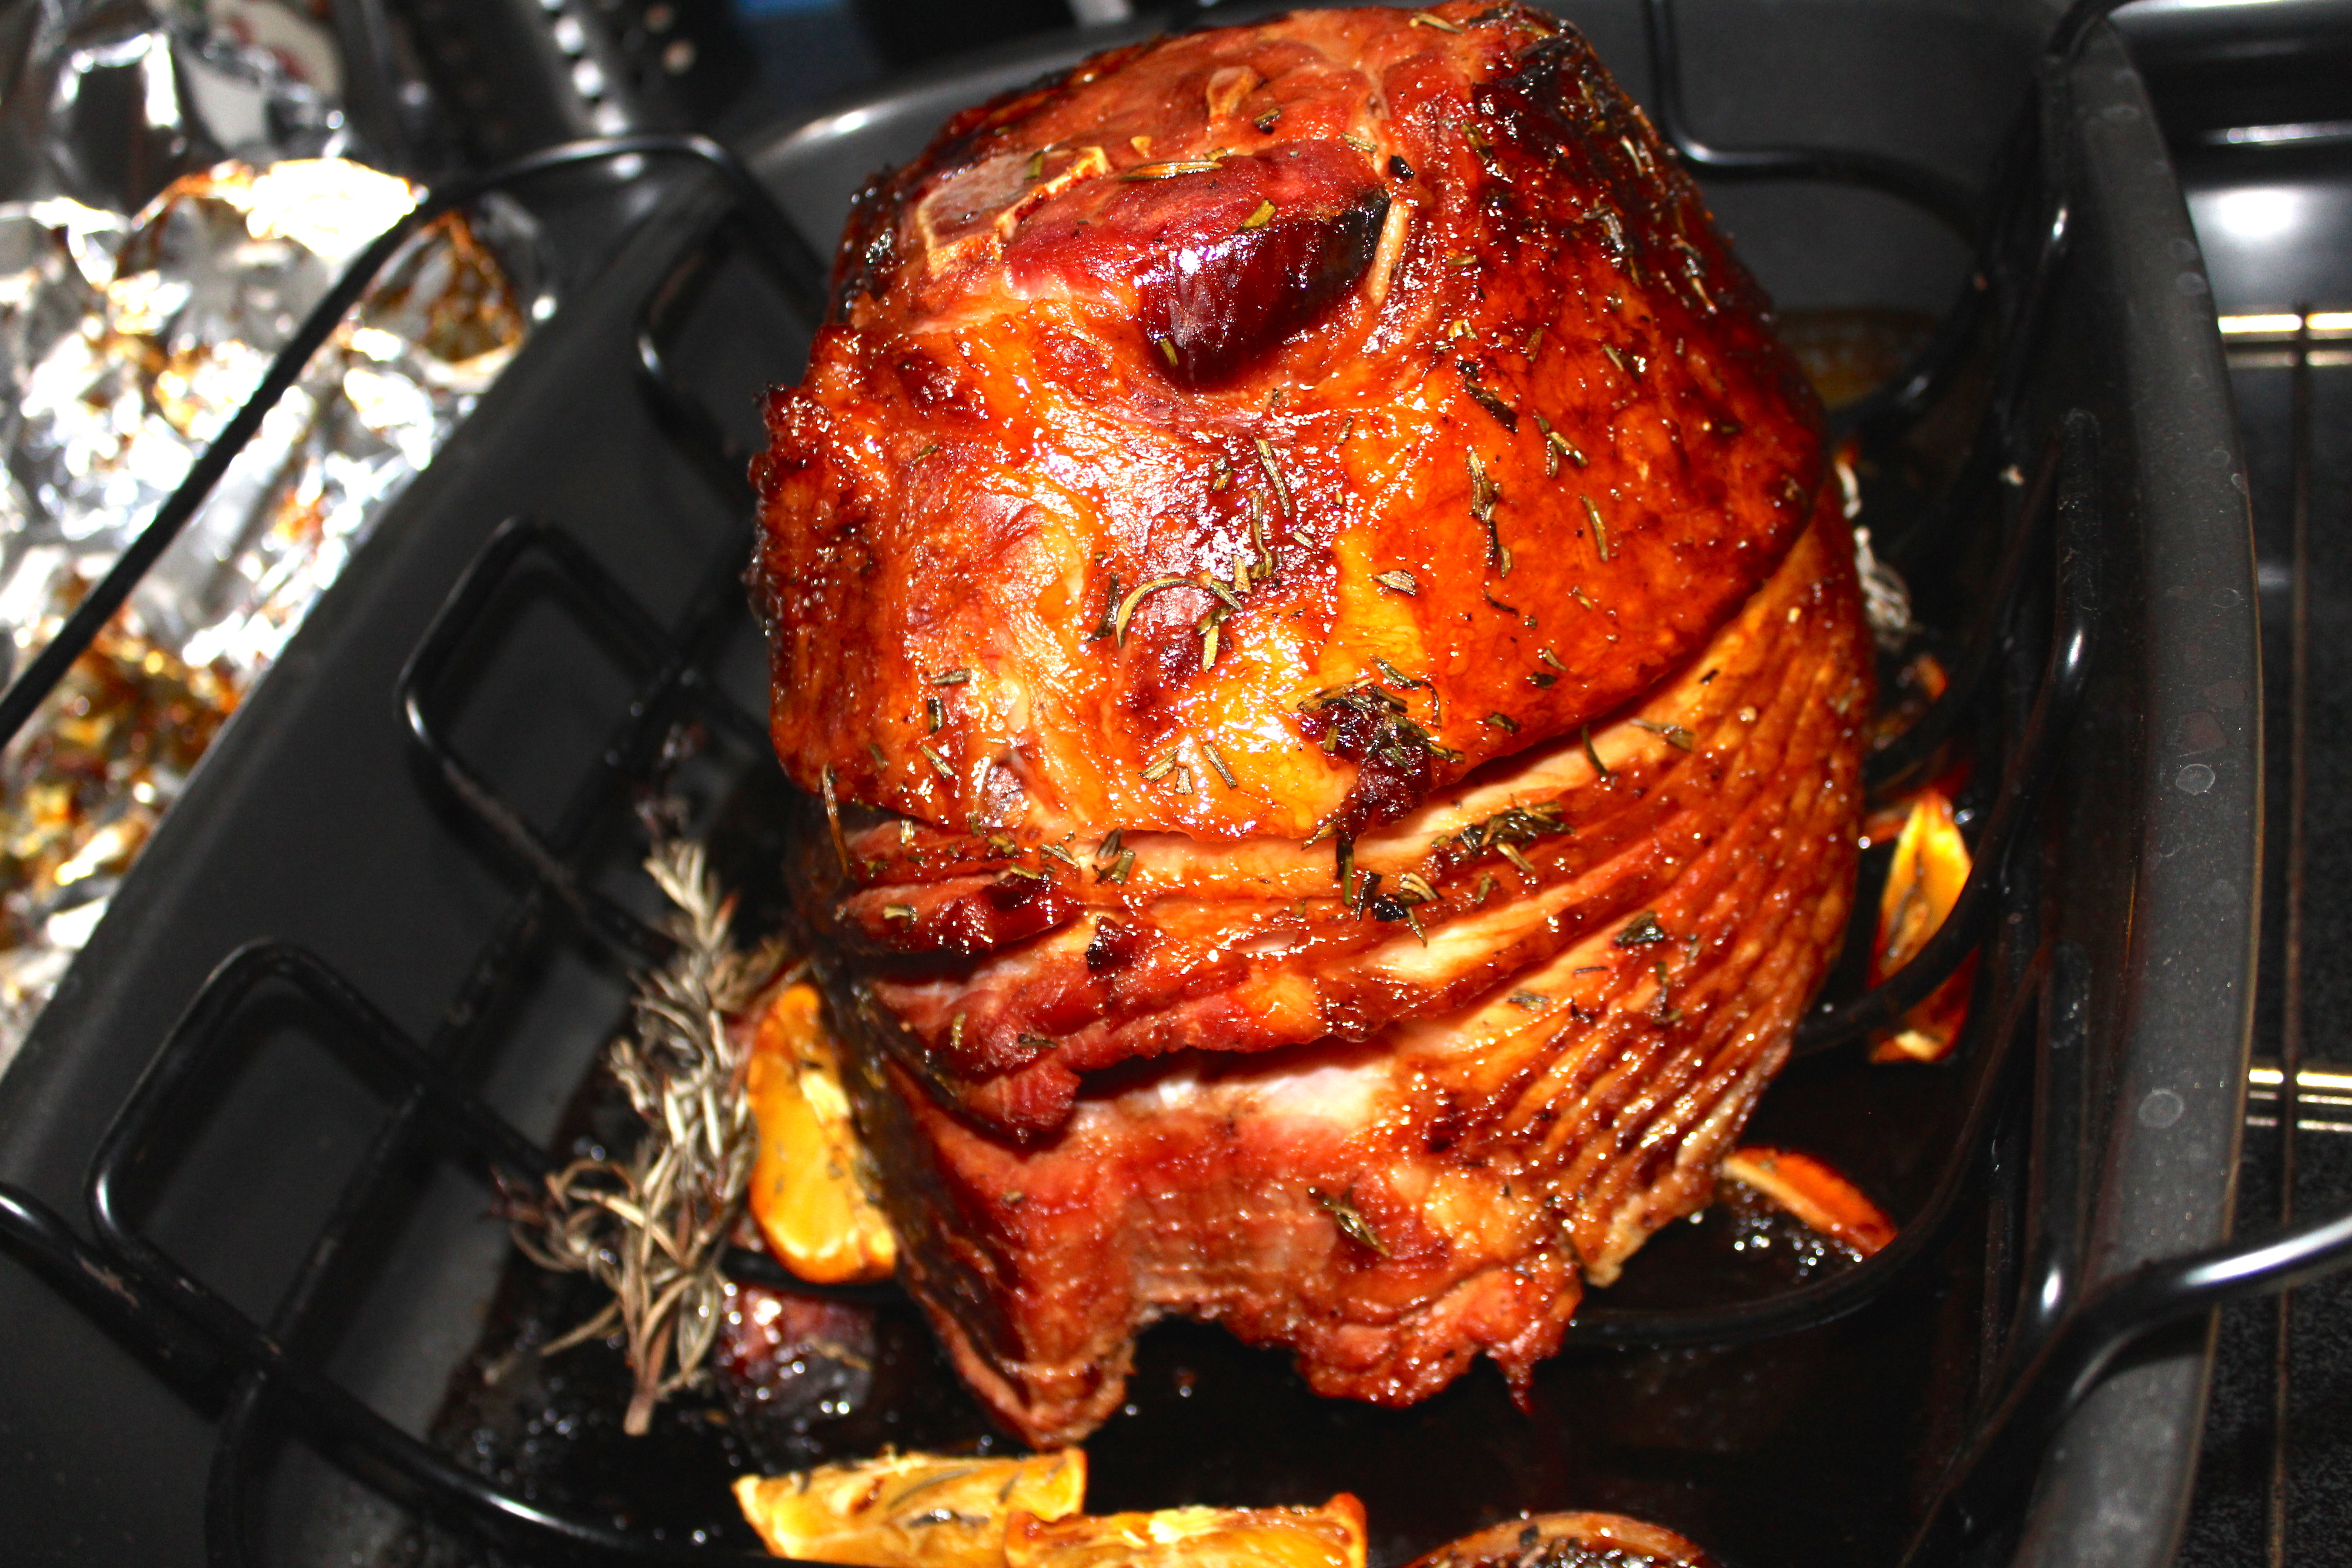
Orange and Rosemary Glazed Hormel Cure 81 Ham: This ham is already cooked, and our glaze only has two ingredients! All we have to do is glaze and bake.
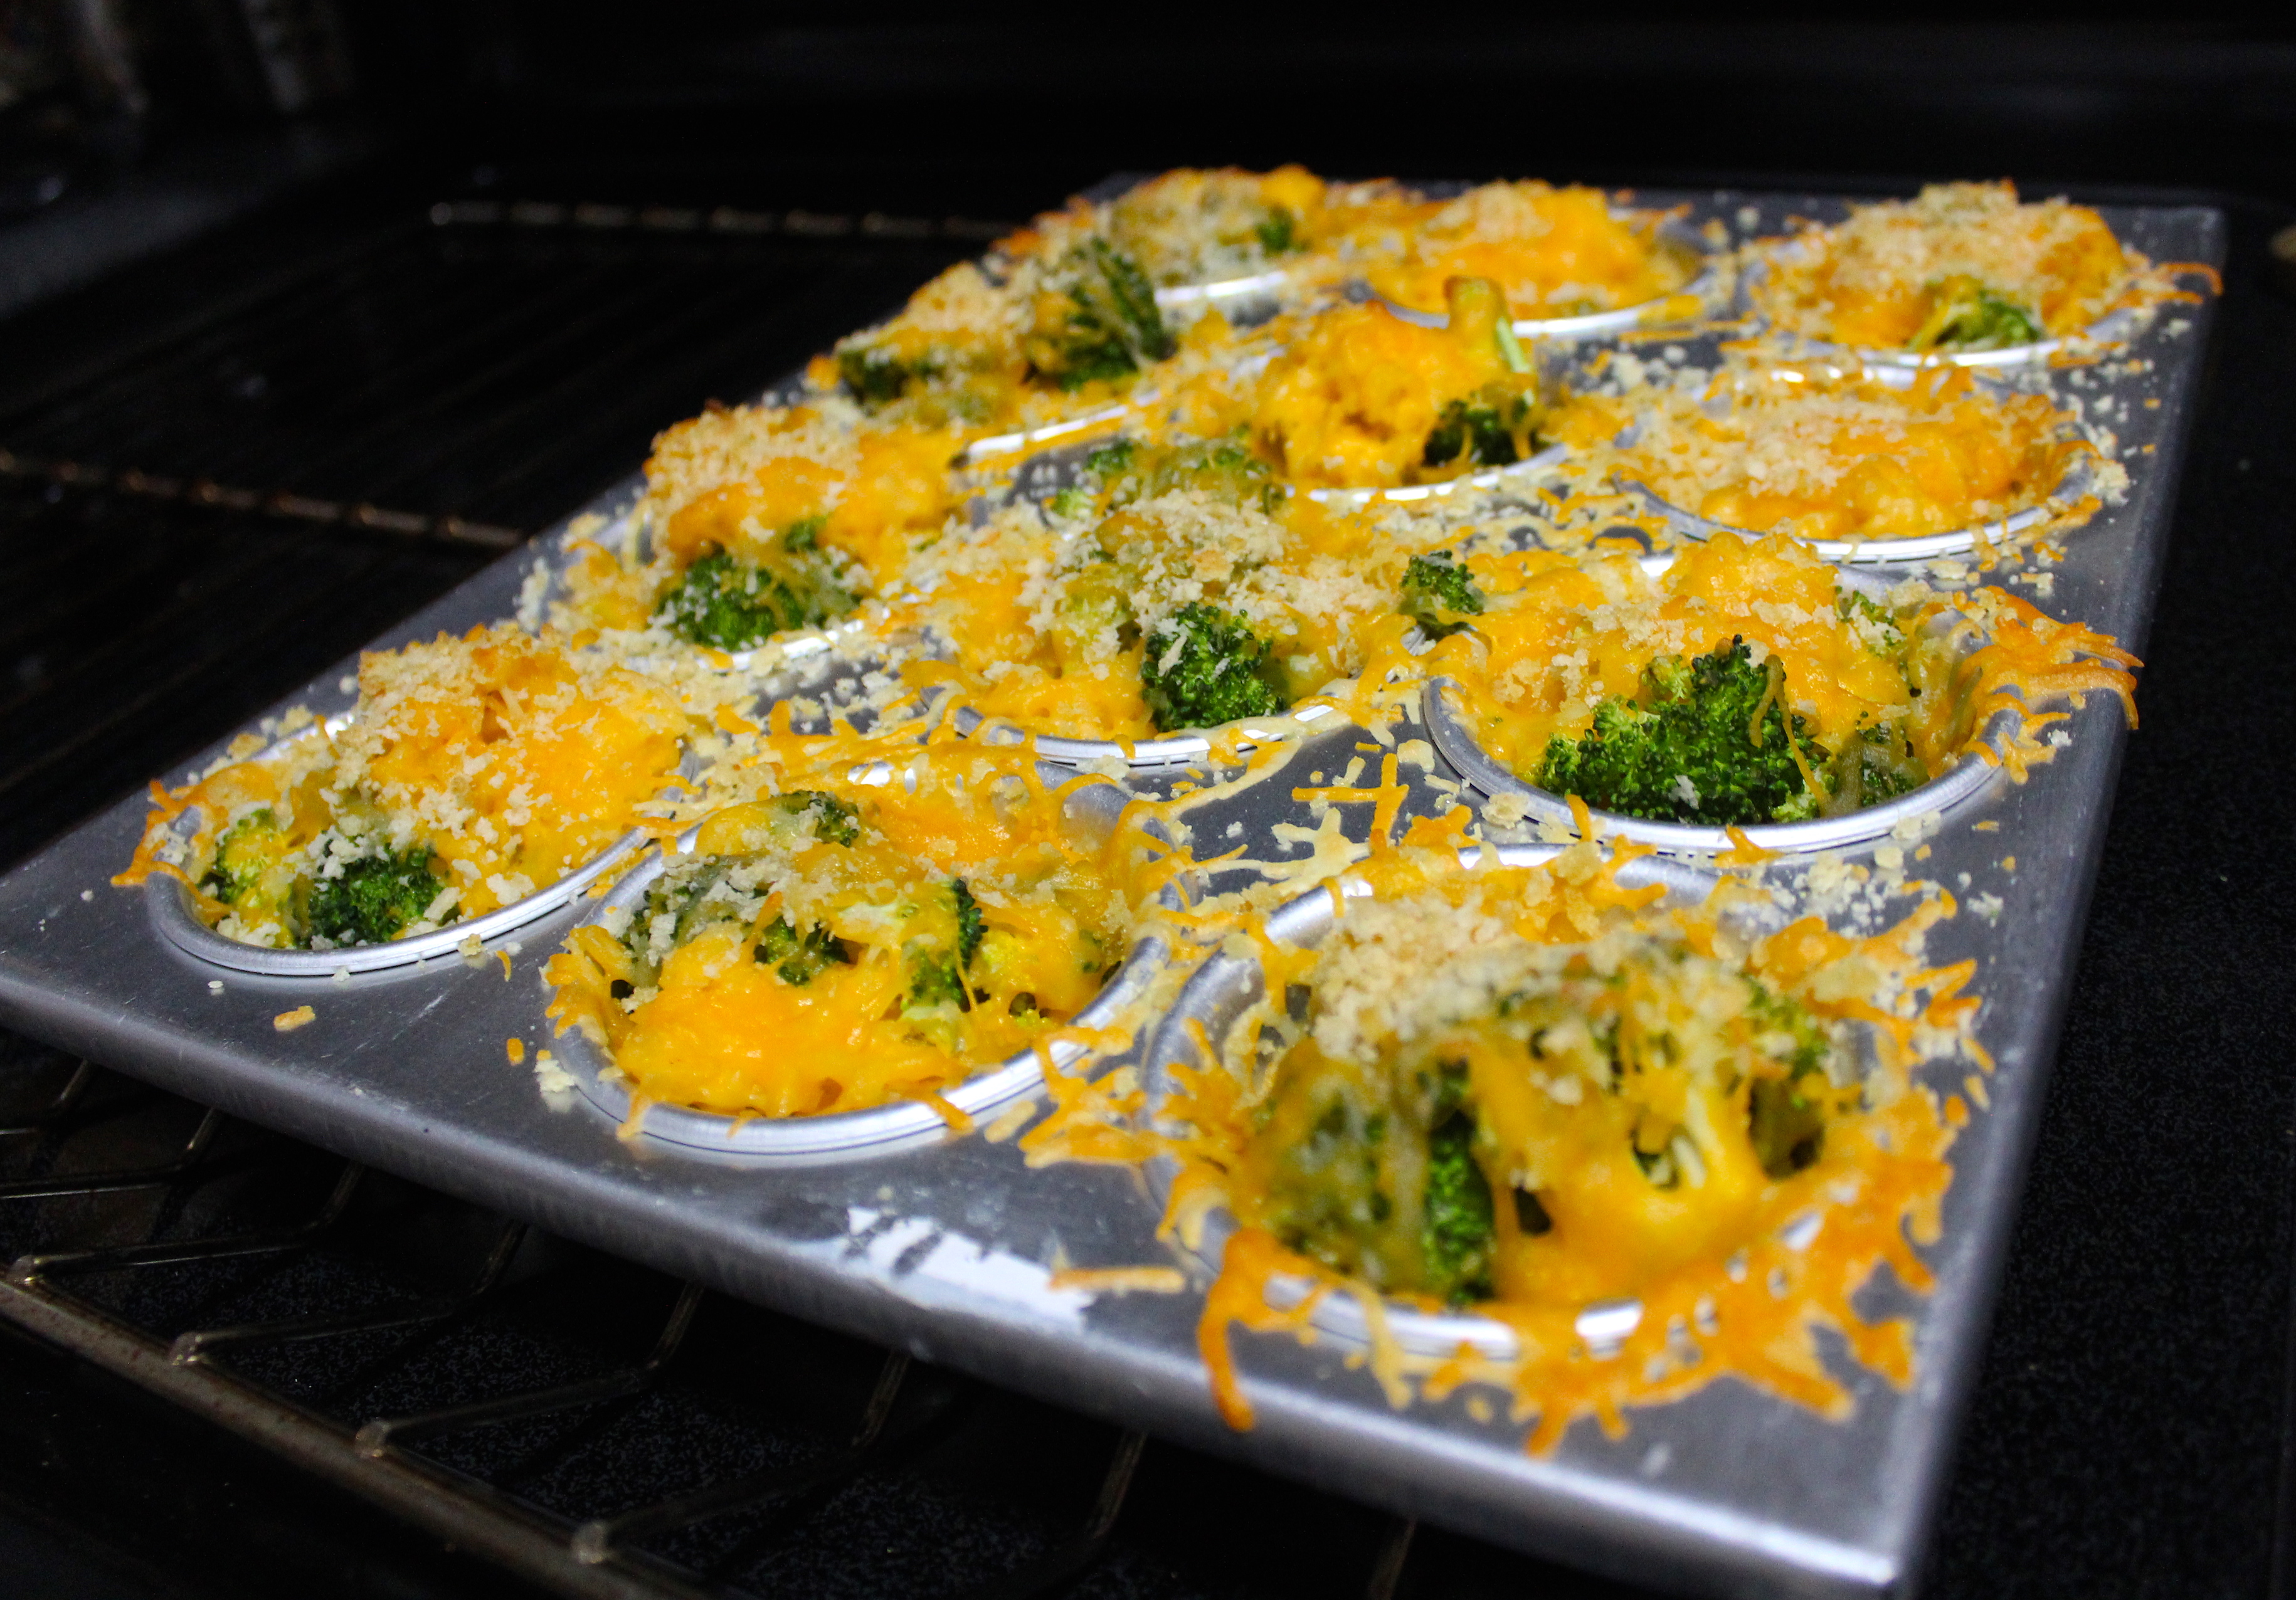
Golden broccoli and cheddar rice cups: Perfect for portioning out your buffet- especially when your relatives really love the sides; as in, ahem, maybe don’t leave much for those people behind them in line.
Salted Maple Butter Sweet Potatoes: Utilizing ready-to-go, mashed potatoes takes the boiling and the pulverizing out of the equation for you. Save that bicep strength for unwrapping presents later!
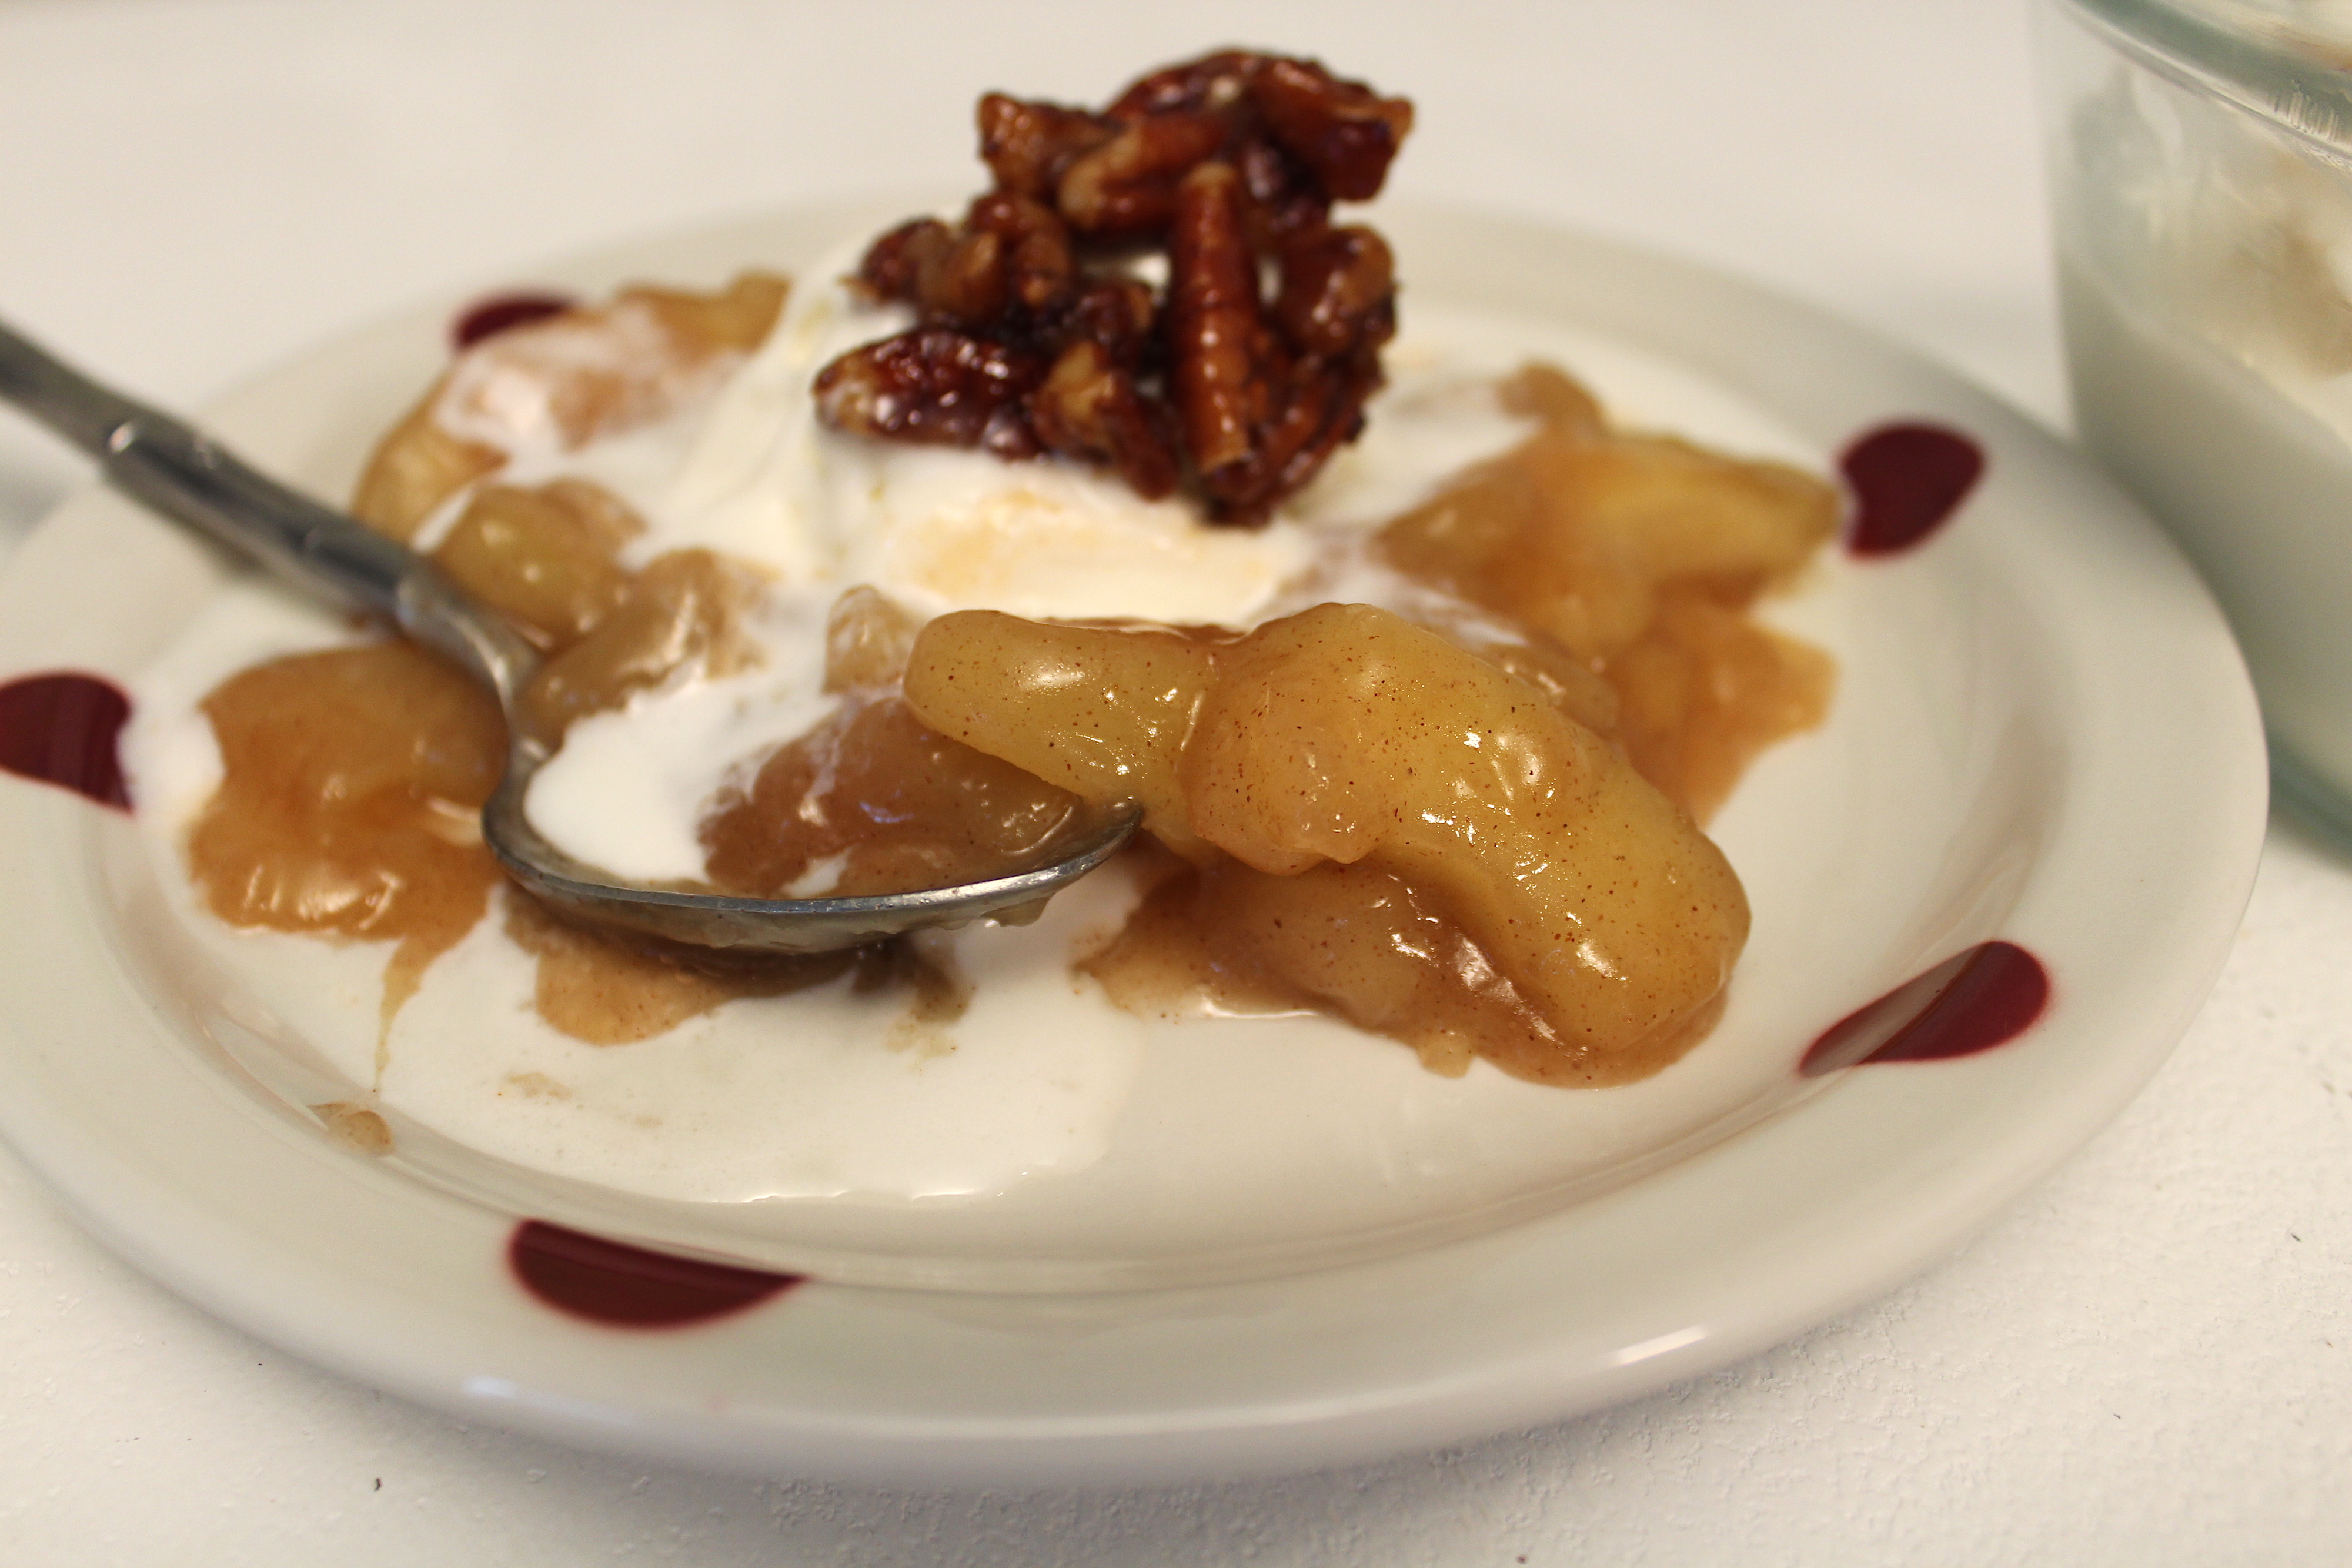
Sautéed Apples with Vanilla Bean Ice Cream and Candied Pecans: Sweet apples with creamy ice cream and candied pecans. Yessss pleeeassee!
Oh AND surprise!! The Hormel team also took some sweet behind-the-scenes photos I thought you guys would dig.
Let the film roll begin!
Sharing my love of ham with the camera!Our broccoli-cheddar beauties baking up in the oven.Our Cherrywood Cure 81 ham and glaze ingredients awaiting their debut.Warm cinnamon apples, vanilla ice cream and candied pecans for dessert.Fresh sautéed asparagus with butter and lemon zest deliciousness.Sweet, caramelized glazed ham in all it’s glory.
You guys, my amazing readers and watchers- I couldn’t be more thrilled to share this video, and this season, with you. You and my friends and family- you guys are the ones that make holiday food special for me. And the fact that Hormel has made an effort to make this easy for all of us- well, I’d say that’s Luv Cooks style: having a blast, cooking delicious food, and making the people around us feel special.
So, from my kitchen to yours, may your table be full of the food, sparkle and loving warmth of a hope-filled season. I can’t imagine anything more delicious.
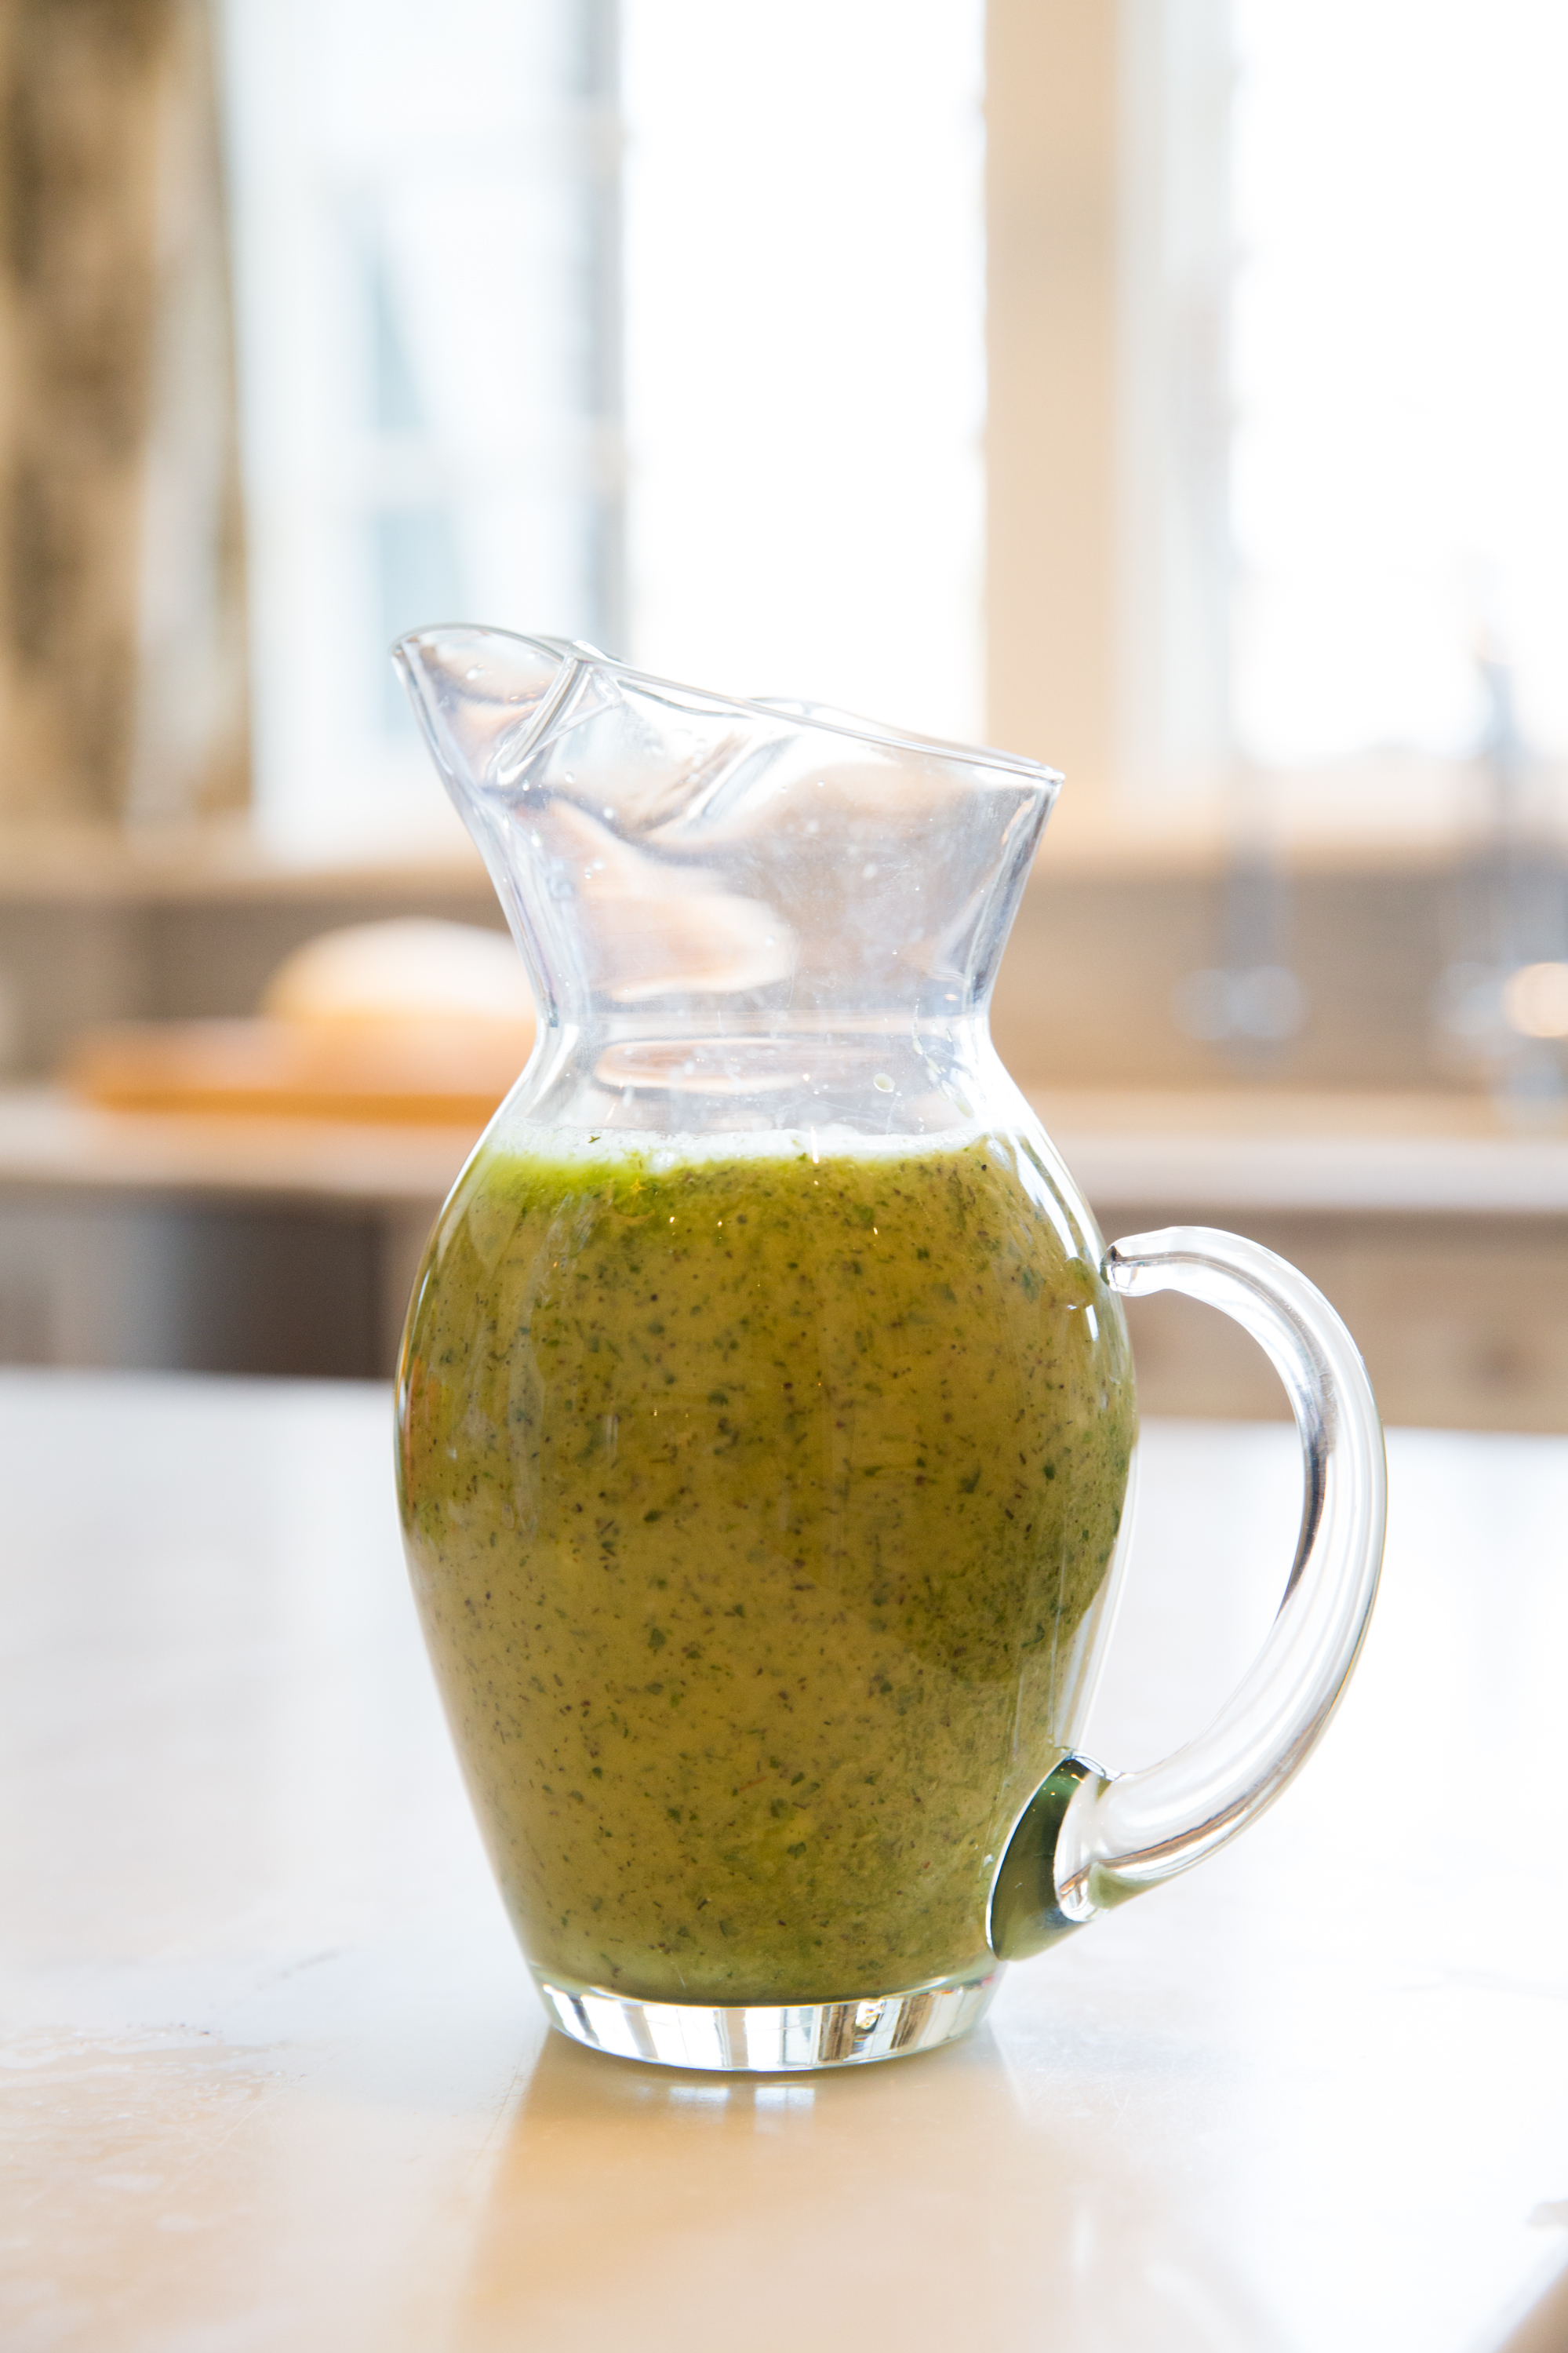
Greek dressing. The kind of dressing that carries you through college, graduation, work, marriage- with flavors that at the same time comfort and excite and brighten. The dressing that you use on everything that tastes great to make it taste even better. The dressing everyone asks for but it’s exact measurements are felt in your hands, measured by your palms, and known only after a finger dipped in the blender tells you where it stands.
Today I am honored and thrilled to share with you the dressing; the one that Buffy at The Style Gathering has known for years. Just click on those links and you will find her incredible recipe. And y‘all– I am part Greek (my grandfather’s name is Dionysus) and I can envision my great ancestors now, applauding and cheering Buffy and I on as we used this dressing to marinate, drizzle, and accent some amazing spring dishes that we are excited to share with you this week.
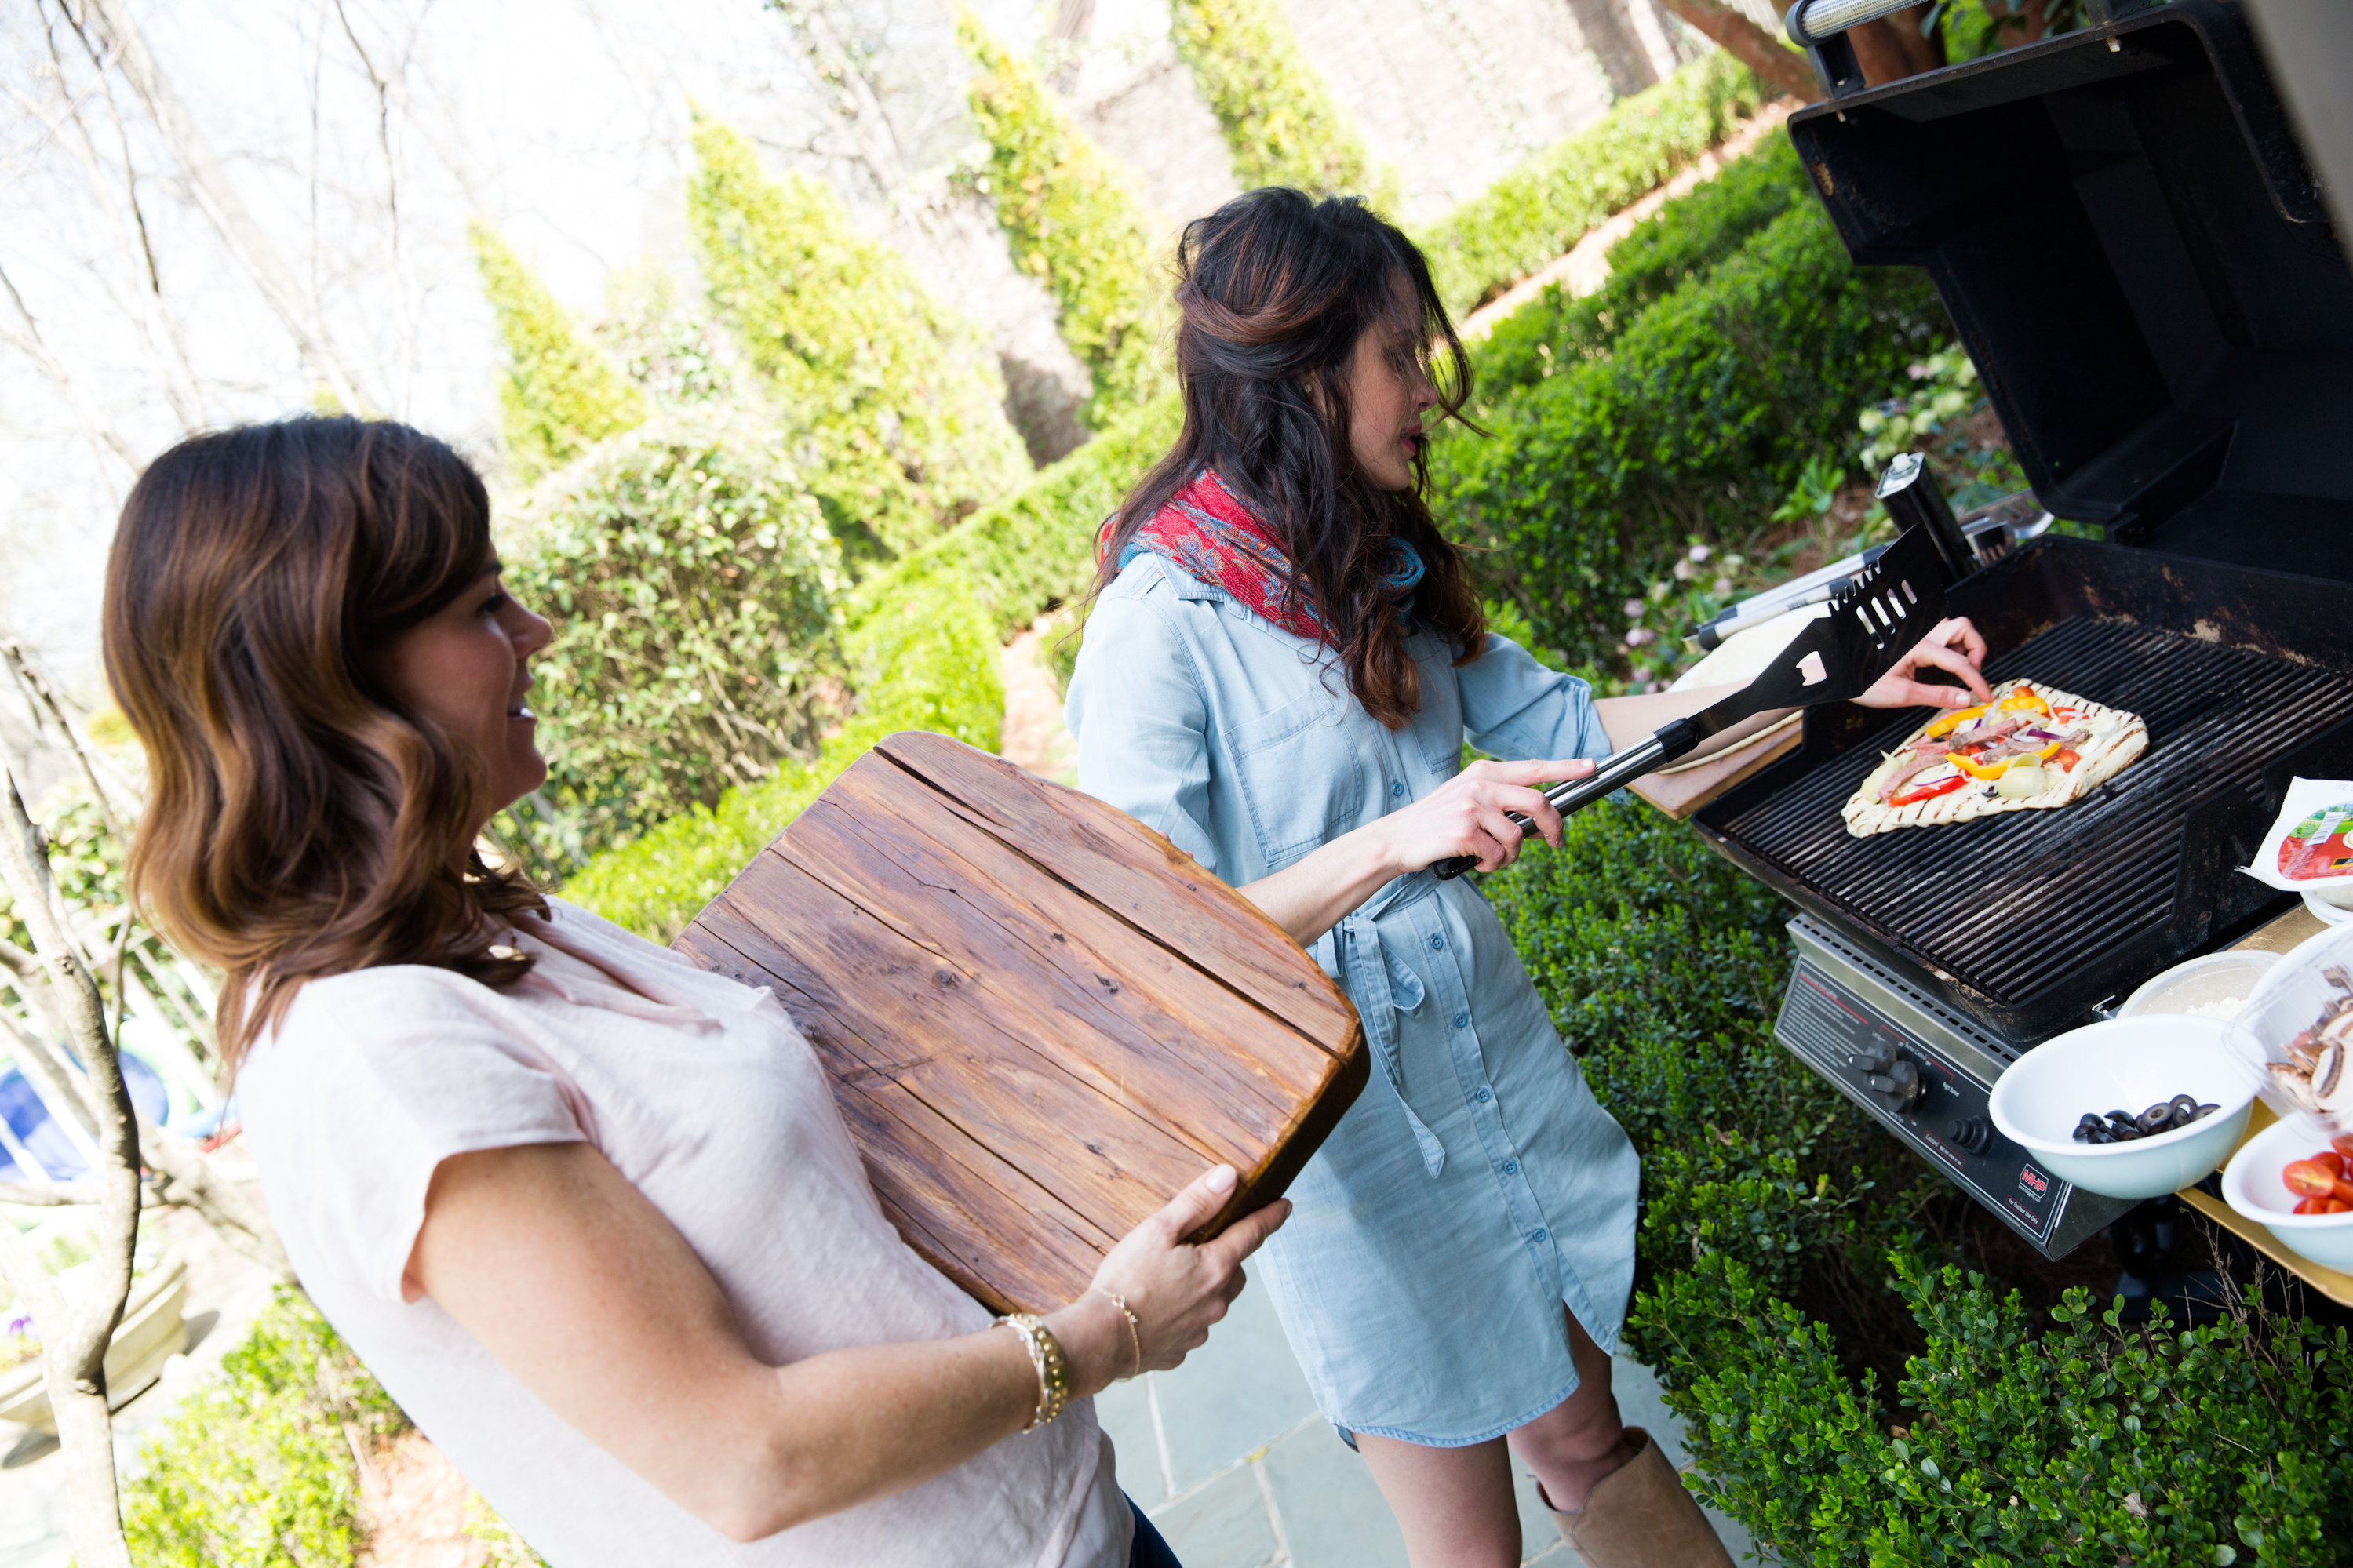
For those of you who may not know Buffy (above left), she is not only beautiful, she is talented. Her blog is a treasure of Southern style-beautiful clothes, food, travel, more yummy food, and entertaining ideas- and she is the resident expert on all things lovely. Her eye for beauty and design is refreshing to be around and I absolutely loved being in the kitchen with her.
Rolling out the pizza dough
Also, needless to say, her incredible photographer Jennifer Hagler did great work on making our food look as incredible as it does.
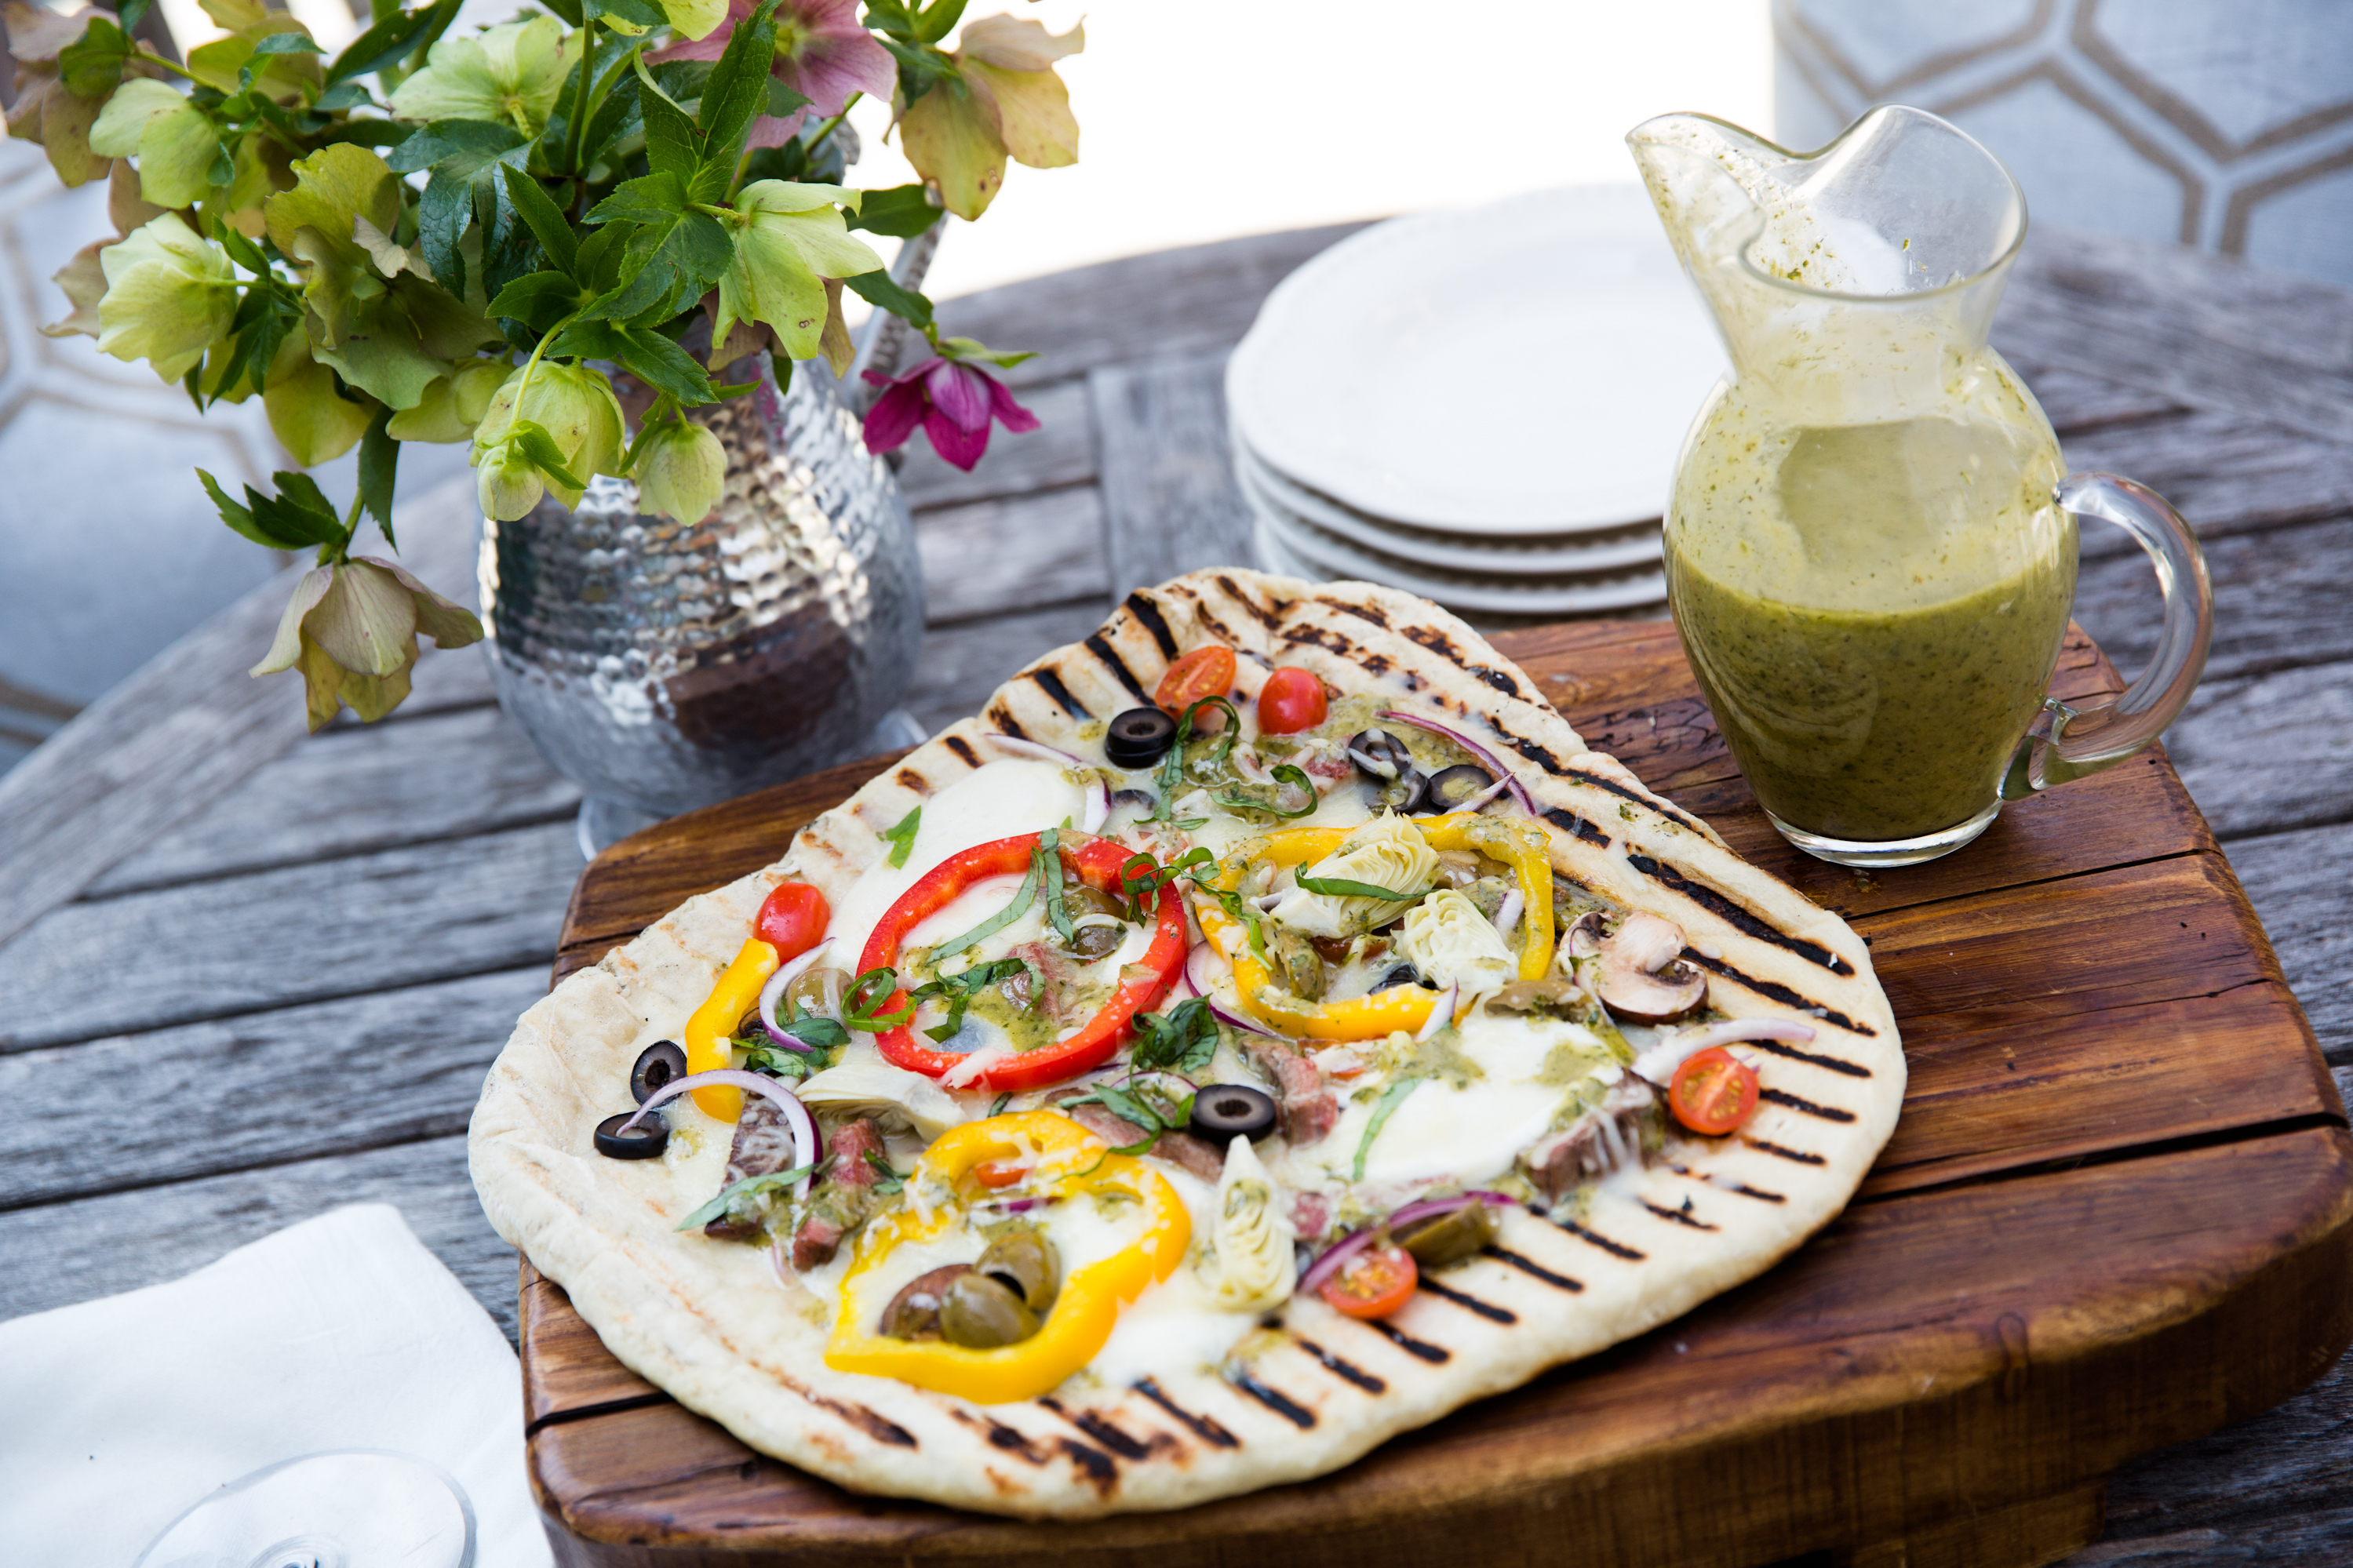
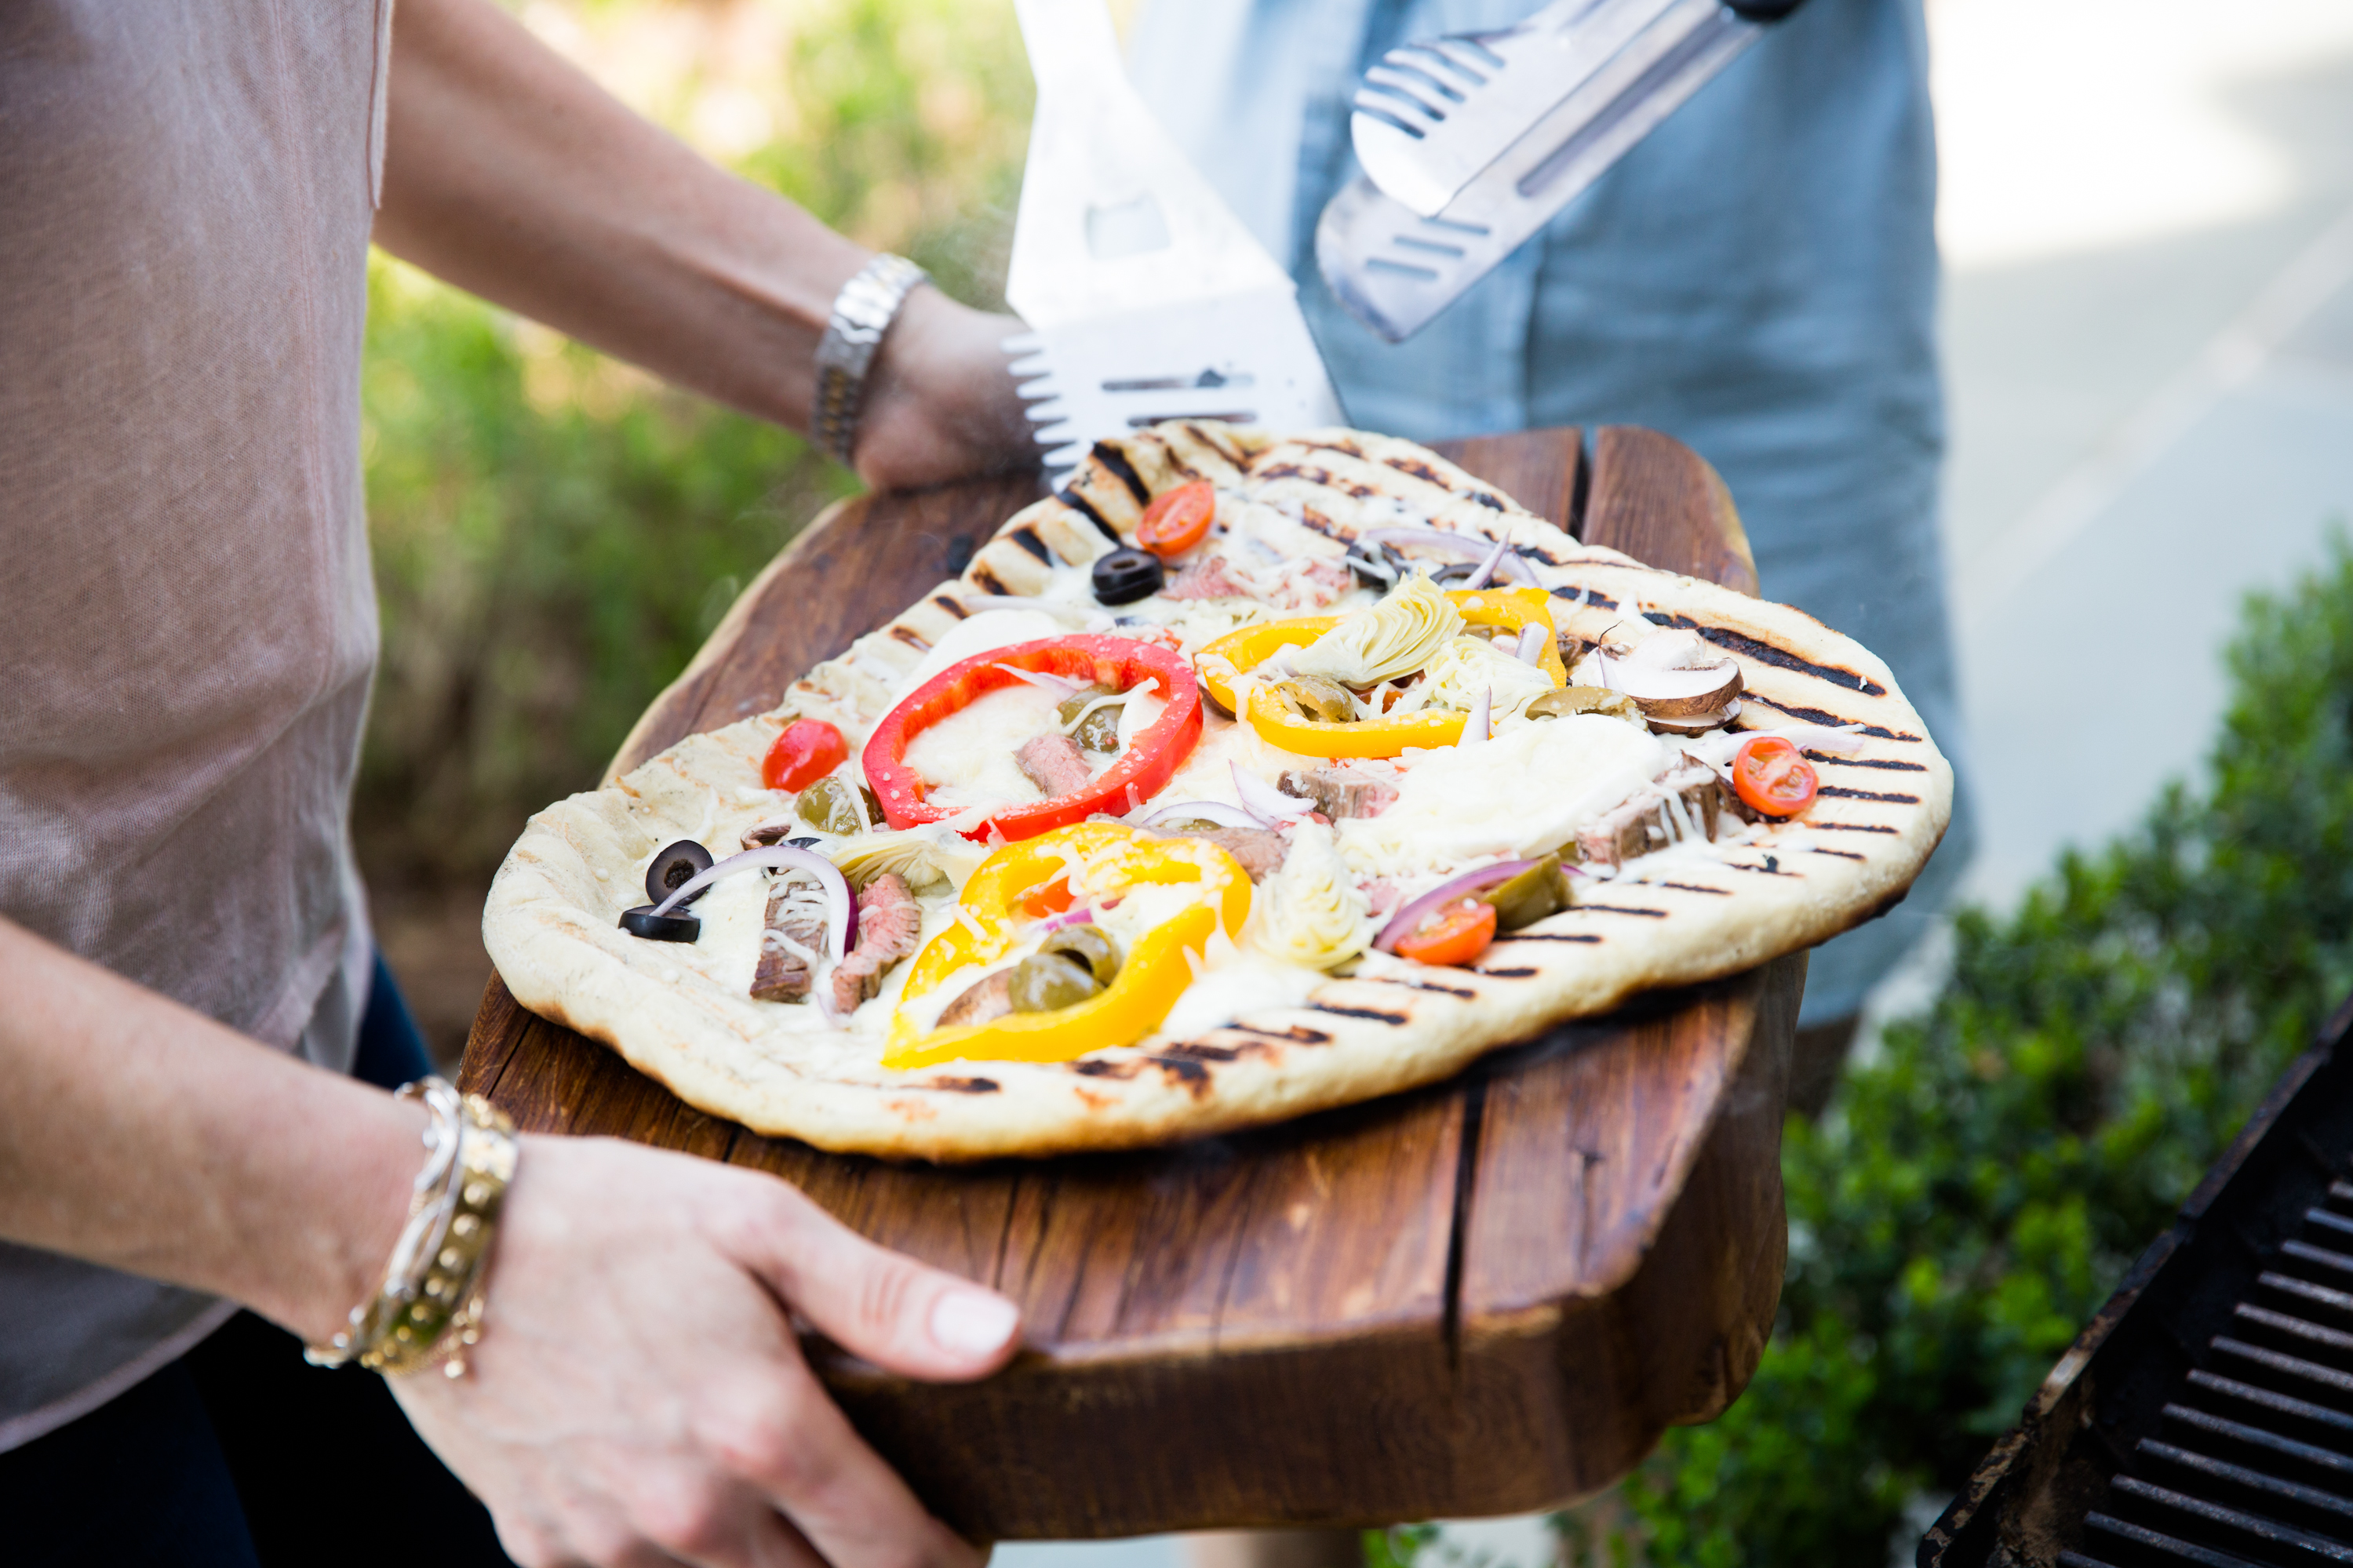
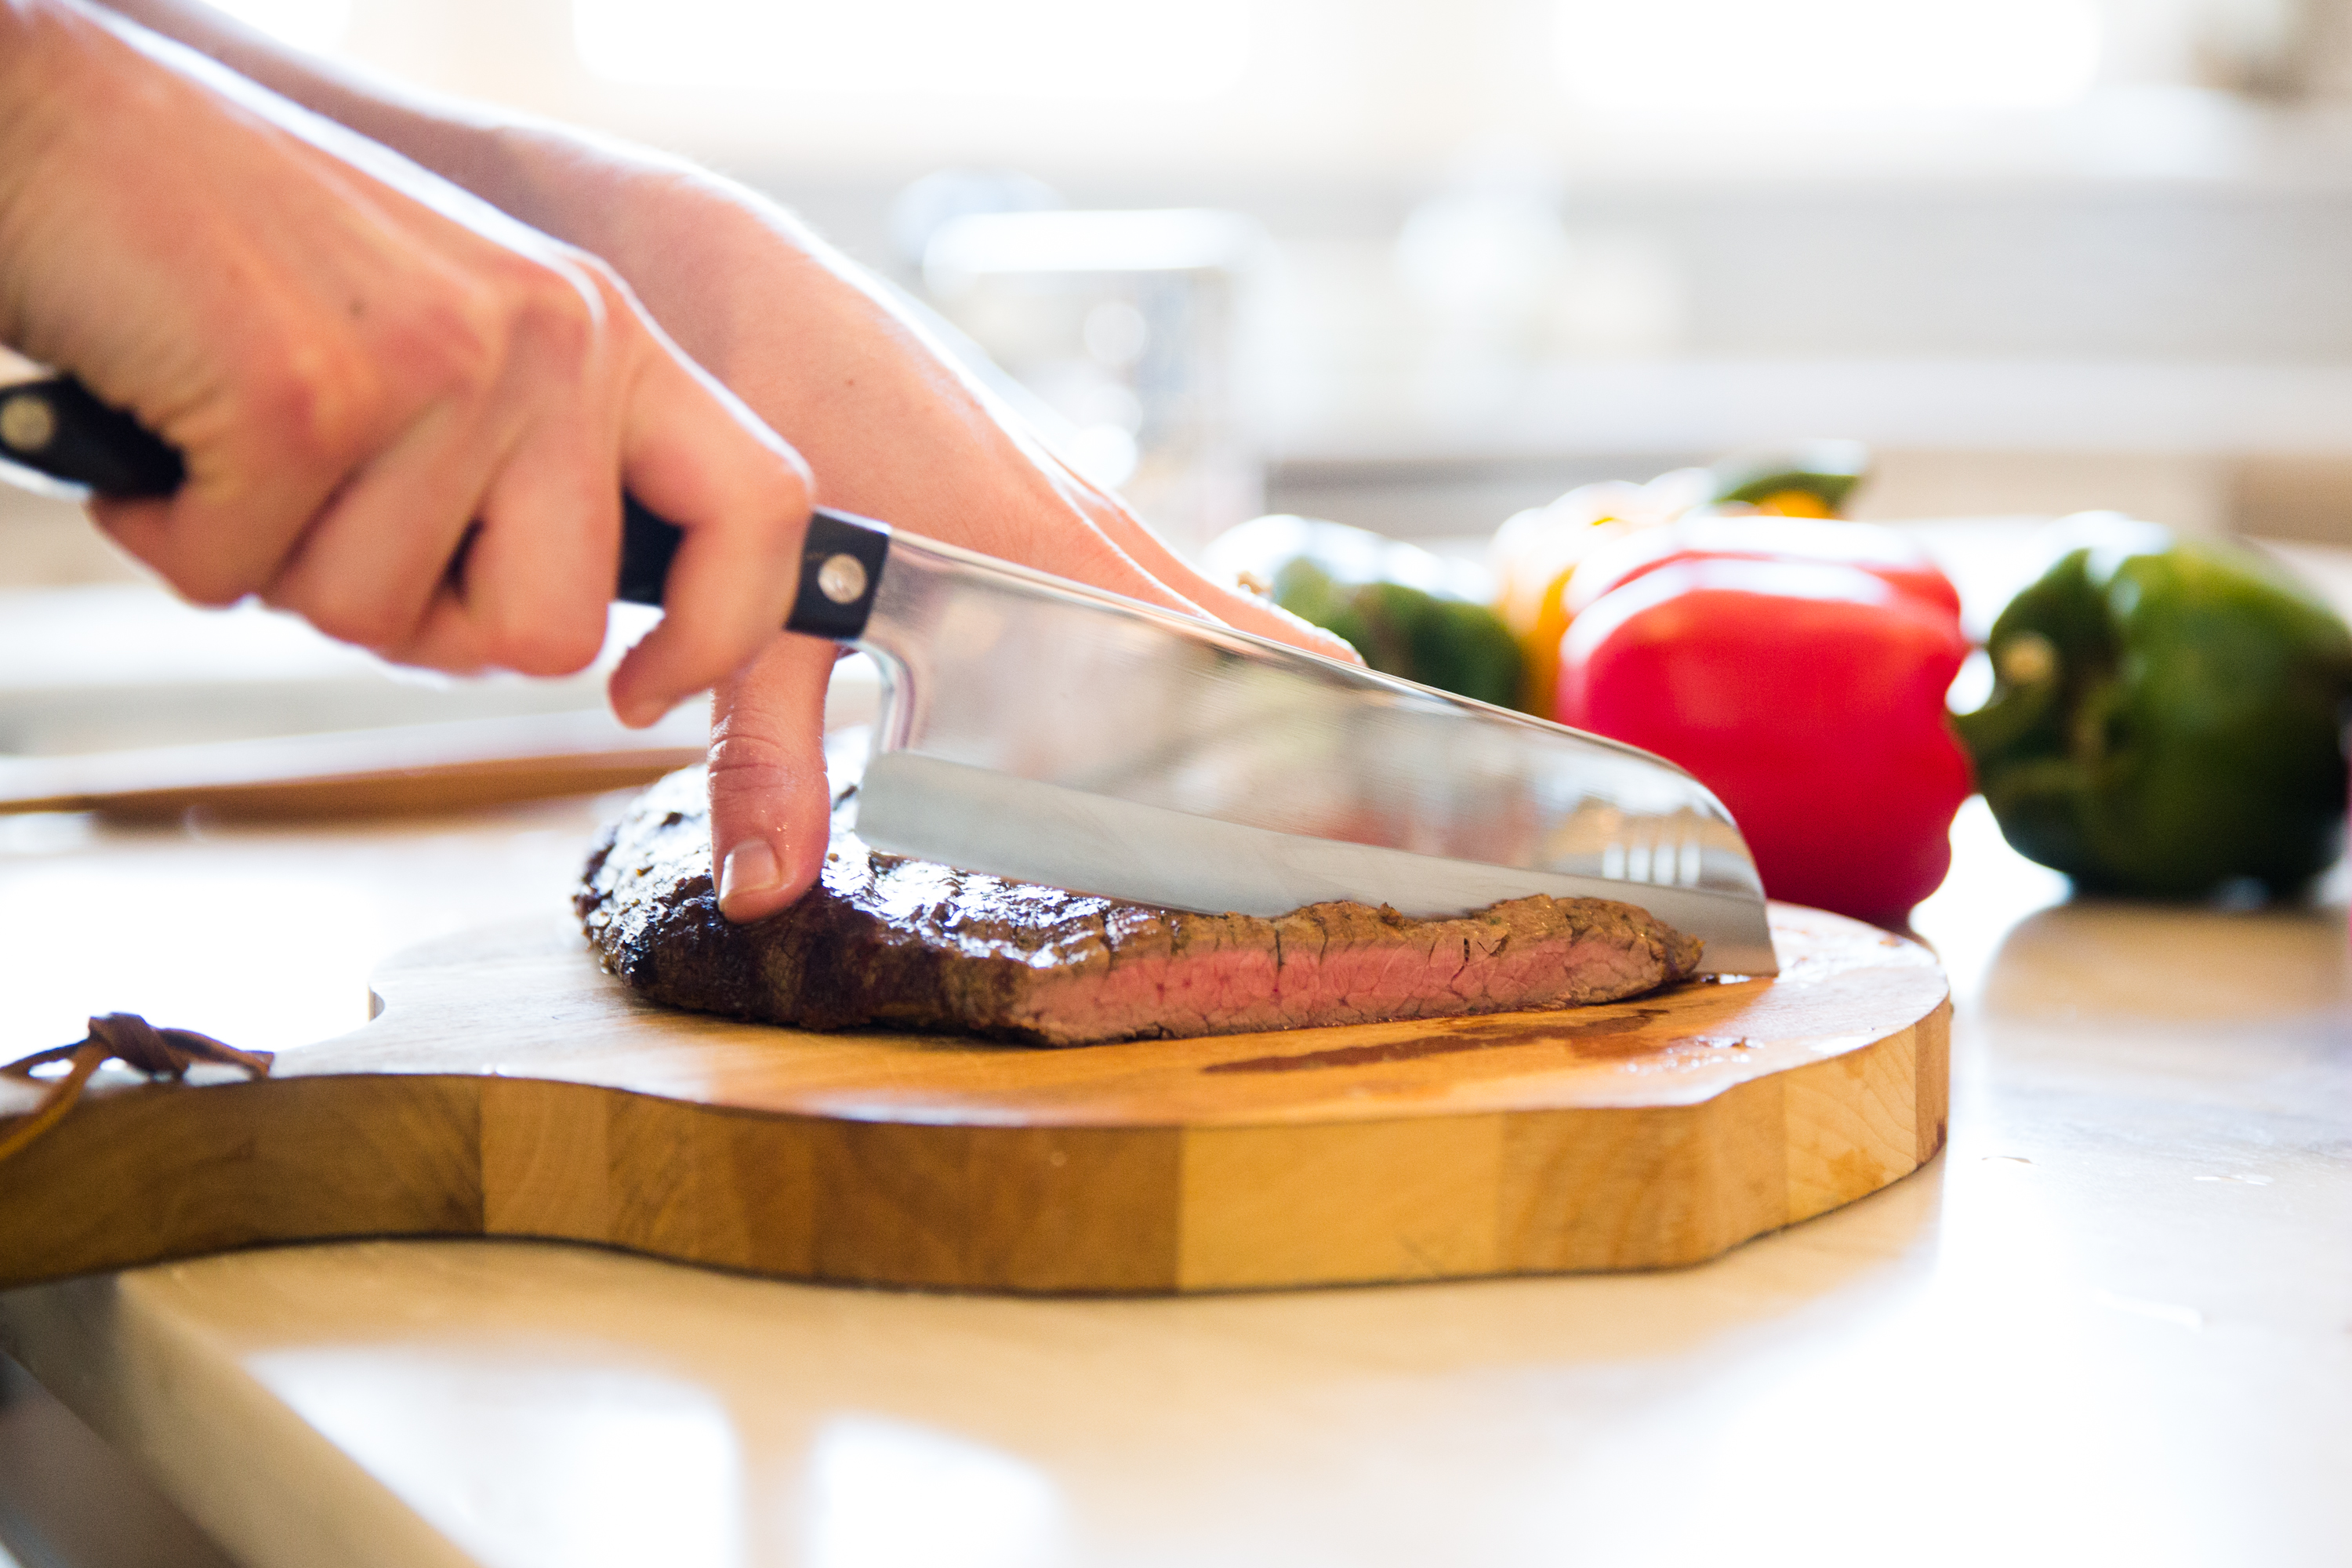
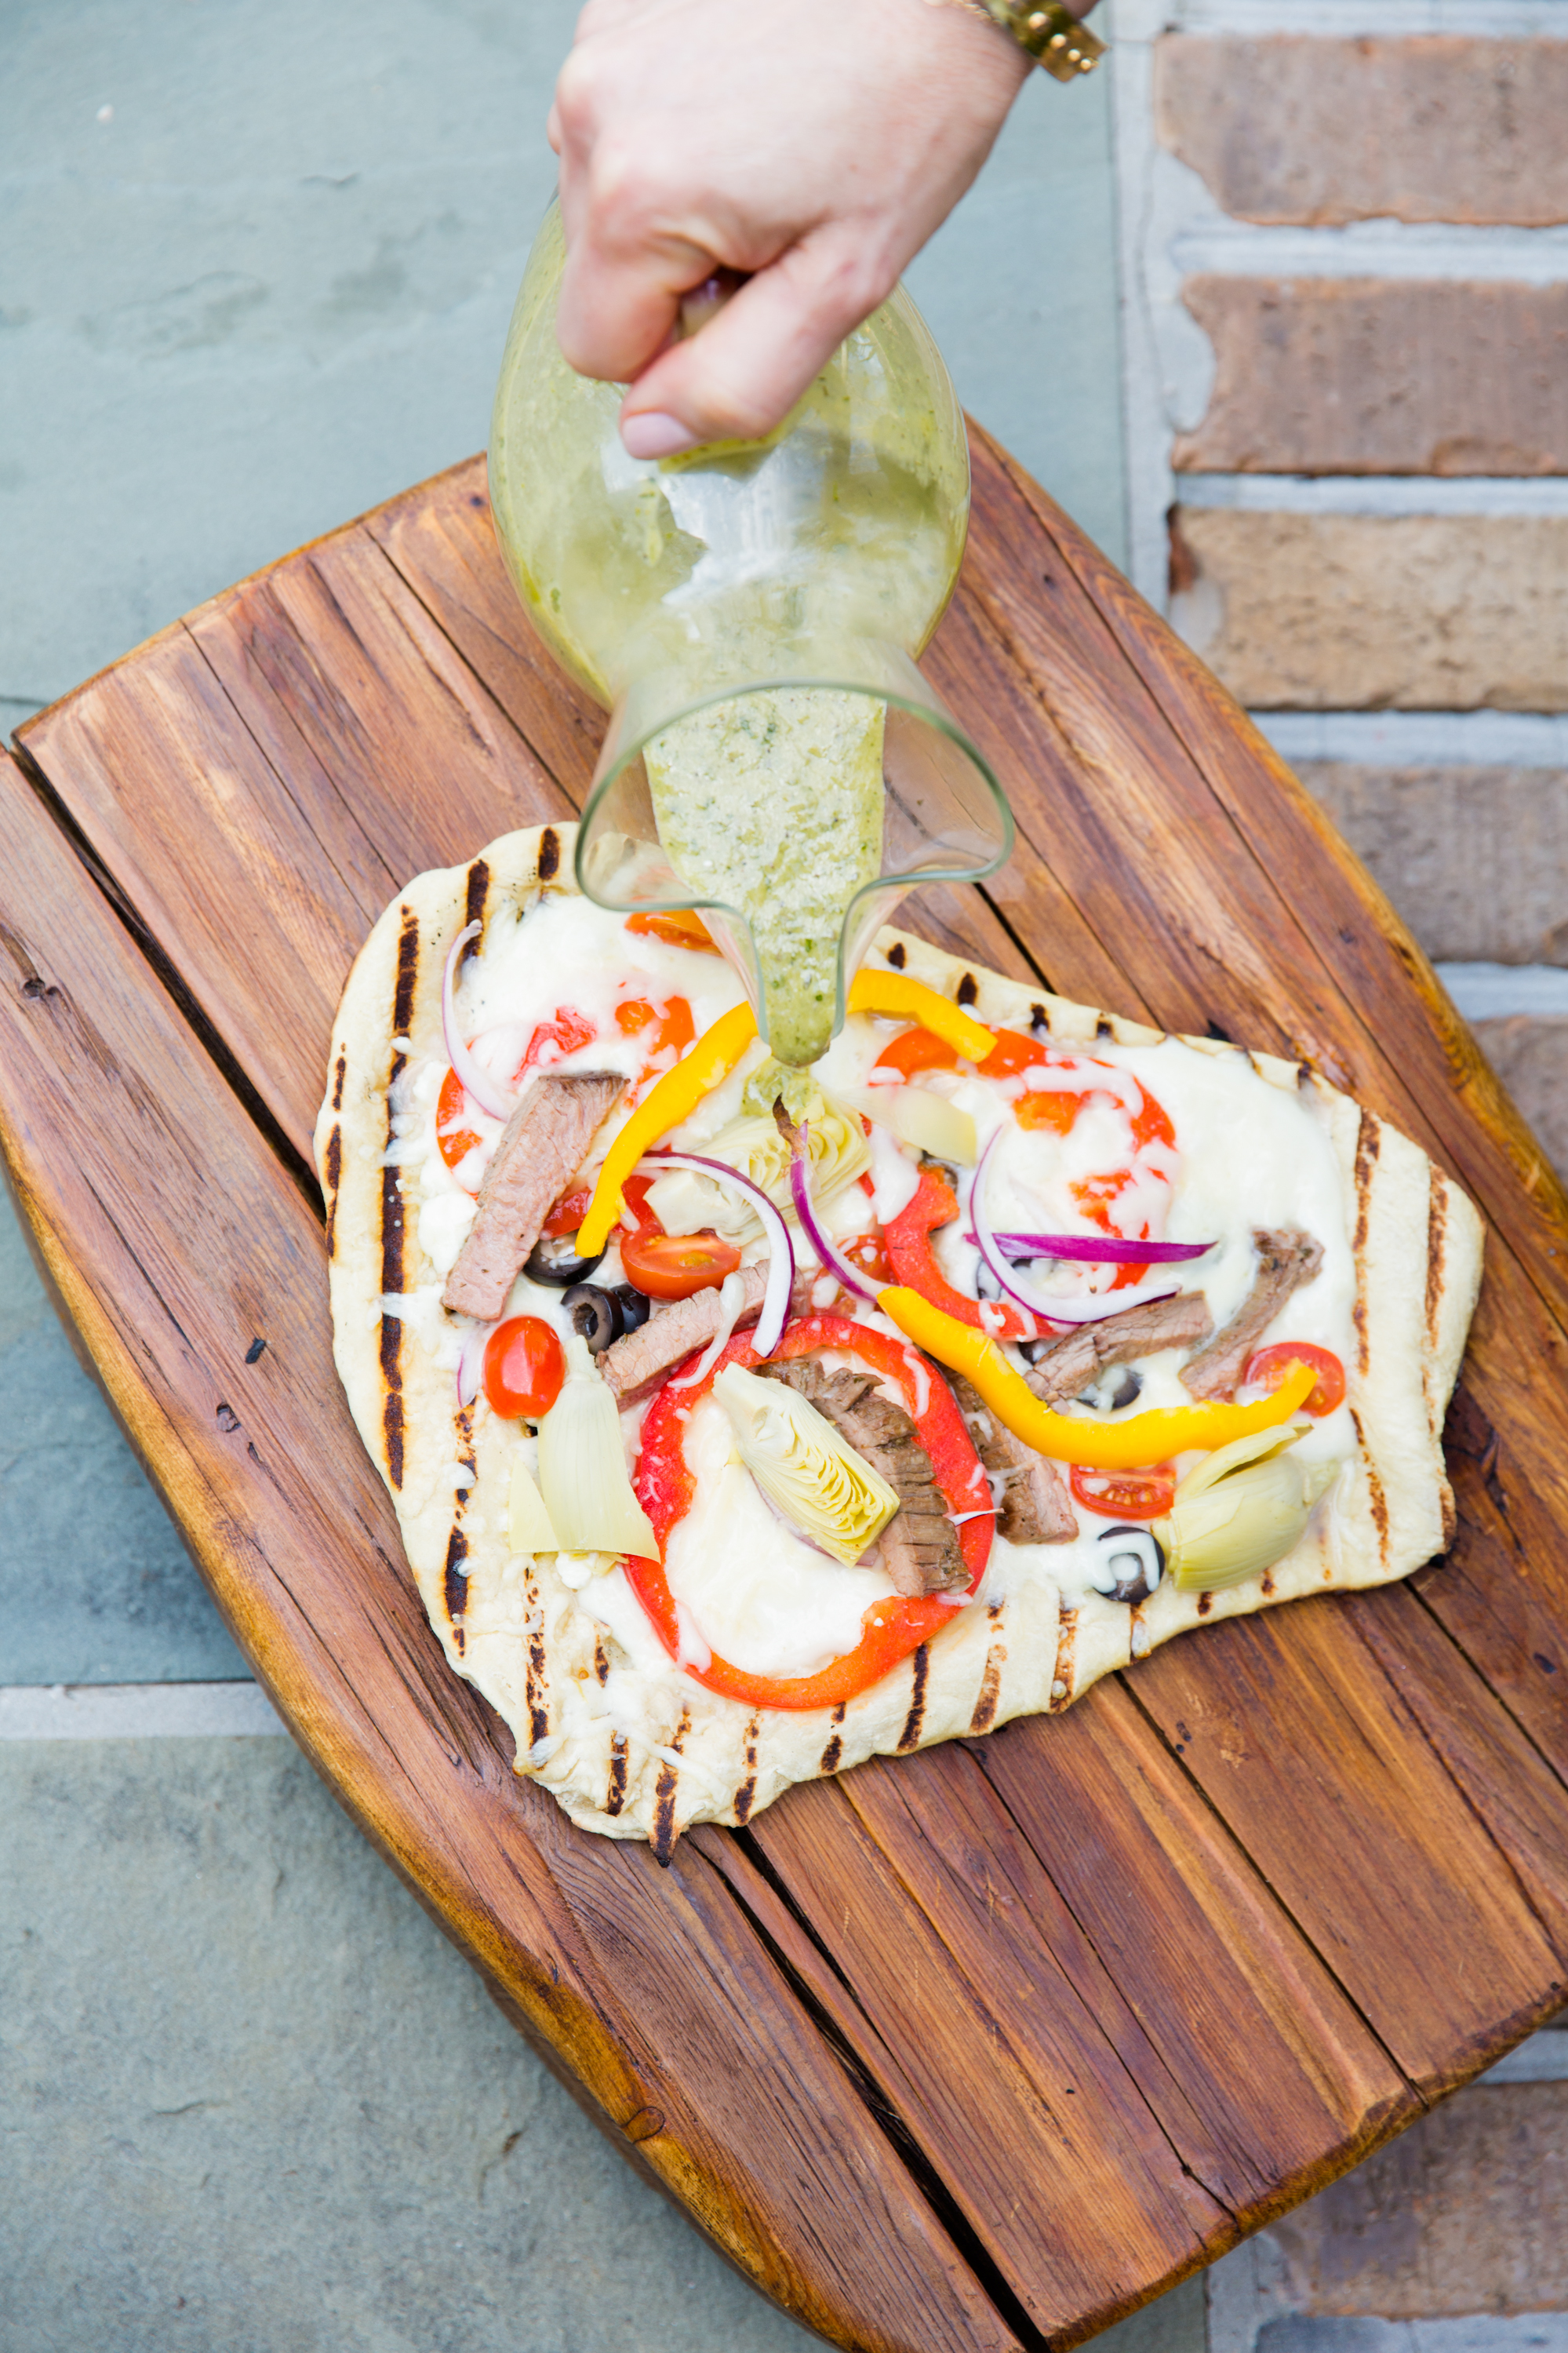
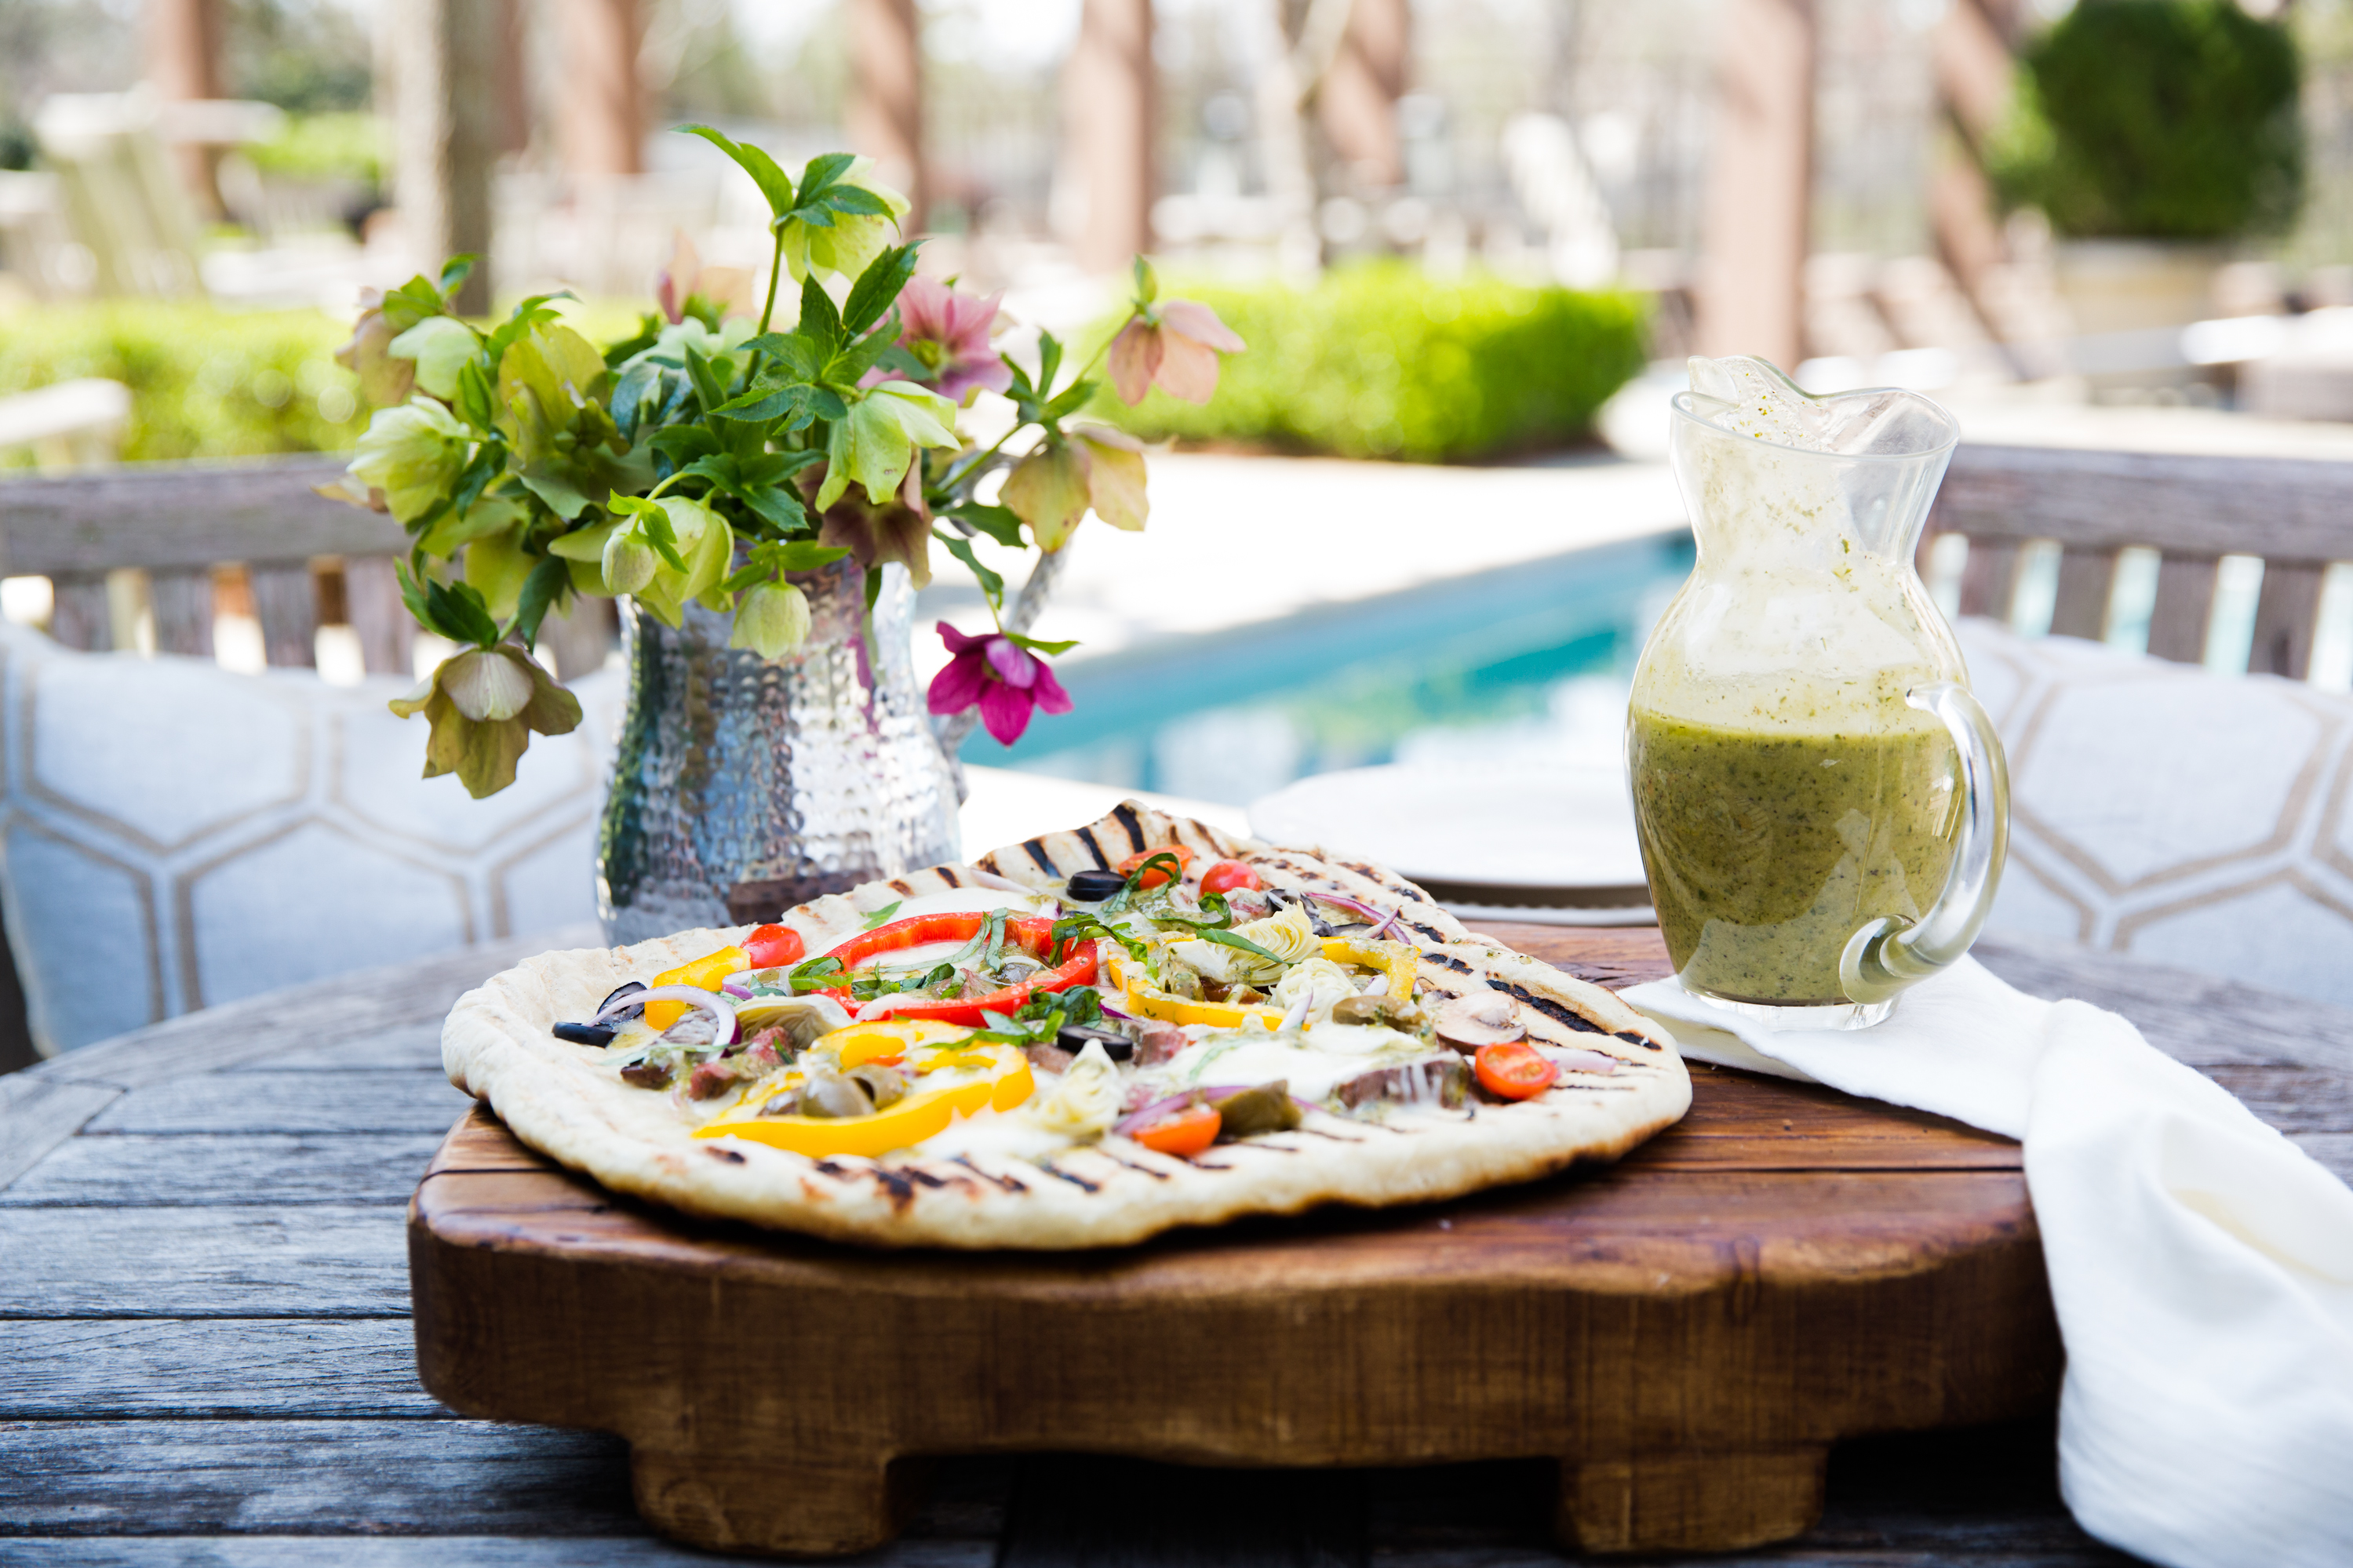
For this post, we landed on using her dressing to do two things- marinate a flank steak, and top a grilled pizza. Like the dressing, spring is upon us and with it comes awakening flavors and new vegetables. Which leads us of course to grilled Greek pizza, topped with her dressing and our beautiful pan grilled steak.
Also, to be fair, I am no grilling expert. My relationship with the grill resembles very closely that of a small child rewarded with a bag of Skittles every three days. When it works- bliss! When it doesn’t, a time of sulking and an emotional low known only to my husband, takes its place. However, with this pizza- and this flank steak- I have tried to create the easiest-to-follow instructions possible to help even the flame-challenged among us achieve grilling success.*
Cue the grilling montage:
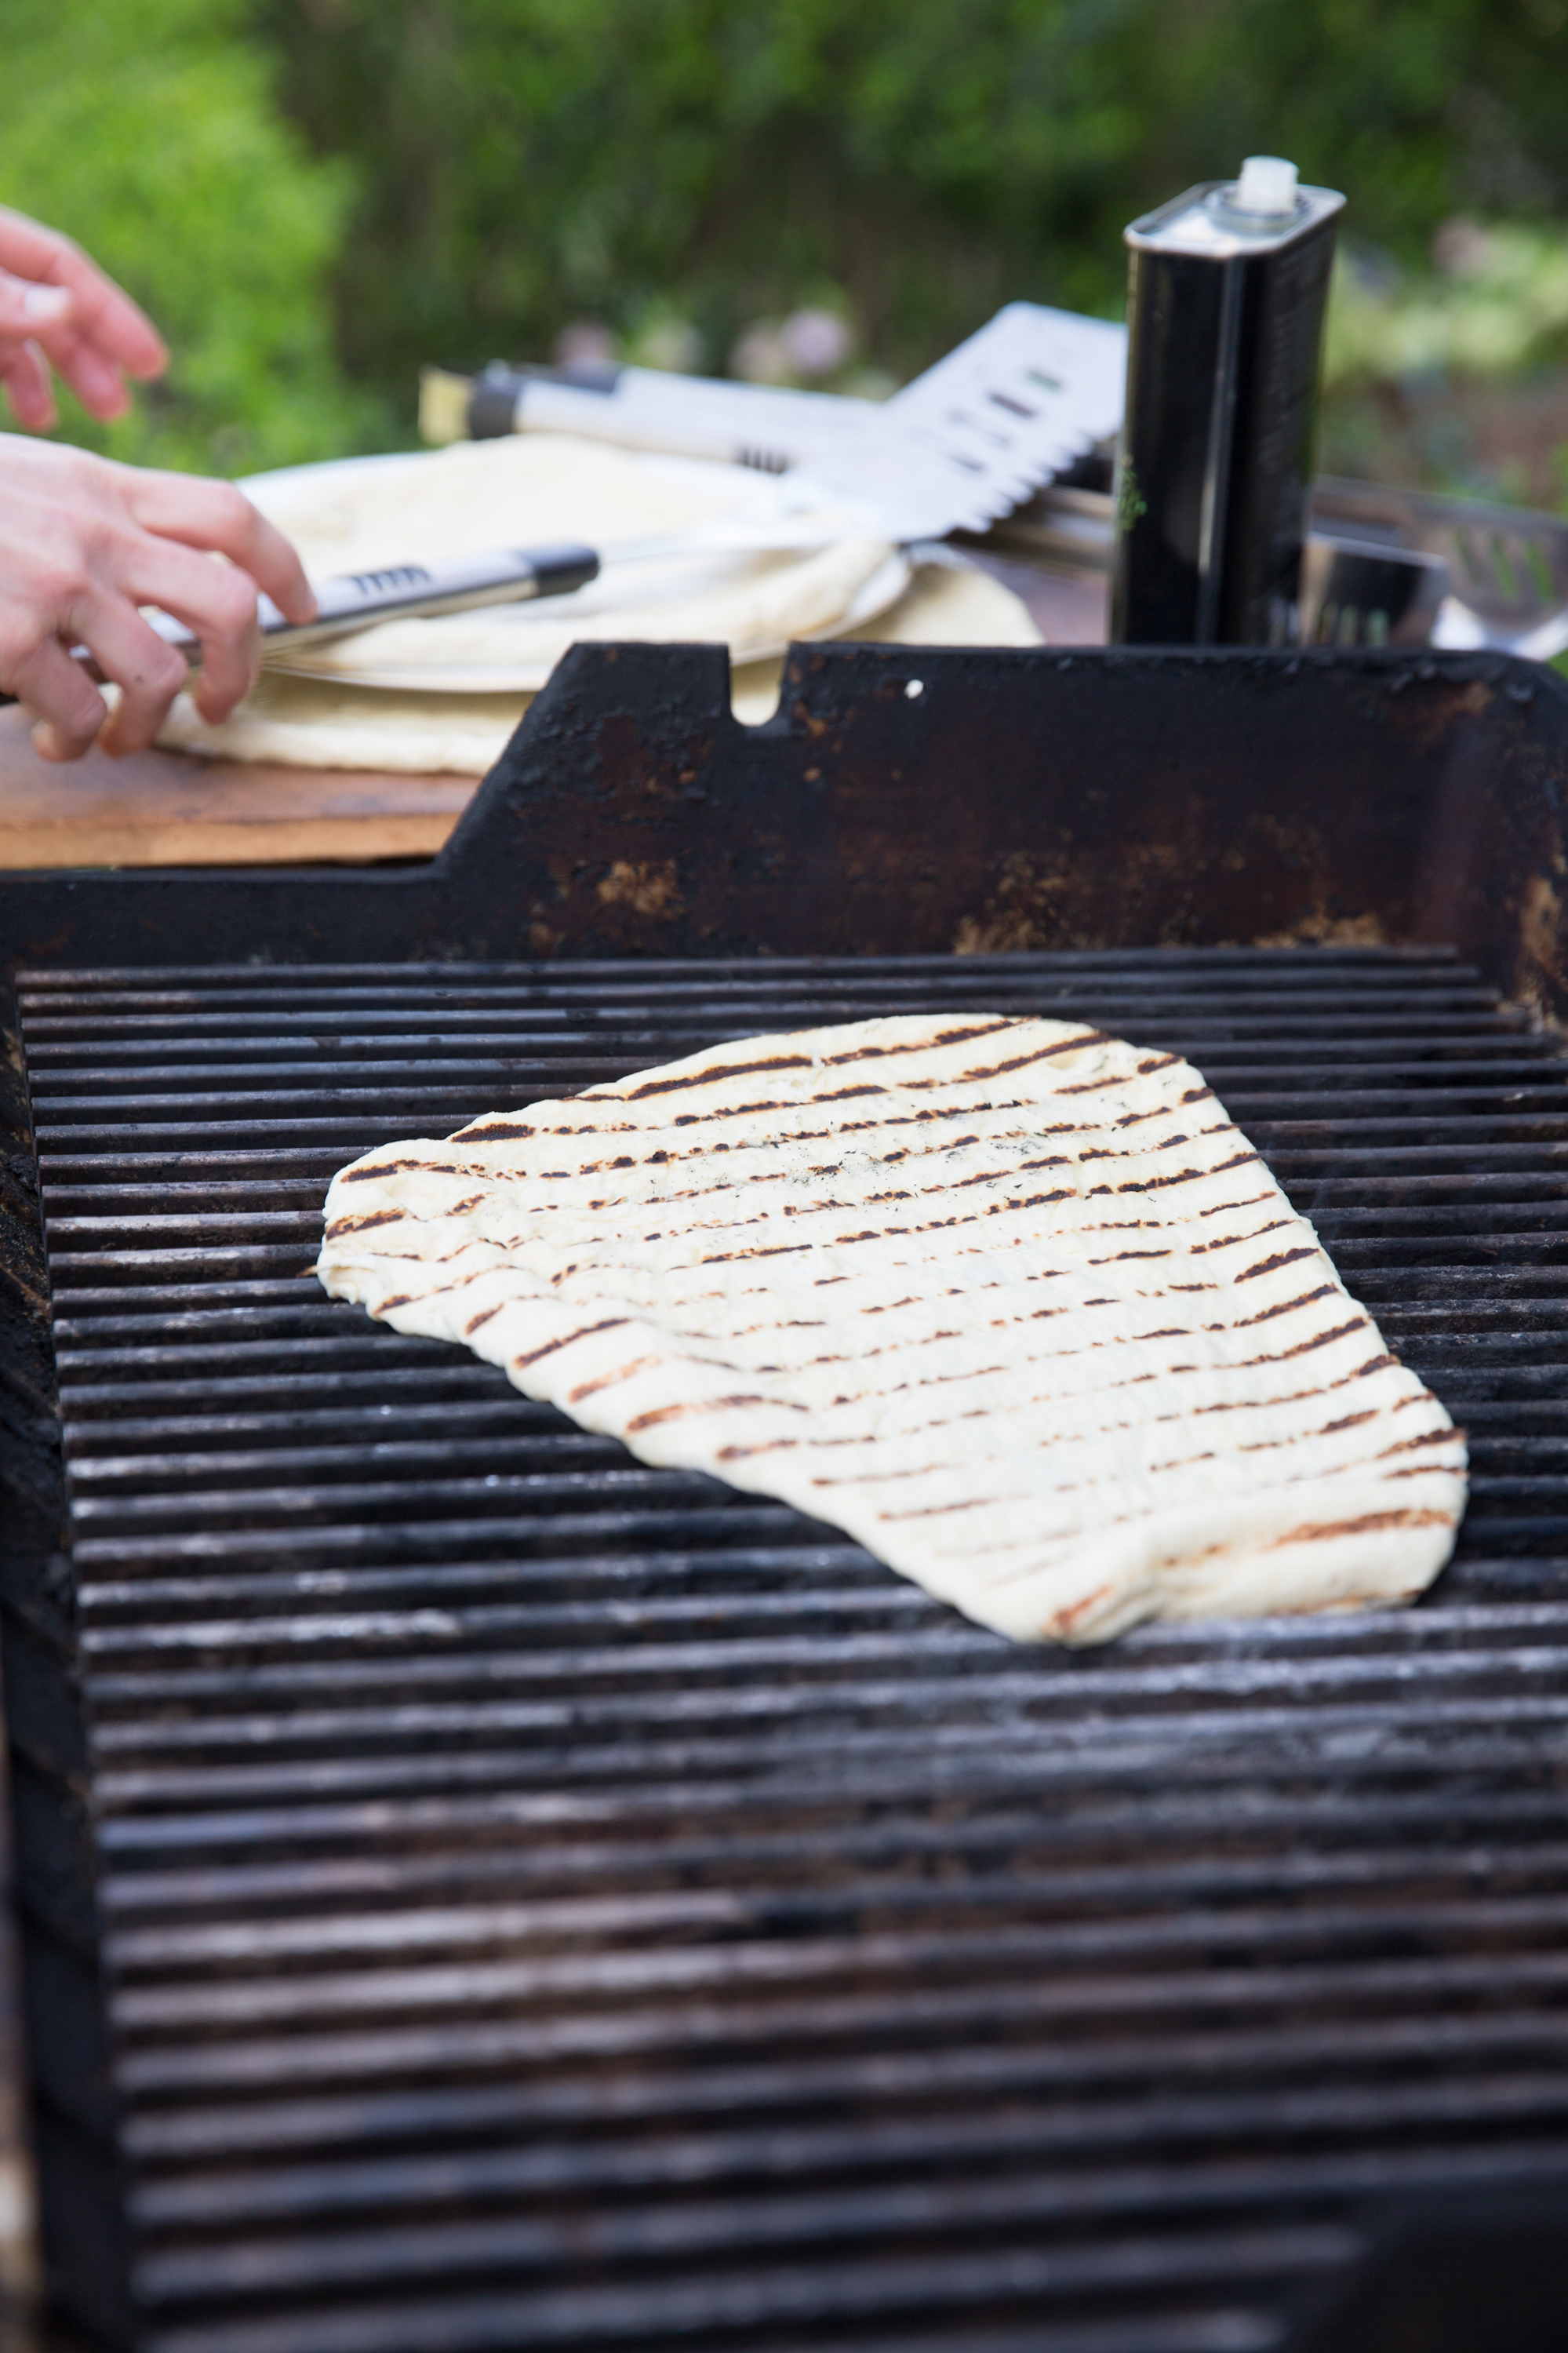
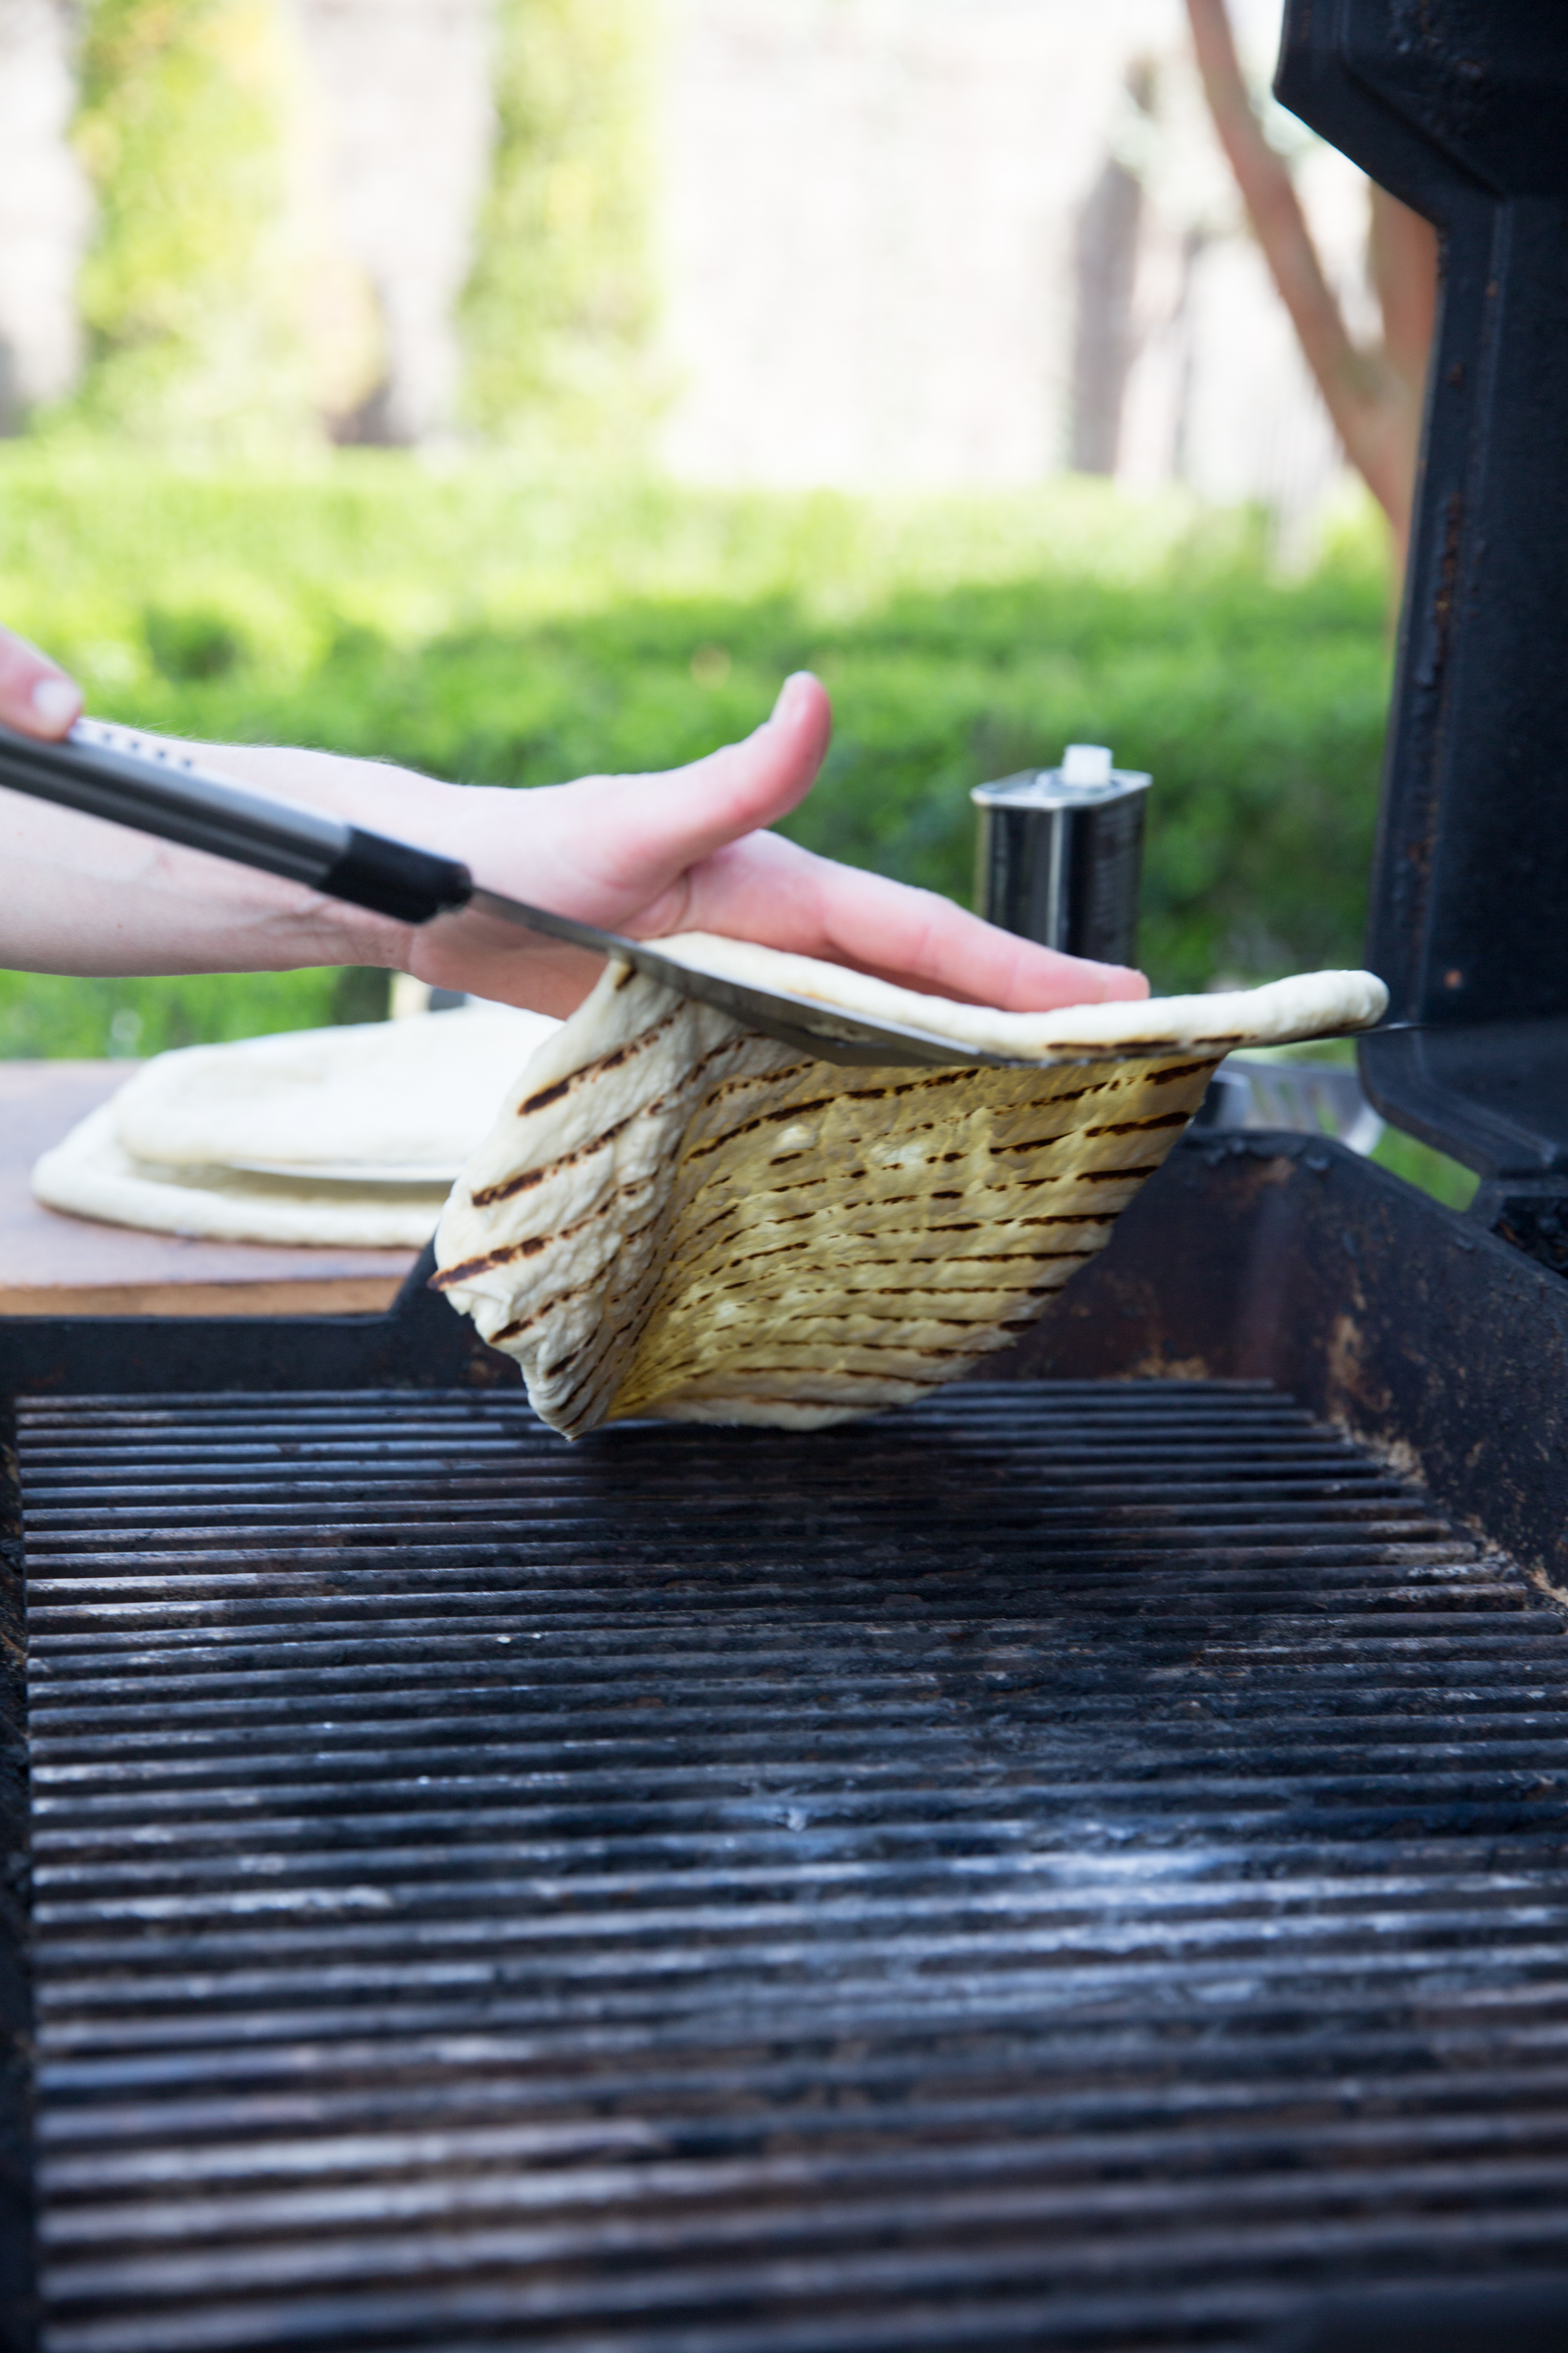
Oiled pizza goes on the grill…
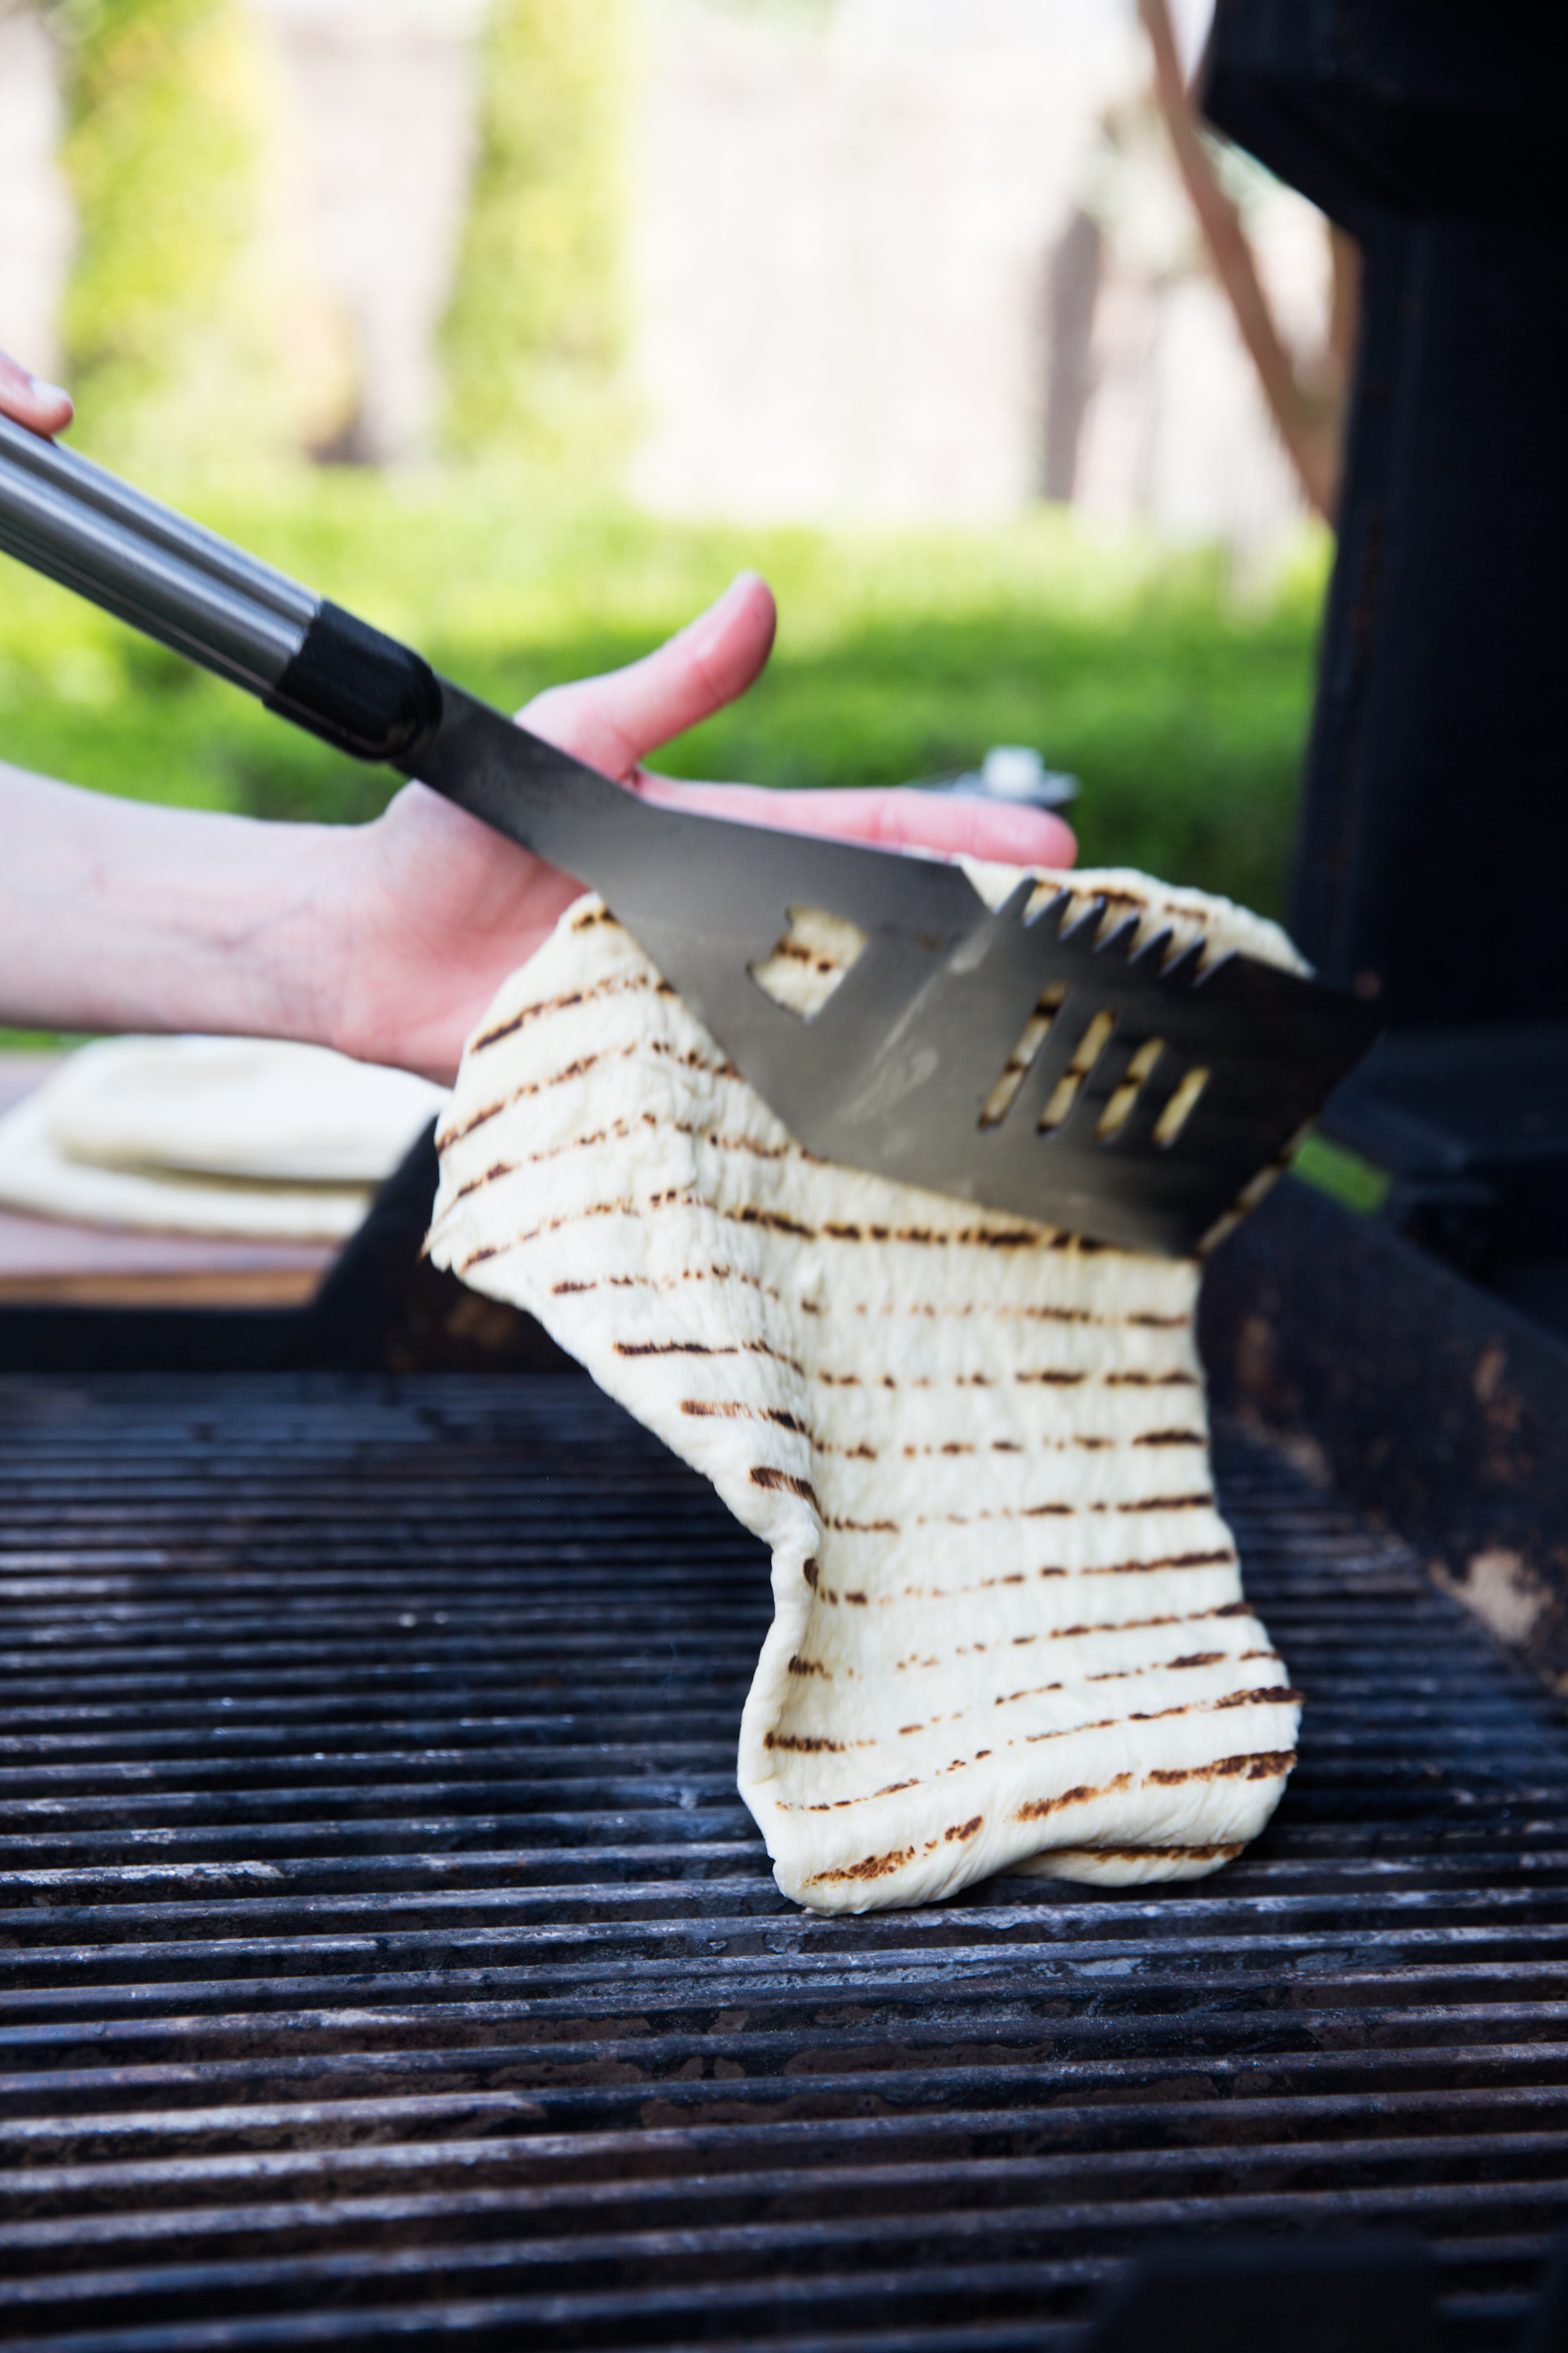
The all important flip occurs…
The flipped side is put back on the grill…
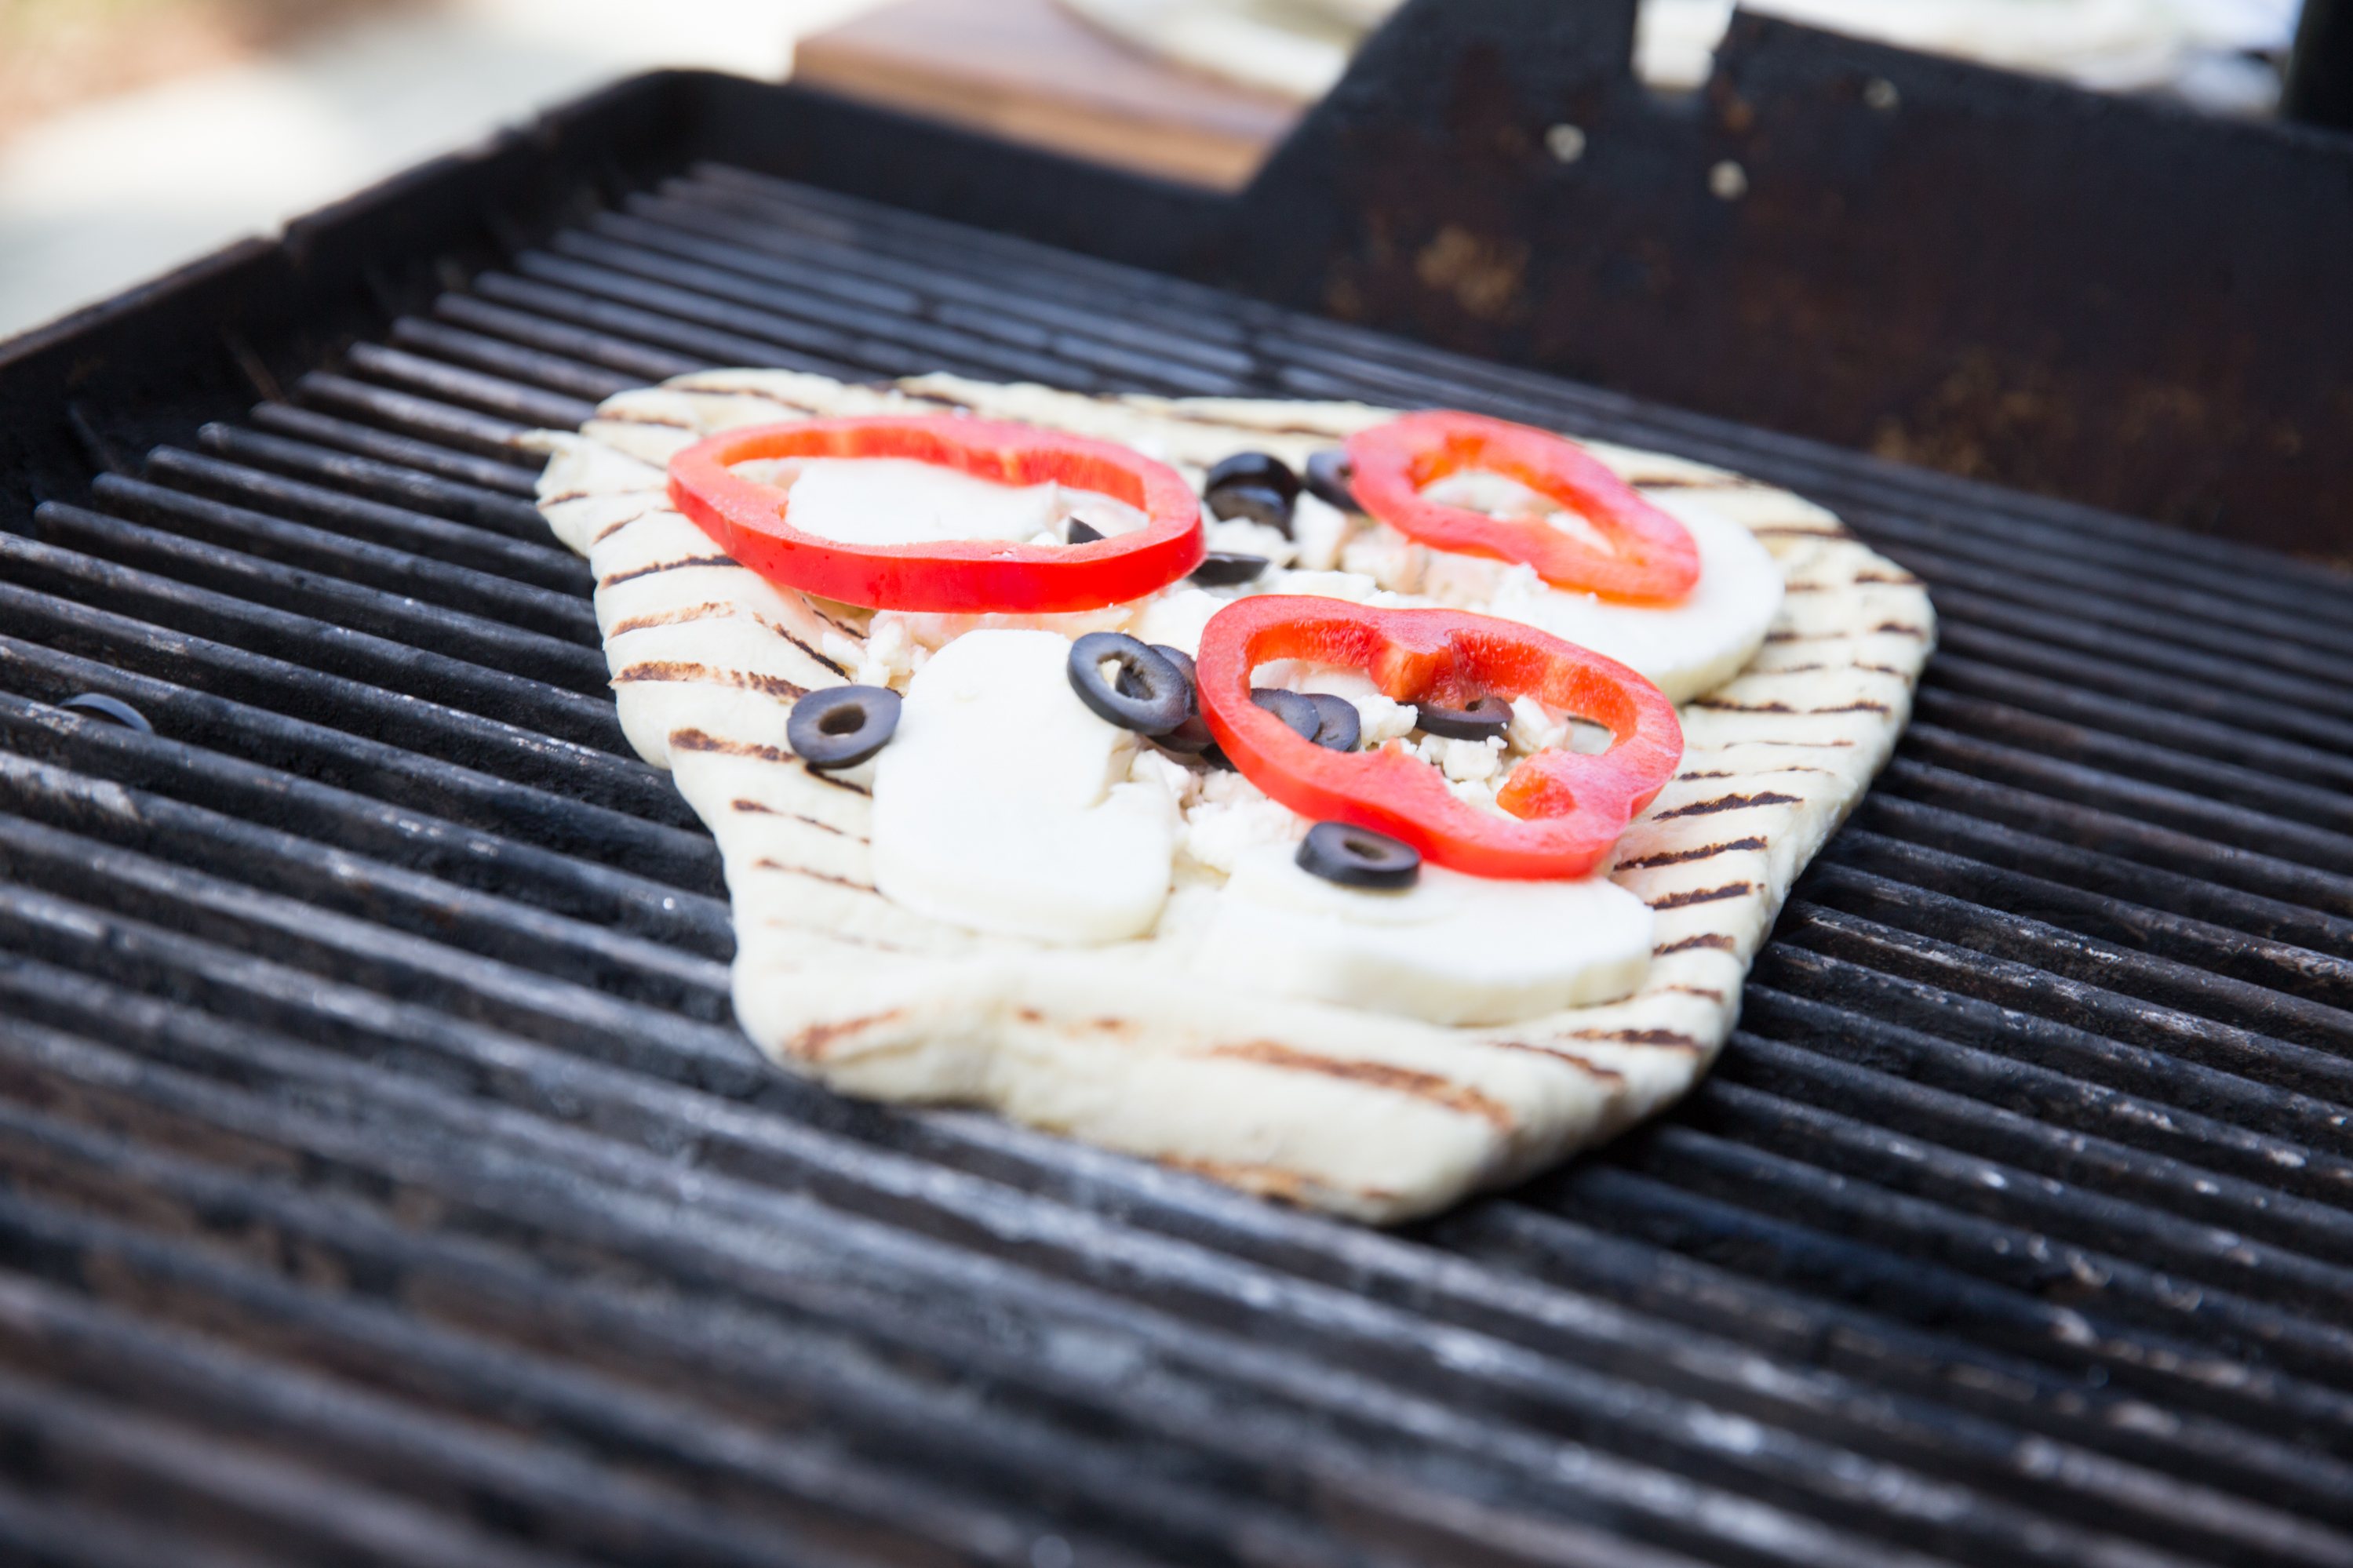
Toppings are placed on the dough…
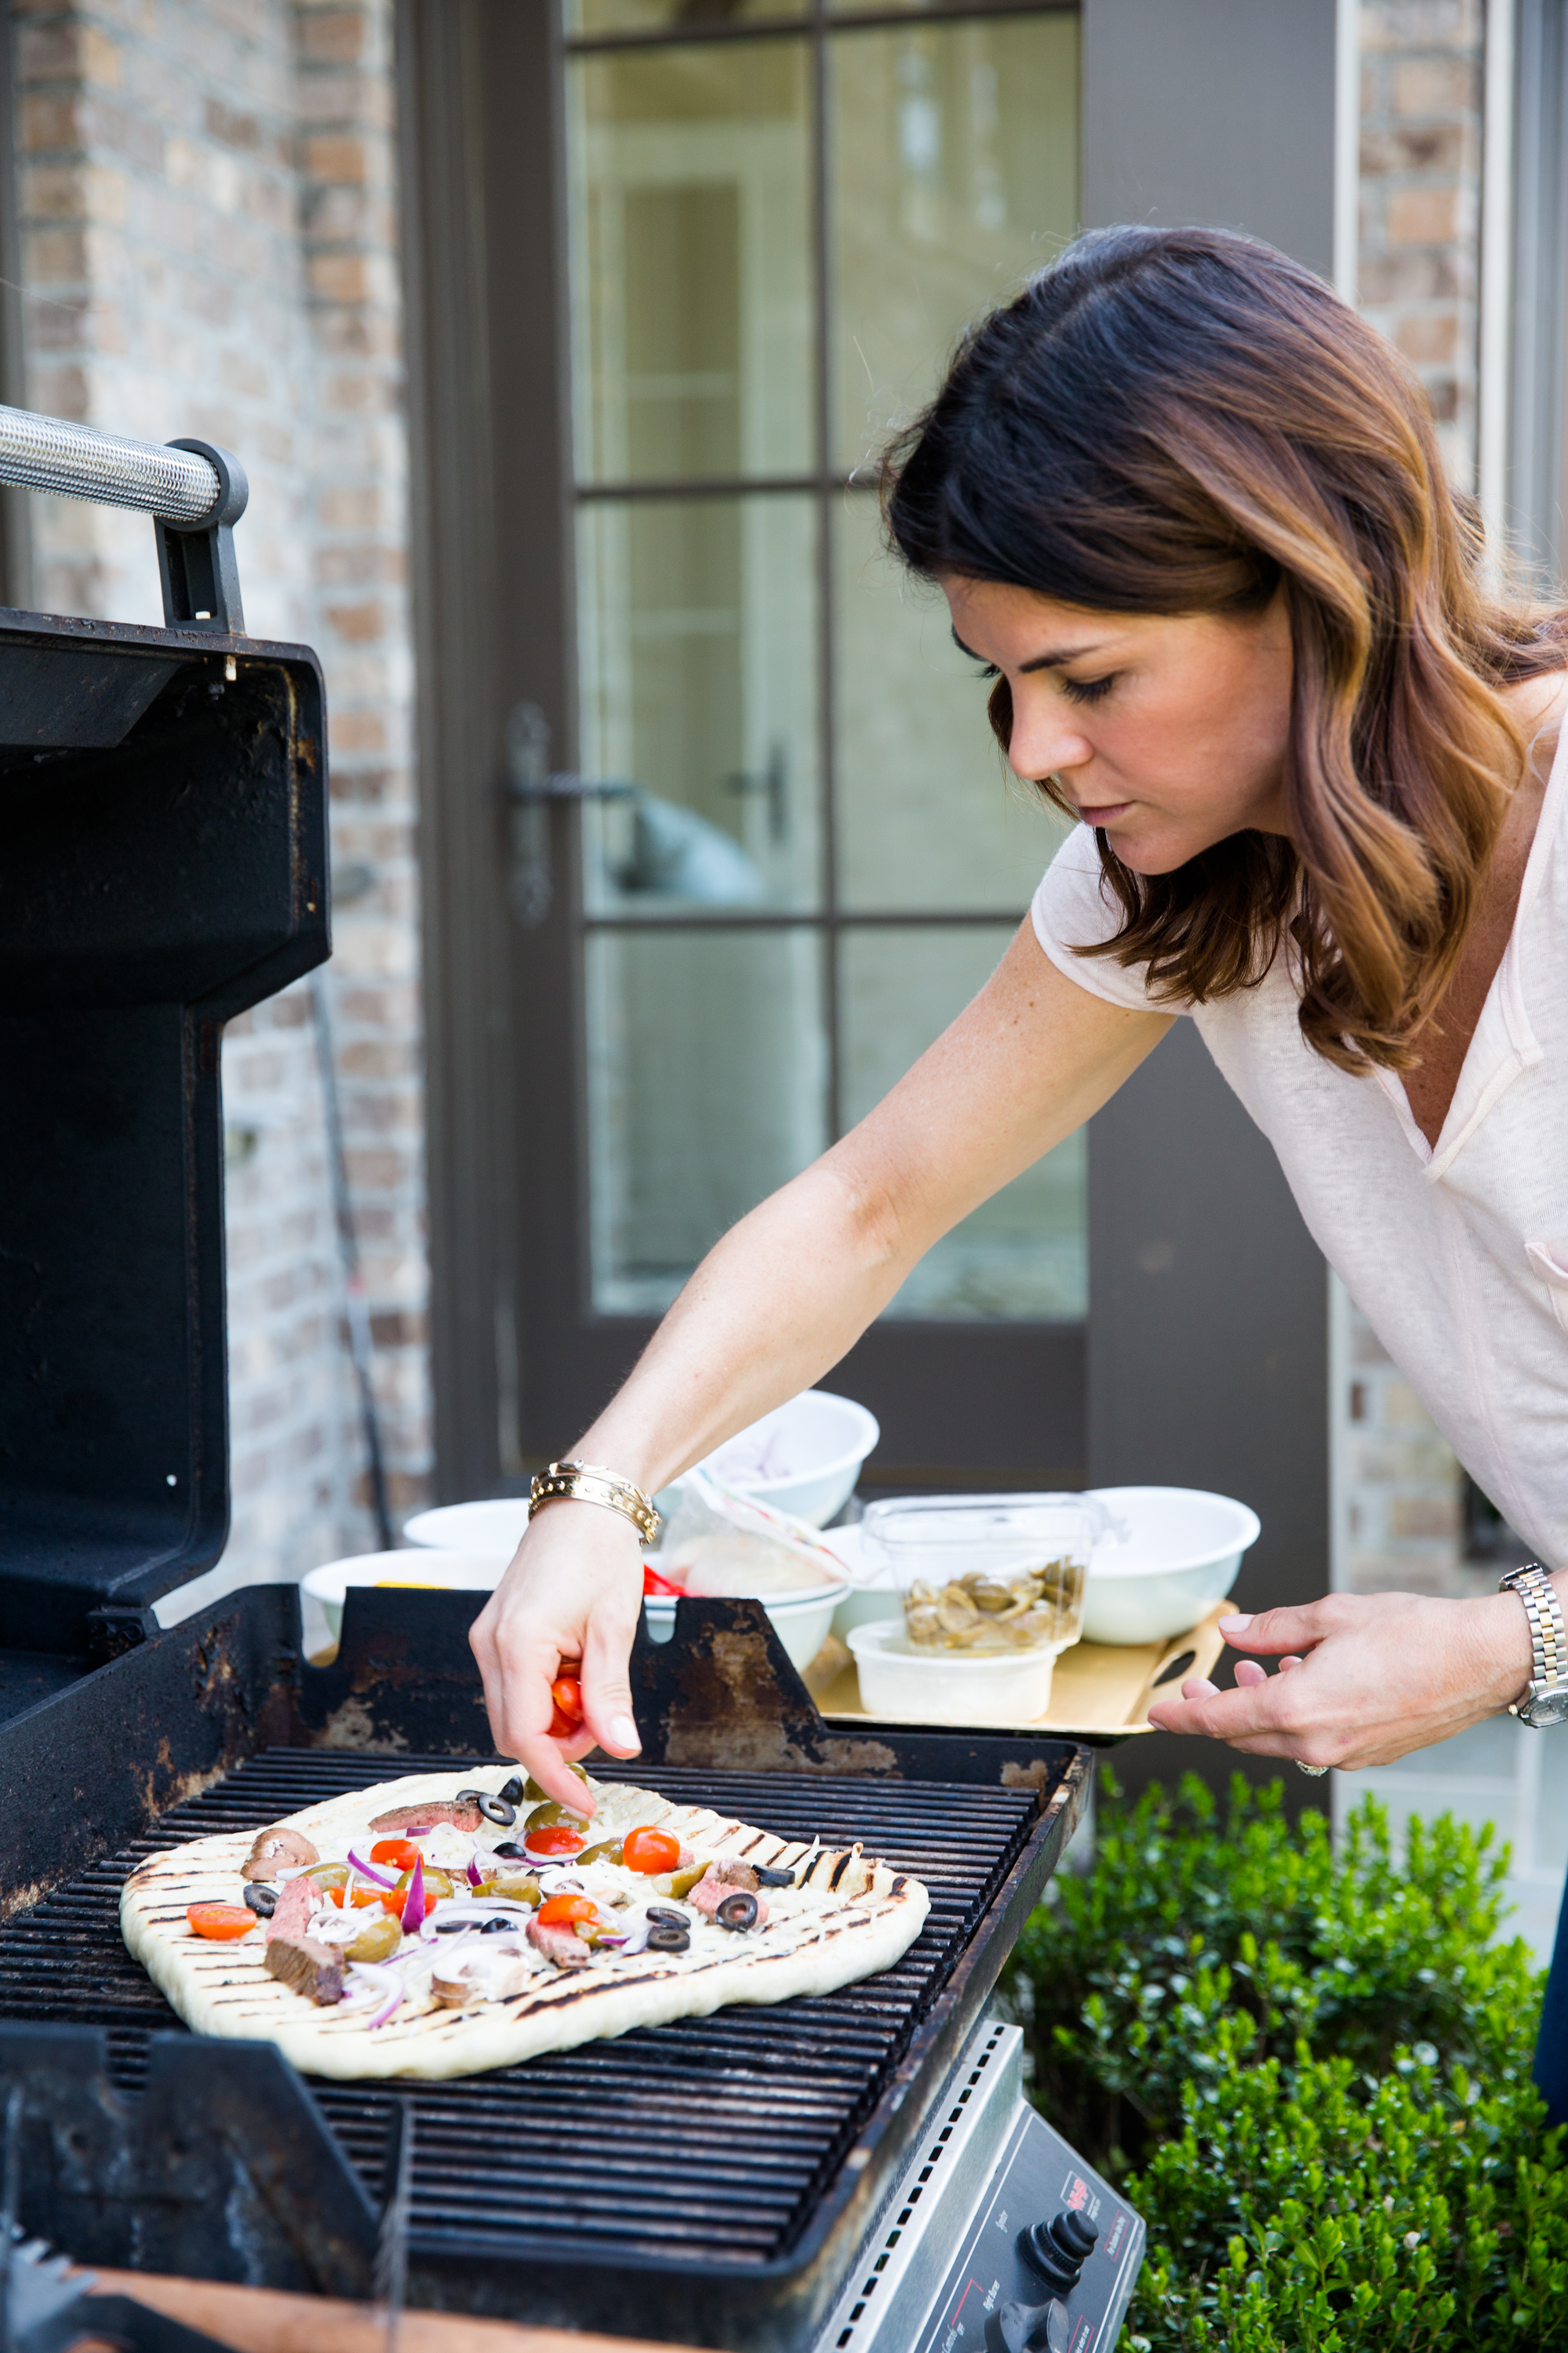
Buffy skillfully adds more toppings…
We check to make sure the pizza feels done…
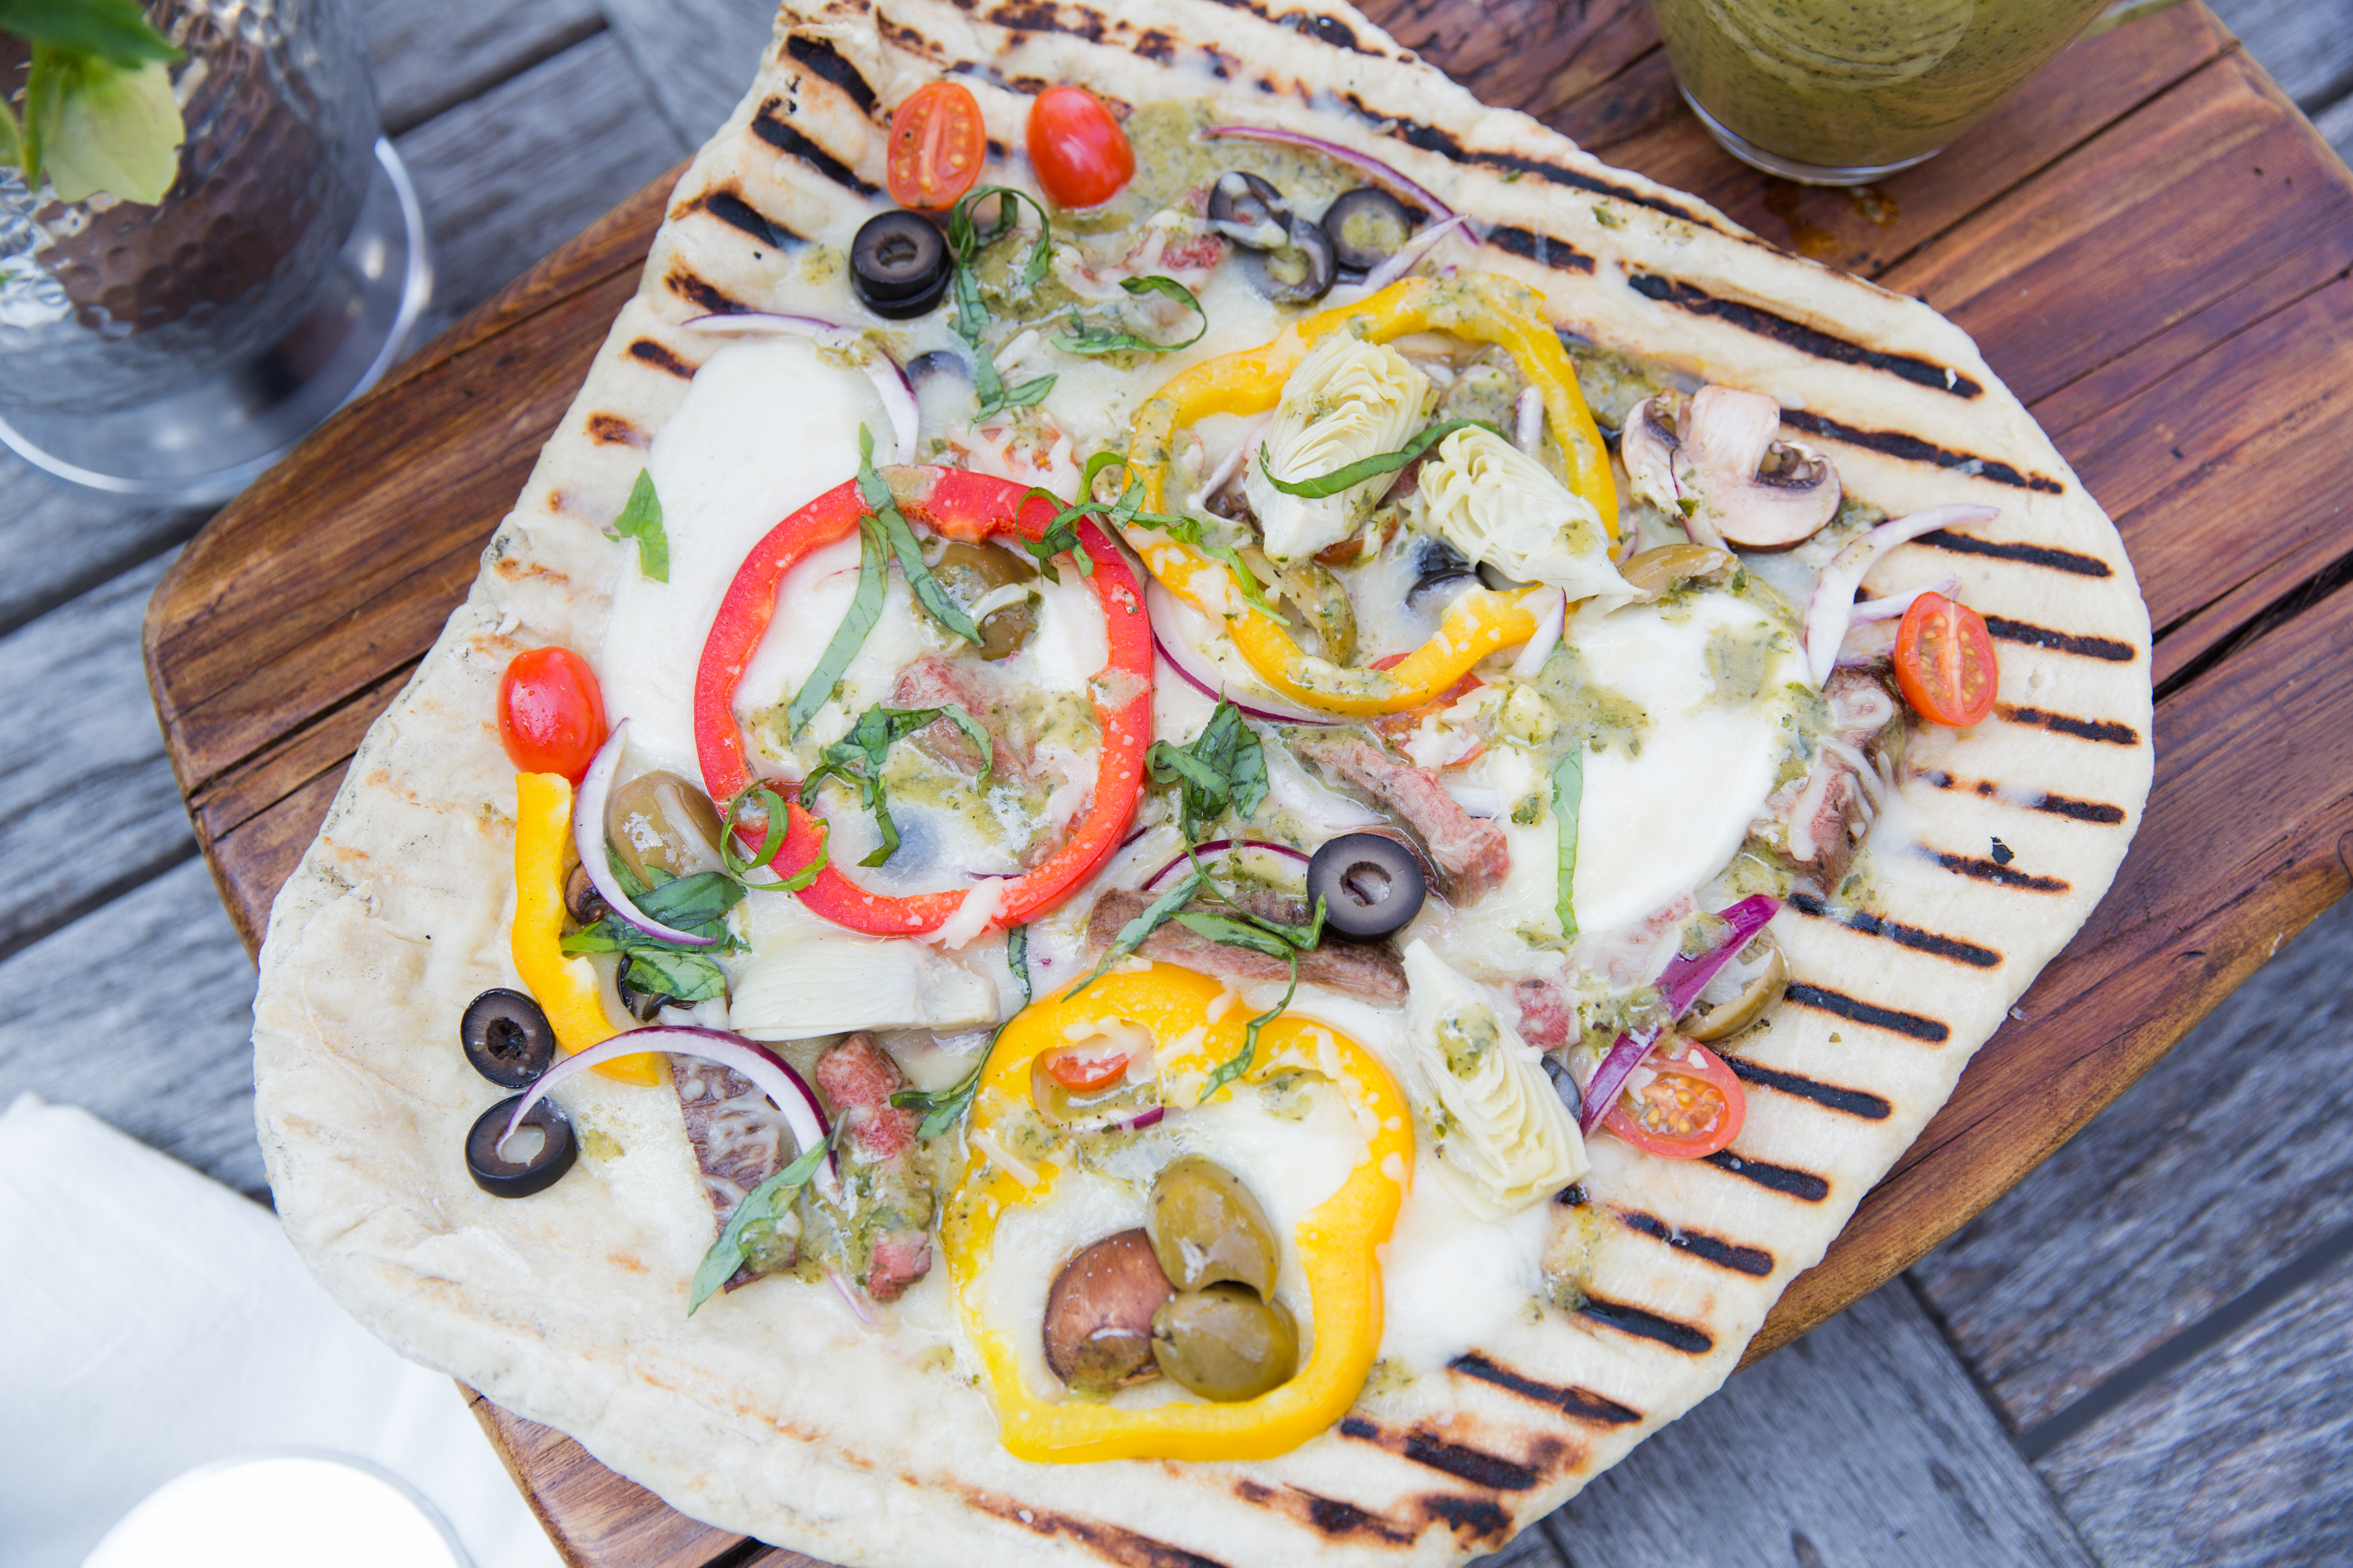
And voila! Grilling success!
Also, if you want to do the pizza sans-dairy, Buffy and I thought that it would be amazing do do a grilled dough topped with dressing and veggies. Yummy. If you try this method, please bring us leftovers.
Alright everyone- bust out the shorts (stylish and blush, of course), turn on the grill, and start blending up a fabulous batch of dressing. It’s sure to put a spring in your step this week.
Marinated, Grilled Flank Steak (with tips on grilling from The Pioneer Woman)
What You Will Need:
2-3 lbs flank steak
1 cup (or more, depending on size of steak) homemade Greek dressing
olive oil (for drizzling)
salt and pepper to taste
grill pan
What You Will Do
1. Put your flank steak into a large plastic bag. Pour in dressing, and swirl around in the bag until it covers all of the meat. Let marinate in fridge for at least four hours.
2. Drizzle grill pan with enough olive oil to lightly coat the pan. Heat grill pan on high heat (for about two to three minutes).
3. Remove steak from marinade, and place on the grill pan horizontally. Grill for two minutes. If you want to get fancy, you can turn your steak at a 45 degree angle (I learned this from the Pioneer Woman) and grill for about a minute or two more, to get those fancy grill marks.
4. Turn the steak over and grill for three to four minutes more (or two minutes, plus 45 degree rotation time), or until the steak reaches 145 degrees (you can also do the finger test if you don’t want to bother with a meat thermometer. #juiceslost)
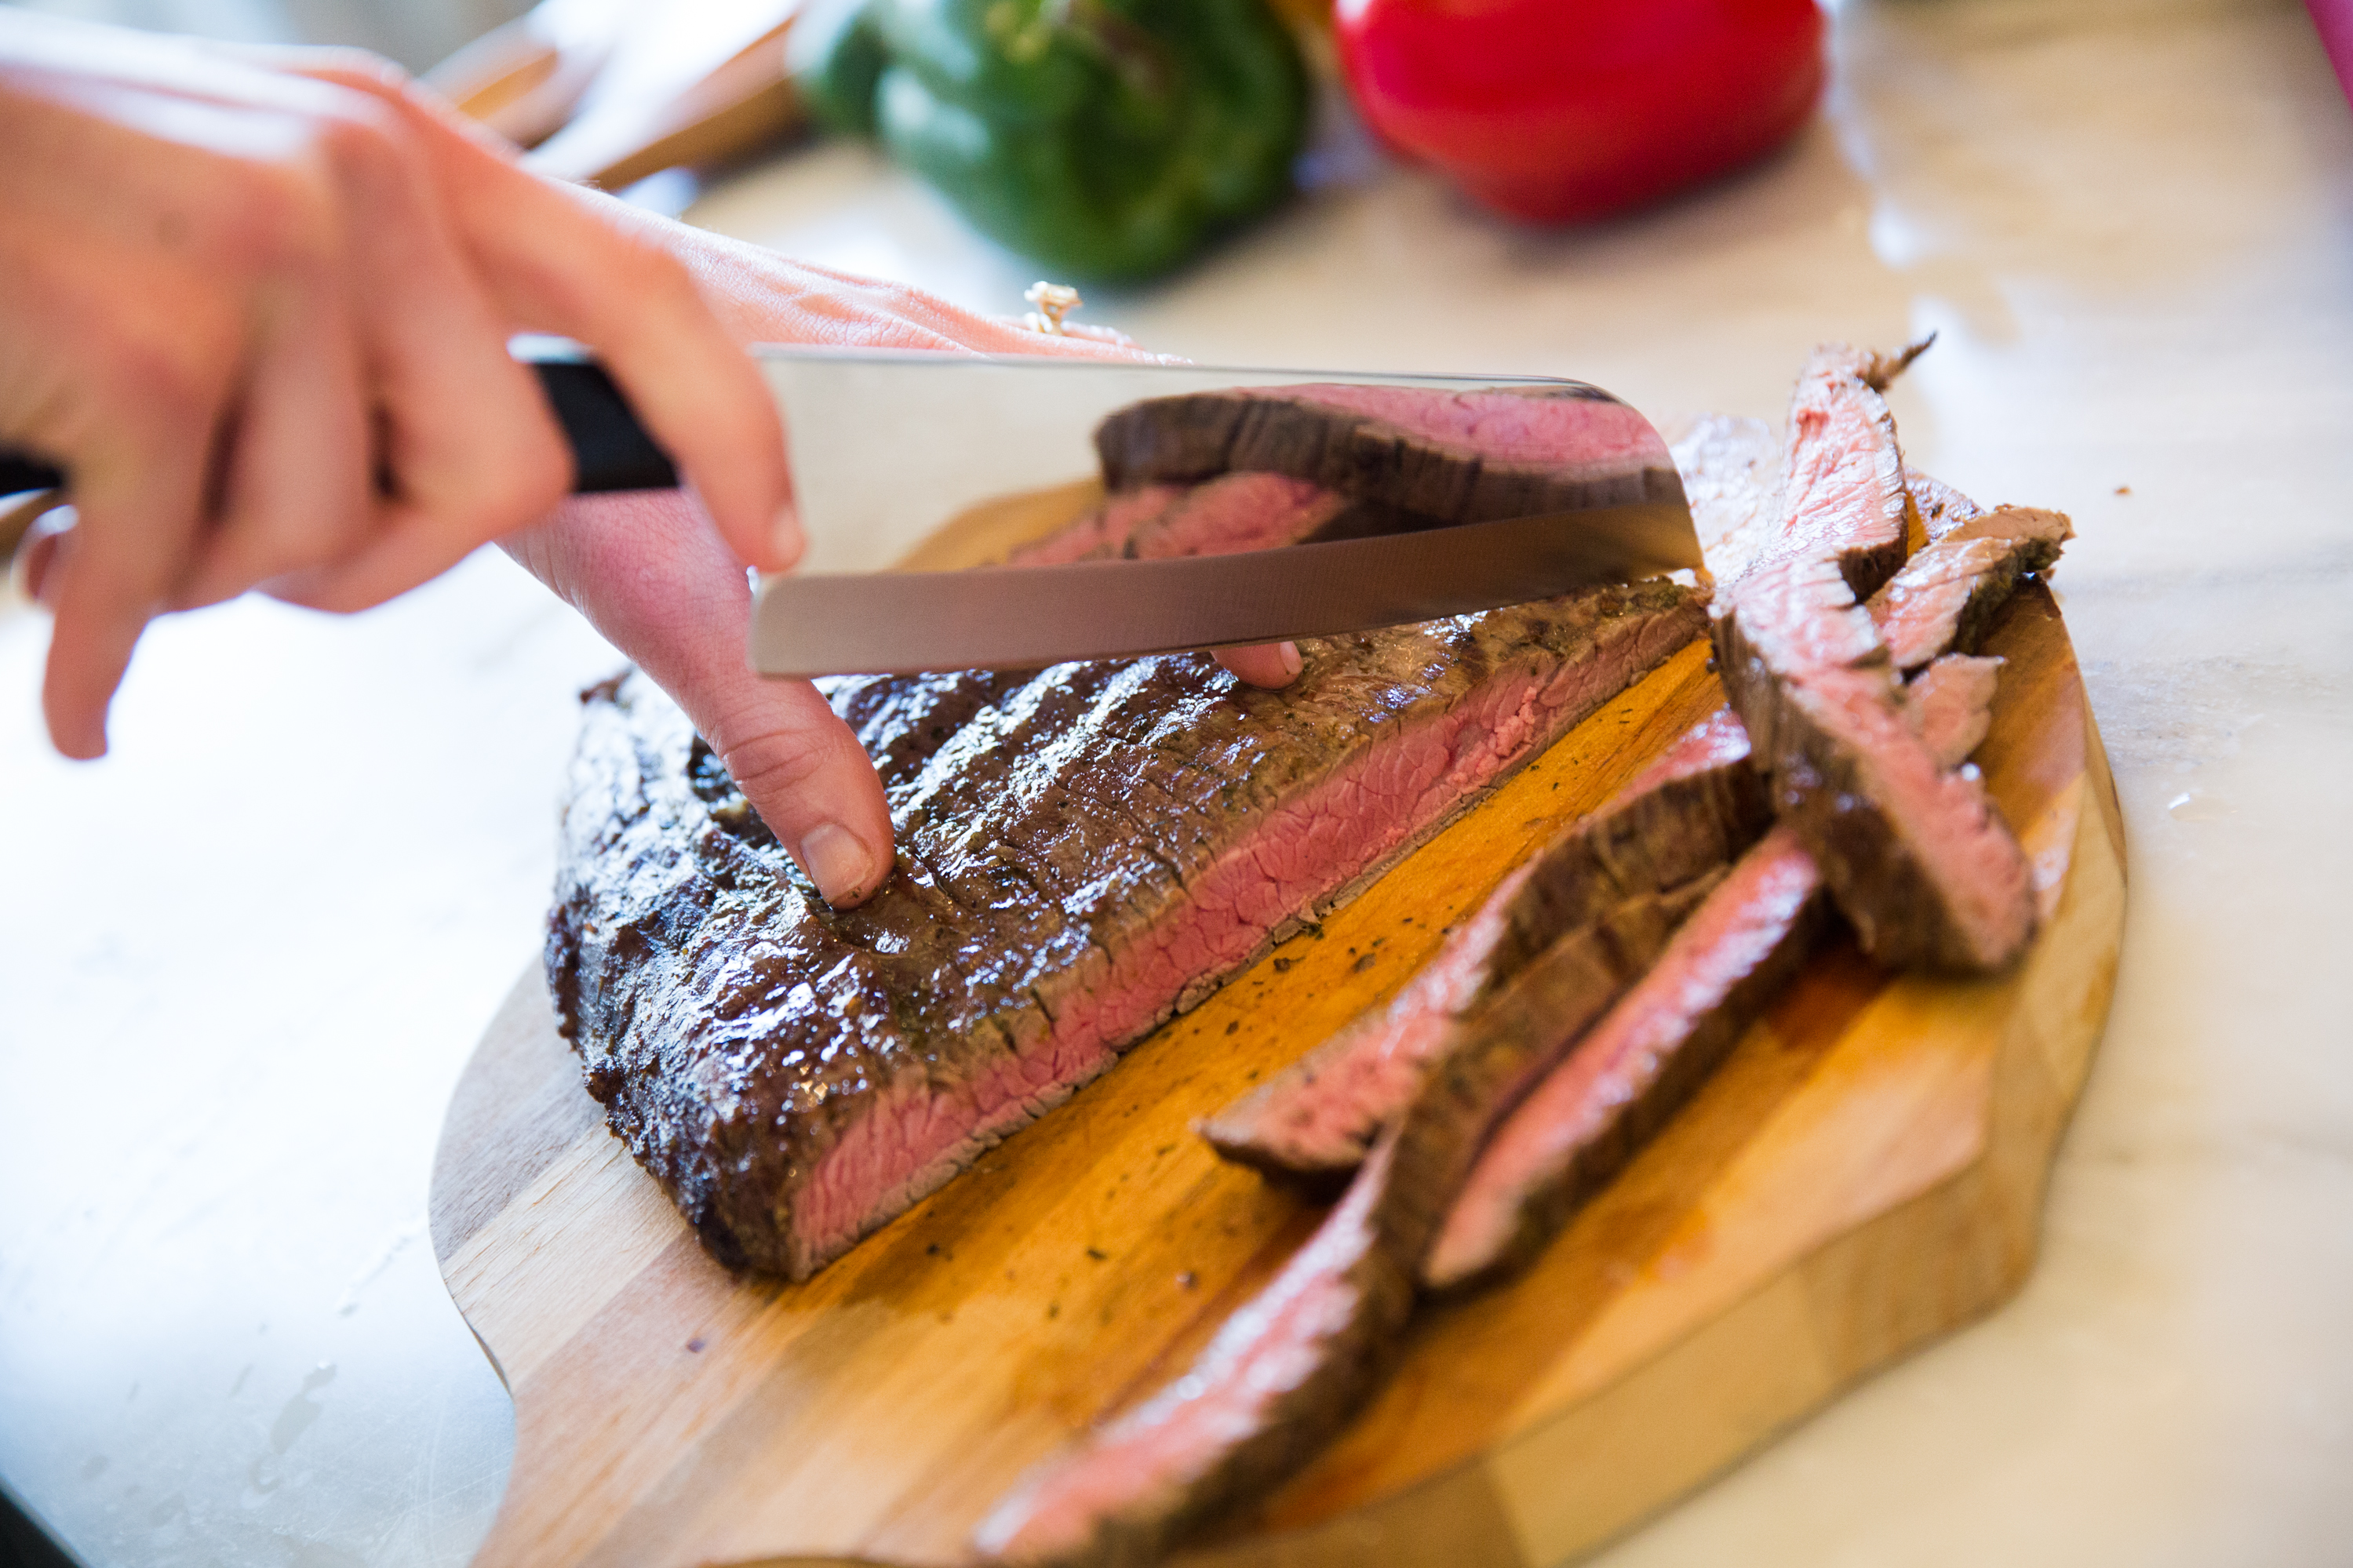
5. Let the steak rest for at least five minutes before you slice. This keeps it so juicy.
Grilled Greek Pizza with Homemade Dressing
What You Will Need:
1 lb Publix (or any other brand) pre-made pizza dough, standing at room temp for one hour
Flour, for dusting
Olive oil, at least 1 tablespoon (or more) for drizzling
Grilled flank steak
Veggies (for topping): red bell pepper, yellow bell pepper, red onion, black olives, artichoke hearts, cherry tomatoes
Feta cheese, crumbled; mozzarella cheese (Cut into circles and/or shredded if you desire. I like the combination of both!)***
Greek dressing, for drizzling
What You Will Do
Preheat grill to about 300 degrees. Now, every grill is different. So, if your grill becomes too hot during this process, turn the heat down and open the lid. If it is too cool, turn the heat up and close the lid.**
Assemble your ingredients. It is key when grilling pizza that you have all of your ingredients in place because the grilling process happens very quickly! So, chop those veggies (if desired), put the cheese into bowls, and get the Greek dressing ready to drizzle. I like to put all of my ingredients onto a jelly roll pan to stay organized.
Lightly flour a wooden surface. Roll your dough into a large circle with your palms (you can also half this dough if you like to make two smaller pizzas), then flatten into a disc. Lightly dust surface of pizza disc with more flour, then, using a rolling pin, roll out into about a 12 to 13 inch circle. The dough should feel stretchy and at a similar thickness to what you see when those fancy Italian men throw the dough towards the ceiling.
Take your now assembled pizza dough and ingredients out to the grill.
Brush one side of the pizza dough with olive oil. Place that side directly onto the grill and cook for two to three minutes with the lid off. Check the underside of the dough as you grill. It should begin to firm and you should see grill marks forming.* Once those grill marks form and the dough is firm, flip with a large spatula.
Drizzle top with olive oil, then add meat, toppings and cheese. Go light on the toppings; too heavy and your pizza will sink a bit. Grill for an additional three minutes, or until the cheese is melted and the dough fills firm.
Let rest for one or two minutes, then add a drizzle of dressing, and slice! Enjoy your hard-earned Greek goodness.
To be noted:
*I once disintegrated a chicken on the grill. Literally, it’s legs burned beyond a crisp into charcoal dust. Yet it was still on fire. It’s demise may have had something to do with the fact that I set the grill to 500 then left it on for at least thirty minutes:)
**As I experienced, if grill marks are forming too quickly and your crust is burning, go ahead and flip the dough over (so it doesn’t burn) and top with ingredients. You can finish that one off in the oven. Turn down the heat on your grill, and try again. Like I said, every grill is different and takes a while to adjust to!
***Dairy-free option: If you want to go sans cheese on this, I suggest replacing the olive oil drizzle on the flipped pizza side with a good drizzle of Greek dressing. Add veggies, and cook until desired doneness:)
A lot of times in cooking this is a good thing. You run out of cinnamon, scan your pantry, and decide that another spicy ingredient like chili powder would go great in those chocolate brownies. Or, you run out of lemon for your hummus and decide to use lime juice instead (so good; another post for another day).
But this accident was not one of those creative culinary breakthroughs you see on Cooking Channel where someone finds a miracle solution to pizza dough and builds a million-dollar food truck empire. This was more along the lines of, “Oh, my Lord, I have just dumped all of the soup I was supposed to bring to my food shoot on my carpet, down my purple pants and in-between my toes. And on my neighbor’s front door. Oh dear-and their door mat.”
This, by the way, was the first time I met my incredibly sweet neighbor across the hall. In an attempt to carry all of my food props, the food itself and my large purse in one trip to my car- because, heaven forbid I have to take two trips- I also tried balance my pot of soup on the steps next to her door. Instead, the pot slid forward, cascading in a slow-motion orange waterfall from my orange dutch oven down my (now-orange) lower half.
After the initial shock, squishing back into my apartment for paper towels and trying my best to sop up the thick, slightly warm mess from her surrounding steps and entryway, I knocked on her door, mustered my brightest smile and shouted a very overenthusiastic “HI! I just spilled sweet potato soup all over the entryway to your home. I AM SO SORRY!” She was, of course, incredibly gracious and wonderful and understanding. While I, on the other hand, had orange gew in my hair and was experiencing mild symptoms of a panic attack and/or emotional breakdown.
But the lovely blessing in disguise from this was the answer to the prayers I quickly uttered right after the pot of soup splattered down our hallway. In a final, last-ditch effort, I rushed back to the pot in my kitchen sink with the faint hope of any liquid left inside we could photograph. And you know what? A thin rim, silver-lined rim remained. It was a total loaves-and-fishes moment: like the miracle of feeding the five thousand (but with a tiny bowl and stage lighting).
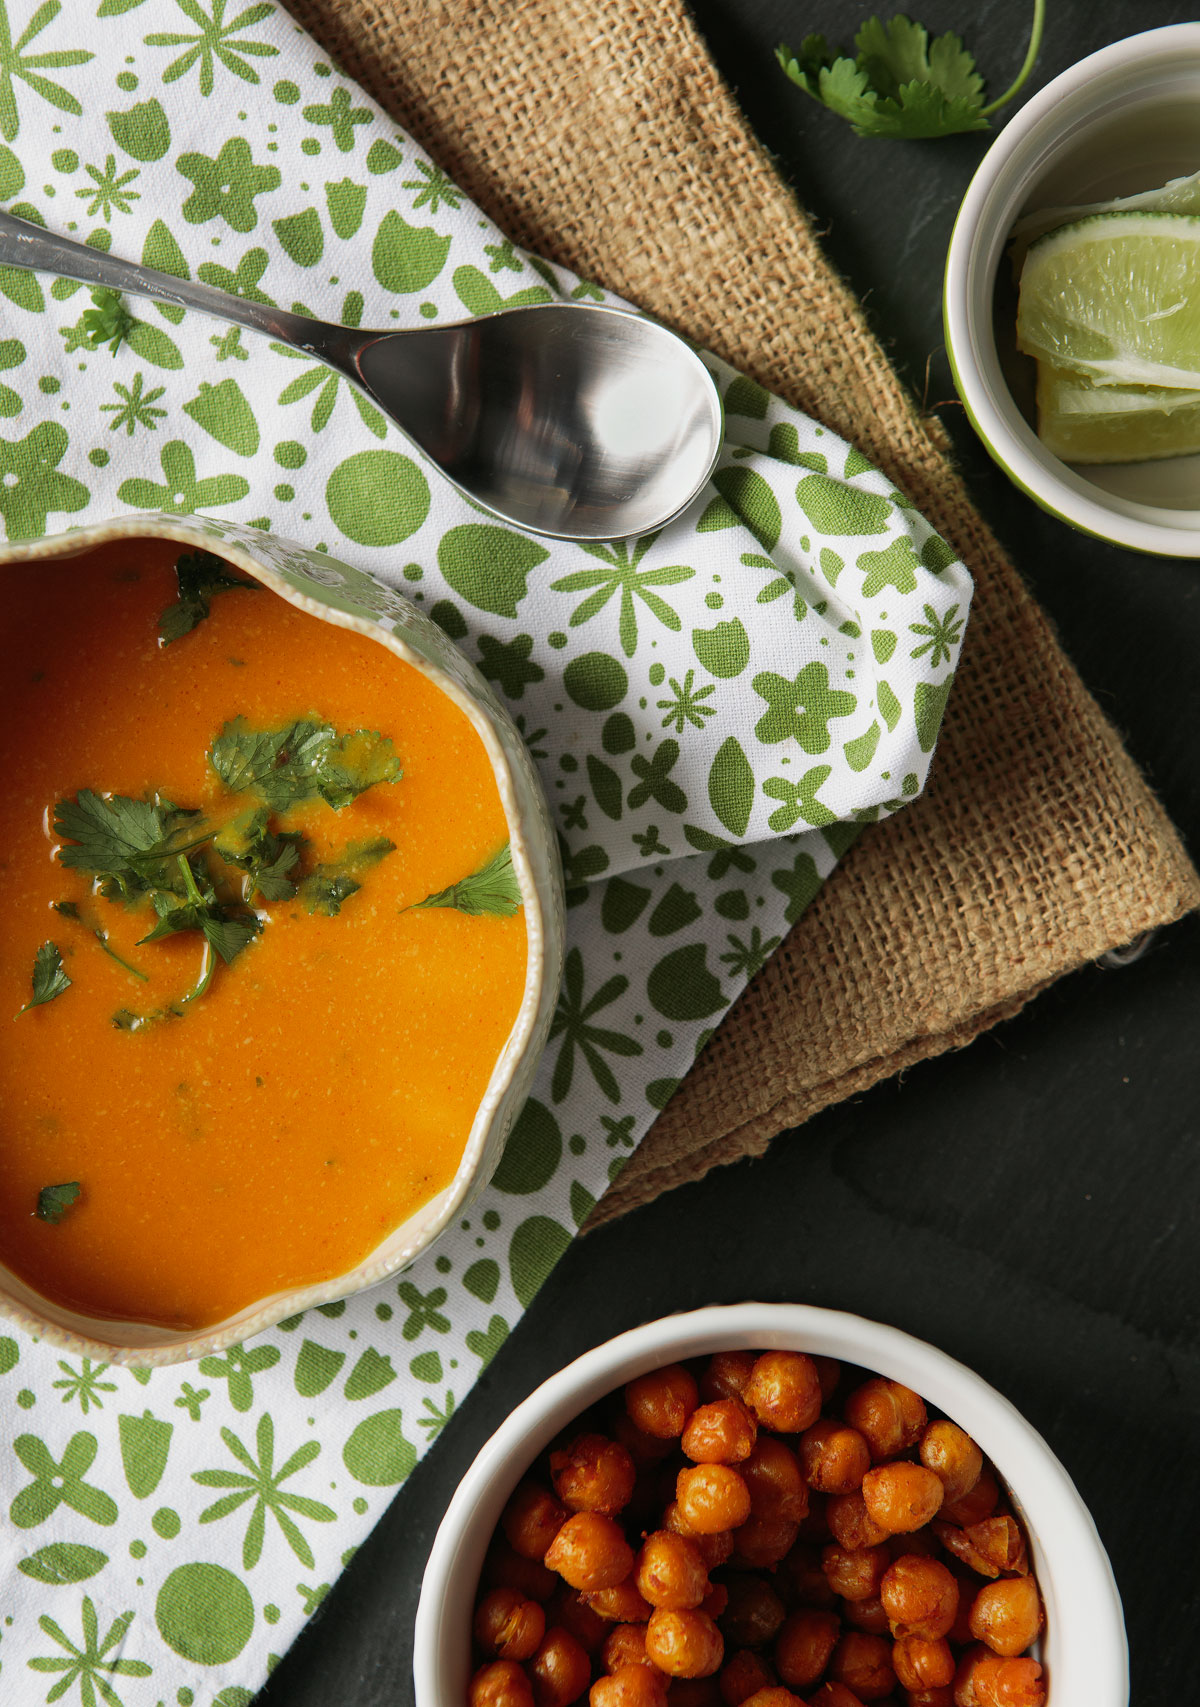
The miracle continued as my talented friend Stephen DeVries took my offering and once again made the spread look gorgeous. I am so glad he did because, y’all, it is delicious. As a Southern girl far from the country of Thailand, I imagine it tastes like what that country would offer: spice, tons of flavor, and a sweet nuttiness from the potato and peanut butter combination. And the toasted chickpeas offer a fantastic spicy crunch to compliment the jalepeno and cilantro in the broth.
Take a Southern, Thai advenure this week- just try not to spill your luggage.
Coconut Sweet Potato Soup (This recipe was taken from the lovely blog Foodess.com)
What You Will Need
1 tbsp oil
1 cup chopped onion (from 1 medium-large onion)
1 jalapeno, chopped (seeds removed)
1 large clove garlic, minced
3 tbsp Thai red curry paste
1 large sweet potato, peeled and chopped into 1½” pieces
1 can coconut milk
3 cups vegetable or chicken broth
⅓ cup natural peanut butter
3 tbsp minced fresh cilantro, plus additional for garnish
salt, to taste
⅛ tsp cayenne (optional)
1 lime, cut in wedges (optional)
What You Will Do
Heat oil in a medium saucepan over medium heat. Add onion and saute until just softened (and a bit translucent). Add jalapeno and garlic; saute for one minute. Stir in curry paste.
Add chopped sweet potato, coconut milk and broth. Bring this mixture to a boil, then turn it back down to medium and cover. Cook until the sweet potato is very soft, about 20 minutes (I like to test mine with the back of a wooden spoon; if it gives gently when you press it, it is ready-to-go). Puree the mixture with an immersion blender, or do it in batches in a regular blender. (Does anyone out there own an immersion blender? I feel like if I had one I would be a total gourmand, much more like the Foodess, and it would save me from clumsily pouring boiling liquid into a blender. Be warned; if you pursue the blender method, do not fill the liquid up to the top of your blender! The steam will explode the top off and soup will go flying everywhere. Trust me.)
Stir in peanut butter, cilantro, and a generous pinch of salt until combined. Stir, and adjust salt to taste. Add cayenne if additional heat is desired.
Serve with more minced cilantro and lime wedges on the side. And chickpeas! And jasmine rice if you have some.
Toasted Chickpeas (This recipe is adapted from the wonderfully detailed Everyday Maven)
What You Will Need
2 cans chickpeas, drained and rinsed
1 tablespoon vegetable oil (if you have coconut, it would work great here)
½ teaspoon curry powder
1/2 teaspoon hungarian paprika
½ teaspoon ground cumin
½ teaspoon ground coriander
¼ teaspoon cayenne pepper
5 to 7 turns of fresh ground black pepper
What You Will Do
Preheat the oven to 350F.
Drain and rinse chickpeas and place them into a bowl. Add in oil and spices. Toss with a spoon until the beans are evenly coated.
Scoop chickpeas onto a non-stick baking sheet OR a baking sheet lightly sprayed with cooking spray. Leave any extra liquid in the bowl (don’t pour it onto the cookie sheet).
Roast the peas for 15 minutes. Toss them again, making sure to evenly distribute them across the cookie sheet, and roast for another 15 minutes.
Let cool for 5 to 10 minutes, then place in a bowl and serve! (Make sure that you let these completely cool before you put them in the bowl; they get mushy if you let them cool together).