Aunt Annie’s Strawberry Layer Cake

Perfect strawberry heaven
Spring strawberry greatness

I wish I had an Aunt Annie.

If I did, I would ask for her for her home address so I could show up every Saturday morning and listen as she lovingly taught me to bake cakes.

The unfortunate reality is that this recipe was not easy to come by. I did not find it on Pinterest, or google “best strawberry cake,” or ask Pioneer Woman. No, this cake took me by complete surprise. And the moment I tasted it, I knew the recipe had to be yours.

Cake on a platter

At a recent photographer friend‘s birthday party, a coworker of ours arrived with a strawberry cake. I love strawberry cake. There is a bakery in my hometown that makes impeccable strawberry cake. But I had yet to recreate anything like it on my own. And to be completely honest, I almost didn’t try this one. I had been let down too many times, sure that it was going to be another missed attempt at strawberry greatness.

But my first bite was a game changer. This cake was pure strawberry; fresh, light and moist with chunks of strawberry, delicately sweet and airy. The frosting was whipped, dense with a strawberry punch. A perfect precursor of spring on a plate. With light streaming in from the cafe windows where we ate, I thought for a brief moment I was living and breathing happiness. And before I left my dream state, the slice was gone.

I think something's missing

My obsessive quest for the recipe began. The owner of the ingredients list did not want to share it (see egg salad dowry entry last week), and so there was one thing left to do: I stalked her. I came by her desk every day and told her I wouldn’t give up. I pled, whined, hid behind office doors to pop out and remind her I wanted it . Then one day, a lovely slip of paper appeared at my desk. A lovely piece of newspaper.

Newspaper recipes are a lost art. I know my generation has passed them over for quick reviews and input from social media sources; I can’t tell you the last time I read a local paper on a Sunday. But the great thing about recipes in the Food section is you know they were loved. Someone took the time to type it out from most likely a handwritten card. They knew it was worth printing and putting on everyone’s front door step. And that’s what I want for this blog- to share with you recipes that are loved, known, and appreciated.

And so, without further ado, I present to you the infamous (stalked) Auntie Anne’s Strawberry Layer Cake. Trust me, it’s worth the effort.

A slice of strawberry

Aunt Annie’s Strawberry Layer Cake

What You Will Need:

1 cup fresh frozen strawberries, thawed (I washed two pints of strawberries, sliced a cup of them in half, then put that cup in a freezer safe bag for the cake. I then froze and thawed the rest of the berries to make sure I had enough juice for the frosting.)

1 box white cake mix

1 box strawberry Jello

3 tablespoons all-purpose flour

1 cup vegetable oil

4 eggs

1/2 cup water

2 batches strawberry butter cream frosting, recipe below

Fresh sliced strawberries and white chocolate coconut truffles for garnish if you like

What You Will Do

1. Preheat your oven to 350 degrees.

2. Spray two (9-inch) metal cake pans with nonstick cooking spray. Set them aside.

3. Drain your cup of strawberries well, reserving the juice for the frosting. I would go ahead and drain the rest of your frozen strawberries separately at this point to make sure you have enough juice.

4. Combine the cake mix, strawberry Jello powder and flour in a large bowl of an electric mixer. Add the oil, eggs, water and drained strawberries. Mix well on low for 30 seconds, then at medium speed for two minutes (make sure NOT to overmix here; it messes with the jello texture), scraping the sides of the pan as neccessary.

5. Divide the batter equally among two prepared pans and bake for 30 minutes. Check these at about 28 minutes to make sure they don’t over-bake. Remove the cake from the oven and let it cool for 10 mintues in the pan, then turn it out onto wire racks to cool for another 30 minutes.

6. At this point you can go ahead and frost the cake with buttercream. However, BAKERS ALERT– you will have a moister cake if you take these rounds, wrap them in plastic wrap first then aluminum foil, and freeze them overnight. Take them out of the freezer the next morning and let them sit at room temp until you need to frost them.

7. Garnish to your heart’s content with strawberries, white chocolate truffles, sprinkles, marshmallows, edible glitter

Strawberry Buttercream Frosting

What You Will Need

1 stick butter at room temperature (This is important for your frosting to whip up to it’s peak fabulousness)

1/4 cup strawberry juice (Please, please, please don’t skimp on this; the juice makes this frosting!)

1 pound powdered sugar

What You Will Do

1. Using an electric mixer, mix the butter, juice, and sugar together on low until blended. Then cream the mixture on high until light and fluffy, about two minutes. The icing will start to form peaks and feel like a dense buttercream when it is ready.

2. Scrape the sides of the bowl and/or taste frosting as necessary.

BAKER ALERT (These are way too much fun) If you dip your icing knife or spatula into a bowl of warm water, it will help smooth the frosting without tearing the cake. Also, it is easier to make one batch of frosting for the layer between the two cakes, then make a second batch for the top and sides of the cake. This ensures even frosting in the center and on the outsides of the cake.

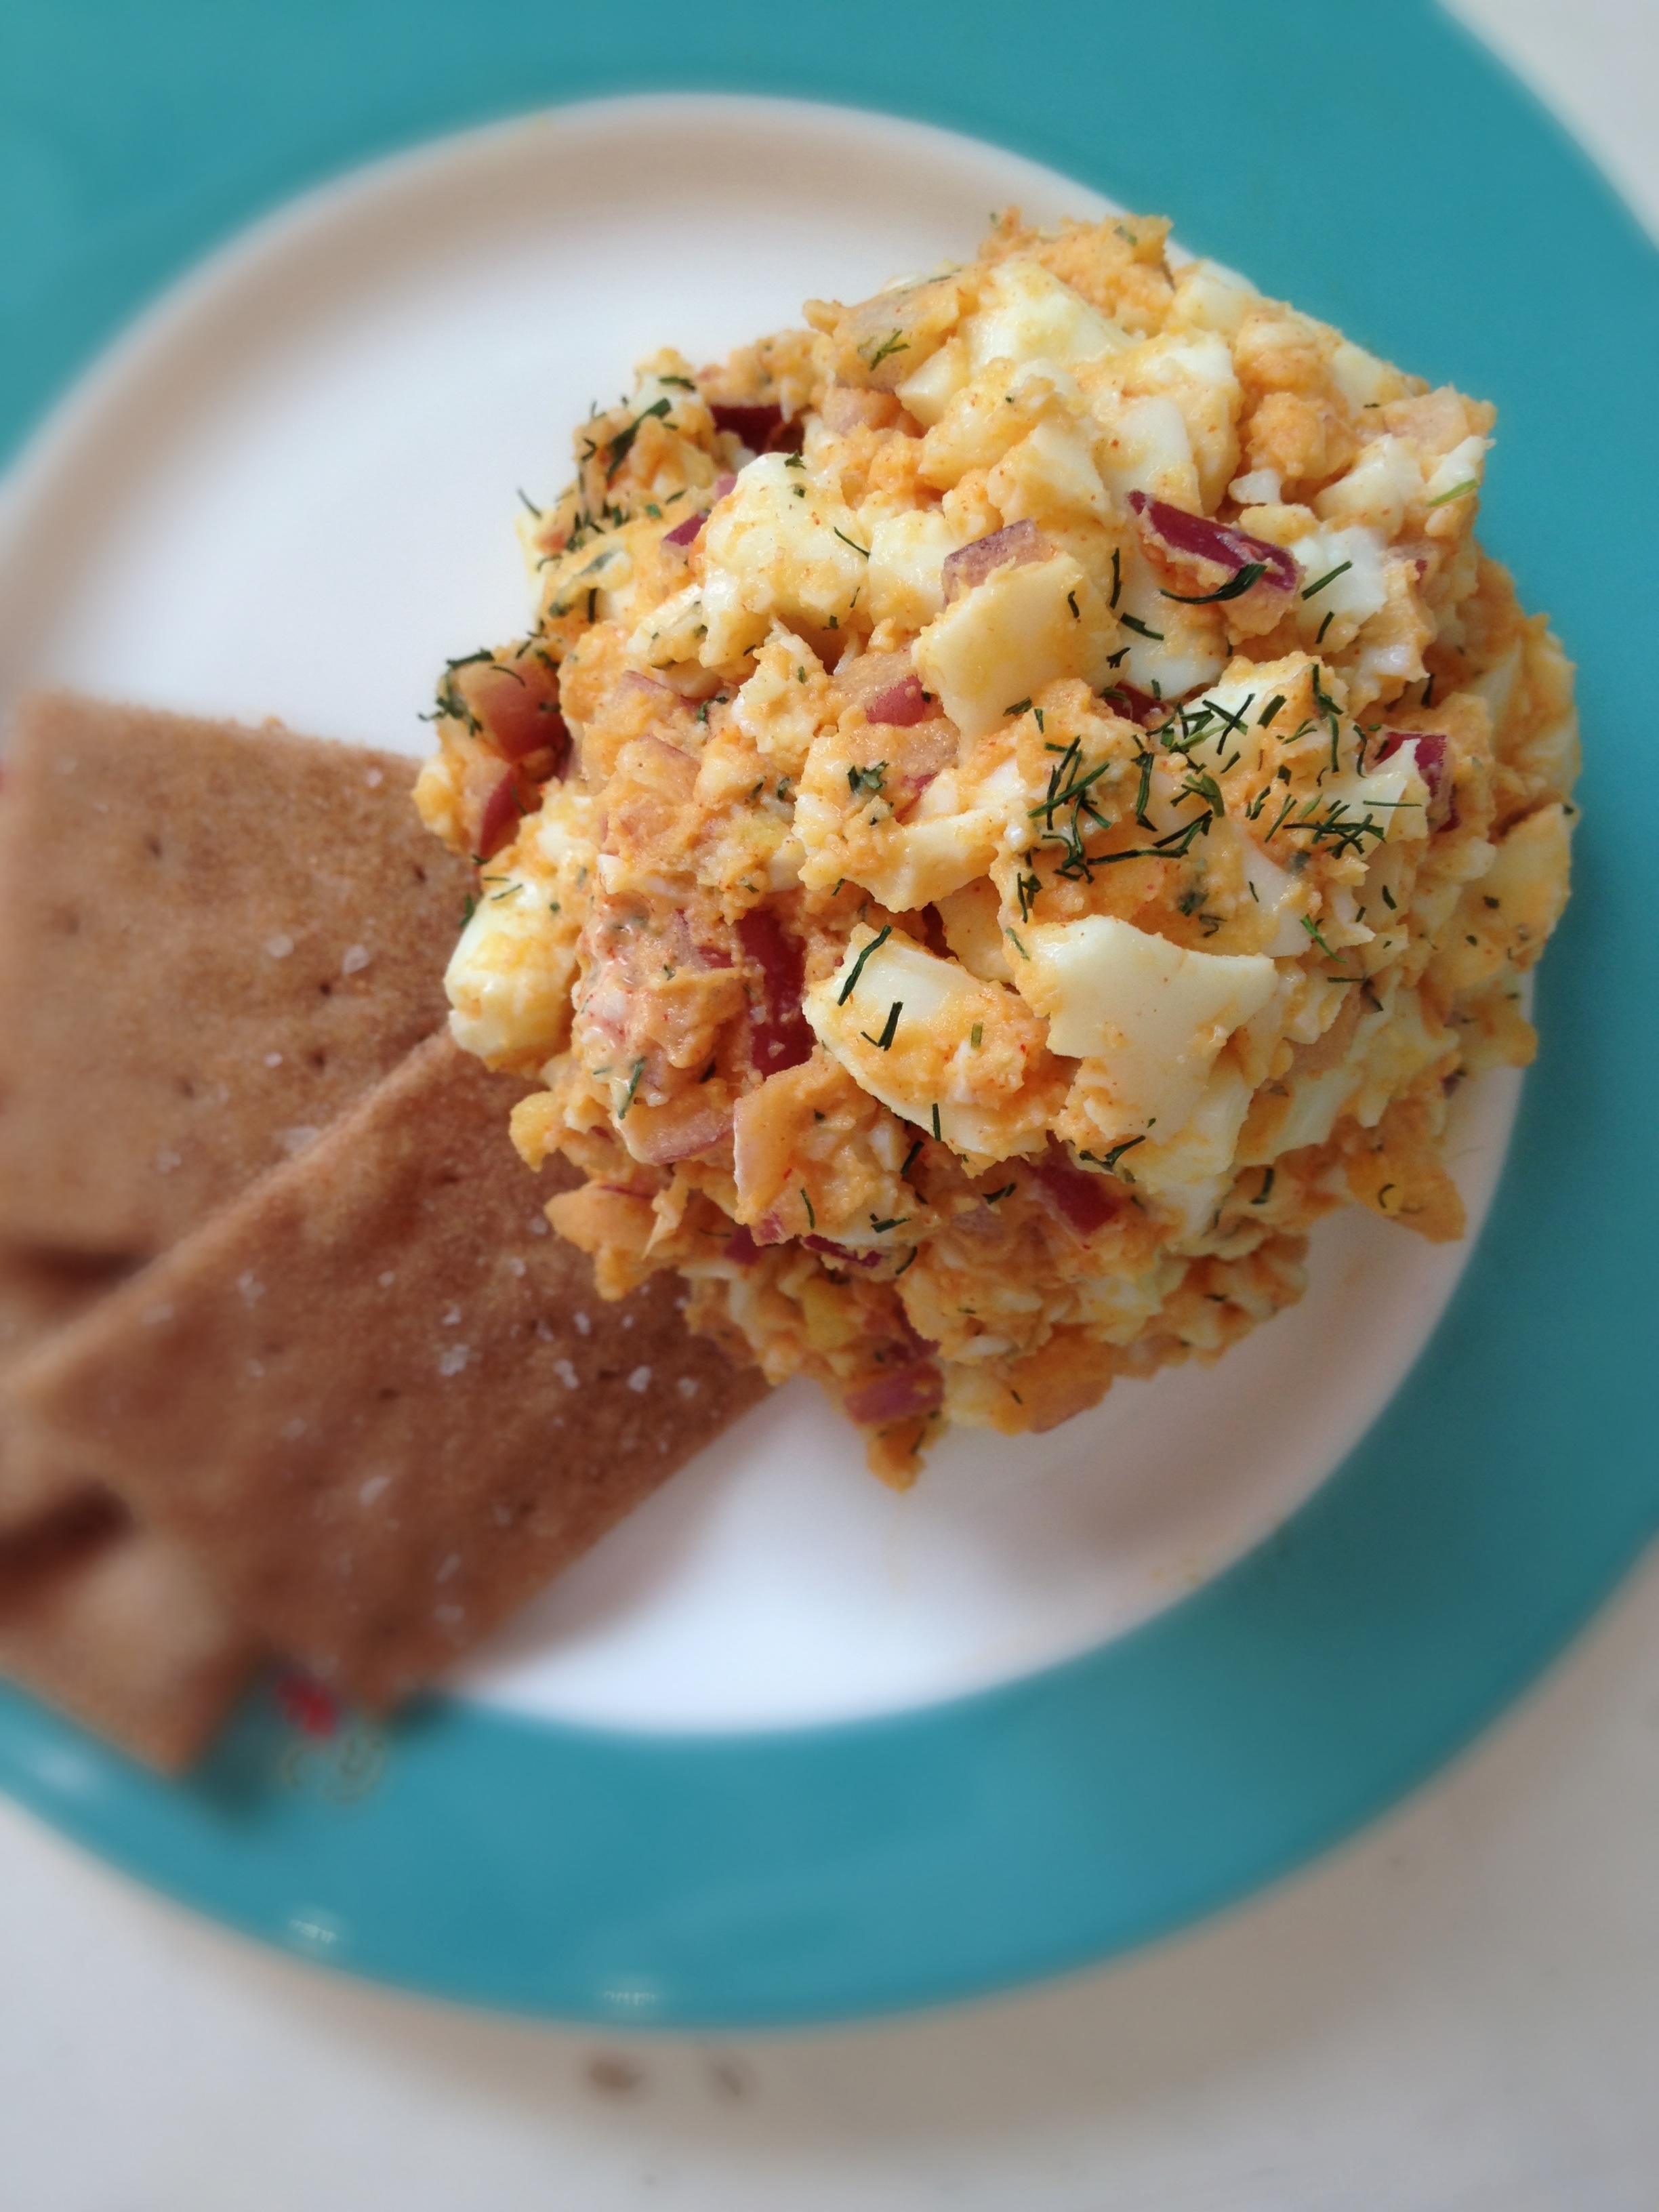
Spicy Egg Salad with Homemade Wheat Thins

Bright and spicy, a sweet twist on a Southern tradition
Bright and spicy, this egg salad is a sweet twist on a Southern tradition

Maybe it’s the bunnies, or the baby showers, or the easter egg dying I have been eying on Pinterest, but spring is in the air. And it has left me with a serious craving for egg salad.

Spring is a season for parties in the South, and a good egg salad recipe is very similar to the antiquated idea of a bride’s dowry- a pursuit to be taken seriously, most importantly because it ends up on your great Aunt Frances’ silver platter that was passed down through three generations and used at your next best friend’s wedding shower. The pressure is on to not mess this thing up- expectations are high, but unfortunately, egg salad is something that can easily over promise and under deliver.

Too much mustard and it’s stained a fluorescent sunshine color; too much mashing and your eggs end up the texture of warm cement; too much mayonnaise and it tastes about as bland as a jar of the stuff on a spoon.

This fact, as you might have assumed, drives me crazy.  Every recipe that winds up on this blog should be a winner- something you are proud to take to your great aunt Sally’s third cousin’s twice removed housewarming party. Something people will scoop onto their plastic plate, taste, and go, “This is fantastic! I must know you! And your recipes!”

Spicy and smoky-sweet from the paprika (I highly recommend Hungarian paprika here) with a liveliness and bright note of dill, this egg salad ushers in spring beautifully. And to top it off (no pun intended), the homemade wheat thins are a fabulous vehicle for the eggs. Well worth the extra effort, the crackers are crispy (depending on how thin you roll them), slightly sweet and deliciously nutty. Sprinkle them with a bit of flaky salt and voila- so much better than the version you tear open from a box.

Addictively easy and delicious

I can’t wait to see all that spring has in store- for you, for me, and for our egg salads.

Spicy Egg Salad (This recipe was adapted from Meg’s Everyday Indulgence)

What You Will Need:

8 boiled eggs (This is the best method for boiling eggs, trust me)
1 tablespoon mayonnaise (I like Duke’s brand)
2 tablespoons prepared Dijon-style mustard (I like Grey Poupon)
1 teaspoon dried dill weed
1 teaspoon paprika
1/4 cup minced red onion
salt and pepper to taste
Homemade wheat thins (recipe below)

What You Will Do

1. In a large bowl, combine the eggs, mayonnaise, mustard, dill, paprika, onion and salt and pepper.

2. Mash the mixture well with a fork, but make sure you don’t get carried away and form a paste. Egg paste never appealed to anyone; its best left for tooths.

3. Serve on your best silver platter with a plate of homemade wheat thins.

Homemade Wheat Thins (This recipe is adapted from none other than one of my favorites, Smitten Kitchen. Have I told you lately that I want to be like Deb when I grow up? Because I do.)

What You Will Need 

1 1/4 cups (155 grams) whole wheat flour
1 1/2 tablespoons (20 grams) light or dark brown sugar
1/2 teaspoon (3 grams) table salt, plus additional for topping
1/4 teaspoon smoked paprika (a friend of mine gifted me with this kind and I am officially addicted; it smells amazing)
4 tablespoons (55 grams) unsalted butter, cold is fine, cut into small bits

What You Will Do

If you have a food processor:

1. Combine the flour, sugar, salt, paprika and butter in a food processor, pulsing the mixture until the butter is evenly disbursed in the crumbs. It looks like fine sand. Drizzle in 1/4 cup (60 ml) cold water with the machine running; run it until the mixture begins to form a ball. You might need more than 1/4 cup of water; just slowly add a little bit of water until the mixture darkens and clumps together.

If you don’t have a Cuisinart and love to work out your arms:

1. Combine the flour, sugar, salt, paprika and butter in a medium bowl. Using a pastry blender or your fingertips, work the butter into the mixture until mixture resembles coarse cornmeal. Add 1/4 cup (60 ml) cold water, stir with spoon until combined. Knead once or twice on counter.

2. Roll your dough out, half at a time, to a large, very, very thin rectangle-ish shape on a well-floured counter. Thinner than you even think necessary is best. I rolled mine out to be about 6 inches wide by at least twelve inches tall. Frequently check to make sure your dough isn’t sticking (this is an important step because it sticks easily); if it is, gently scrape a spatula underneath to lift it, then flour the counter again. Using a knife or pastry wheel, cut dough into about 1 1/2-inch squares. Dock crackers all over with a toothpick or sharp knife.  I sort of free styled the dots like I thought Emeril Lagasse would if he were making these. Bam!

3. Evenly coat a baking sheet with cooking spray.

3. Transfer crackers to baking sheets using your hands or a spatula, depending on how delicate they are. You only have to space them a little bit because they really don’t spread. Sprinkle with flaky sea salt if you’d like to approximate the salty exteriors of the store-bought crackers.

4. Bake the crackers until they are crisp and bronzed, about 5 to 7 minutes, but please keep a close watch on the first batch as thinner crackers will bake faster and the thicker ones will take longer. I also didn’t roll my dough out perfectly evenly, so some of my crackers cooked faster than others. If this happens, I recommend just sliding the thinner crackers off the sheet to cool and baking the others a few minutes longer, until the edges turn light brown or look crisped.

5. Cool the crackers in baking pans on racks. Crackers will keep in an airtight container officially for a week, if they can last that long, but mine have seemed to disappear. You can also freeze them in an airtight container between sheets of waxed paper for a couple months.