Spicy Turkey Sausage and White Bean Soup

Makes you feel warm inside.

In the south, “winter” is a loosely defined term.

Sometimes it means 75 degrees, flip-flops, shorts, and a football sweatshirt. Other days, it is defined as freezing temperatures, layers, more layers, gloves, and a freak snowstorm which requires at least another layer.

But this week, we are in a weather gray zone. Not quite warm- it hovers around the lower fifties, upper forties; drizzly, with no snow; and fog. Fog in the morning, fog in the evening, fog in the noontime.

And it’s times like these that call for soup. It’s the one time a year I feel (somewhat) urban with my cooking, imagining myself walking home from the market around the corner, toting a super cool umbrella and handmade grocery bag, skipping up to my loft and making a big pot of stew from locally grown organic tomatoes, hand-fed chicken broth, and the cilantro I raised in my rooftop garden.

But, back to reality, my tiny foggy kitchen, and the February “Winter Comforts” issue of Bon Appetit. Their Chorizo and White Bean Stew recipe caught my eye- the flavor profile was spicy, balanced by the beans, and quick. Looking for a way to make due of what I currently had in my refrigerator (and not being able to retro-bike to my nearest fresh foods market) I substituted spicy Italian turkey sausage for the chorizo, splurged on fresh thyme at Publix, added some smoked paprika, and got simmering.

This soup hit the spot, easily one of the best I have made in a while, and made me long for the end of the in-between: when fog clears, the sun comes out, winter needs no definition, and it’s time for flip-flops again. But this time without the layers.

Spicy Turkey Sausage and White Bean Soup

This recipe was adapted from Bon Appetit

What You Need

  • 2 tbsp olive oil, divided, plus more for drizzling
  • 1 1b spicy Italian turkey sausage (or you could use mild for a sweeter flavor)
  • 1 large onion, thinly sliced
  • 4 garlic cloves, finely chopped
  • 1 sprig thyme
  • 2 15-ounce cans cannellini (white kidney) beans, rinsed
  • 2 cups low-sodium chicken broth
  • Kosher salt, freshly ground pepper
  • 5 ounces baby spinach (about 10 cups)
  • Smoked paprika

What You Will Do

1. Heat 1 tablespoon oil in a large skillet over medium heat. Add sausage and cook, turning occasionally, until browned and cooked through, 15-20 minutes. Mine took about 23 minutes; I think turkey sausage links take a bit longer to cook through. Transfer the sausage to a plate.

2. Reduce heat to medium. Heat remaining 1 tablespoon oil in the same skillet. Make sure you keep all of those delicious pork bits in the pan to saute with your veggies. Add the onion slices, garlic, and thyme sprig. Cook, stirring occasionally, until the onion is softened, about 5-8 minutes. I like to add the garlic later; at about six minutes. Because burned garlic is no good to anyone.

3. Add the rinsed beans and broth and cook, crushing a few beans with the back of a spoon to thicken sauce, until slightly thickened, about 8-10 minutes. Watch the soup here; mine needed a bit longer to thicken. When it is the consistency of a chili, it’s perfect. Season with salt and pepper. Add spinach by the handfuls and cook just until wilted, about 2 minutes.

4. Slice the turkey sausage and fold it into stew; add water to thin, if you like. Normally I don’t like to add water because I feel it dilutes the flavor, but this is a thicker soup, so you have some room to play. Taste it again to make sure your salt and pepper ratio is working.

5. Divide the soup among bowls; drizzle with oil. I highly recommend sprinkling it with more paprika, and then some more just for good measure.

Creamy Thai Sweet Potatoes and Lentils

Image
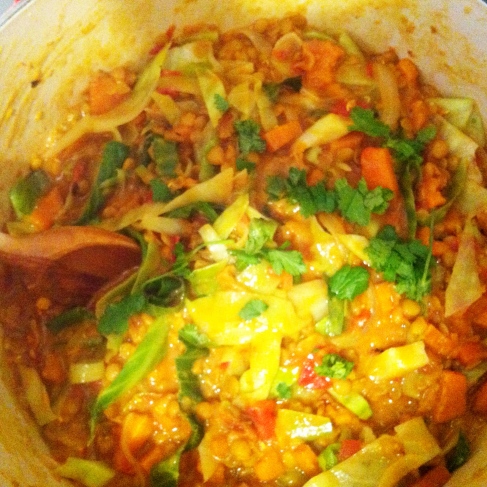
The sun shines on creamy Thai dishes. Literally.

“Just keep shipping.” Or in my case, just keep posting. Whether this quote came from Mark Zuckerberg, Steve Jobs, or Seth Godin, it is has been on my mind. And this recipe is definitely worthy of a post.

Despite my normal need to explain every single detail of why this recipe works- and it does- I have chosen instead to illustrate some of the incredibly simple steps that it takes to make this- or, what happens when sweet potatoes and lentils, stewed with vegetable broth and tomatoes, are added to sauteed cabbage with onion and garlic, then topped with coconut milk. That’s right, coconut milk; the distant cousin in flavor profile of this delicacy we all probably grew up on (a tropical delight I believe comes from the exotic “take-the-water-out-of-cows-milk-and-somehow-make-it-last-for-decades” tree).

Also, word to the wise- cabbage takes a while to cook. Do not, as I did, overload your skillet with cabbage and expect it to behave like spinach and wilt up instantly.

Maybe one of these days I will actually learn to be patient while I cook. Maybe. Please teach me how to do this.

Also, check out my new favorite cooking blog, A Pinch of Yum. Lindsay is a cooking and photography inspiration. Jealousy+Admiration+her writing makes me laugh= my feelings towards this blog.

This recipe is taken from A Pinch of Yum and can be found here.

Creamy Thai Sweet Potatoes and Lentils

You will need:

  • 1 cup lentils, rinsed
  • 4 cups vegetable broth
  • 2 medium sweet potatoes, unpeeled and diced.
  • 1 teaspoon turmeric
  • 3 tablespoons oil
  • 1 tablespoon butter (I found I didn’t need the butter; it depends on your taste buds.)
  • 2 cloves garlic, minced
  • 1/2 onion, thinly sliced
  • 1/2 head green cabbage, thinly shredded
  • 2 jalapenos, ribs and seeds removed, minced
  • 2 teaspoons fresh minced ginger (I also didn’t use the ginger because I am not a huge ginger fan. If you like ginger, I would suggest you put it in. If you don’t, then don’t. Thank-you-very-much.)
  • 14.5 ounce can fire roasted tomatoes
  • 2/3 cup regular coconut milk
  • salt to taste (I would suggest adding salt and pepper as you cook; I find mine lacked a bit of salt once I served it.)

You will:

  1. Pour lentils, broth, and sweet potatoes into a large pot. Bring to a boil and then simmer on low for 30-45 minutes, or until lentils and sweet potatoes are just barely done cooking. Add the turmeric, tomatoes and ginger (or not) to the pot and cook for another 10 minutes.
  2. Heat the oil and butter in a large skillet. Add garlic, onions, and jalapenos. Saute for 2-3 minutes. Add the cabbage and cook for 10 minutes, or until cabbage is cooked through. (This is where you should be patient. This is where I was not.)
  3. Add cabbage to lentil pot and stir in coconut milk. Top with cilantro.

This looks like:

Cabbage might be the funnest thing to slice in the universe.
This reminds me of the earth's core diagram I think I saw in second grade.
Do not crowd the pan like this. You end up with cabbage all over your floor and in your stovetop burners. Not a good smell.
It is hard to take iphone pictures with one hand. I am glad I had an "assistant" for this shot.
The fresh cilantro on top makes this dish. Enjoy!

In case you are wondering, this dish is super healthy and doesn’t have much fat or calories. Which means I will now down my Whoppers milk shake. What to do with leftover Easter candy? Make that. You totally earned it.

Spicy Southwest Black Bean Burgers

Pretty patty.

Commitment.

Yes, that is the theme of today’s post. Most of you will probably conjure up images of couples, married for 50+ years, holding hands, walking along a beach. Or someone climbing Mt. Everest. However, not for this blog. Today, I confess that there are few recipes that have required as much commitment to tweaking as today’s endeavor to make a delicious black bean burger.

As you well know, I. love. black. beans. (And, to be clear- I love you, my readers, more than black beans.) But, the quintessential black bean burger has eluded me. To me, black beans are the Mary Poppins bag-of-tricks for the culinary world. Craving brownies? Puree a can with water and add to brownie mix. Fresh Salsa? Chop up cilantro and garlic, add some crushed tomatoes and corn, and voila- deliciousness. But whipping out a burger that actually tastes like a burger (juicy, with full, rich flavors and a slightly smoky undercurrent laced through) from BB* has yet to happen for me.

However, today’s recipe is one step closer to our goal.

This, to me, is the closest I have come yet to a BB burger that has depth of flavor, and the addition of cumin gives it that smokiness I look for in a good meat burger. Plus, the Panko bread crumbs are a brilliant addition that help hold the burger together and give it a crispy exterior (other recipes I have seen look like someone took a mudpie, threw it on a skillet, and called it a day).

So enjoy the recipe, and post below to let me know how you create your perfect black bean burger.

I came across this recipe from the fabulous Ree Drummond (aka Pioneer Woman) and her Tasty Kitchen site; my modifications are in italics. Does making things in italics seem so much more dramatic to you? I feel like whenever I do this it automatically makes things intriguing. I think should  all should do this more often. 

You will need:

  • 1 can (16 Oz. Size) Black Beans (you know what brand to use)
  • ½ whole Onion, cut into wedges
  • 3 cloves garlic, peeled and rough chopped (I used four because I have a slight addiction.)
  • 1 whole red pepper, stem and seeds removed, chopped
  • 1 whole egg
  • 1 teaspoon cumin
  • 1 teaspoon onion powder
  • 1 teaspoon chili powder
  • 1/4 teaspoon salt (Because the recipe calls you to rinse/drain the beans, I thought they needed some extra salt.)
  • 1 tablespoon Sriracha hot sauce (For us Southern girls, Texas Pete does the trick.)
  • ½ cups finely chopped cilantro
  • 1 cup Panko bread crumbs
  • 2 tablespoons canola oil
  • 4 whole burger buns or kaiser rolls (I used thinly sliced everything bagels here and it worked great.)

You will:

Drain the can of black beans. In a mixing bowl, mash the black beans with a fork or a potato masher. I forgot this step and had to do this with a pastry cutter after I added the onion/garlic/red pepper. Actually, it was really fun, and I felt like I was working out my biceps. 

My bicep workout for the day.

Use a food processor to chop the onion, garlic, and red pepper until very fine. Stir the mixture in with the beans. See note above.

In a separate mixing bowl, combine the egg, cumin, onion powder, chili powder, salt, Sriracha (or Texas Pete) and cilantro. Add this to the bean mixture and combine well.

If the mixture has a lot of liquid, strain with a cheesecloth or let it strain through a colander with very fine holes. When I make this again, I will strain my bean mixture. They were a bit watery, and that made it harder to form the concoction into patties. Once the excess liquid has drained off, return the bean mixture to the bowl and stir in half of the bread crumbs.

Use your hands to form four evenly sized patties. Coat the outside of the burger patties in the remaining bread crumbs. I just dunked each patty in bowl of Panko- this was also fun and satisfying. See, with black beans, the fun just never ends.

Heat the oil in a skillet on medium high heat. Cook burgers in the pan until heated through and slightly browned on both sides. To cook these more evenly, flatten them a bit with your spatula. You can also put them in the over for a few minutes if you like them more well-done.

Put the finished burger on top of a bun. Dress with all your favorite burger condiments and enjoy! In my case, this involved tomato, lettuce, guacamole and mayonnaise. For my hubby, who does not yet understand the joys of oil and egg whipped together into heaven, just guac.

At this point, I was so excited to bite into this I think I lost my sense of lighting. Apologies for that gnarly reflection at the bottom of the plate.

*If it is alright with you, and I am now going to abbreviate black beans with BB. This makes my writing sound much better because I can not find an alternative to this word.

The Art of Chinese Stir Fry

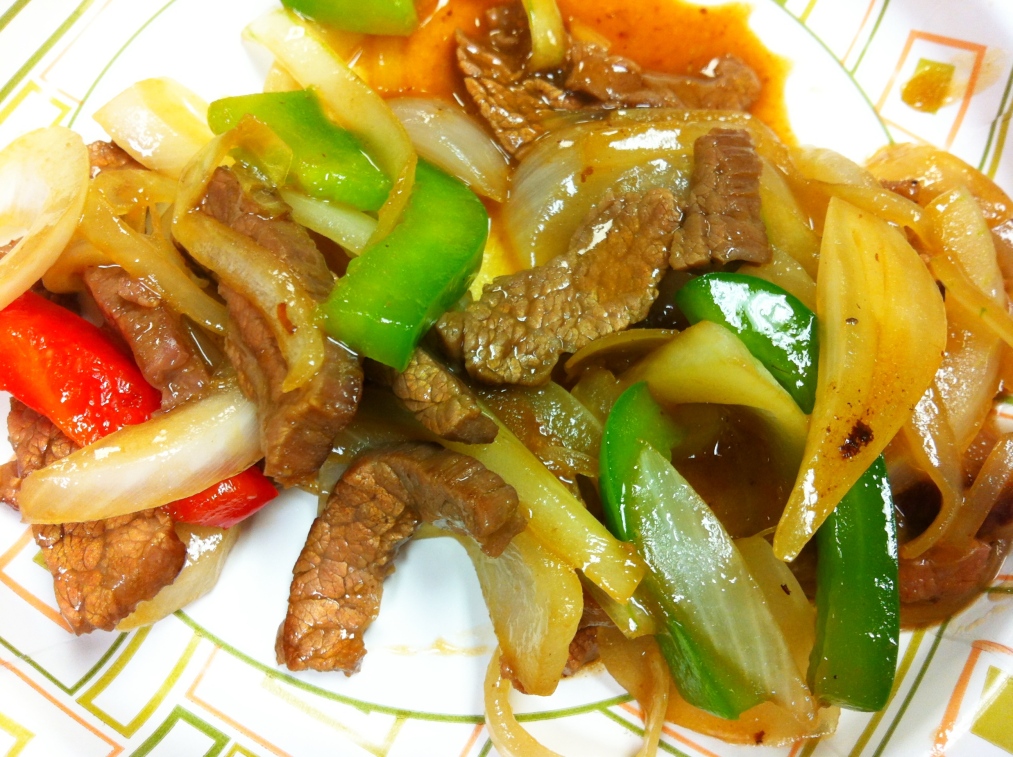
Beef, bell peppers of multiple hues, and onions

Let me begin this post by saying I am very, very far from mastering the art of Chinese cuisine. My experience with Asian food began at the tender age of five going to pseudo-Japanese steakhouses and filling up on so much fried rice that I could not get my wee body out of the pseudo-stool I was pseduo-sitting on.

That sentence felt very intellectual.

Moving on.

However, a dear friend of mine recently invited myself and a few others to accompany her to a “Authentic Chinese Stir Fry” class at a local cooking store. Slightly intimidated by my lack of skills with a wok and/or chopsticks, but intrigued my love of the aforementioned fried rice, I pressed on.

What I found was absolutely delightful. Not only is stir fry easy (well, Susan made it seem that way), it was tasty and quick. And to help all of you out there who might feel threatened by the sight of a hand-hammered wok, I have listed below my top 5 tips I learned while at the class.

Top 5 Stir Fry Tips

1. You need a wok to stir-fry correctly. Yes, I said wok. Not pan, not cast iron skillet. I thought I could get away with using my oversize non-stick pan and forcing as many items as possible inside. It turns out you can’t because the oil has to get hot enough (thus the word stir-fy) to cook the ingredients properly. Also, apparently I am violating health codes by attempting to get my nonstick pan that hot.

2. Smoking oil is burnt oil. I did not know this. In my mind, the steam coming off of oil in a pan seemed like something I would see in a magazine spread. When you stir fry, you want your oil simmering, not smoking. Simmering– it just sounds so romantic.

3. Organization is key. Make sure all of your ingredients are pre-chopped and ready on your counter in the order they need to go into the pan. This helps the stir-fry process flow a lot more smoothly and allows you to avoid the “WHERE THE HECK IS MY SOY SAUCE!!” epidemic/panic common to cooks in small kitchens. Yes, this should be a diagnosed disorder.

4. Don’t crowd the pan. I learned to cook the meat/thicker veggies first, take it or them out to rest, then put it/them back in at the end with your sauce.  Do not, like me, try to cook everything at once. Your veggies will steam and relase juice into your pan, and your ingredients will not have the chance to caramelize and get crispy. Thus the watery mess I had experienced with my former non-stick situation.

Side note: If you use mushrooms in your stir fry, also cook those separately and add them in at the end of your cooking. They have the ability to release a ton of water and turn your saucy stir fry into a watery stir fry. This is not good eats. (Insert your best Alton Brown imitation here.)

5. Use shallow serving platters to serve your stir-fry. When you pile your golden goodness into a big bowl, the heaviness of the bowl takes out some of the juices. It is best to use a wide, shallow pan, and serve it immediately.

Extra tip: Japanese soy sauce is different than Chinese soy sauce. Chinese is darker and has more molasses, thus making it tastier. Please impress your other foodie friends with this fact.

And, to go out in a blaze of stir-fry glory, we also learned about a local Chinese foods store if anyone wants to take a trip and get their own stir-fry a wokkin’.

Yes, those are bamboo shoots. And they are glorious.


Thai Shrimp Noodle Bowls

Image

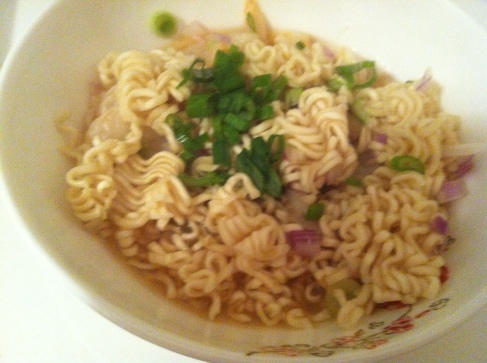
“Do not post something involving cheese” (see previous recipe below). Noted. Result? Thai shrimp noodle bowls.

Thai food is a new love of mine. The spiciness, use of nut-based-sauces (Peanut sauce on everything? Yes please), and layers of flavor appeals to just about everything cooking is to me. The challenge I faced with my newfound passion was two fold- a.) Thai food can be expensive and b.) Thai food is expensive.

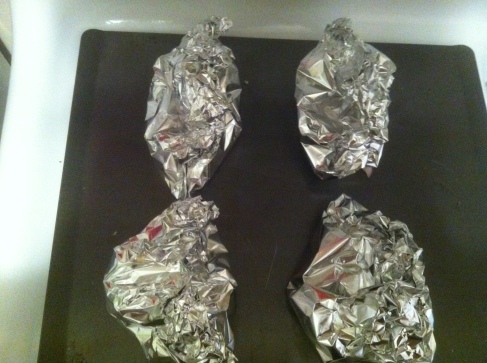
And then I come across this recipe- marinated shrimp in a soy-lime broth- all for about the cost of what one Thai dish would be at your local restaurant, if not less. Oh, and the best part? You bake the shrimp pouches in the oven. Anytime you get to say the word pouches in a recipe it automatically makes it cuter and a bit quirky.

Image

Image
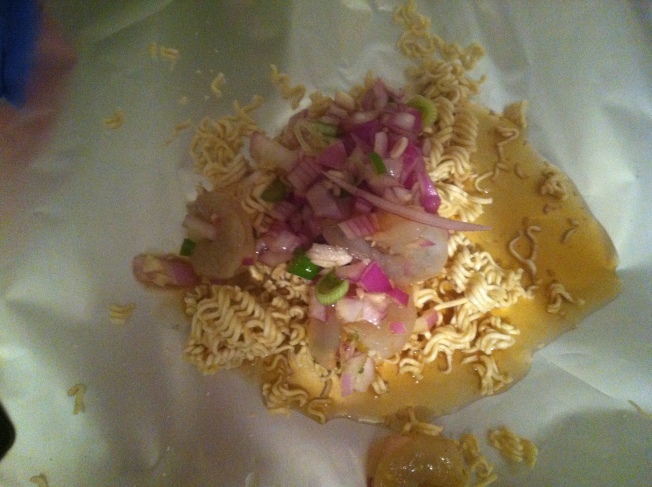
Pouches of powerful, peppy (culinary) presents.

Pouches. You’re welcome.

So get your Thai on, take out the stress of your day by breaking up some ramen noodles, and make an aluminum pouch, dang it.

This recipe was taken from rachelray.com. It serves 4 and took about 30 minutes to make.

Ingredients

  • 2 tablespoons fresh lime juice
  • 1 tablespoon soy sauce
  • 2 teaspoons sugar
  • 2 garlic cloves, finely chopped
  • 2 scallions, thinly sliced, dark green slices set aside
  • 1/2 red onion, finely chopped (about 1/3 cup)
  • Pinch of crushed red pepper flakes
  • 1 ounce peeled baby shrimp, thawed
  • 2 3 ounce packages  ramen noodles

Directions

  1. Preheat the oven to 400 degrees . In a medium bowl, whisk together 1/2 cup water with the lime juice, soy sauce, sugar, garlic, white and light green scallion slices, onion and red pepper flakes. Add the shrimp and marinate for 10 minutes. I suggest adding some of the flavor from the packet that comes with your ramen noodles to the marinade. I found my pouches (ok, this is excessive-there was no need to bold this word- but I can’t help it. It’s too fun) needed a bit more flavor.
  2. Meanwhile, break the ramen noodles into small pieces and divide evenly among the centers of four 16-inch-long sheets of heavy-duty foil. Top with equal amounts of the shrimp mixture. Pull up the sides of the foil and pour 1/3 cup water over each of the shrimp-and-noodle mounds. Crimp the sides of the foil to enclose, and transfer the pouches to a rimmed baking sheet. Bake until the shrimp and noodles are cooked through, 8 to 10 minutes. Depending on how many shrimp you put in each pouch you might need a bit longer- just make sure your shrimp are pink when you take them out of the oven.
  3. Transfer to individual bowls and top with the dark green scallion slices. Also a squirt of sriracha works beautifully here.

Whole wheat black bean tortilla pie

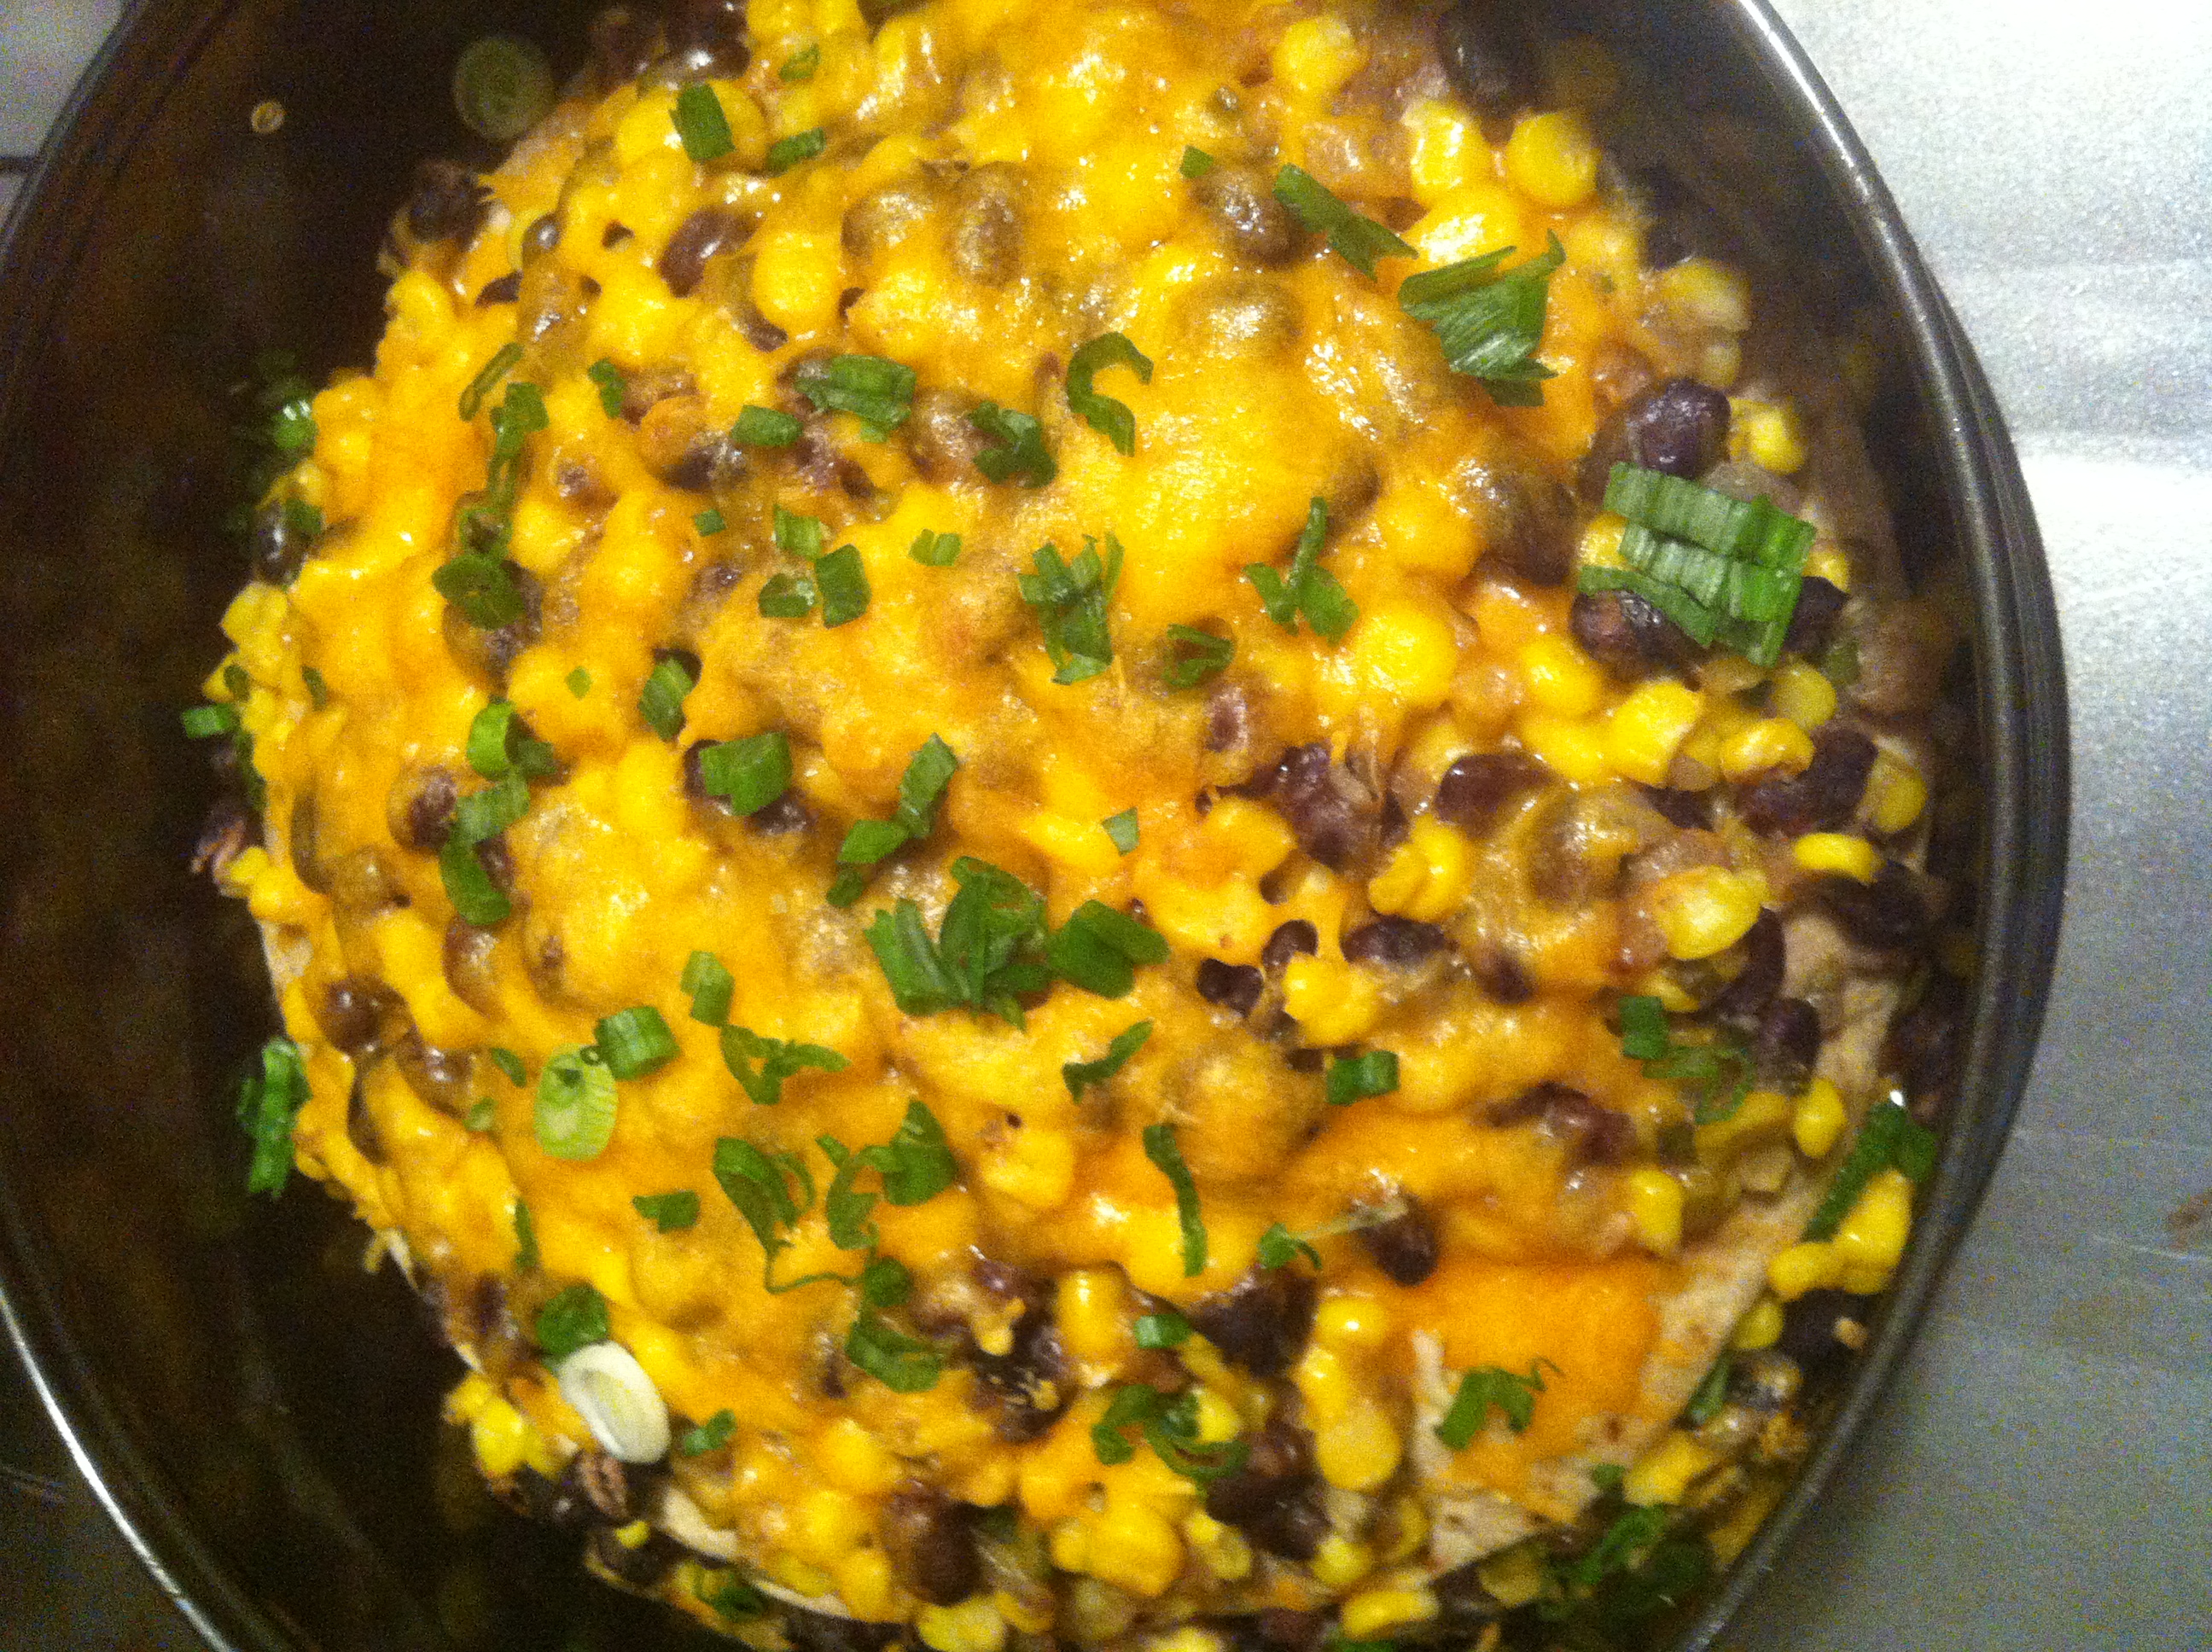
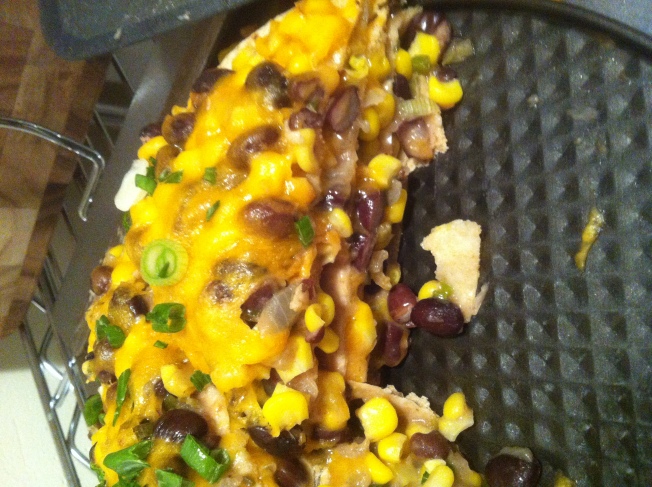
Tower o' black beans

This is what black beans do on their vacations- make layers and bake.


Image
This is what black beans do on their vacations: make layers and bake.

I am all for easy. I am all for Mexican food. And I looooooove black beans.

Did I say I love black beans? I. Love. Black. Beans.

Yes, there is something to be said for taking an entire afternoon to make your own homemade version (just ask Heidi Swanson). I am sure it is worth it. And before you ask- no, it was not attempted on this recipe. Though maybe one day I will get over ambitious, watch too much Cooking Channel, and decide to make a day of it.

The recipe below was not only easy, it hit the niche of what I was craving: something spicy, cheesy (this seems to be a running theme on this blog; note to self: do not post something cheesy for the next entry-hah!), and full of black beans. It also reminds me a bit of those layered Mexican dips you see at parties, only way bigger and better.

So if you have an extra thirty minutes to spare, are aching to use those jarred cans of black beauties, and love a layered Mexican dish like I do, strap on your onion goggles and get choppin’.

For my favorite brand of canned black beans, go here.

For my favorite restaurant’s black beans, go here.

This recipe came from marthastewart.com, but I modified it a bit.

Ingredients

  • 4 10-inch flour tortillas  (I used “medium” size and the whole wheat version instead)
  • 2 tablespoons canola oil
  • 1 large onion, diced
  • 1 jalapeno chile, minced (one can remove ribs and seeds if one desires; one may also leave them in if one loves jalepenos like I do)
  • 2 garlic cloves, minced
  • 1/2 teaspoon ground cumin (I also added a bit more cumin because this spice loves Mexican food)
  • Coarse salt and freshly ground pepper
  • 2 cans (15 ounces each) black beans, drained and rinsed (you know what brand to use)
  • 12 ounces beer, or 1 1/2 cups water
  • 1 package (10 ounces) frozen corn
  • 4 scallions, thinly sliced, plus more for garnish
  • 8 ounces cheddar cheese, shredded (2 1/2 cups)

Directions

  1. Preheat oven to 400 degrees. With a paring knife, trim tortillas to fit a 9-inch springform pan. Use the bottom of the pan as a guide. Set aside. (I did not trim my tortillas because they were smaller than 10 inches and it worked great.)
  2. Heat oil in a large skillet over medium heat. Add onion, jalapeno, garlic, and cumin; season with salt and pepper. Cook, stirring occasionally, until softened, 5 to 7 minutes.
  3. Add beans and beer, and bring to a boil. Reduce heat to medium; simmer until liquid has almost evaporated, 8 to 10 minutes. Stir in corn and scallions, and remove from heat. Taste and adjust for seasoning. (I needed more salt here.)
  4. Fit a trimmed tortilla in bottom of springform pan; layer with 1/4 of the beans and 1/2 cup of cheese. Be careful here to keep the bean layers even. In my overexcitement, and what some may call “eagerness” to eat and therefore put this bean bliss in the oven, I sort of haphazardly piled the beans on the middle of the tortilla and by the end of the recipe it resemebled more of a bean tower than a neatly layered dish. Well, we can’t all be Martha Stewart.
  5.  Repeat three times, using 1 cup cheese on top layer. Bake until cheese melts, 20 to 25 minutes. Remove side of pan; sprinkle pie with scallions. To serve, slice into wedges.
This makes a normal six servings, or, for my husband and I, two meals’ worth.
Image