Tofu FUN: Marinated Tofu Salad with Spicy Peanut Vinaigrette

Marinated-Tofu-Salad-9

Tofu is FUN, and so are leftovers!

Ok, here me out.

Part of being a food stylist means I am oftentimes left with some of the craziest leftovers. Normal, wonderful people have ketchup and chicken breast and maybe a stray Chinese take-out container in their fridge. I have quail eggs, bonito flake puree and beluga lentils.

And you know what I realized? That’s kind of awesome. I mean- I am the first to admit that I hate leftovers past two days old. Spaghetti on day 3? It reminds me of my days at the Samford (university) cafeteria and let’s just say- I can’t go there (spaghetti, day one; manicotti, day two; shepherds pie, day 3; sloppy joes, day 4….you see where this is going).

But weird, random ingredients piling up in my pantry and/or fridge that haven’t been cooked yet? We can work with that.

Marinated-Tofu-Salad-3

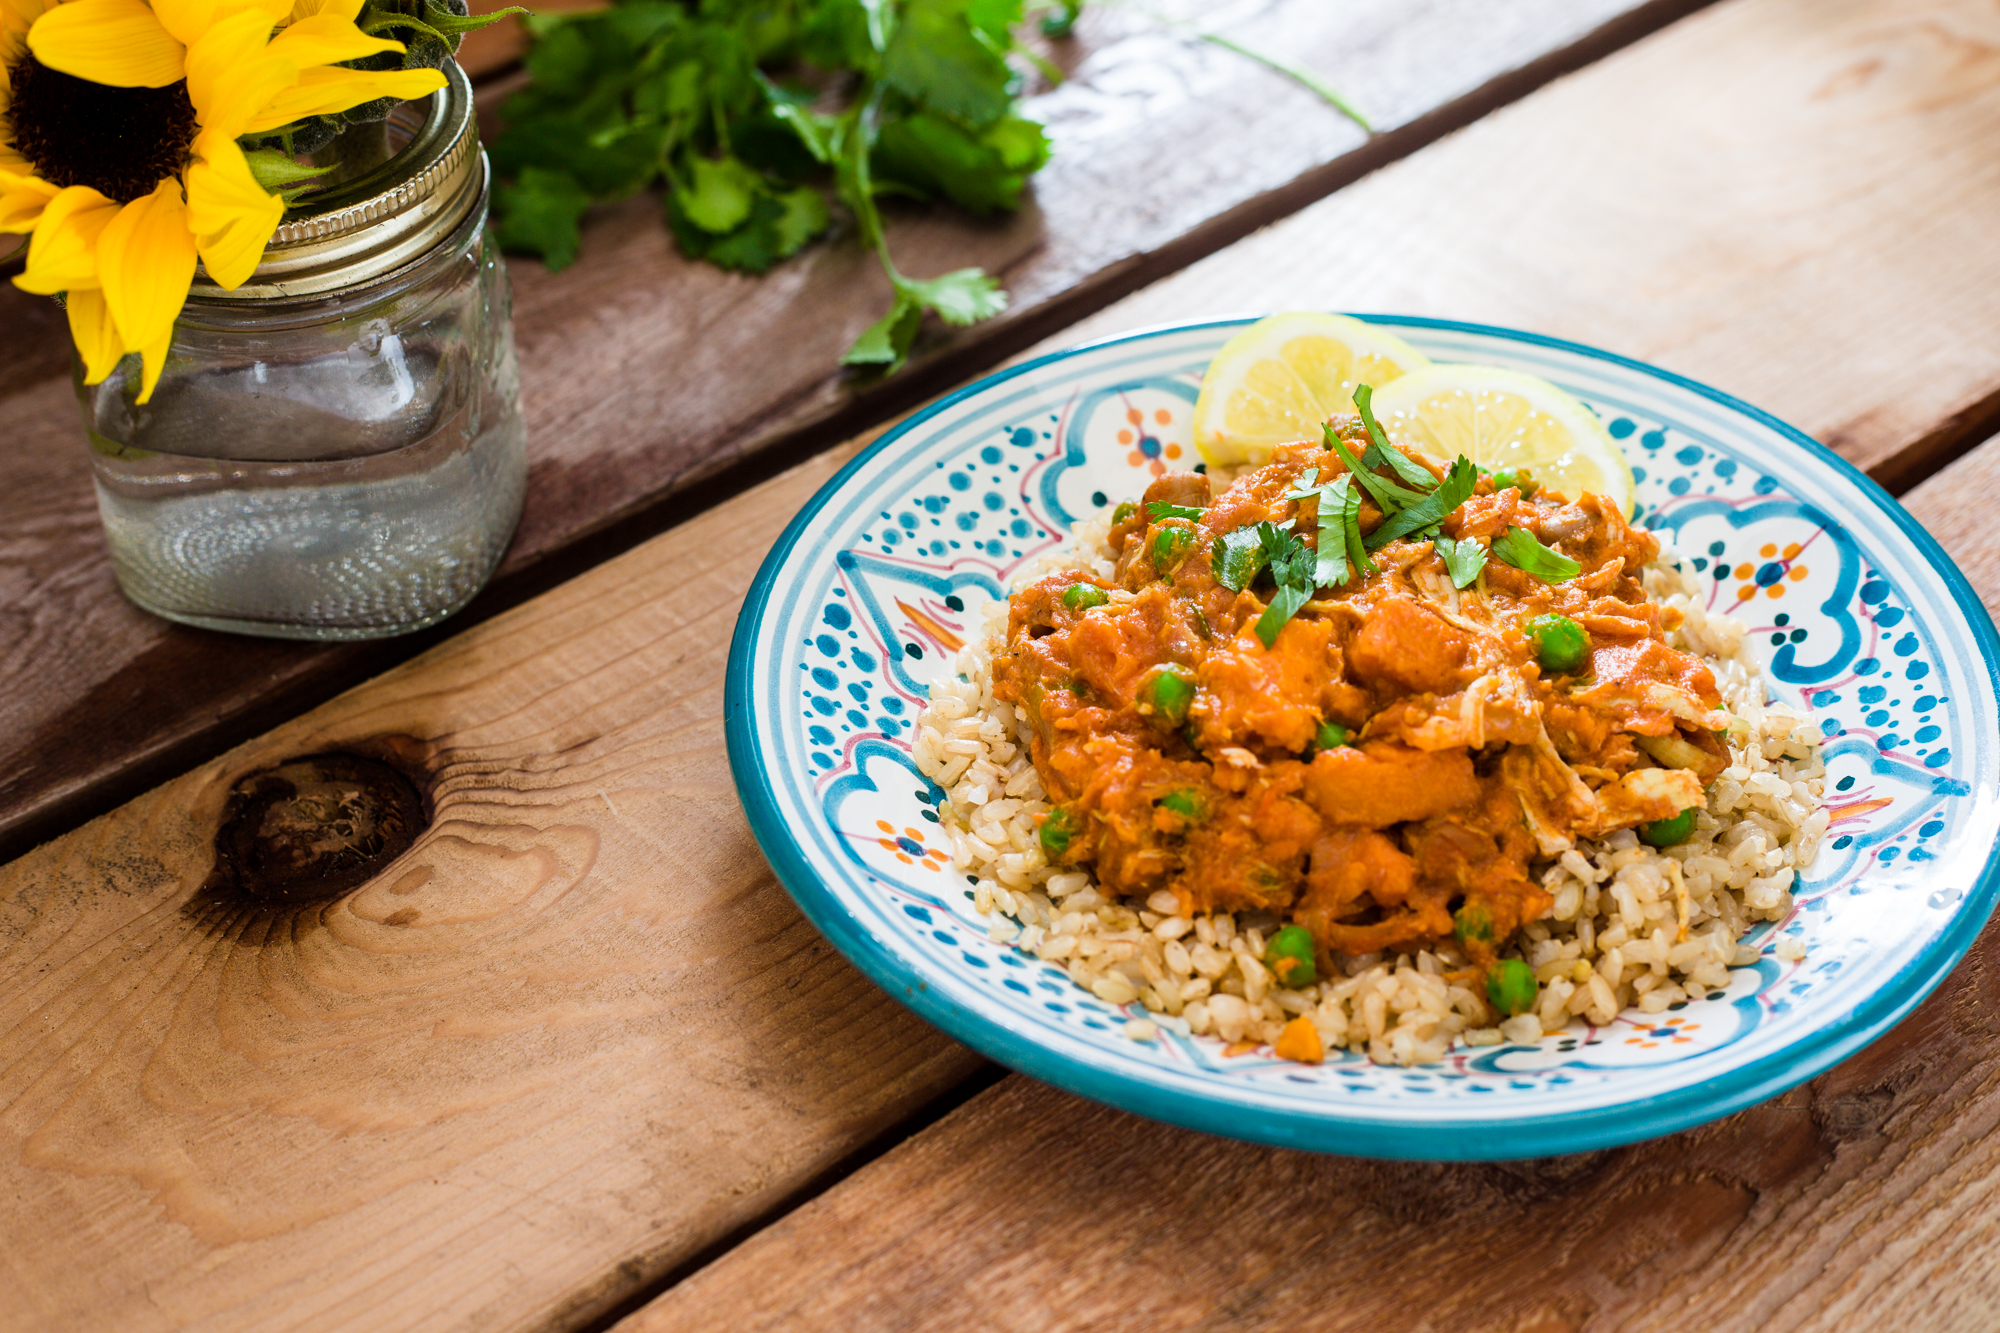
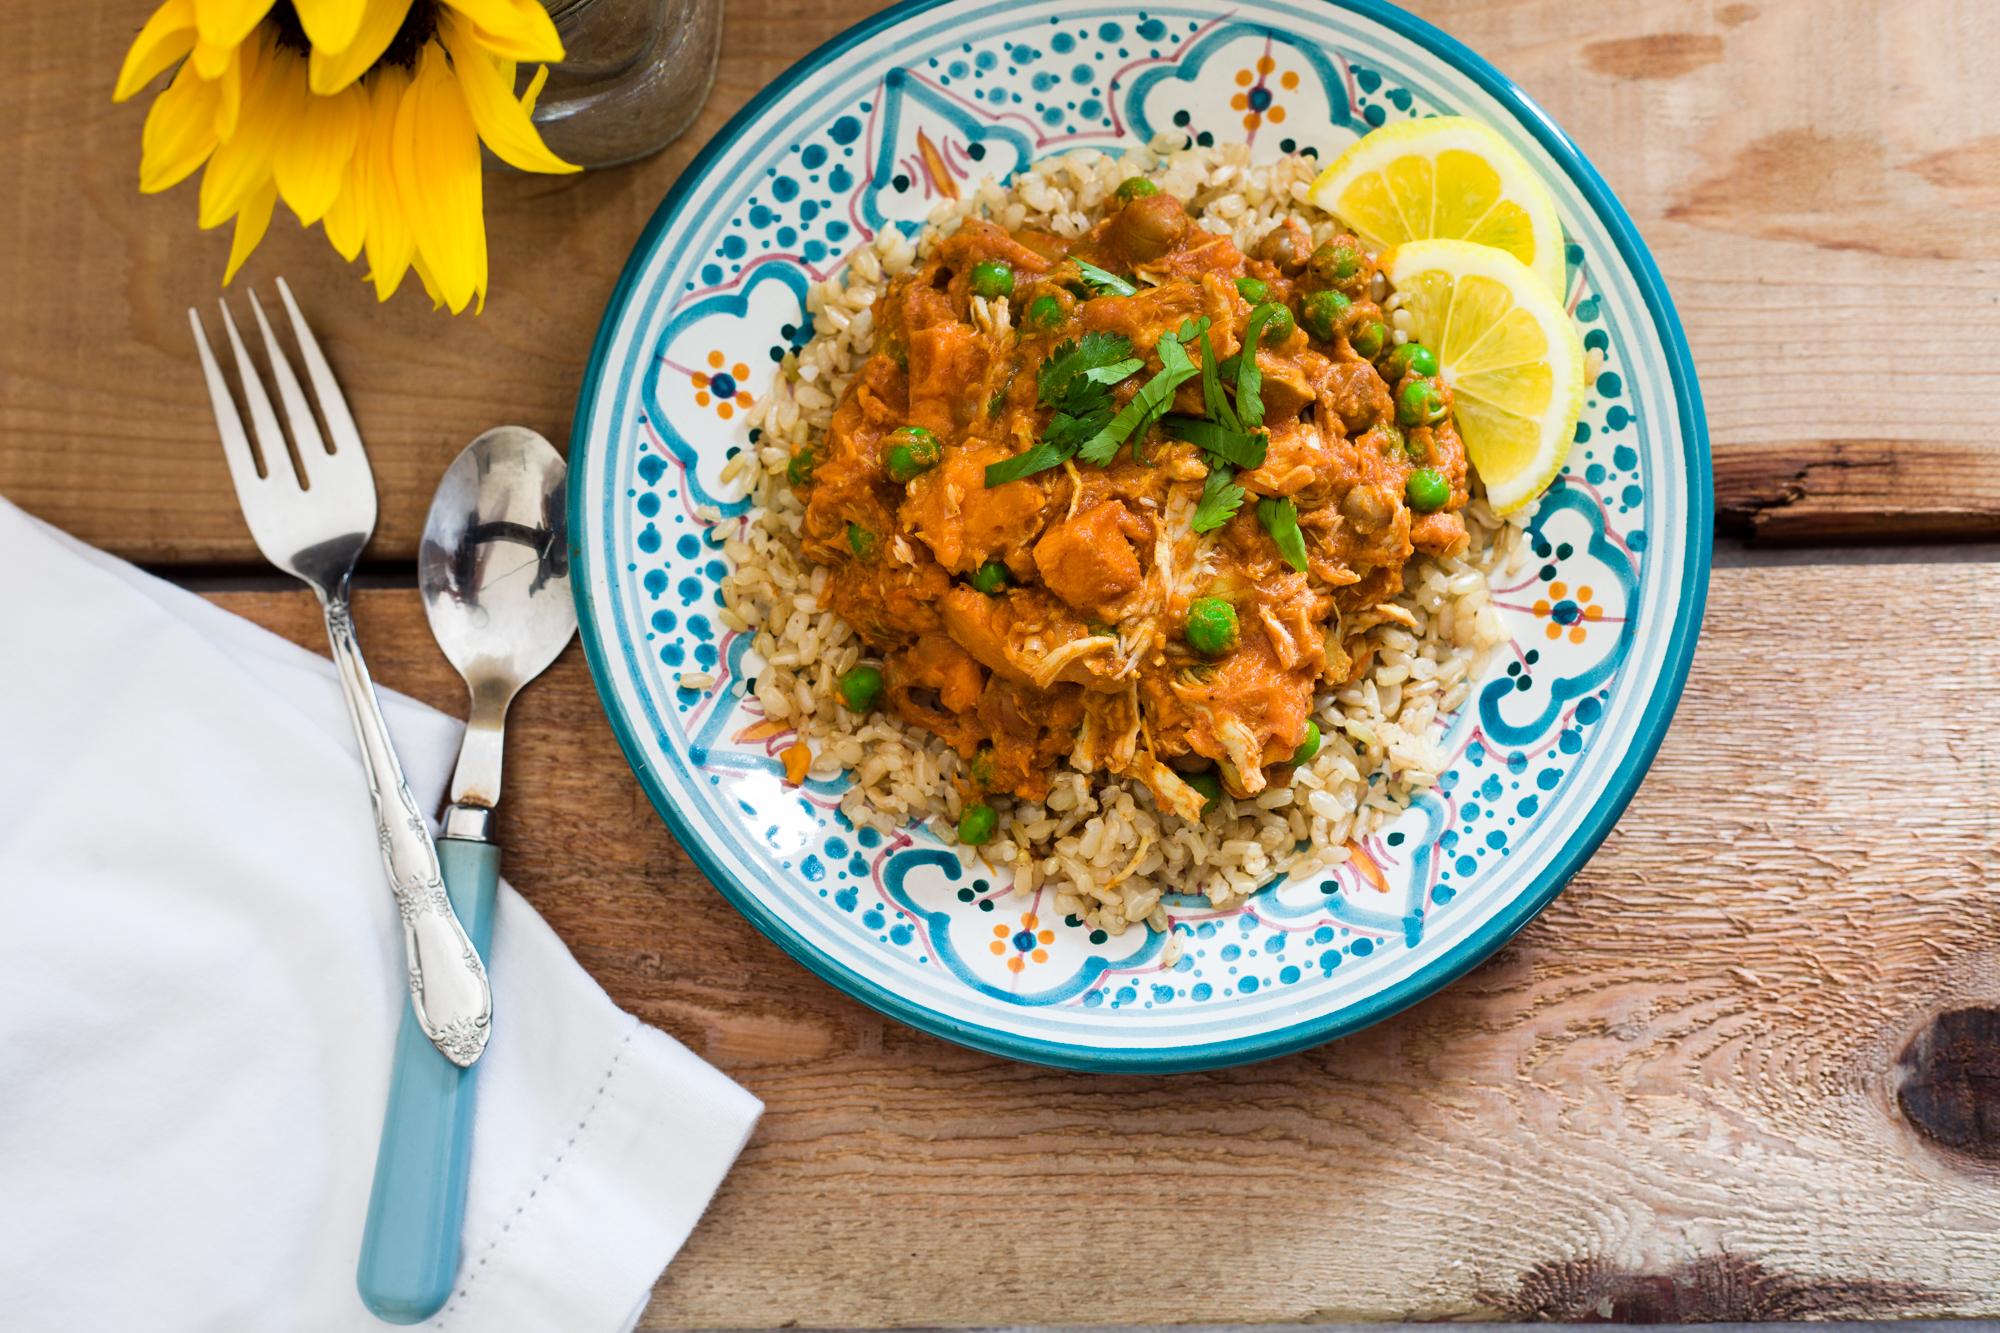
Which brings me to this month’s focus- vegetarian recipes that attempt to use what I already have on hand. I’m thinking that if this goes well, I may just capitalize on it for months to come- highlighting some of the cool shoots I’ve been working on and sharing with you the ingredient leftover recipes. Let me know if this interests you!

On to tofu.

My inspiration for this salad came from my current favorite cookbook- Tokyo Cult Recipes– and their tofu salad. I noticed that the tofu they used was raw- as in not fried, roasted, or stir-fried- just all by it’s lonesome, right there on top of raw salad greens and veggies. My tofu-hesitant self was thrown. But also intrigued…so here’s what I learned.

Tofu 101: Huge shoutout to this article by the Kitchn for the helpful info! I highly recommend checking out the post if you are interested in learning more!

  • Tofu is a staple of Asian cuisine. Lots of people in Asia are super healthy. So I interpolate some connection there.
  • Tofu is made of soybeans and called bean curd! The difference in the two types of tofu comes from how much water is pressed out of the curd.
  • The more water you press out of tofu, the firmer it becomes and the longer it takes to cook. No water pressed = silken tofu; water pressed out=regular tofu.
  • Silken tofu is a beautiful thing; light and creamy, it ranges in texture from extra soft to medium to extra firm. It’s perfect for smoothies, puddings, salad dressing and sauces!
  • ***BAKING TIP ALERT*** Silken tofu can be used as an egg substitute in baking!
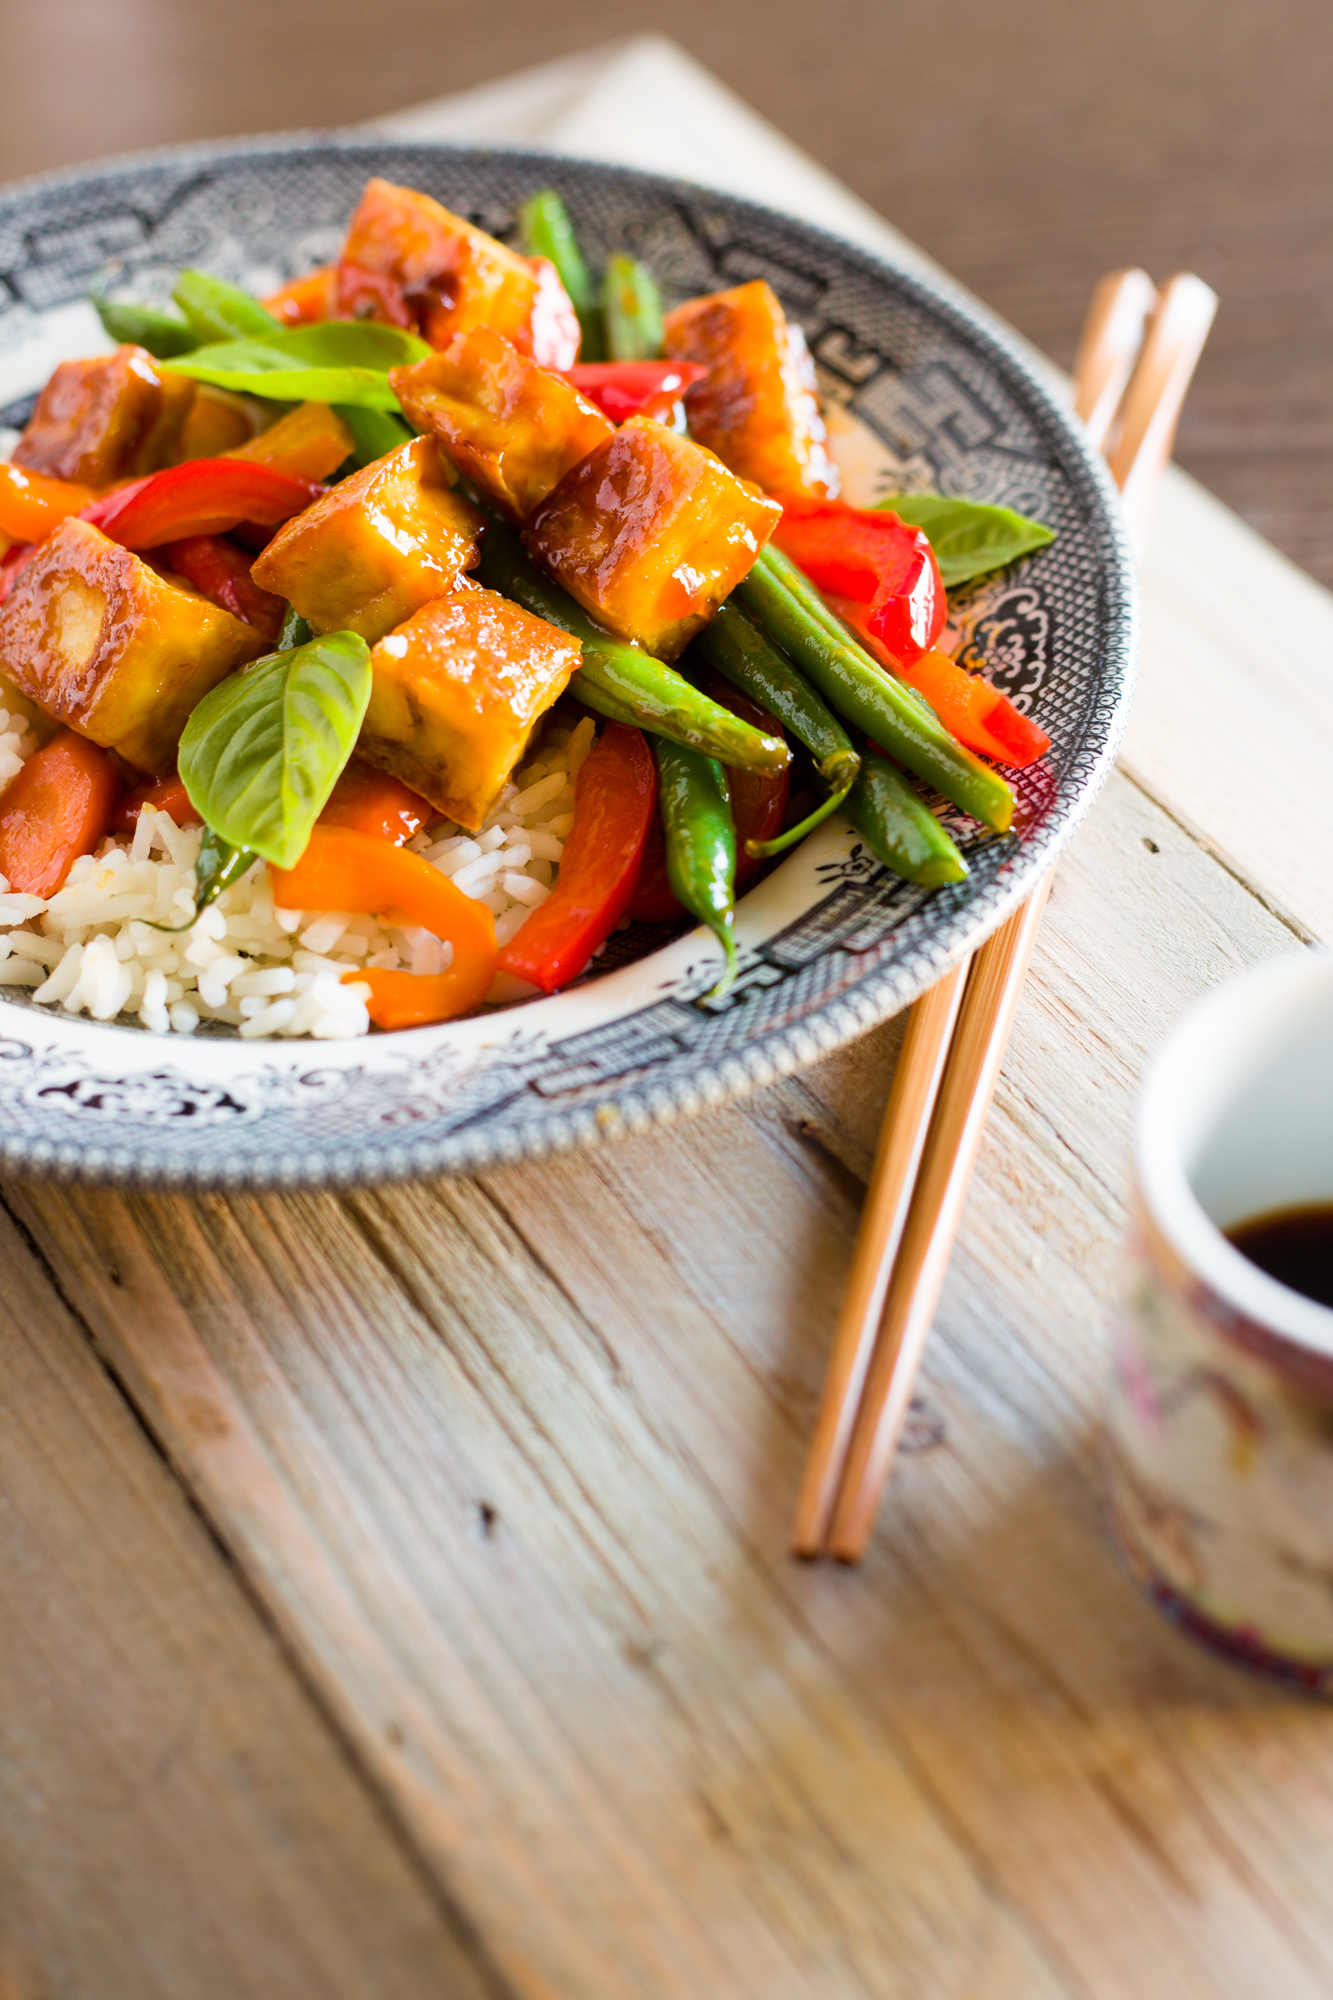
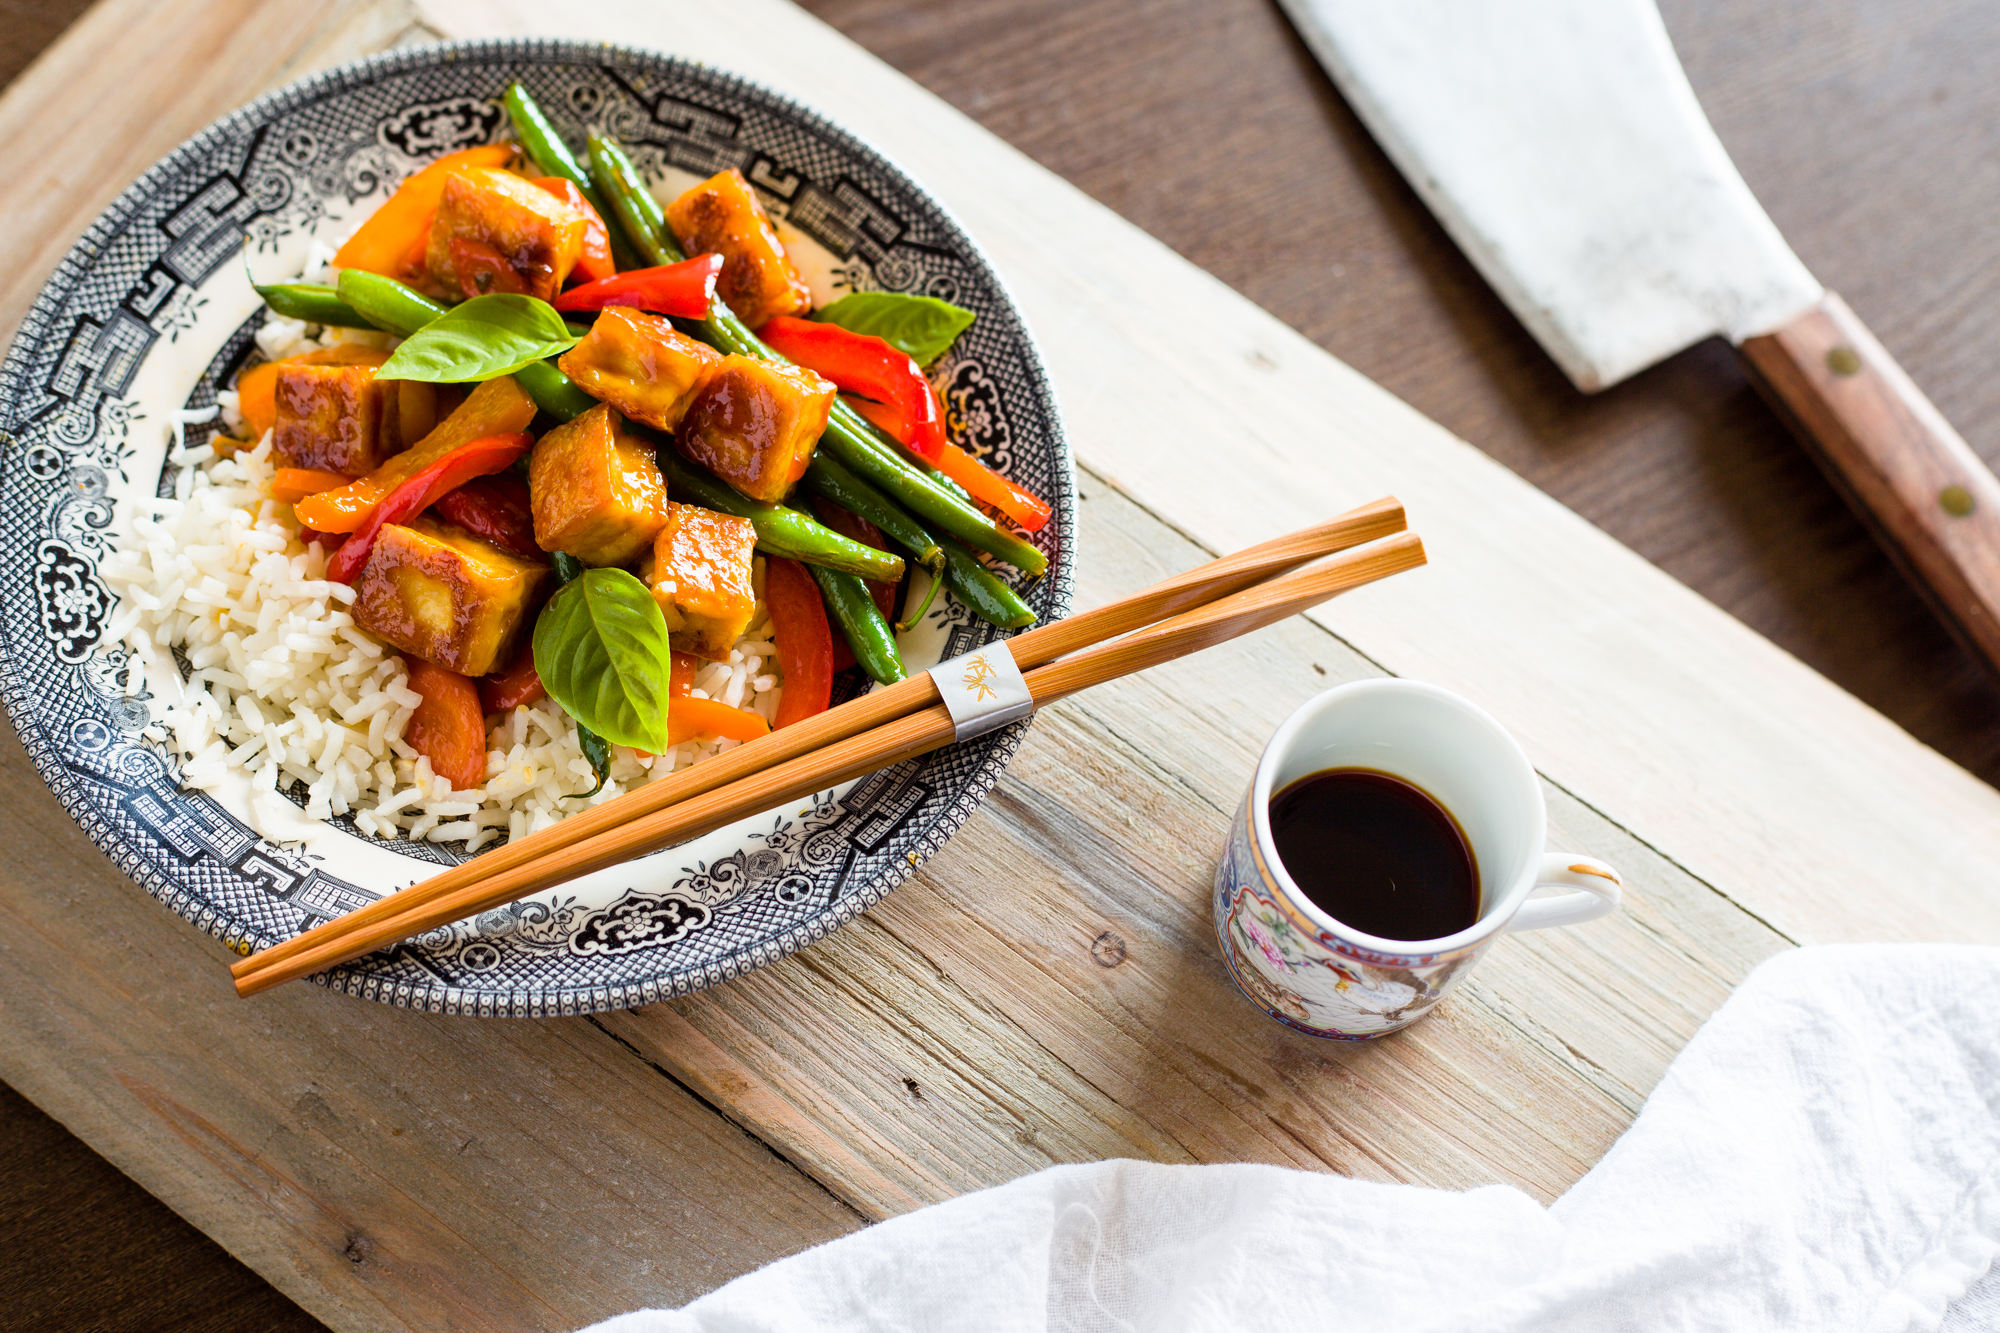
  • Regular tofu is also a beautiful thing. I used it in this spicy sweet tofu stir fry and it’s easier to take on the flavors of what you are cooking when you work with regular tofu. To keep it crispy and light, it helps to press even more water out of the tofu before cooking using a cast iron skillet and lots of paper towels (which you can read more about in that recipe).

Marinated-Tofu-Salad-4

This week’s recipe uses silken organic tofu from Trader Joe’s as well as the Trader Joe’s Spicy Peanut Vinaigrette (which I dig). It’s SUPER simple to put together, will sincerely impress your vegan and vegetarian dinner guests and leaves you with leftover tofu to eat the next day that tastes EVEN YUMMIER.

Here’s to tofu love- and never being intimidated by leftovers!

Marinated-Tofu-Salad-1

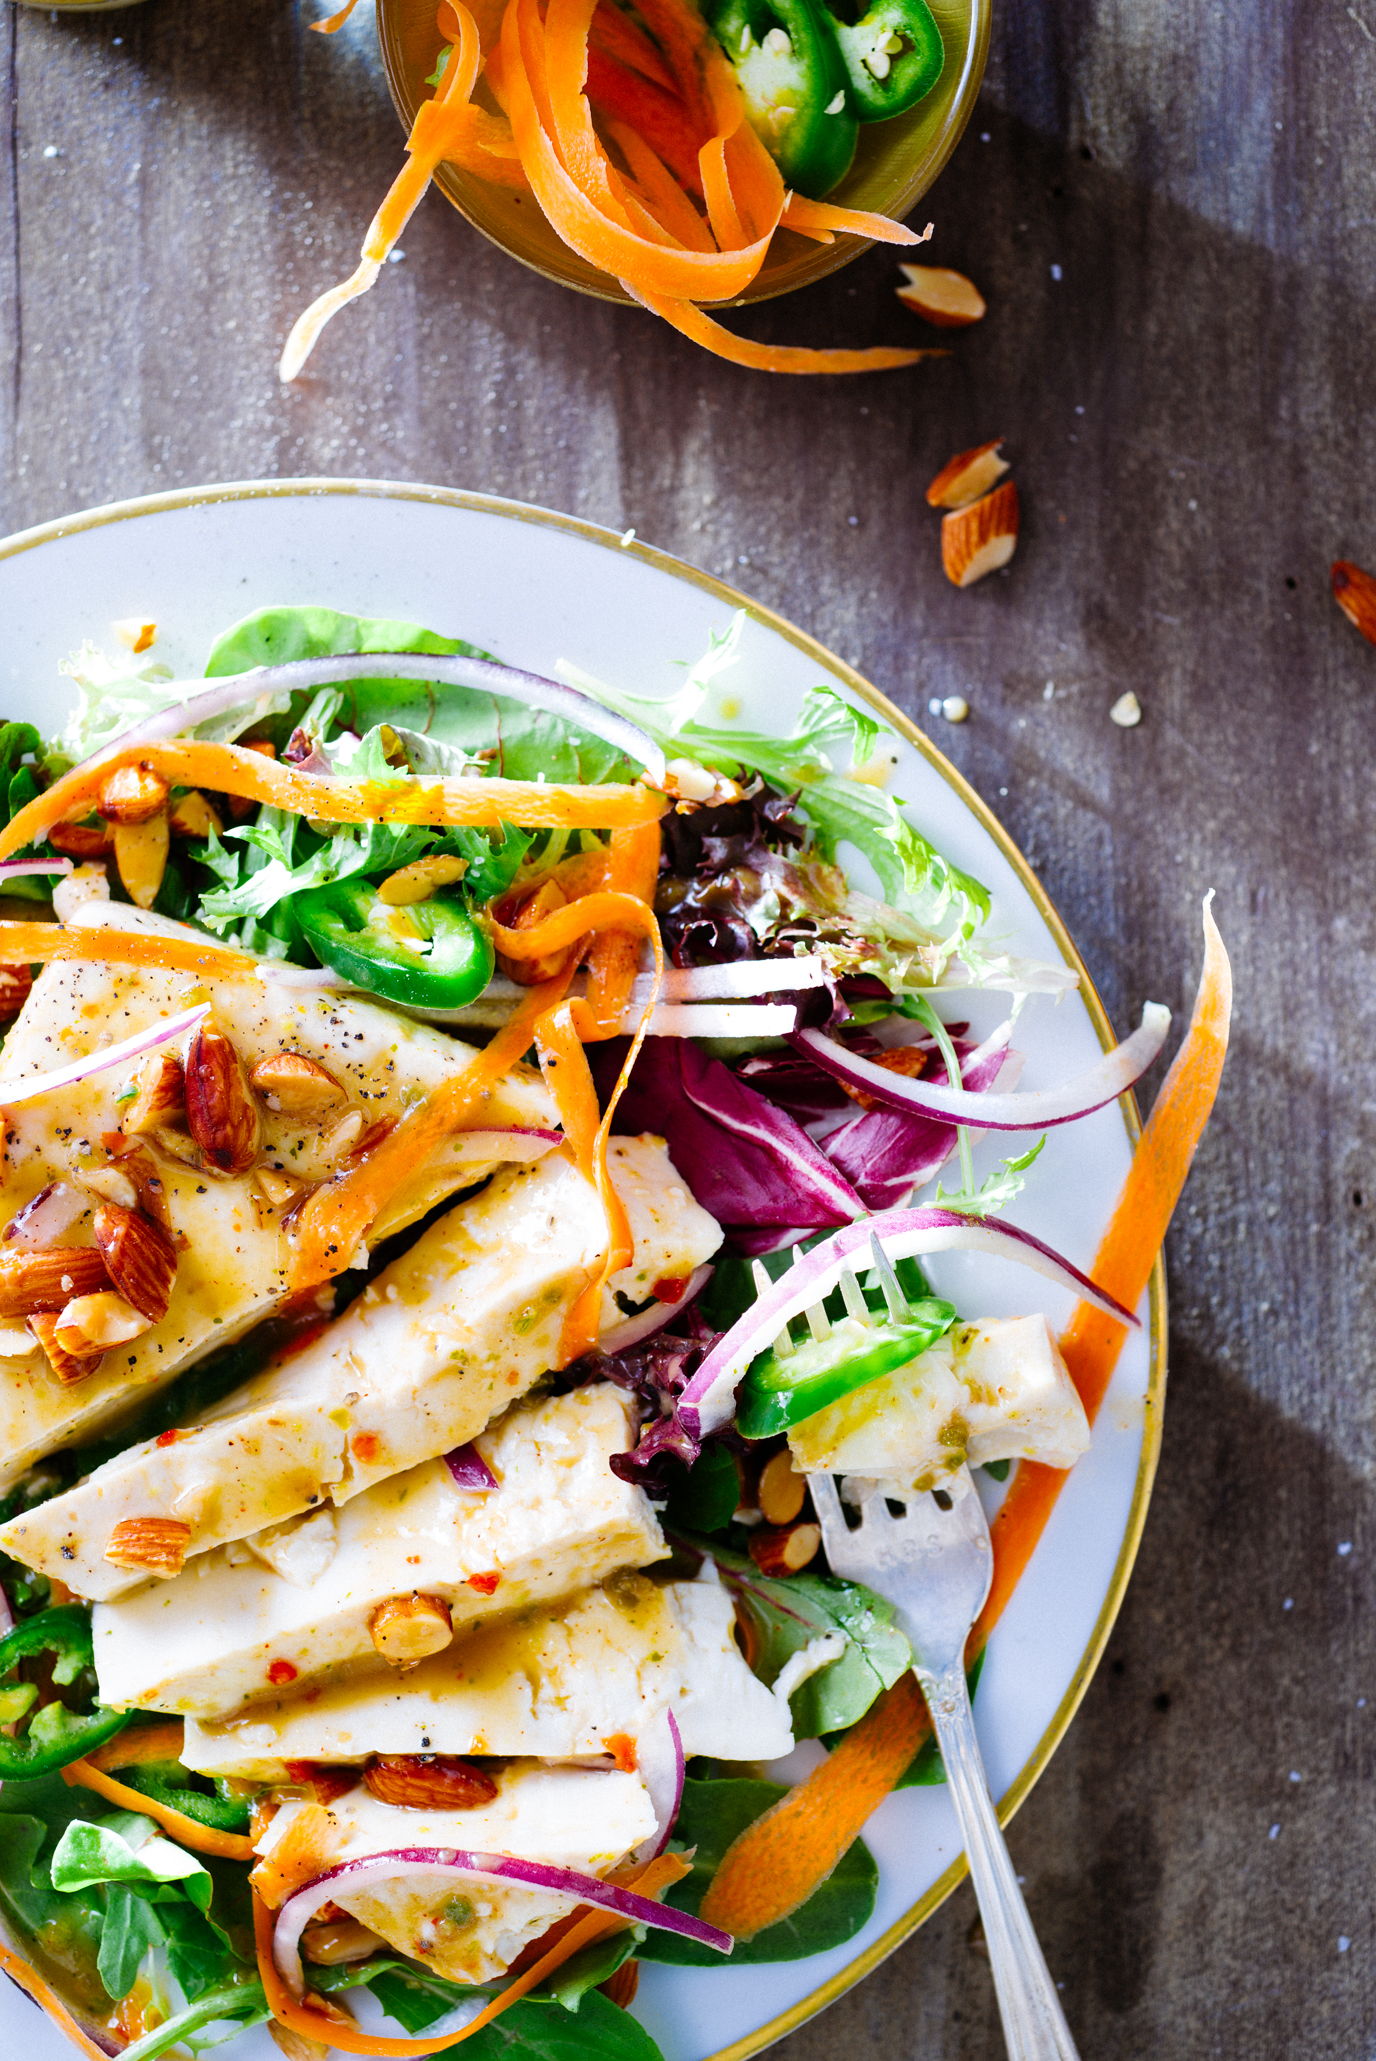
Spicy Tofu Salad with Peanut Vinaigrette (Recipe inspired by Tokyo: Cult Recipes Tofu Salad)

The only prep required in this recipe is marinating the tofu overnight in a pre-made, spicy peanut dressing. Once the tofu is marinated, just assemble your veggies, soak the red onions if you want less of a bite, and voila! Lunch!

Serves: 6

Time: Overnight marinating plus 15 minutes assembly time

What You Will Need:

  • 19 ounces organic silken tofu, drained and cut in half lengthwise (so it forms two thinner planks)
  • 1/2 cup Trader Joes Spicy Peanut Vinaigrette plus additional for drizzling
  • 5 ounces organic mixed salad greens
  • 1 carrot, peeled then thinly shaved into ribbons with a vegetable peeler
  • 1/4 cup roasted salted almonds, roughly chopped
  • 1/4 red onion, thinly sliced and soaked in cold water for 30 minutes
  • 2 jalepenos, sliced
  • salt and freshly cracked pepper, to taste

What You Will Do:

  1. Pour 1/2 cup dressing over tofu halves in 8 by 8 inch baking pan, making sure to coat the top and sides of the tofu well with dressing. Cover with plastic wrap and put in fridge overnight.
  2. When you are ready, assemble the salad! Create a bed of salad greens, then top with one or two tofu planks. Add carrot ribbons, almonds, red onion, and jalepenos.
  3. Right before serving, drizzle with additional dressing to taste. You can either serve the tofu plank(s) whole and allow guests to slice, or go ahead and slice it into pieces for easy serving.


Cauliflower Fried “Rice”


Cauliflower Fried Rice


It’s a Farmer’s Market around my kitchen these days.

Let me explain- my husband loves produce. And not just in a “Oh, I think I’d like broccoli for dinner tonight” way. A “Callie! This tastes just like what a plum should be. Deeply sweet at first bite, then tart at the finish. Beautiful!” Yep, that’s my Jake.

He also loves to shop for produce, so I have relegated our weekly grocery trips to him. He has a knack of picking out the best of the best in fruits and vegetables. Last week he brought home these tiny little oranges that looked like flaming prunes, but tasted like heeeaavennnn. In another life, I think he would make a great farmer/produce guy/”Jackson” on Gilmore Girls.

Since he normally brings home ingredients I know what to do with- carrots, celery, peppers- I’d gotten into a comfort zone of rotating dishes with those as a base. But the other day, he brought home a bright, unexpected, creamy cauliflower with a sturdy green base. Don’t get me wrong, I will eat cauliflower if I am forced to, but my past experiences with the poorly cooked variety lingered in my mind. So, the prized produce sat on the first shelf of the refrigerator, slightly pushed back behind the carton of eggs and leftover Moroccan chicken (post coming soon; I can’t wait to share this with y’all!)

I neglected the cauliflower, ignored the cauliflower. Until our monthly budget came through and I realized that in order to save for our future, I had to suck it up and try my best to be Pioneer Woman.  I needed to use up what we had. And that meant, you guessed it, digging out that cauliflower.

I’d heard of cauliflower fried rice before, but had yet to attempt it on my own. Y’all- this flipped my cauliflower experience around and could quickly become a new, rotating dish for me. It’s healthy, uses up all of those leftover veggies you have lying at the bottom of your crisper drawer, and tastes good. It doesn’t taste quite like rice- the texture is completely different- but it’s right up there in the “fried rice” flavor profile. Because the cauliflower is so neutral, it soaks up the flavors like a champ. And this recipe made a ton- I think we ate on it for at least four days. And I got to throw in those leftover radishes my personal produce guy may have picked out a while ago.

So, in the spirit of all things quick, easy, and good-for-you-but-tasty, try this recipe out y’all. I think you might dig it (and the leftover veggies you use up in the process).

Cauliflower Fried Rice, recipe inspired and adapted a bit by The Kitchn version here

This easy, quick weeknight staple is lightened up a bit in carbs but not in flavor. Use whatever leftover veggies you have in the stir-fry portion. I like frozen peas, chopped celery, radishes, frozen chargrilled corn, zucchini, squash, Vidalia onions…whatever your creative, cookin’ heart desires. 

What You Will Need:

  • 1 head cauliflower, washed and dried
  • 2 tablespoons vegetable oil, divided
  • 3 large eggs
  • 1 tablespoon minced ginger
  • 3 cloves garlic, minced
  • 2 carrots, diced at about 1/2 inch (cut the carrot in half lengthwise, then each half in half again, then dice)
  • 1/2 cup peas, fresh or frozen
  • 3 to 5 radishes, thinly sliced
  • 4 green onions, thinly sliced (plus extra for garnish)
  • 1/4 almonds, roasted and tossed in a bit of olive oil and sea salt
  • 2 to 3 tablespoons gluten-free soy sauce or Tamari (or you could use regular if you like)
  • Sriracha and extra chopped green onions, for topping

What You Will Do:

1. Cut the cauliflower into florets, making sure to discard most of the stems and inner core. Working in batches, pulse the cauliflower in a food processor until it breaks down into rice-sized pieces. You should have 5 to 6 cups of cauliflower “rice.” I think mine took about three batches in a smaller food processor.

2. Heat 1 tablespoon oil over medium to medium-high heat. Whisk the eggs and pour them into the skillet. Quickly scramble the eggs, or make a giant omelet. This can be incredibly satisfying; watching the eggs cook without stirring them. Not quite sure why. #weird Transfer the eggs to a cutting board and roughly chop into pieces.

3. Wipe the skillet clean and warm 1 tablespoon of vegetable oil over medium to medium-high heat. I give this leeway because our stove gets really hot so I use medium.

4. Add the ginger and garlic, and sauté until fragrant, about 30 seconds. You should really be able to smell the garlic-ginger combo here. Stir in the carrots, peas, radishes,  and the cauliflower “rice” into the pan, mixing the ingredients thoroughly with a spatula.

5. Lower the heat to medium (or medium-low), cover the pan, and cook until the cauliflower is tender, 5 to 8 minutes. Uncover and stir in the chopped eggs, green onions, almonds, and 2 tablespoons of soy sauce. Taste and add more soy sauce to taste; I think we used about three tablespoons. Drizzle Sriracha festively on top if you like it spicy. Enjoy!


Slow Cooker Chicken Curry

Slow Cooker Chicken Curry

I don’t know about y’all, but a lot of the time my weekly dinner plans are less than perfect.

Work runs late, e-mails overtake your inbox, an unexpected phone call takes about 1.5 times longer than normal- you know, life happens. But for me, it doesn’t change the fact that, at then end of the day, I am still starving. And that means, without fail, dinner must arrive or I will be a cranky woman.

Enter the slow cooker. This device is amazing for those days when schedules supersede sanity and time to come home, unwind, and cook a slow-roasted chicken fades into the distance. Plus, those who know how to use a slow cooker well are kitchen MVP’s. Unlike some other recipes I’ve tried with goopy sauces, stringy meat, or flavorless liquids, using a slow cooker well actually enhances the texture of meat and allows flavors to gently, and deliciously, develop over time.

Slow Cooker Chicken Curry

And this recipe for slow-cooker chicken curry from The Lemon Bowl hits both of those notes. Not only is the curry flavor spot-on, this dish satisfies my constant craving for ethnic food. Seriously, Liz hit the ball ball out of the park with this one! I love that she includes a hit of lemon juice at the end of the curry; that citrus note emboldens the coconut milk and chicken stock base . Plus, I heart green peas, and their addition makes the dish even creamier. In fact, this recipe even takes care of the take-out craving that hits at about that time during an especially crazy day when all you want to do is come home, put on PJ’s, and binge watch Gilmore Girls.

So, get those ingredients ready, turn on the slow cooker, and relax. For an episode, at least.

Slow Cooker Chicken Curry

Slow Cooker Chicken Curry (Recipe from the incredible blog The Lemon Bowl)

What You Will Need

  • 1 pound boneless, skinless chicken breasts
  • 1 medium onion, thinly sliced
  • 15 oz can chickpeas, drained and rinsed
  • 2 medium sweet potatoes, peeled and cut into about 1/2 to 1 inch dice
  • ½ cup coconut milk (I prefer regular, but you can use light here)
  • ½ cup chicken stock
  • 15 oz can tomato sauce
  • 2 tablespoons curry powder
  • 1 teaspoon salt
  • ½ teaspoon cayenne powder (for those who like a spicier curry)
  • 1 cup frozen green peas
  • 2 tablespoons fresh lemon juice
  • cilantro (for garnish)

What You Will Do

  1. In the bottom of the slow cooker, whisk together coconut milk, chicken stock, tomato sauce, curry powder, salt and cayenne.
  2. Add chicken breasts, onion, chickpeas and sweet potatoes. Using tongs, gently toss ingredients together to ensure evenly coated.
  3. Cook on Low for 8 hours or High for 4 hours (I did high for four hours b/c I was getting hangry).
  4. Using two forks, shred cooked chicken (if it’s easier, go ahead and remove it from the cooker to shred). Stir in peas and lemon juice 5 minutes before serving.
  5. Serve over brown rice and with plenty of fresh cilantro. (And hot sauce if you like it spicier!)


How to Sterilize a Jar for Homemade Coconut Milk Yogurt

Coconut Milk Yogurt

My memories of yogurt begin at the ripe old age of seven as a proud member of our Baptist Church’s G.A.’s (for those of you who may not have been raised in this pseudo-Girl Scout troop, this stands for “Girls in Action”). Before G.A.’s class began, my precious mom rounded up three- yes three- of her wild children, made them wash their faces, and climb into the Dodge van with wood paneling in order to high-tail it to the Church every Wednesday evening.

This journey was often fraught with fighting (“Callie won’t quit poking me!”), bad hair (“MOM! Can you fix my side ponytail? The velcro roller got squished”) and all around pre-church bickering (“We are eating pot roast tonight? Again?! Eww!”) This adventure also occurred during what we’ll call “fall” in Alabama, which translates to heat, more heat piling into the van, sweat behind your knees, and striped leggings that were way too warm to be wearing in September.

Needless to say, it was a feat and accomplishment for all of us to weekly be in one place at the same time. As a reward for our efforts (and as a way to give my mom a breather, thank you Lord) we always drove our van through the soft serve yogurt drive through after Church. In the (golden age of) the 90’s, soft serve yogurt was definitely not the rage (there was only one “creamery,” gasp!, in our small town) so this experience was a precious commodity to us. I always knew that my chocolate yogurt with chocolate chips was going to be, in one word, bliss.

Coconut Yogurt on Granola

Fast forward past my teenage and college years, where I began to not feel so great after eating yogurt. Or milk. Or ice cream. Which was horrible. So, my battle with dairy began, and to this day, I still can’t stomach an abundance of it. After meeting my husband, I discovered that he too has the same issue, and so we are constantly trying to come up with solutions to our dairy-free dilemma. Enter, coconut milk yogurt.

The beauty of coconut milk yogurt is two-fold. One, it is easy to make at home. And, you get to practice your fancy jar-sterilization technique for our upcoming summer season of canning! Check out this video below of my tips for the easiest way to prep you jars- so you can share the probiotics, not the germs:


Two, you get the same health benefits/probiotic power from this yogurt as you do from the dairy variety. Oh, and three, I think it’s less expensive than the pre-made variety. Plus, you can sweeten it to your satisfaction. I don’t like my coconut yogurt super-sweet, as I am usually adding it to already sweetened granola or berries or cereal, so I only added a tablespoon of honey for the whole batch. And, you can turn it into soft-serve yogurt if you choose. Actually, great recipes for vegan soft serve abound!!

Oh, and coconut yogurt is fantastic in smoothies!! And the height of smoothie season is almost here, whoop whoop!

So, warm up that oven, sterilize those jars, and get ready for the richest, creamiest coconut yogurt. Because it’s delicious. And you’re #fabulous for making it!

Homemade Coconut Yogurt

Homemade Coconut Milk Yogurt, Recipe from The Kitchn

This recipe for coconut milk yogurt is wonderful. Seriously, thank you the Kitchn! I recommend making this in the evening, to make sure you set aside 12 hours for your yogurt to become yogurt in the oven. Also, it’s super important that you sterilize your jars, so make sure to follow those steps I listed in the video closely!

What You Will Need:

  • 2 (14-ounce) cans coconut milk
  • 2 teaspoons agar agar flakes, or 2 tablespoons tapioca starch (I used tapioca starch)
  • 4 probiotic capsules, or 4 tablespoons store-bought coconut yogurt (I used store-bought yogurt)
  • 2 tablespoons raw sugar or maple syrup, optional (I used a tablespoon honey instead)

Equipment:

  • Glass jars with lids, for storing the yogurt
  • Measuring spoons
  • Medium saucepan
  • Whisk
  • Thermometer, optional; spatula

What You Will Do

  1. Put water in a kettle on high heat to bring to a boil.
  2. Preheat the oven for about 5 minutes, until it reaches about 100°F, then turn off the heat — leave the light on to help keep the oven warm. Fill the jar(s) you’ll use for storing the yogurt with boiling water to sterilize them. Let stand a few minutes, then pour the water out. I also placed the lids to my jar in a bowl, then poured hot water over that. Alternatively, you can run the jars through the dishwasher.
  3. Pour the coconut milk into a saucepanShake the can of coconut milk, open it, and pour it into a medium pot. Whisk until the milk is smooth and uniform.
  4. Add the thickenerIf you’re using agar agar, sprinkle 1 teaspoon of agar agar flakes into the pot over the coconut milk — but don’t stir! If you’re using tapioca starch, scoop out roughly 1/3 cup of the coconut milk and transfer to a bowl with the starch. Whisk this together until the starch is dissolved, then pour back into the pot. The tapioca starch method is the one I used and it worked great!
  5. Warm the coconut milkPlace the pan on the stove over medium heat and warm until the coconut milk starts to simmer. (The agar agar will also start to melt together.) Whisk the milk and turn down the heat to low. Continue cooking on low, whisking occasionally, for 5 to 10 minutes, until the agar agar flakes are fully dissolved or the tapioca starch has thickened the mixture.
  6. Cool the milk: Cool the milk until it’s just warm to the touch, about 100°F. I used a candy thermometer to measure this:)
  7. Add the probioticsTwist open the probiotic capsule and pour the powdery contents over the milk (discard the capsule’s casing). Whisk to combine. Alternatively, whisk in 4 tablespoons store-bought coconut yogurt. I whisked in the coconut yogurt and it was delicious!
  8. Add the sugar or maple syrup (I added about a tablespoon of honey to make it a less-sweet variety). Whisk together well.
  9. Pour into jar(s) and allow the yogurt to set for 12 to 24 hoursPour the coconut milk into the sterilized jar(s) and screw on the lid(s). Place into the oven — turn the oven light on to keep the environment warm. Alternatively, use a yogurt maker or place into a dehydrator at 110°F. Leave for 12 to 24 hours without disturbing.
  10. Chill the yogurtPlace the set yogurt into the fridge and chill for at least 6 hours. The yogurt will become thicker as it chills. After this stage, you might find that the mixture has separated with a yellowish, translucent layer at the bottom and a thicker white layer on top. Stir to recombine or scoop off the top layer for thicker coconut yogurt.
  11. Keep coconut yogurt refrigerated and use within 2 weeks. Enjoy your fabulous yogurt success! And use your yogurt with abandon- over cereal, oatmeal, fruit, in a smoothie, freeze some to add thickness to a smoothie- the list goes on and on!

Extra Tips from the Kitchn:

  • If the yogurt develops a pink or grey discoloration on its surface, that means it has been contaminated with bad bacteria. Throw it away and do not eat it!
  • Thickener-free coconut yogurt: The night before making the yogurt, chill the can of coconut milk. Do not shake. Open the can of chilled coconut milk and scoop off the top layer of cream, leaving behind the liquidy coconut water below (you can discard the water or use it for making smoothies or cooking oatmeal). Add the probiotics and continue making the yogurt as directed.

Greek Salad with Homemade Dressing and The Style Gathering

Delicious Greek Salad

I’ve been on a quest for the perfect Greek salad for some time.

For those of you who read my previous post on grilled Greek pizza, you know that authentic, homemade Greek dressing is the start to many an amazing dish. Little did I know the importance of nailing the dressing until I spent time with my friend Buffy from The Style Gathering and she introduced me to her version– the one she learned from her college roommate after celebrating Greek Easter with her family- and it’s fantastic. Also, I realized, this was the missing link to my authentic Greek salad conundrum.


The perfect dressing
Topping beautiful Greek salad with Tina Liollio’s dressing

As opposed to the iceberg-heavy, dressing-soaked red onion fest that is some restaurants’ version, taking matters into your own hands with this recipe allows for a level of ingredient control that is much needed to make your salad amazing.

One of my first memories of an American Greek salad is at Zoes Kitchen. This was years ago, in the heart of the South, and my middle school palette was immediately intrigued at the notion of a salad missing the title “Tossed.” Upon digging into the mammoth mound of sliced vegetables, light green lettuce, black olives and (gasp) squares of Feta cheese, my fork hit something soft: potatoes. There were potatoes at the bottom of my salad. A delicious, tiny mound of roasted red potato vinaigrette underneath the stack of sheared iceberg.  It was a glorious, and odd, discovery. I wanted more.

Greek Salad beginnings

After further research, I realized that in the States, everyone does their Greek salad a bit differently. In Detroit, for example, they like to add beets to their plates. Tampa Bay does it Zoe’s style by piling their ingredients onto potato salad.

Beautiful French feta

But our version, I think we got it just right. For one, Buffy introduced me to French feta cheese. Ok, I thought I knew feta. I loved feta. But feta could get beta :) This feta, here, is rich, light and crumbly, and oh-so-addictive. A mandoline made my job of slicing the red onions less painful. And the absence of lettuce is for a reason. I think that the best, most authentic Greek salad is chunky; full of red, ripe tomatoes, lots of fresh cucumber and a mix of both green and black olives. Toss those together, drizzle dressing on top, and add a few sprigs of fresh basil. Perfection.

Easy Greek Salad

Easy Greek Salad (With all of the beautiful photos by J Hagler Photography)

What You Will Need:

  • 4 to 5 Ugly Ripe tomatoes, halved and quartered
  • 1/2 red onion, sliced into rings
  • 1 green bell pepper, sliced into rings
  • 1 medium-to-large cucumber, sliced (If you want to get fancy, you can alternately peel strips of the skin off with a vegetable peeler to make them appear striped before you slice them.)
  • 1 block French feta cheese
  • Homemade Greek dressing, for tossing
  • Fresh basil leaves, for garnish

What You Will Do:

1. In a large bowl, toss all of the vegetables together.

2. Crumble as much Feta cheese as desired on top of salad. Drizzle with Greek dressing, to taste, and top with torn basil leaves. Enjoy salad bliss!

A honeymoon in Miami

Fried Pig Ears
Crispy Pig Ears at Michael’s Genuine


My first experience with Miami began the minute our red Ford Fusion zipped out of the Enterprise parking lot and onto Northwest 25th Street. Ferraris, Porshe 4-doors and Mercedes sedans cruised alongside us as we merged onto the causeway, where I was stunned; brilliantly blue, ocean water spread out as far as our eyes could see. Radio blaring, wind whipping through my hair, hand out the window to feel the breeze- this was going to be a beautiful trip.

The weather in Miami was in the middle of what locals would call a “cold snap”- mid 50’s to low ’60’s- yet still warmer than what we have been enjoying in the southeastern sector. Jake and I’s plans to enjoy the beach were thwarted a bit in leu of warmer tourist activities, namely those that involved eating and walking, which were just fine with me. But despite the weather, the city was pulsing with life and design. The Miami skyline is one of geometric pristines; clean, clear-cut skyscrapers juxtapose golden pink sunsets and pillowy clouds. Even the textures in Miami architecture were vibrant-wavy, loose, and rhythmic.

The Wynwood Walls
The beautiful Wynwood Walls

The colors were, beside the food, my favorite element of the city. Color pulses through Miami, coloring graffiti stained warehouse walls, weaving into pastel Art Deco hotel fronts with vintage Rolls Royces parked at the curb. And and the food, like the colors, are vivid, passionate, and full of life; almost evangelically inviting passers by to experience their perspective, wooing them through the way ingredients are layered, simmered, stacked upon one another until they meet the flavor point the chef so thoughtfully constructed.

The city was always moving, through bicyclists and muscled runners and the two women who steamed milk at the Cuban counter around the corner from our condo.

Passion fruit at Robert Is Here
Passion fruit at the Robert Is Here fruit stand

I fully realize that we are rarely without bias in our taste experience; each taste informs and builds upon the other in the stream of our flavor consciousness. And Jake and I did not eat a bad meal (which is rare for me to experience when in an unknown city). Each stop brought it’s own perspective, outlook, and care for ingredients. Really, each place had heart, and that resonated with me. From our experience at Yardbird where we were greeted with two glasses of champagne and the manager (who shared how with us how honored he was that we chose to spend our honeymoon with them); to the crispy, fried beef juiceness of a Magos hot dog  (so patiently explained by a Spanish-speaking waitress holding a laminated photograph of the said item in her hand). The seafood was abundantly fresh, and the tuna tartare at Wynwood Kitchen tops my list of faves, as did the vaca frita at Havana 1957-the first flavor glimpse I have been given to the Brazilian food I love in along time.

So here I offer my humble acknowledgment of the beauty and passion of Miami eating; our favorite stops, and an open invitation for you to experience the heart behind what the city has to offer. And as you do, I invite you to sit with me, and reflect on this month’s memories. Especially the good ones that propel us into the Christmas season-and all of the joy that lies ahead.

Miami Must Eats:


Ham, butter and cheese croissant at Panther Coffee


1. Ham, butter and cheese croissant/latte at Panther coffee: I love espresso. Like, have bought every coffee contraption outside of the $2,000 one you can get on Williams Sonoma’s website to try and make it at home. So, when I travel I am always on a quest for the perfect espresso. The lattes at Panther are some of the best I have ever had (I tried the whole milk, soy and almond milk varieties). They also offer two different roasts of espresso; I love the East Coast variety.


Morros at La Carreta


2. Moros Rice at La Caretta– I love feijoada (Brazillian black bean stew), and this was the closest I came to it while in Miami. They also have the best cortado I have ever tasted- and don’t miss the cinammony sweet plantains either.


Key Lime Pie at the Key Largo Conch House


3. Key Lime Pie at the Key Largo Conch House– So, apparently true key lime pie isn’t the “green stuff,” it’s the yellow. This was the brightest, most deliciously citrus cream held together by a thin graham crust I have ever tasted. You. Must. Try. This.


Cinnamon roll at Knoax Farm


4. Cinnamon roll at Knaus Berry Farm– I also learned that there is an Amish community in Homestead, Florida that makes the best cinnamon roll I have ever had. The beauty of this roll is that the sweetness comes not from outward icing, but instead from a maple/honey/cinnamon glaze that creates a buttery crunch, soaking in the inside and outside of the roll,  you can’t get enough of. Oh, and the batter has specks of cinnamon in it. Yes.


Fried Chicken at Yardbird


5. Fried chicken with cheddar chow chow waffle, pickled watermelon and bourbon syrup at Yardbird– Yardbird is doing something incredibly special with their fried chicken. Juicy and lickably moist on the inside, crunchy, dark golden skin on the outside, with a puffy cheddar waffle and bourbon-spiked syrup to soak into every square. The taste dynamic when you layer all of the elements is like a rich, chicken-sweet punch. It’s delightful! Also, if you are by chance able to try their lemon poppyseed cornbread, prepare thineself. It will change you.


Midas Hot Dog at El Mago de Las Fritas


6. Mago magic dog at El Mago de Las Fritas– a pure sausage dog, layered in frita and fried potato wisps, with a spicy mayonnaise. Upon putting this in my mouth, I did a happy shake in our red leather booth and through a mouthful of food attempted to squeal  in pure delight (#potato-spray).


Dessert at Michael's Genuine


7. Milk chocolate peanut butter candy bar sundae at Michael’s Genuine– Salted peanut brittle meets malted vanilla ice cream stacked on top of a crunchy dark chocolate/hazelnut brownie, with dark chocolate sauce and floating pomegranate seeds. Because it was our honeymoon, the restaurant gave us a sparkler to top off a magnificent trip. (I’ll save you the finished version, with chocolate smear on a licked clean wooden board).  #luv


Honestly, these are only a few of my favorite spots we visited (and that I had the patience to photograph). I highly recommend you also checking out Spris, Dylan’s Candy Bar on Lincoln Road, Alaska Coffee Company, Wynwood Kitchen, Buenos Aires Bakery. Feel free to comment below with any menu questions! Love you guys, and merry, merry Christmas.


Ok, I couldn't resist:)
Ok, I couldn’t resist:)


Dinnertime Luv and Spicy Sweet Tofu Stir Fry

Spicy Tofu Stir Fry
Spicy Sweet Tofu Love

Ya’ll! I am so stoked to begin today a four-part series with the adorable, precious, oh-so-talented Mattye Woodcock of the lovingkind blog. Mattye and her blog are absolutely fabulous for many reasons, but one of the main ones I know you will be drawn to her is her passion for loving people. Whether it’s your spouse, your coworkers, your family- she cares about making our lives the best they can be. So, Mattye is going to take us on a journey of making dinnertime more intentional and fun in the relationship department, and I will be supplying the recipes and tips on the essentials tools every kitchen needs to her blog here. And in the weeks when we aren’t posting, make sure to check out her blog- it’s fantastic!

And here she is!

Mattye honing her chopping skills

Hi y’all! It’s Mattye Woodcock here from the lovingkind. I am so excited to partner with your very own Callie dearest of Luv Cooks for a love-filled kitchen collaboration! In this series of posts, Callie will be giving you great recipes for newlyweds and I have the honor of sharing my heart for marriage, love, and how to make mealtime about more than just good food. Thanks for having me as your dinner guest today!

Dinnertime has become one of my favorite times in our home. This isn’t because I’m an amazing cook—I’m not. It isn’t because I have the most lavish dining room—I don’t.

In our almost two years of marriage, dinnertime has often been topped with stress as a garnish and served with chaos for dessert. As I mentioned, my cooking skills are a work in progress, and for a gal who likes to be efficient and good at what she does, this regularly dishes me up a hefty helping of tension. Whether something burns because I’ve cooked it at the wrong temperature or I’ve convinced myself I’ve ruined the meat and it’s no longer safe for human consumption, there have been no shortage of near “come aparts” in my kitchen.

Spicy Tofu Stirfry-226
Excellent knife skills by Mattye

Spicy Tofu Stirfry-315 Spicy Tofu Stirfry-330

Why then, you may ask, is dinnertime even a candidate, much less a top contender, for a favorite time in our home? It’s quite simple, really. It’s because of the man who steps in to help me even when I tell him to (please) get out of my way. It’s the man who eats the “ruined” meat, ignoring my hypersensitivity to food safety. It’s him commenting, “this pizza is restaurant quality” after taking his first bite or “ do you like the placemats I set out for our dinner?” when he finishes preparing the table. That’s what makes me love dinnertime.

Spicy Tofu Stirfry-332
Mattye stirring the stir fry

When I think about it, the imperfections that initially drive me crazy are what end up making dinnertime endearing to me. There is something about it that is so authentically representative of our lives. We make a plan and it doesn’t always turn out like we thought. But even then, we move forward to experience it side by side and support each other through the last bite. The way it comes together is sweet, special and so real.

I think about our life in 20 years and I imagine we will look back on these dinnertimes in the early years of our marriage and smile at the simplicity of them. Our meals are mostly good, but all-around pretty basic, and we sit around our little dining room table, the first major piece of furniture we purchased as husband and wife (after weeks of deliberating no less). But the point is, we do all of this together week after week as we discuss our days, our evening plans, our concerns, our hopes, and a dozen random things in between. There is nothing elaborate or amazing about it, but it’s in these moments that we are writing our story and building the foundation of our life together that make it worth cherishing.

Spicy Tofu Stir Fry

So, in a couple decades, when our life has developed and we have a house and children and days full of things we currently know nothing about, I think we will chuckle as we reminisce on these times and maybe even have a twinge of longing to return, just for one moment, to a night when a ruined piece of dinner meat created waves that were quickly calmed with a little patience and a great, big dose of sweet luv.

Mattye and I loving the foodie moment


Spicy Sweet Tofu Stir Fry

**Recipe adapted from The Minimalist Baker, a fantastic husband-and-wife food blog.

What You Will Need

For the Stir Fry

  • 1 14-ounce package firm or extra firm tofu
  • Cooking spray
  • 2 cups roughly chopped green beans
  • 1 cup diagonally sliced carrots
  • 1 cup sliced red bell pepper
  • 1 cup sliced orange bell pepper
  • 2 Tbsp toasted sesame oil for sautéing (you can also use peanut or coconut)

For the sauce

  • 1/4 cup low-sodium soy sauce (I like tamari because it’s gluten-free)
  • 1/2 tsp dried ginger
  • 1/2 tsp Sriracha
  • 2 Tbsp white sugar
  • 1 Tbsp honey
  • 1 Tbsp corn starch

Optional: white rice; chopped peanuts or additional Sriracha for topping

What You Will Do

  1. Preheat oven to 400 degrees and begin drying your tofu. Remove it from the package, drain, and place it between two thick towels folded into the shape of the tofu. Then place it on a paper-towel lined plate or bowl and top it with something heavy like an iron skillet.
  2. Let it dry for about 15 minutes, changing your towels if they get too wet. Once dry, chop the tofu (with your awesome knife) into roughly 1-inch cubes or rectangles, whichever your heart desires.
  3. Spray a cookie sheet with cooking spray, and arrange chopped tofu on the pan. Bake for 15 minutes, flip over your tofu cubes to ensure even color, then bake for 15 more minutes. This will dry out the tofu and give it a more meat-like texture.
  4. Once the tofu is golden brown and a bit tough and firm, remove it from the oven and set it out to dry a bit more while you prep your vegetables. Ideally, it would set out another 45 minutes or maybe longer. I don’t recommend refrigerating it overnight; I tried this with Mattye and let’s just say it was cheeewwyyy.
  5. If serving over rice, start the rice at this point. I love Uncle Ben’s instant rice.
  6. In a small mixing bowl, whisk together all of the sauce ingredients, then set them aside.
  7. Heat a large skillet over medium-high heat, add oil and swirl to coat the bottom of your pan. Then add (your beautifully chopped) veggies and toss to coat. Cook for 5-7 minutes, stirring often. When the vegetables have some color and have softened a bit (just feel them with your spoon or spatula; they should have some give to them), add the sauce, and stir. It should bubble and thicken. Then add the tofu and stir to coat.
  8. Cook the mixture for 3-5 minutes, stirring often. Try your best to not overcook this; taste it every minute or so to make sure your veggies stay on the crisp side. When veggies are cooked to your preferred doneness, remove from heat.
  9. Serve your stir fry as is or over rice for a more filling meal. Enjoy and revel in your delicious, knife-wielding success. Bravo!
Taste-testing with the LovingKind

Duck Fried Rice

Duck Fried Rice

The first time I ate duck, I ended up with a bullet in my lower molar.

After biting into a freshly sauteed slice, I chomped down on a silver piece of ammunition. The metallic taste rang through the back of my mouth, towards my tongue and up through my nose until I felt like the inside of my cheeks were lined with the barrel of a shot gun. My first thought was that I had broken a tooth. My second thought was that the small fowl my father had so eloquently shot in the backwoods of Alabama and/or Louisiana had not been sufficiently cleaned, leaving me with a very real reminder of the cause of its demise.

Not one to hide my disgust at an instance such as this, and acting in direct violation of my momma’s “Eat at least a scout bite of everything on your plate honey- its ruuude not to” I promptly spit the metal ball onto my plate; threw my elbows down on the table; and drank copious amounts of tea until my taste buds calmed and I came back to my senses.

For those of you giving me more credit than I deserve in the maturity realm, this happened while in the same age group I am currently (20’s), and thank-the-Lord only stopped me from eating duck for ohhh, about three months, until football season rolled around and dad was grilling bacon-wrapped cream cheese-and-jalepeno-stuffed meat kabobs.

What this experience did teach me, however, was that it’s ok to make mistakes in food- even when you are diligent and cooking for the ones you love. Hopefully, this fried rice recipe below almost 100% ensures that you will not be left with any culinary surprises.

These duck breasts are gently fried in coconut oil until the fat from their skin renders, then cut into thin strips and quick-fried again until crispy. The remaining fat magically seasons the fried rice and renders the onions soft and pliable admist bright peas and genlty wilted carrots. And in true LuvCooks style, a generous dollop of hot sauce is added to ensure the utmost interest and all-around spiciness.

So take a risk on duck- even better if it’s wild and shot by someone you love. Just make sure and check for lead projectiles beforehand. Your enamel will thank you.

Rice from above
Rice from above

Duck Fried Rice

What You Need:

2 large duck breasts (if your duck breasts are wild, marinate them for at least six hours and up to overnight in this)

1 tablespoon coconut oil

Salt and pepper, to taste

3 1/2 tablespoons duck fat (a result of the above rendering process)

3/4 onion, diced

3 cloves garlic, diced

1 package frozen peas

1 package frozen corn

2 carrots, skins peeled with a vegetable peeler until in thin strips

2 teaspoons chili paste

3 tablespoons soy sauce

1 teaspoon fish sauce

3 cups cooked jasmine rice

1/4 teaspoon black pepper (or several rounds on a pepper mill)

Generous squirt of honey, or to taste

Generous sprinkle of ginger powder, or to taste

What You Will Do:

1. Score each duck breast with a sharp knife, creating a criss-cross pattern on the outer skin. Apply salt and pepper liberally on both sides after scoring.*

2. Heat a pan on medium-low, then add 1 tablespoon coconut oil. Allow your duck to cook about eight minutes on one side, then flip them and cook for about seven more on the other, depending on how thick your cuts are. It’s perfectly ok if your duck is almost purple-red on the inside at this point. It’s always better to undercook duck than over cook (it gets rubbery), and we are going to slice it and cook it again, so no worries on a bit of an undercooked breast here.

3. Once your duck breasts are done, place them on a plate and tent with foil. Pour about 2 1/2 tablespoons of your gorgeous rendered  fat into a small bowl and put aside. Save the rest! Duck fat is incredible for many other uses- sautéing  vegetables, working into a gumbo, used as a base for fried potatoes. I might even make hot fudge out of it.

4. While the duck is under foil, bring a wok to high heat.

5. Add 2 1/2 tablespoons saved duck fat and chopped onion to the wok. Sautee for about three minutes, or until the onion is soft. Add garlic, and stir for about a minute, or until the garlic is barely light yellow.  Add corn, peas, and rice, quickly stirring to ensure even cooking of your veggies.

6. While your veggies are cooking, take your duck out of the foil and slice the meat off of the breasts into thin strips. It is very helpful to have a friend help you here, as I might have chopped my finger off if I had to do both of these things at once. But more than likely you have ninja-like knife skills and are more adept at multitasking than me.

6. Add the chili paste, soy and fish sauces, black pepper, and honey and ginger powder to taste. Good fried rice takes some tweaking, so taste and add as you like here. Pour the finished fried rice into bowls.

7. After you scoop out your rice, add about 1 tablespoon of duck fat into the wok, and throw duck strips back into the pan. Stir fry them for about 2 minutes, or until the strips are crispy and mid-to-dark brown on the edges.

8. Top the rice bowls with the duck and serve with Sriracha and extra soy sauce on the side.  Mr. Miyagi eat your heart out!

*If you are cooking wild-game style duck, first take your duck breasts out of the above marinade and dry them off well with a paper towel. Then proceed to the rest of step 1.

Horchata Milkshake with Cinnamon-Sugar Topping

Creamy, sweet and celebratory

Feliz el dia de cinco de mayo!

That was what my high school language teacher called “Spain-glish” for Happy Cinco de Mayo amigos/as! In celebration of all things Mexican, culinary, and ice-cream based, a friend of mine suggested I try my hand at making horchata.

The first time I heard this word I thought it was the one producers edited out of telenovelas on Telemundo, but upon further research I realized that in fact it is a delicious almond-and-rice-based drink, heady with cinnamon and a sweet vanilla flavor. Further confirmation found it’s way onto my kitchen table in this month’s issue of Food and Wine. Rick Ortiz’ version of the delicacy- spinning vanilla ice cream and condensed milk into the mix- sounded both comfortable and exotic. Definitely LuvCooks material.

!Que delicioso! Not only was this horchata easy to assemble, paired with churros and a pinata, it was a light and creamy trip to another flavor locale (and even more fun sipped through a straw). Which, with the weather as it is right now in the South, that sun-soaked vacation feeling might not happen until August.

Also, muchos gracias to Stephen Devries for making the shake look muy bonito.

So pull out your finest straws and sip to Mexican food, cinnamon milkshakes, and mas dias de las fiestas! (Lo siento Senora Downs…)

Horchata Milk Shakes (taken from Food and Wine’s Food Travel Special)

What You Will Need

  • 1 cup long-grain white rice, rinsed well
  • 3 cups water
  • 4 medium cinnamon sticks, cracked (I whacked my cinnamon sticks with a mortar and pestle until they were in large chunks or slivers. !Ole!)
  • 1/4 cup sliced almonds
  • 1 tablespoon plus 1/4 teaspoon ground cinnamon
  • 1 tablespoon sugar
  • 1/4 cup plus 2 tablespoons sweetened condensed milk
  • 1/2 banana (2 ounces)
  • 1 pint to 1 1/2 quart vanilla ice cream (depending on how thick you like your milkshakes)
  • 1/2 cup ice

What You Will Do

  1. In a bowl, cover the rice with the water. Add the cinnamon sticks and let stand at room temperature for at least 3 hours or overnight; discard the cinnamon sticks. You might have to use a spoon to make sure any little pieces of cinnamon bark didn’t find their way into your rice.
  2. Meanwhile, in a skillet, toast the almonds over moderate heat, tossing, until fragrant, about three minutes. In a small bowl, blend 1 tablespoon of the ground cinnamon with the sugar.
  3. Transfer the rice and its liquid to a blender. Add the almonds and puree for 2 minutes (keep on pureeing until all of the rice is blended and it is a uniform white color). Strain the horchata through a fine sieve into a bowl. I used a spoon to press the thicker mixture at the bottom of the blender through the sieve to release any remaining liquid.  Rinse out the blender.
  4. Return the horchata liquid to the blender and add the condensed milk, banana and the remaining 1/4 teaspoon of ground cinnamon and puree. Add the ice cream and ice and blend (I like my milkshakes super-thick so I actually used a whole quart and a half to keep the shakes dense).
  5. Pour the shakes into glasses, sprinkle with the cinnamon sugar on top and serve. !Comer bien!

Coconut Sweet Potato Soup with Toasted Chickpeas

Lovely, spicy soup
Lovely, spicy soup with crunchy chickpeas

Accidents happen.

A lot of times in cooking this is a good thing. You run out of cinnamon, scan your pantry, and decide that another spicy ingredient like chili powder would go great in those chocolate brownies. Or, you run out of lemon for your hummus and decide to use lime juice instead (so good; another post for another day).

But this accident was not one of those creative culinary breakthroughs you see on Cooking Channel where someone finds a miracle solution to pizza dough and builds a million-dollar food truck empire. This was more along the lines of, “Oh, my Lord, I have just dumped all of the soup I was supposed to bring to my food shoot on my carpet, down my purple pants and in-between my toes. And on my neighbor’s front door. Oh dear-and their door mat.”

This, by the way, was the first time I met my incredibly sweet neighbor across the hall. In an attempt to carry all of my food props, the food itself and my large purse in one trip to my car- because, heaven forbid I have to take two trips- I also tried balance my pot of soup on the steps next to her door. Instead, the pot slid forward, cascading in a slow-motion orange waterfall from my orange dutch oven down my (now-orange) lower half.

After the initial shock, squishing back into my apartment for paper towels and trying my best to sop up the thick, slightly warm mess from her surrounding steps and entryway, I knocked on her door, mustered my brightest smile and shouted a very overenthusiastic “HI! I just spilled sweet potato soup all over the entryway to your home. I AM SO SORRY!” She was, of course, incredibly gracious and wonderful and understanding. While I, on the other hand, had orange gew in my hair and was experiencing mild symptoms of a panic attack and/or emotional breakdown.

But the lovely blessing in disguise from this was the answer to the prayers I quickly uttered right after the pot of soup splattered down our hallway. In a final, last-ditch effort, I rushed back to the pot in my kitchen sink with the faint hope of any liquid left inside we could photograph. And you know what? A thin rim, silver-lined rim remained. It was a total loaves-and-fishes moment: like the miracle of feeding the five thousand (but with a tiny bowl and stage lighting).

The miracle continued as my talented friend Stephen DeVries took my offering and once again made the spread look gorgeous. I am so glad he did because, y’all, it is delicious. As a Southern girl far from the country of Thailand, I imagine it tastes like what that country would offer: spice, tons of flavor, and a sweet nuttiness from the potato and peanut butter combination. And the toasted chickpeas offer a fantastic spicy crunch to compliment the jalepeno and cilantro in the broth.

Take a Southern, Thai advenure this week- just try not to spill your luggage.

Coconut Sweet Potato Soup (This recipe was taken from the lovely blog Foodess.com)

What You Will Need

  • 1 tbsp oil
  • 1 cup chopped onion (from 1 medium-large onion)
  • 1 jalapeno, chopped (seeds removed)
  • 1 large clove garlic, minced
  • 3 tbsp Thai red curry paste
  • 1 large sweet potato, peeled and chopped into 1½” pieces
  • 1 can coconut milk
  • 3 cups vegetable or chicken broth
  • ⅓ cup natural peanut butter
  • 3 tbsp minced fresh cilantro, plus additional for garnish
  • salt, to taste
  • ⅛ tsp cayenne (optional)
  • 1 lime, cut in wedges (optional)

What You Will Do

  1. Heat oil in a medium saucepan over medium heat. Add onion and saute until just softened (and a bit translucent). Add jalapeno and garlic; saute for one minute. Stir in curry paste.
  2. Add chopped sweet potato, coconut milk and broth. Bring this mixture to a boil, then turn it back down to medium and cover. Cook until the sweet potato is very soft, about 20 minutes (I like to test mine with the back of a wooden spoon; if it gives gently when you press it, it is ready-to-go). Puree the mixture with an immersion blender, or do it in batches in a regular blender. (Does anyone out there own an immersion blender? I feel like if I had one I would be a total gourmand, much more like the Foodess, and it would save me from clumsily pouring boiling liquid into a blender. Be warned; if you pursue the blender method, do not fill the liquid up to the top of your blender! The steam will explode the top off and soup will go flying everywhere. Trust me.)
  3. Stir in peanut butter, cilantro, and a generous pinch of salt until combined. Stir, and adjust salt to taste. Add cayenne if additional heat is desired.
  4. Serve with more minced cilantro and lime wedges on the side. And chickpeas! And jasmine rice if you have some.

Toasted Chickpeas (This recipe is adapted from the wonderfully detailed Everyday Maven)

What You Will Need

  • 2 cans chickpeas, drained and rinsed
  • 1 tablespoon vegetable oil (if you have coconut, it would work great here)
  • ½ teaspoon curry powder
  • 1/2 teaspoon hungarian paprika
  • ½ teaspoon ground cumin
  • ½ teaspoon ground coriander
  • ¼ teaspoon cayenne pepper
  • 5 to 7 turns of fresh ground black pepper

What You Will Do

  1. Preheat the oven to 350F.
  2. Drain and rinse chickpeas and place them into a bowl. Add in oil and spices. Toss with a spoon until the beans are evenly coated.
  3. Scoop chickpeas onto a non-stick baking sheet OR a baking sheet lightly sprayed with cooking spray. Leave any extra liquid in the bowl (don’t pour it onto the cookie sheet).
  4. Roast the peas for 15 minutes. Toss them again, making sure to evenly distribute them across the cookie sheet, and roast for another 15 minutes.
  5. Let cool for 5 to 10 minutes, then place in a bowl and serve! (Make sure that you let these completely cool before you put them in the bowl; they get mushy if you let them cool together).

Now enjoy your tasty Thai adventure!