Chicken Divan and Making Dinner Time Count

Chicken Divine (Divan)

Y’all!

Fall is in the air; life is in full, golden swing; I am running like a crazy person all over town to assist on shoots and plan a wedding (feelings of glee, planning anxiety and squeal here!! AHH!!), and hopefully we are all eating peanut butter granola energy bars to keep us going.

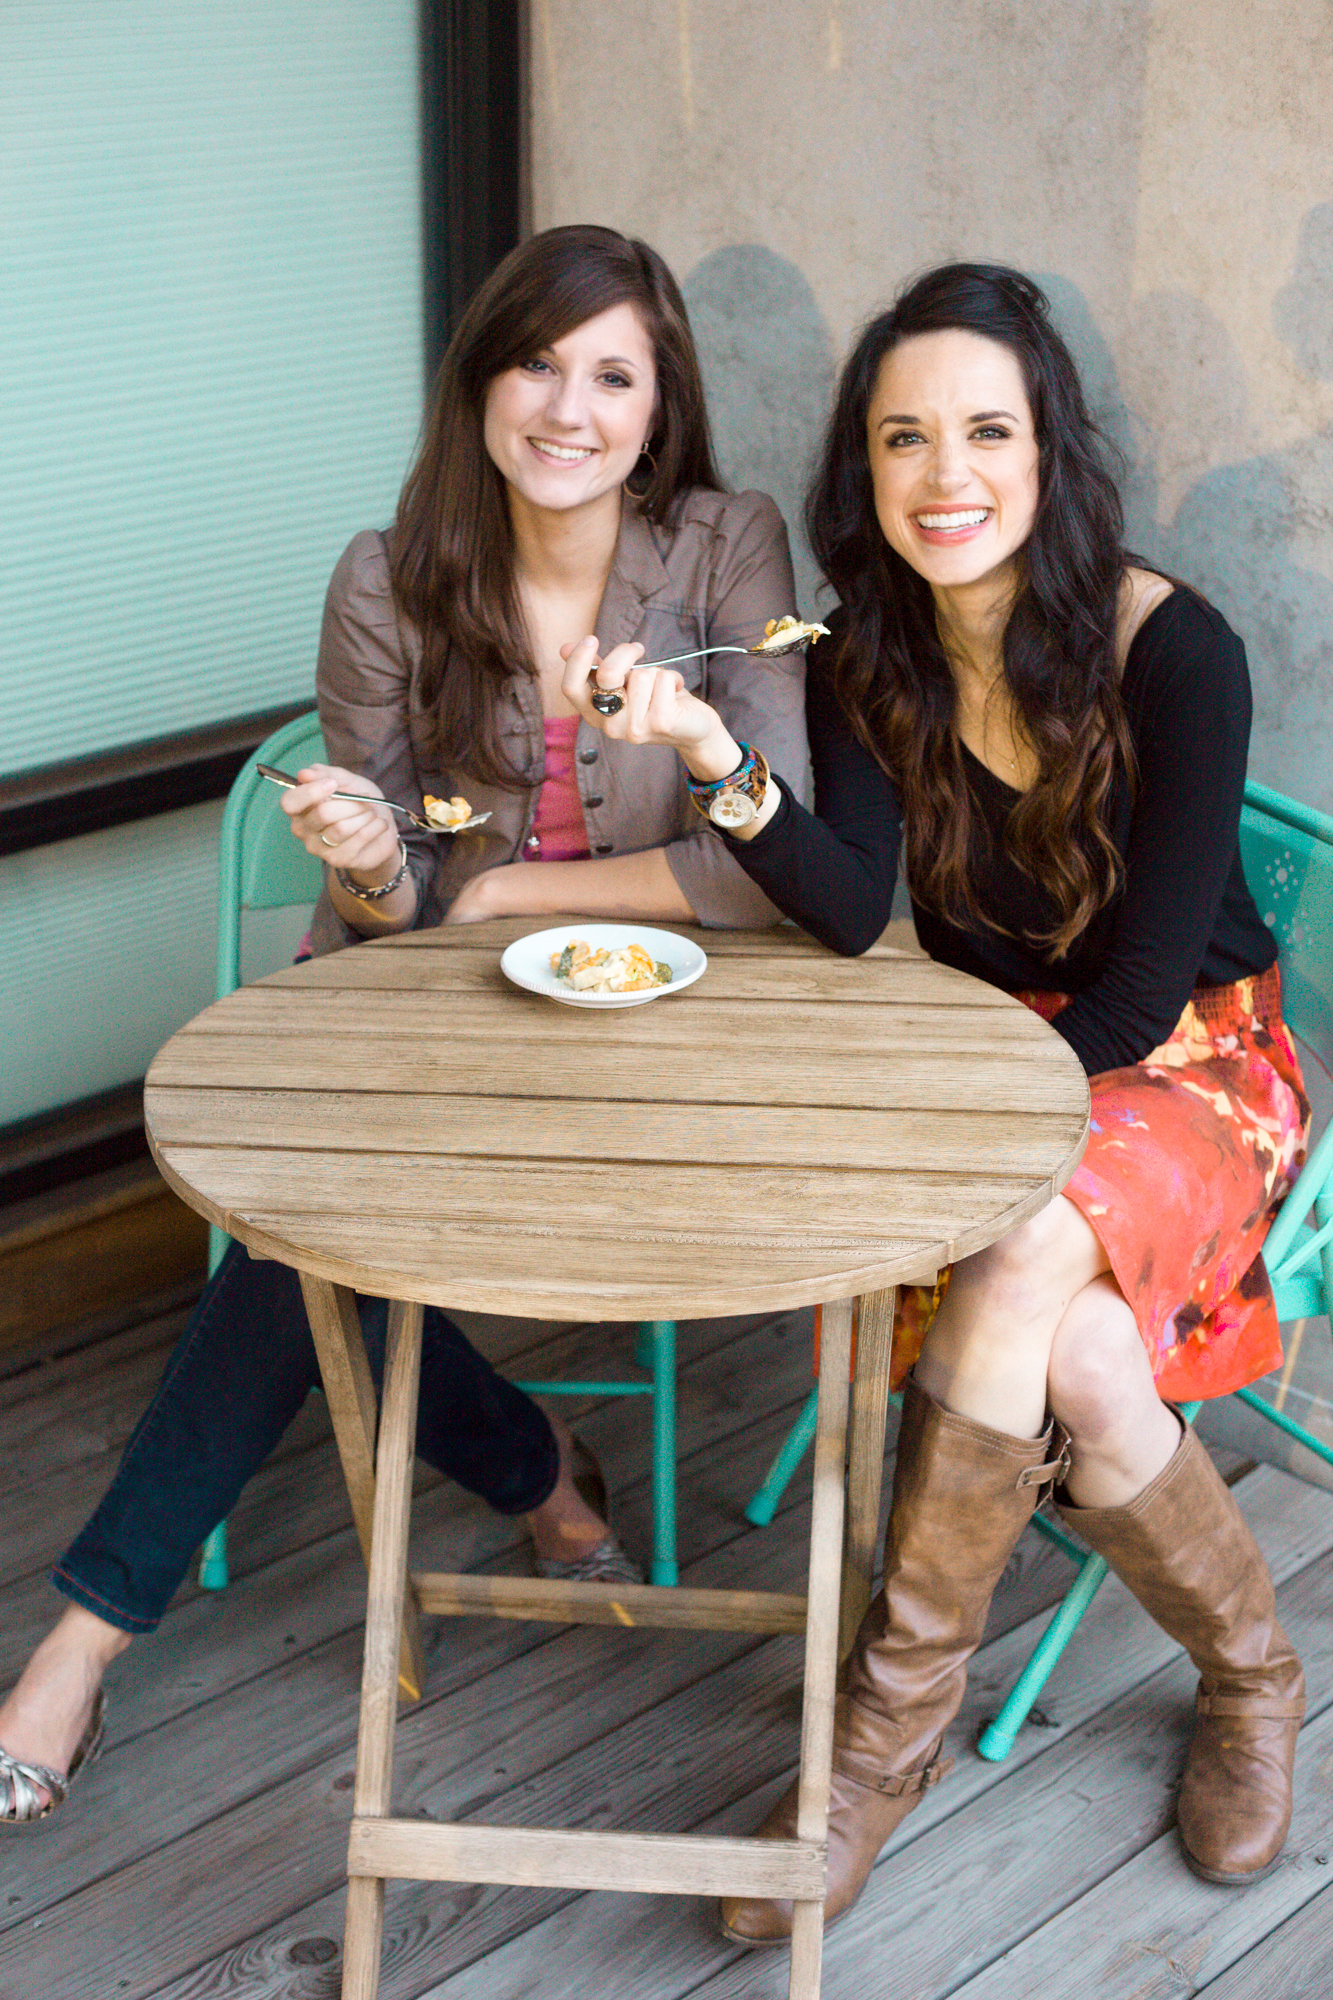
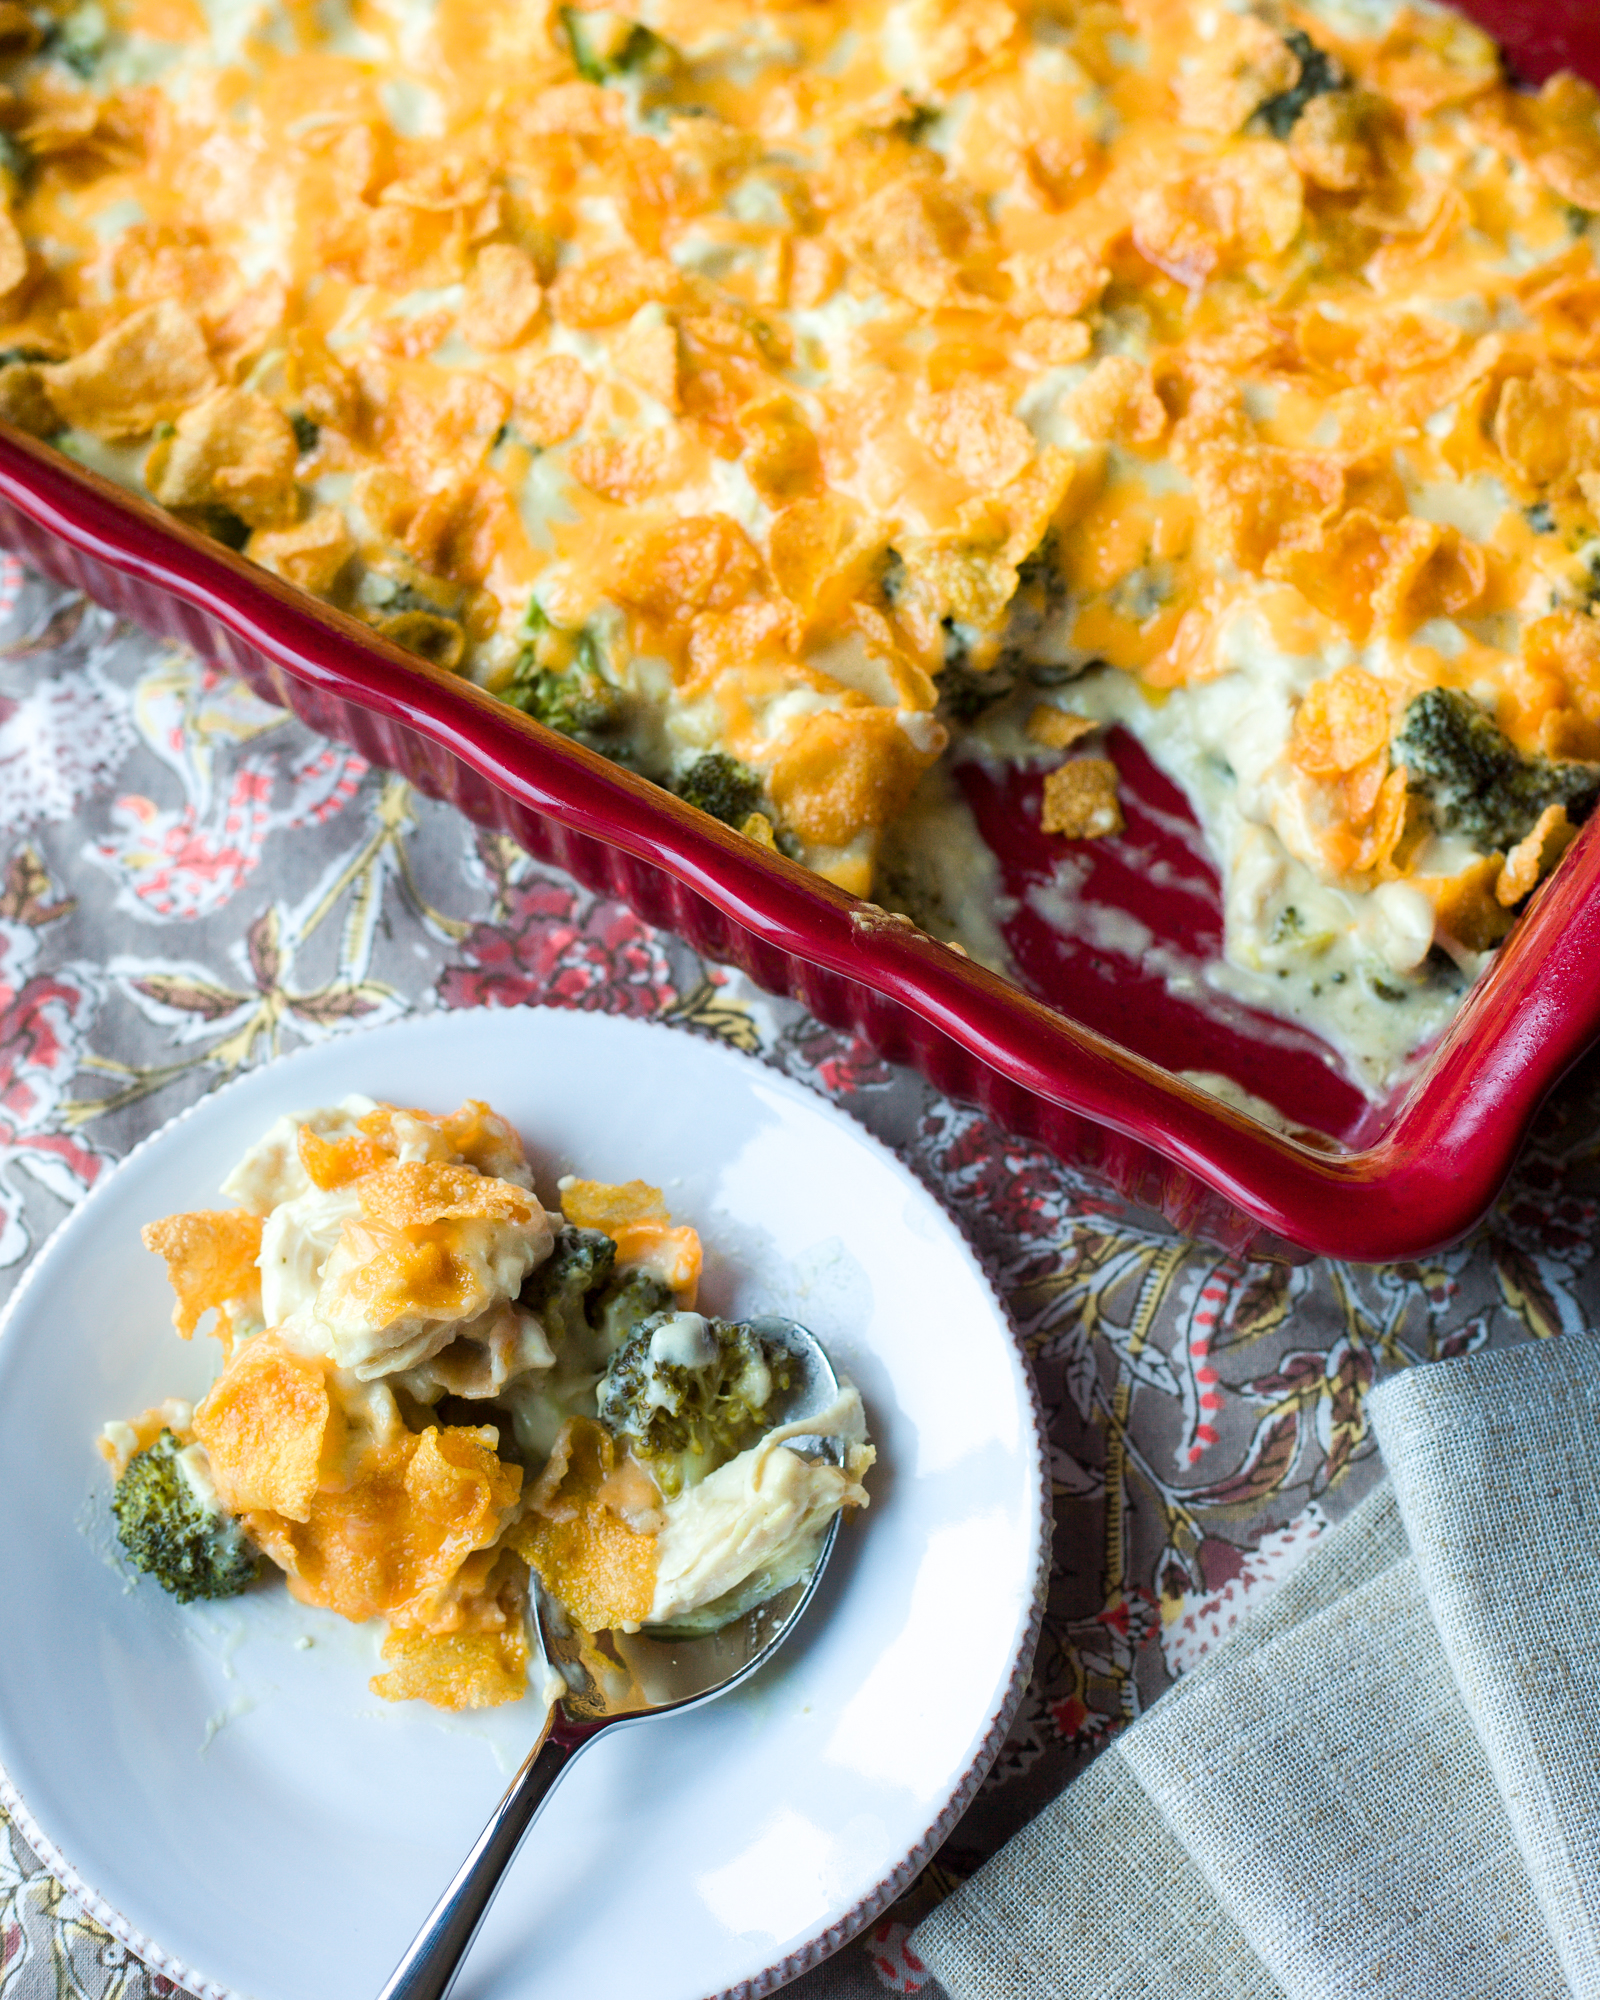
I can’t think of a better person to share this sweet season with and learn from than the always beautiful, inviting, and relationally gifted Mattye from the lovingkind blog! She is back for our second, October installment together on making meal time matter. And I’m here to share one of the easiest, most deliciously warm recipes I can muster, chicken divan. I think you are going to love hearing from her and making this delicious casserole (and I don’t use the words delicious and casserole together lightly).

So put on some snuggly clothes, smell something pumpkiny and preheat your oven as we hear from Mattye on how we can make our fall meals- admits the wonderful busyness of our lives- even more intentional.

Chicken Divine (Divan)

Make Mealtime Matter

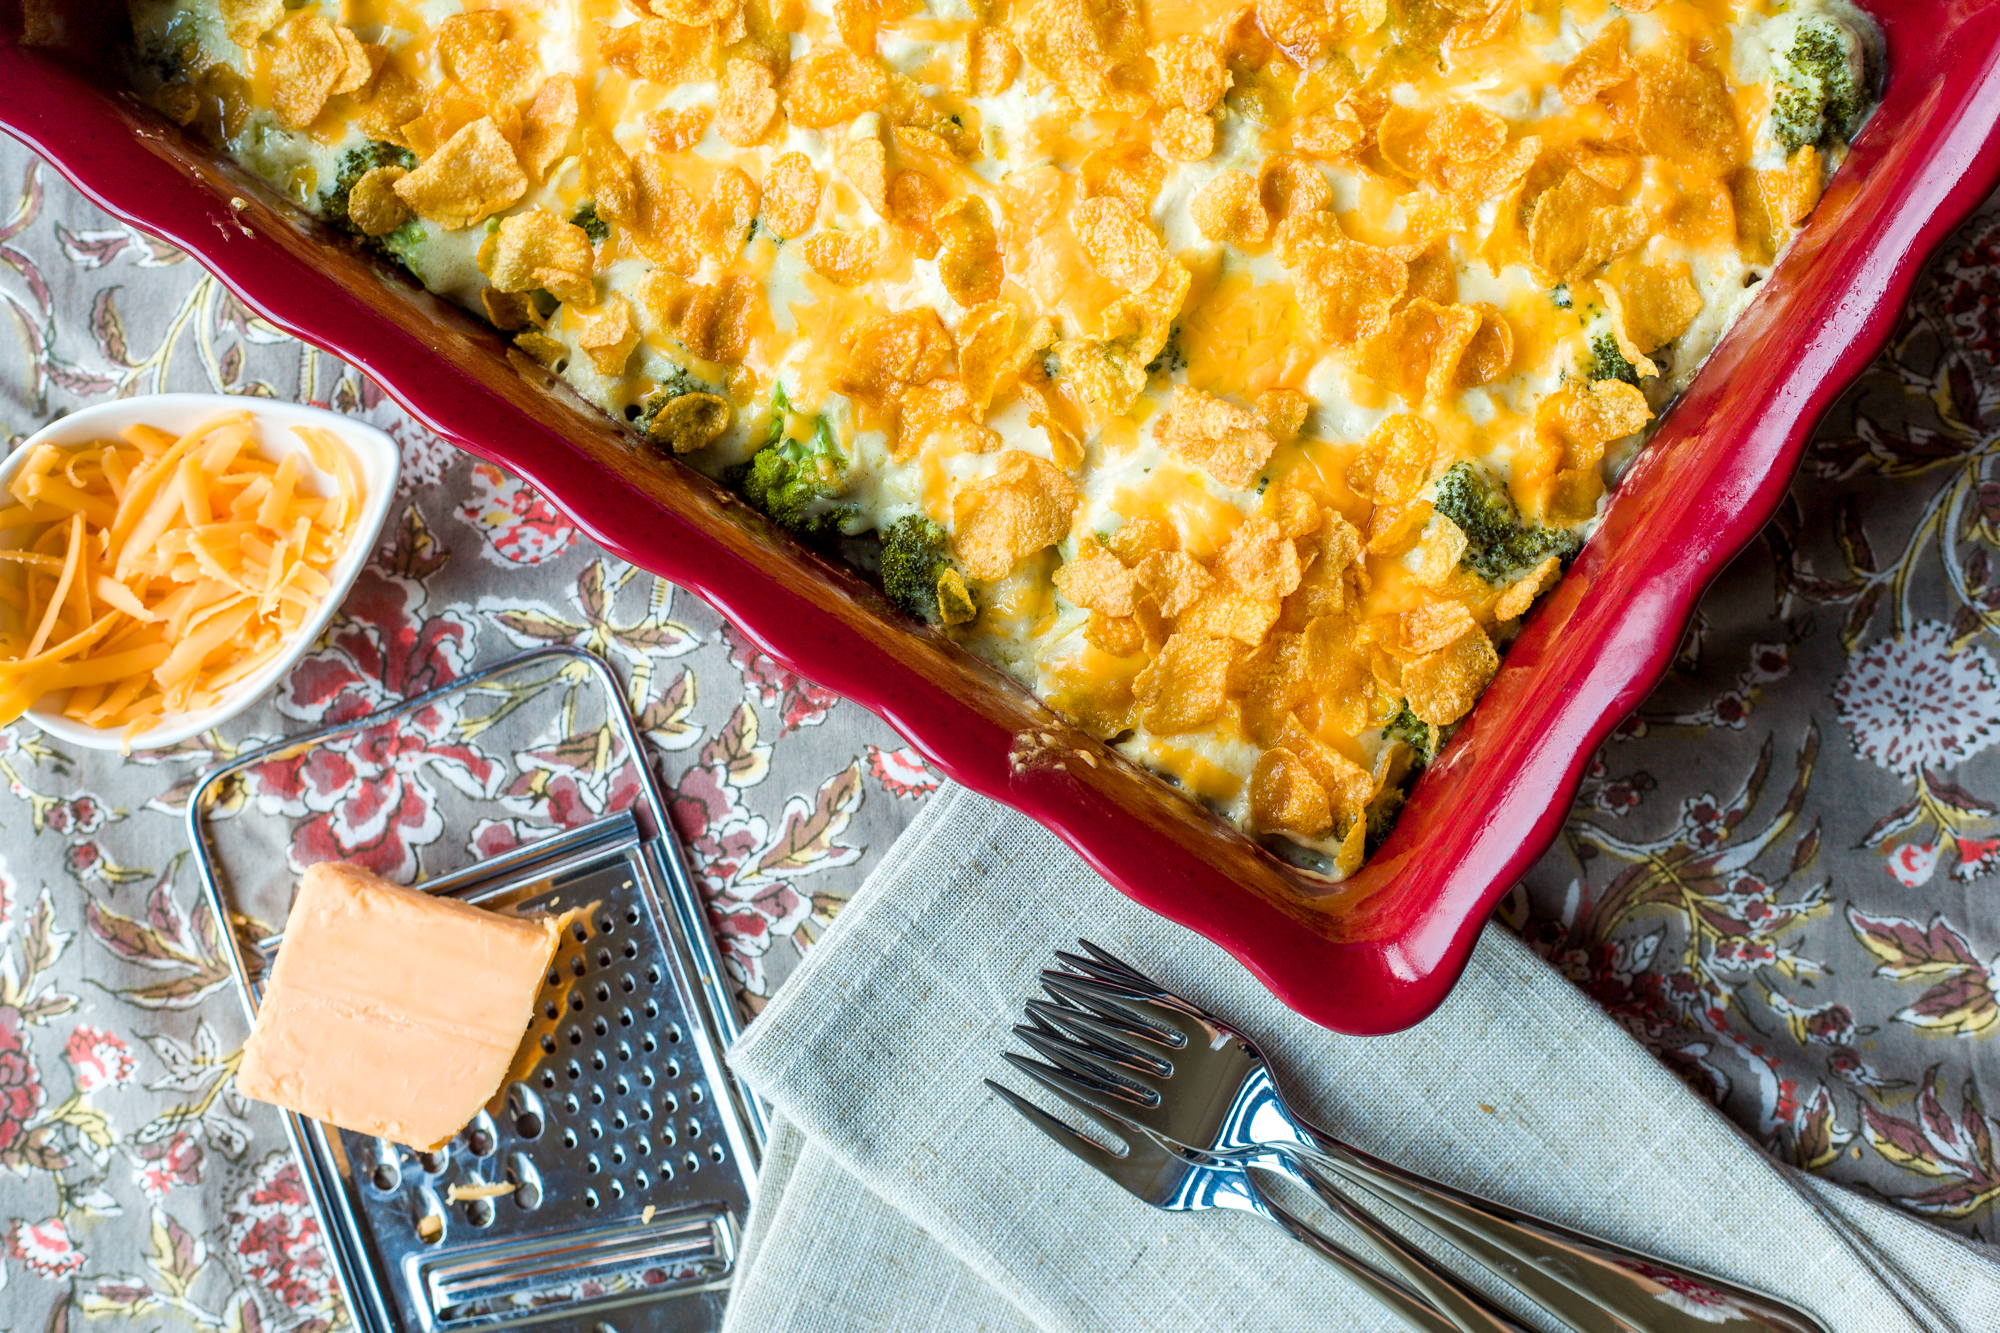
Hey y’all! I’m so excited to be back on the Luv Cooks blog to share some advice that will make your marriage as savory and sweet as your cooking! I promise that if you will purpose to make mealtime matter and cook this Chicken Divan recipe, it will be a happy night in your kitchen and your marriage!

I am not an incredible cook, but I do know something that can make your mealtime significantly better than the average American household. I’m not about to reveal a secret spice, perfected family recipe, or magical cooking tool. In fact, my advice is more about what you leave out than what you put in.

Chicken Divine (Divan)
Fresh broccoli pre-saucing

You can literally transform mealtime in your home with one simple step: remove cell phones from the dinner table! Eliminating this one distraction will give you the chance to look into each others eyes rather than stare at a screen and share about your day in a conversation rather than in a status update.

My husband Woody and I made it a rule that no cell phones are allowed at the table for the Woodcock family before we even got married. While dating, we spent months watching husbands and wives and moms and dads at restaurants ignoring each other or their children in favor of their cell phones. While we were not innocent of this ourselves, it was seeing it take place with other people that really grabbed our attention.

Mattye sprinkling cornflakes on top
Mattye sprinkling cheese on top

We realized that if we don’t want to one day ignore our children, then we need to start by not ignoring each other. Thus, “no cell phones at the table” was established.

We’re not perfect, and we occasionally slip, but we consistently hold each other accountable. On the occasion one of us starts to pull out our phone to look something up, check a message, or share a photo, the other is quick to give a knowing look and say, “What are you doing?” which is enough for the other to slip their phone back in its place and wait until after dinner to use it. As we hoped it would, this has become a healthy habit in our lives. In fact, having a cell phone present at a mealtime with Woody, or anyone else for that matter, just feels unnatural to me now, and it’s all because of a good habit we made a point to develop.

I love that pairing cell-phone-free, intentional time with your spouse alongside mealtime sets it into a part of your schedule that already happens every, single day—eating! Essentially, you don’t have to find extra time in your schedule, you just have to be more purposeful with the time you already have.

Mattye expertly smoothing out the top of our chicken divan

In our nearly two years of marriage, mealtime has become a gift to our relationship because we have chosen to make it matter. It is a consistent time we pause, connect and really see each other. Even on our busier days, a 20-minute meal can make a big difference for us simply by choosing to set aside our phones and other distractions and focus on one another.

When it comes down to it, this isn’t about living a life based on rules or restrictions; rather, it’s about taking a step back to look at your life, see what matters most to you, and find a way to prioritize it. You won’t always feel like making the extra effort to focus on what you really love most, which is exactly why deciding ahead of time is so important. Base your choice on the life you’re trying to build together, not on how you feel in the moment.

Need a snack while you bake? Bust out a box of cornflakes. Seriously, so good!
Chicken Divine (Divan)
Putting the final touches on our casserole

Friends, make mealtime matter. Make it a time where you don’t only refuel your body, but also your marriage. You can do it, and your future self will be thankful you did.

Chicken Divine (Divan)

Chicken Divan
What You Need:
For shredded chicken:
  • 10 frozen chicken tenders (I bought one 32-ounce bag of chicken tenders and took 10 out)
  • 1 tbl olive oil
  • 1 tsp kosher sea salt
  • 1/2 tsp curry powder
For homemade cream of chicken soup:
  • 2 1/2 cups milk (I like unsweetend original almond milk)
  • 7 tbl gluten free flour
  • 2 chicken boullion cubes
  • 2 tablespoons olive oil
  • dash of curry powder
For casserole assembly:
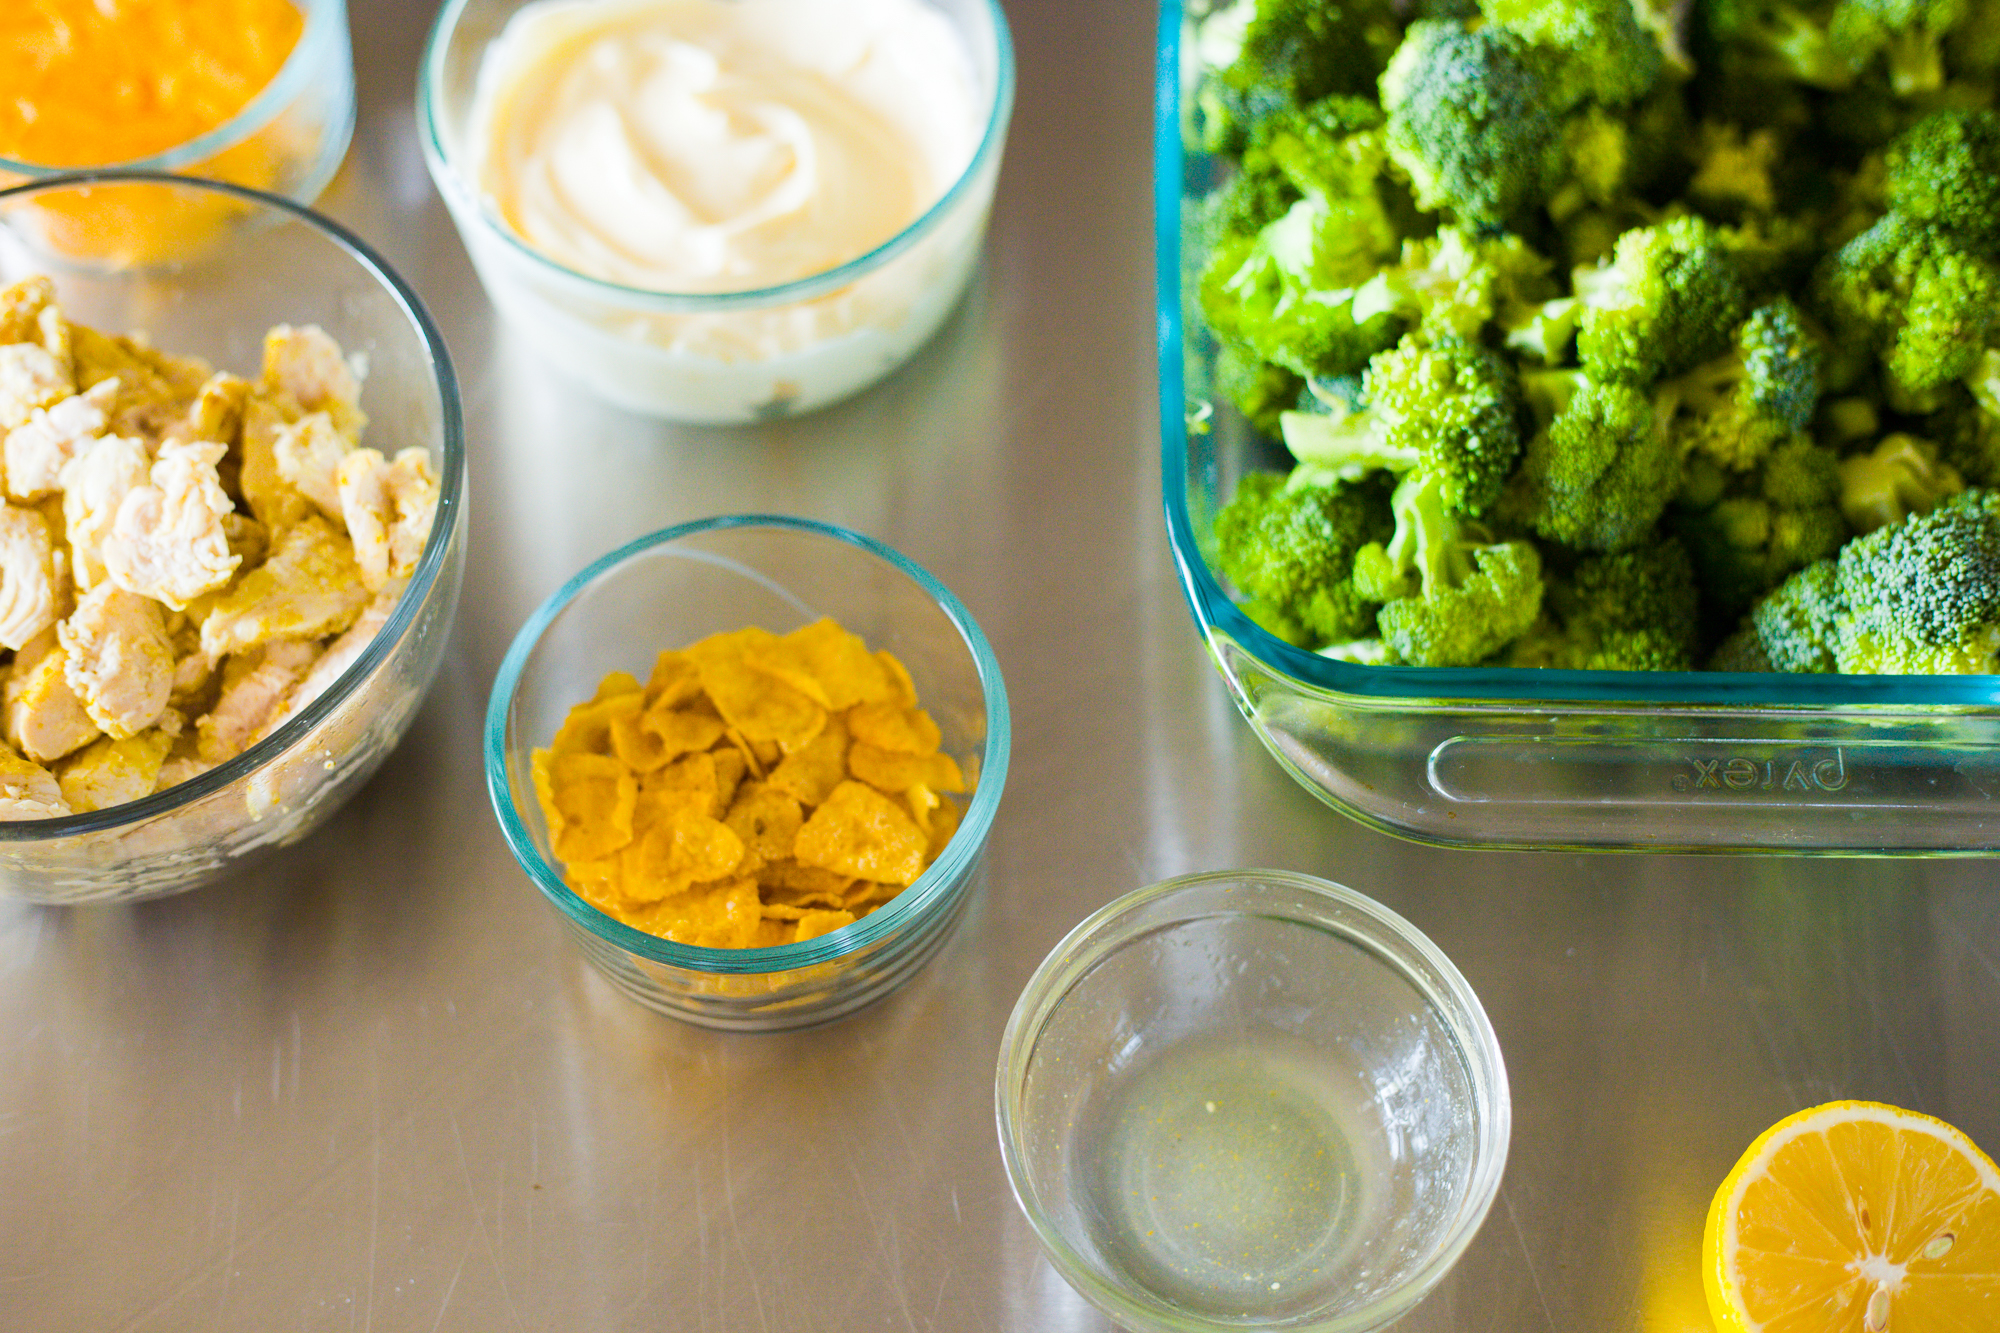
  • 2 lbs fresh broccoli heads, lightly steamed in microwave*
  • 1 cup mayonnaise (I prefer Duke’s)
  • 1 teaspoon fresh lemon juice
  • 1 tablespoon unsalted butter
  • 1 cup grated cheddar cheese (I like Cabot Extra Sharp Cheddar)
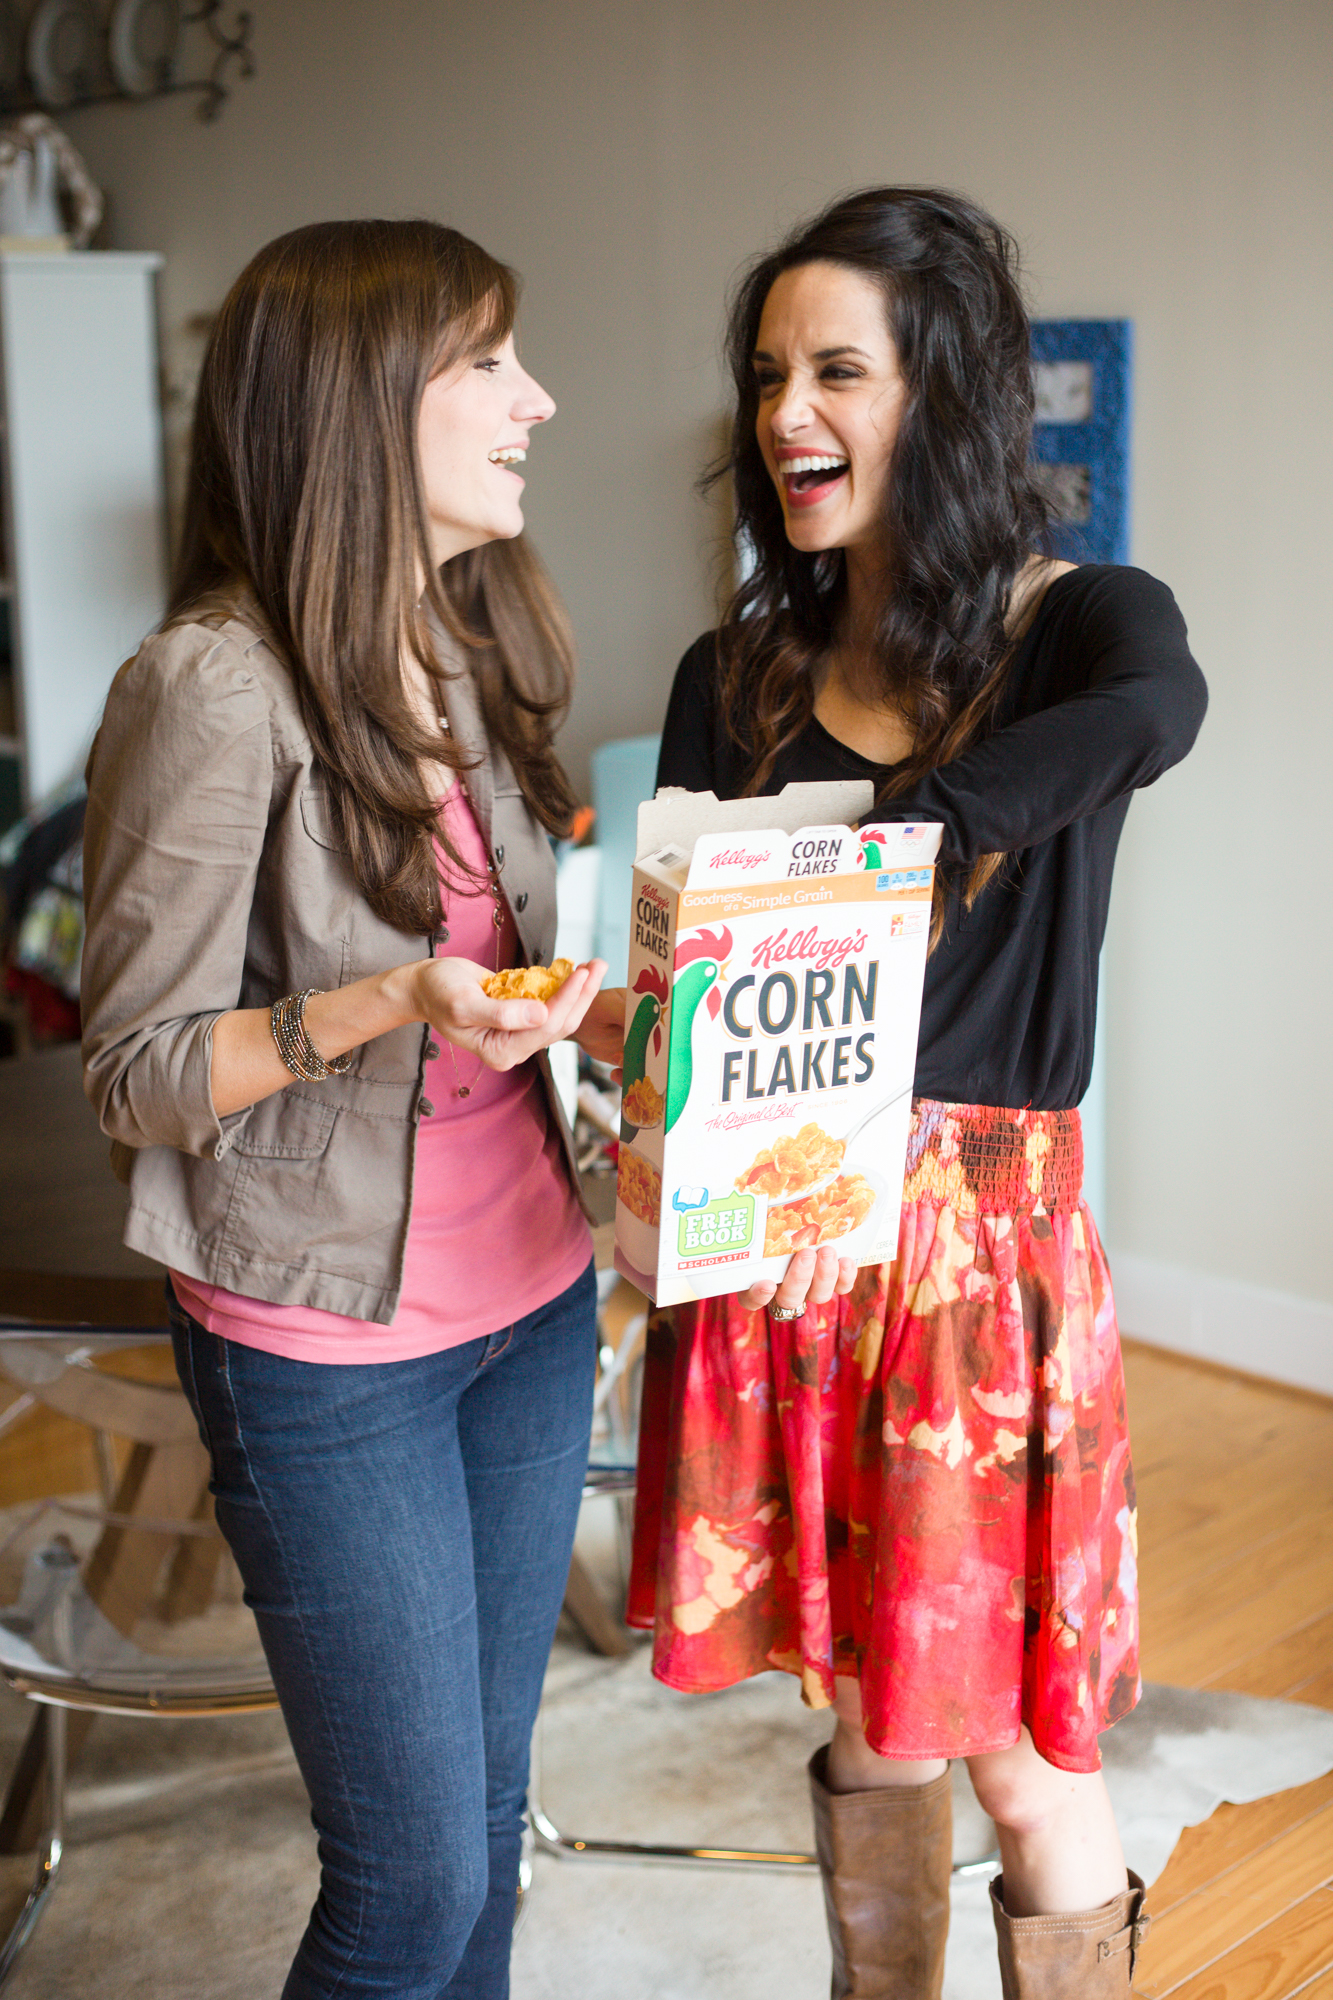
  • 1 cup cornflakes
What You Will Do
  1. Preheat oven to 350 and lightly grease a 13X9X2 pan.
  2. Place frozen chicken tenders in an oven safe pan and coat in tablespoon olive oil. Stir together sea salt and curry powder, then sprinkle the spice mixture over the chicken tenders and lightly stir with spatula to evenly coat the chicken.
  3. Once the oven is ready, bake chicken for 30 minutes. Let the chicken cool, then shred to equal two cups of chicken.**
  4. While the chicken is baking, make your cream of chicken soup: In a medium saucepan, whisk together milk and gluten free flour until combined.
  5. Now turn heat to medium, then add bouillon cubes and 2 tablespoons olive oil, whisking constantly until bouillon dissolves and mixture thickens. Turn heat to low and whisk for a minute or two more, until no lumps remain. Take off heat and add a dash of curry powder (a shake or two).
  6. Once the cream of chicken soup has cooled a bit, add mayonnaise, lemon juice, and unsalted butter. Stir to combine with spatula.
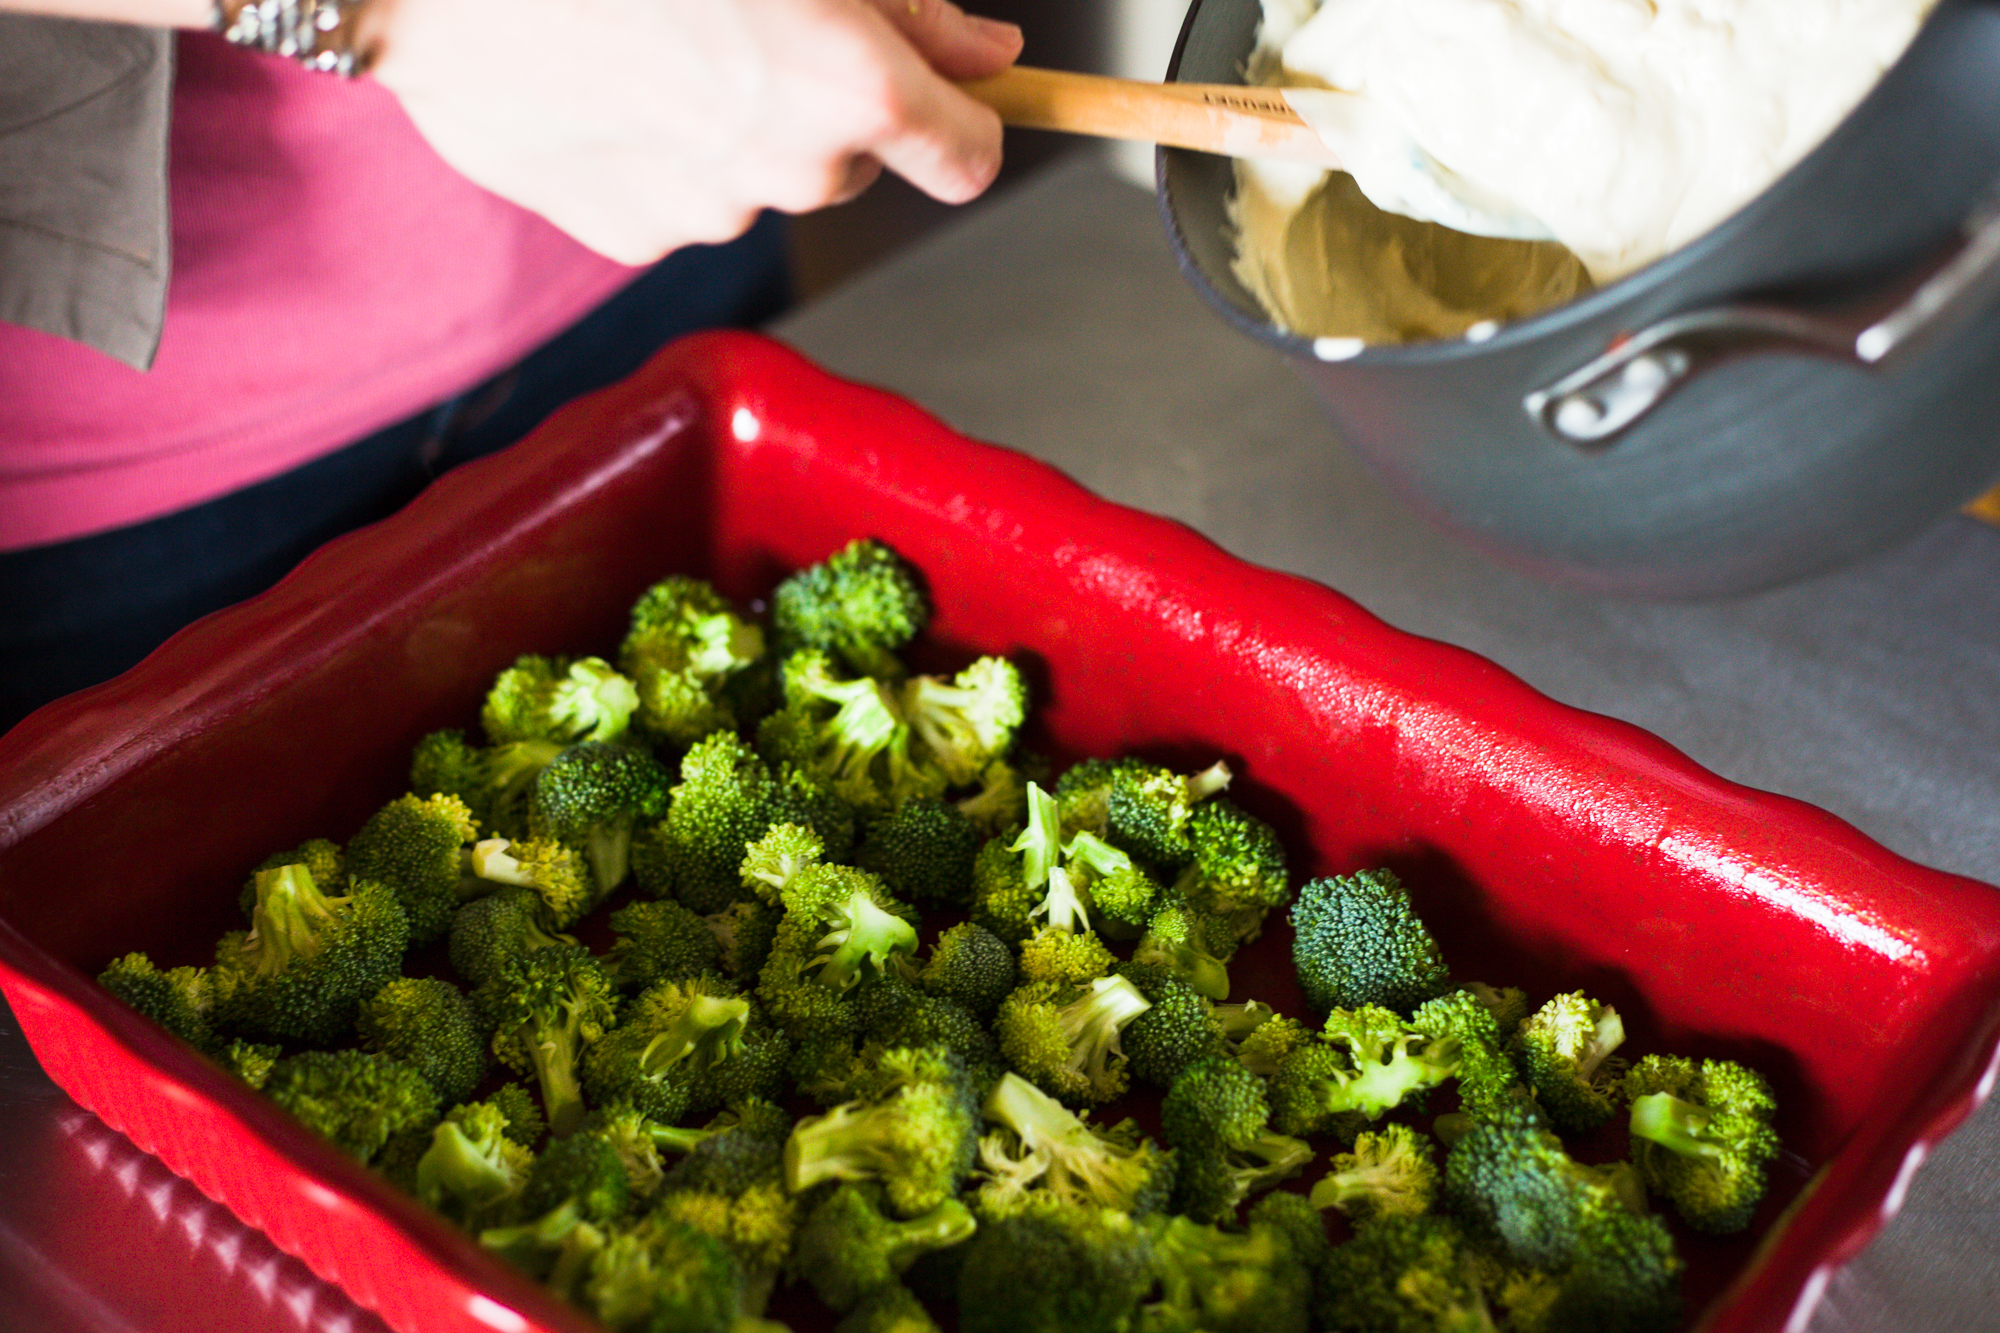
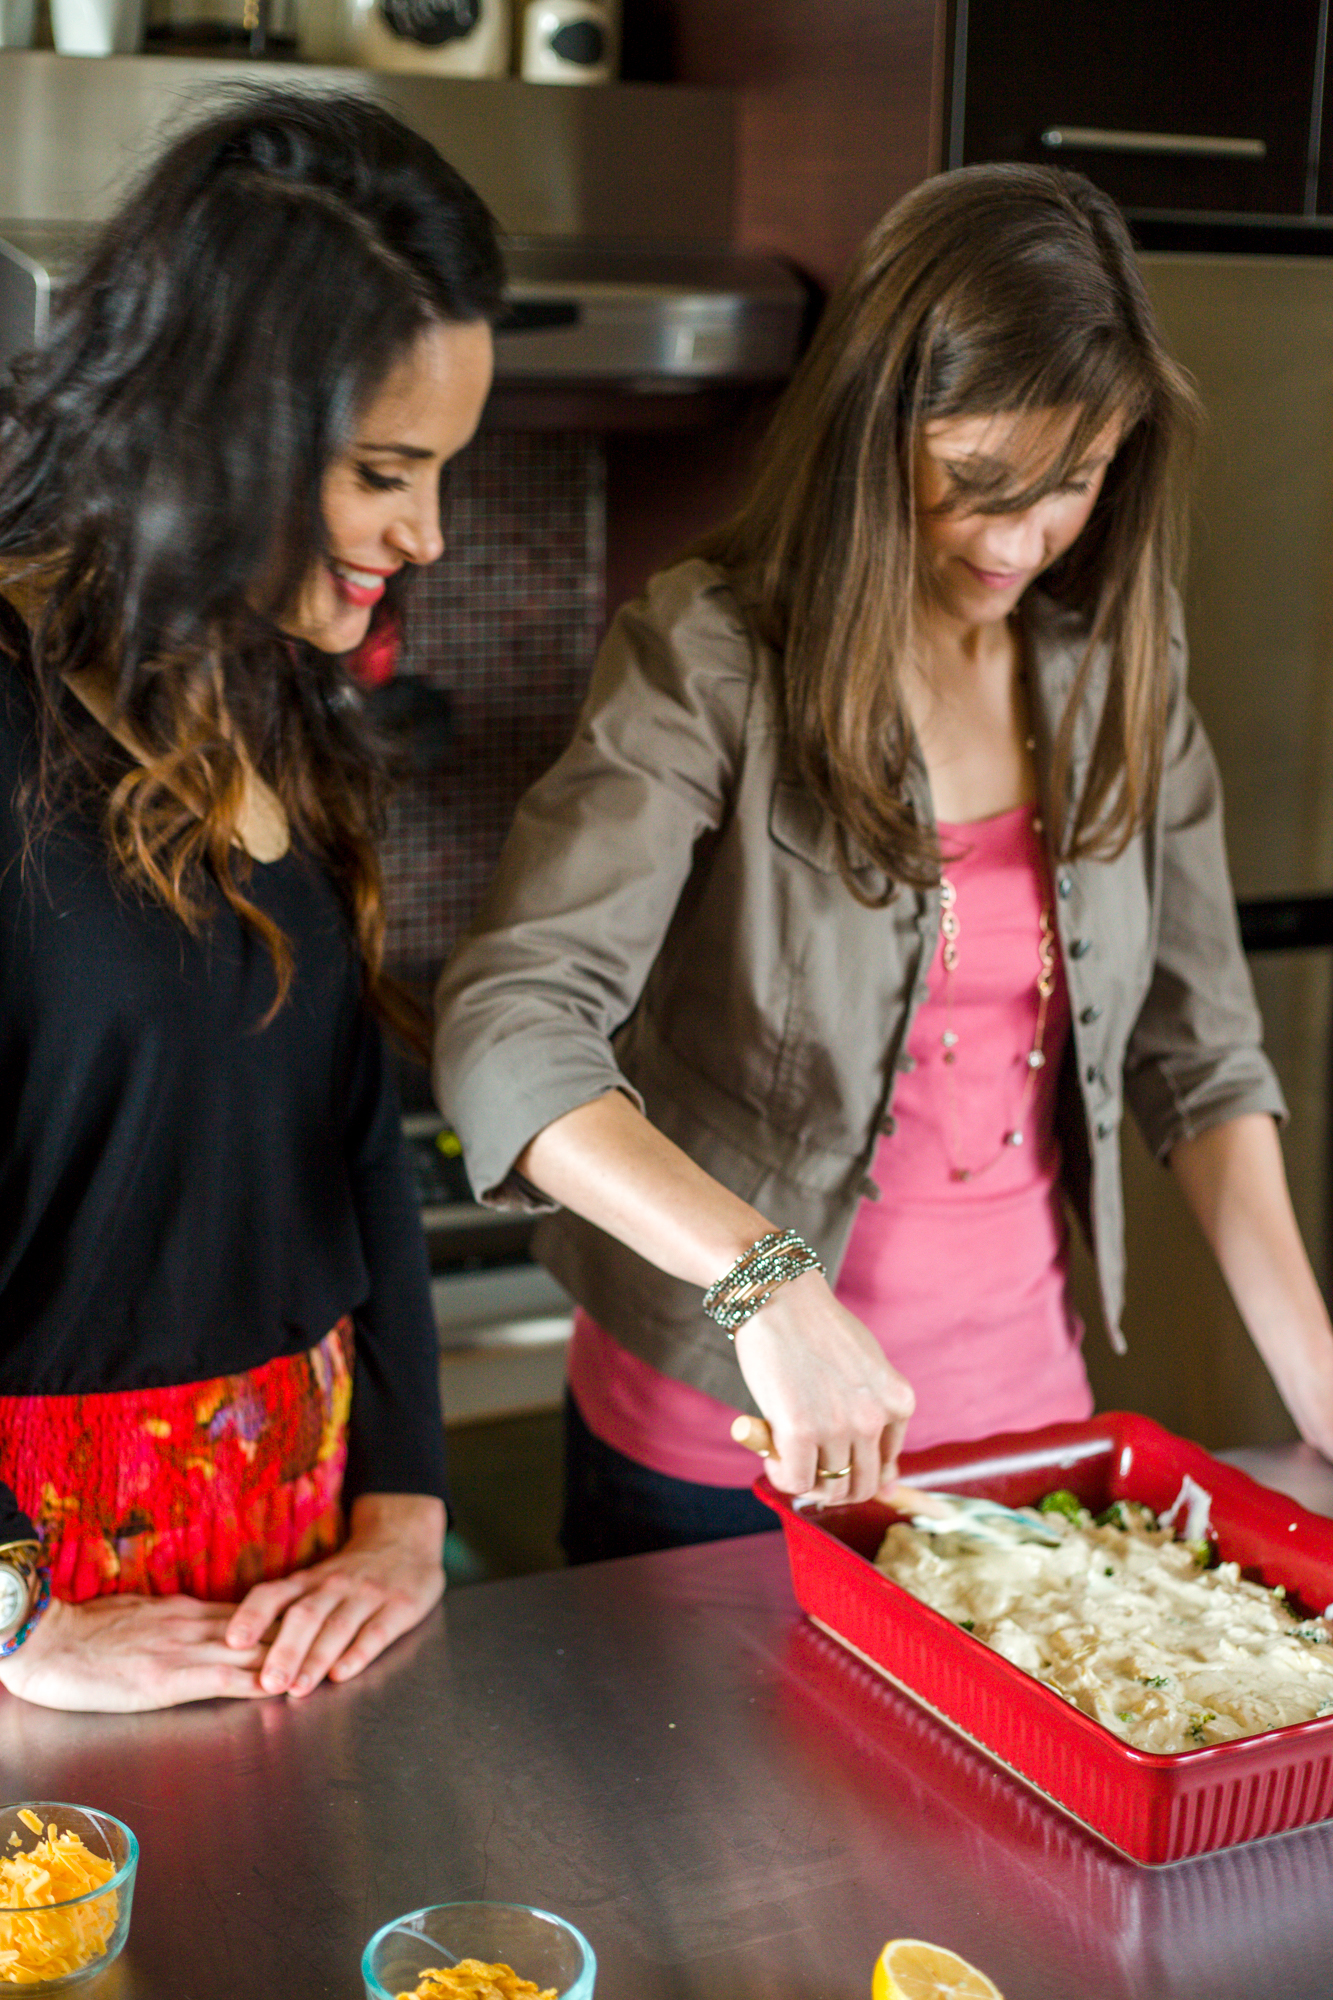
  7. Line the bottom of your 13X9X2 pan with the lightly steamed broccoli, making an even layer of veggies. Top with shredded chicken. Using a spatula, gently pour the creamy mixture on top, making sure to scrape the sides of the bowl to get all of that goodness on the chicken/broccoli layer.
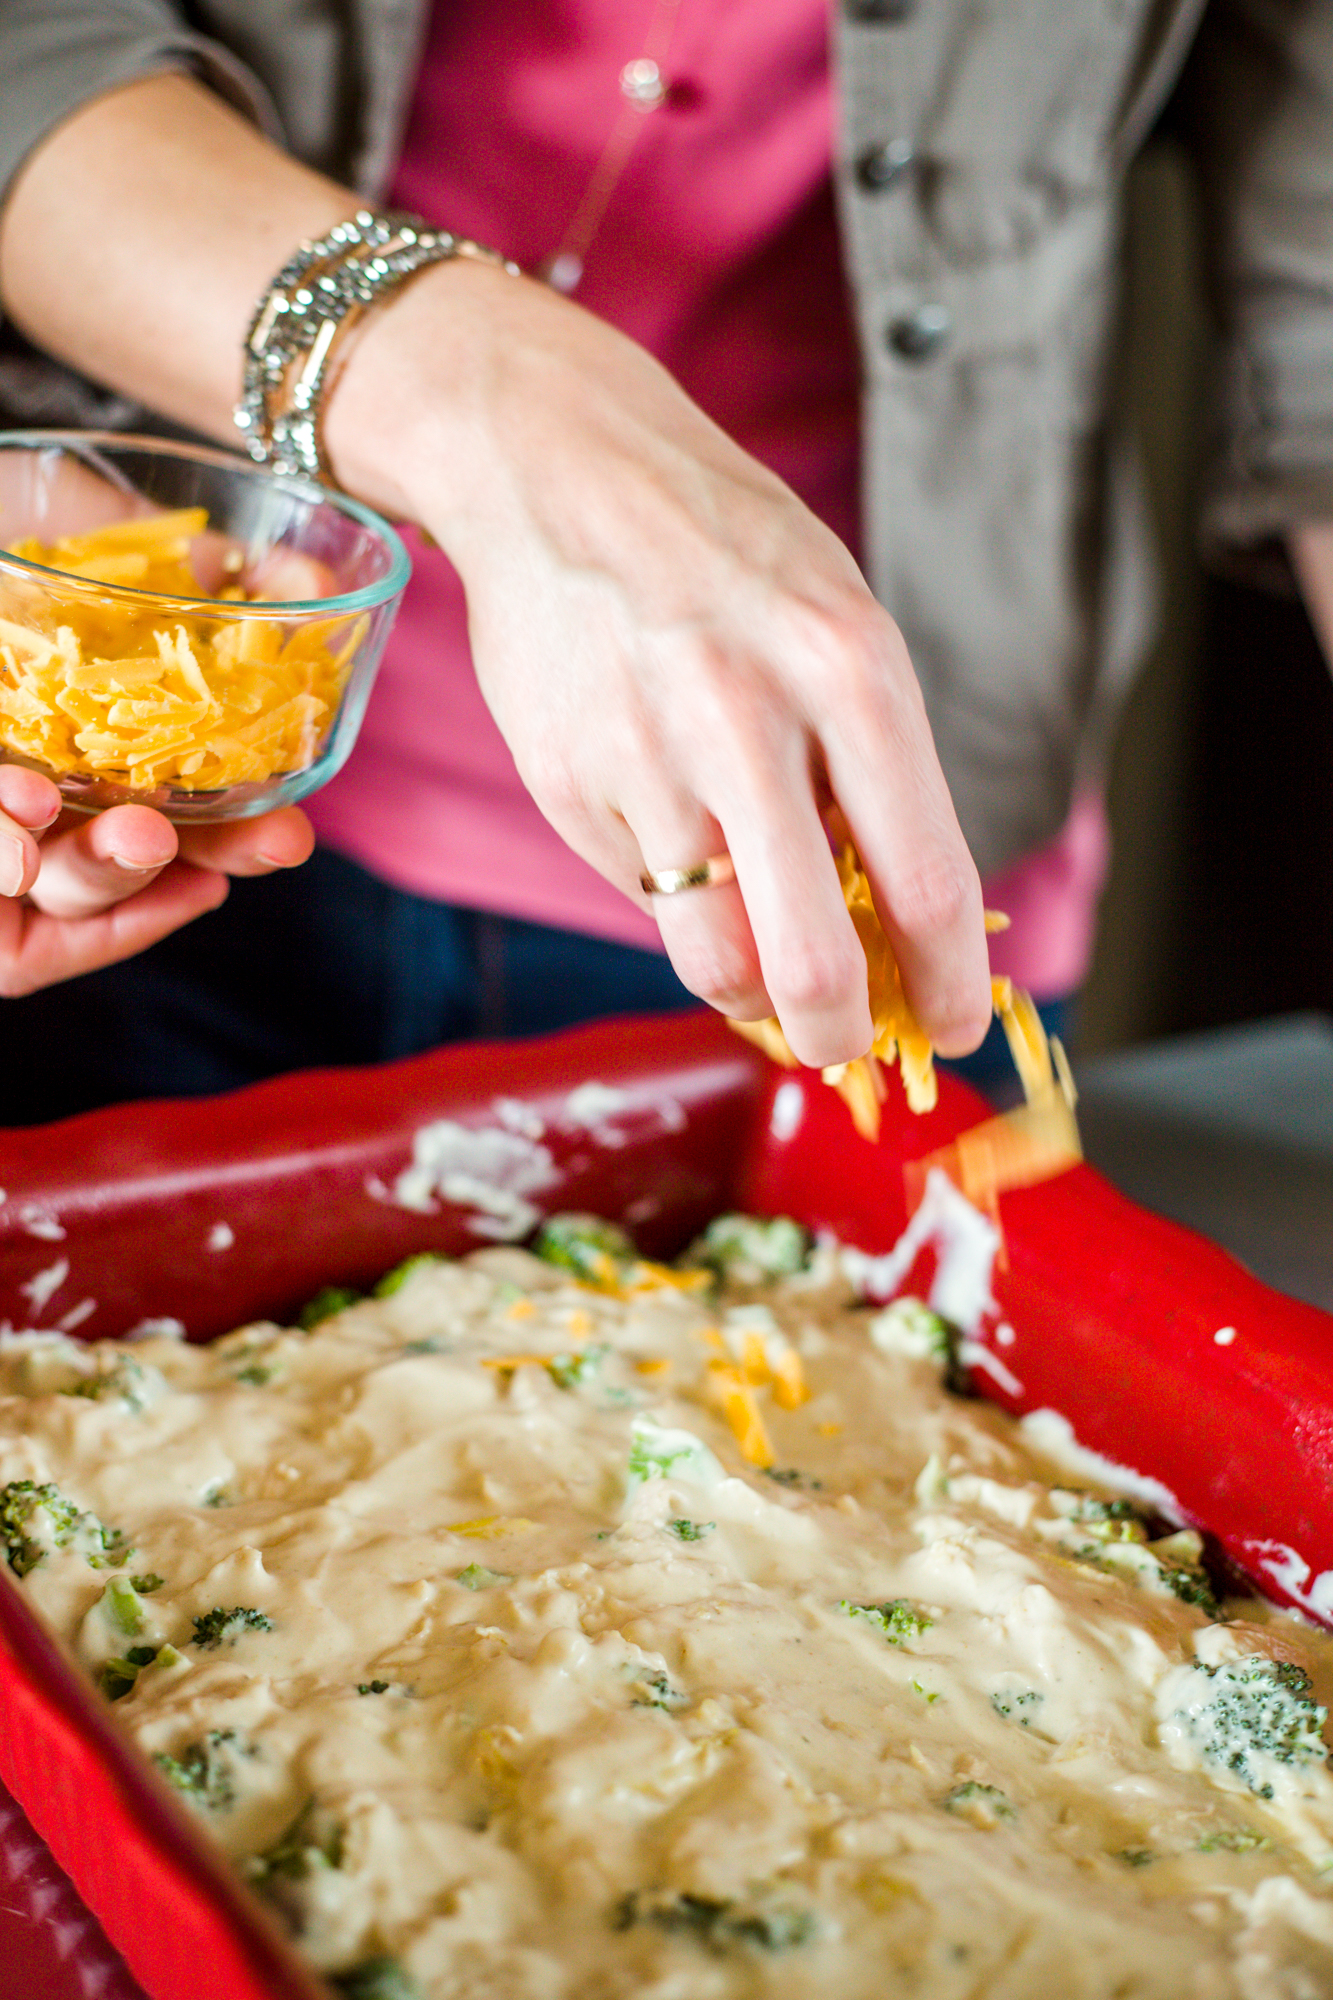
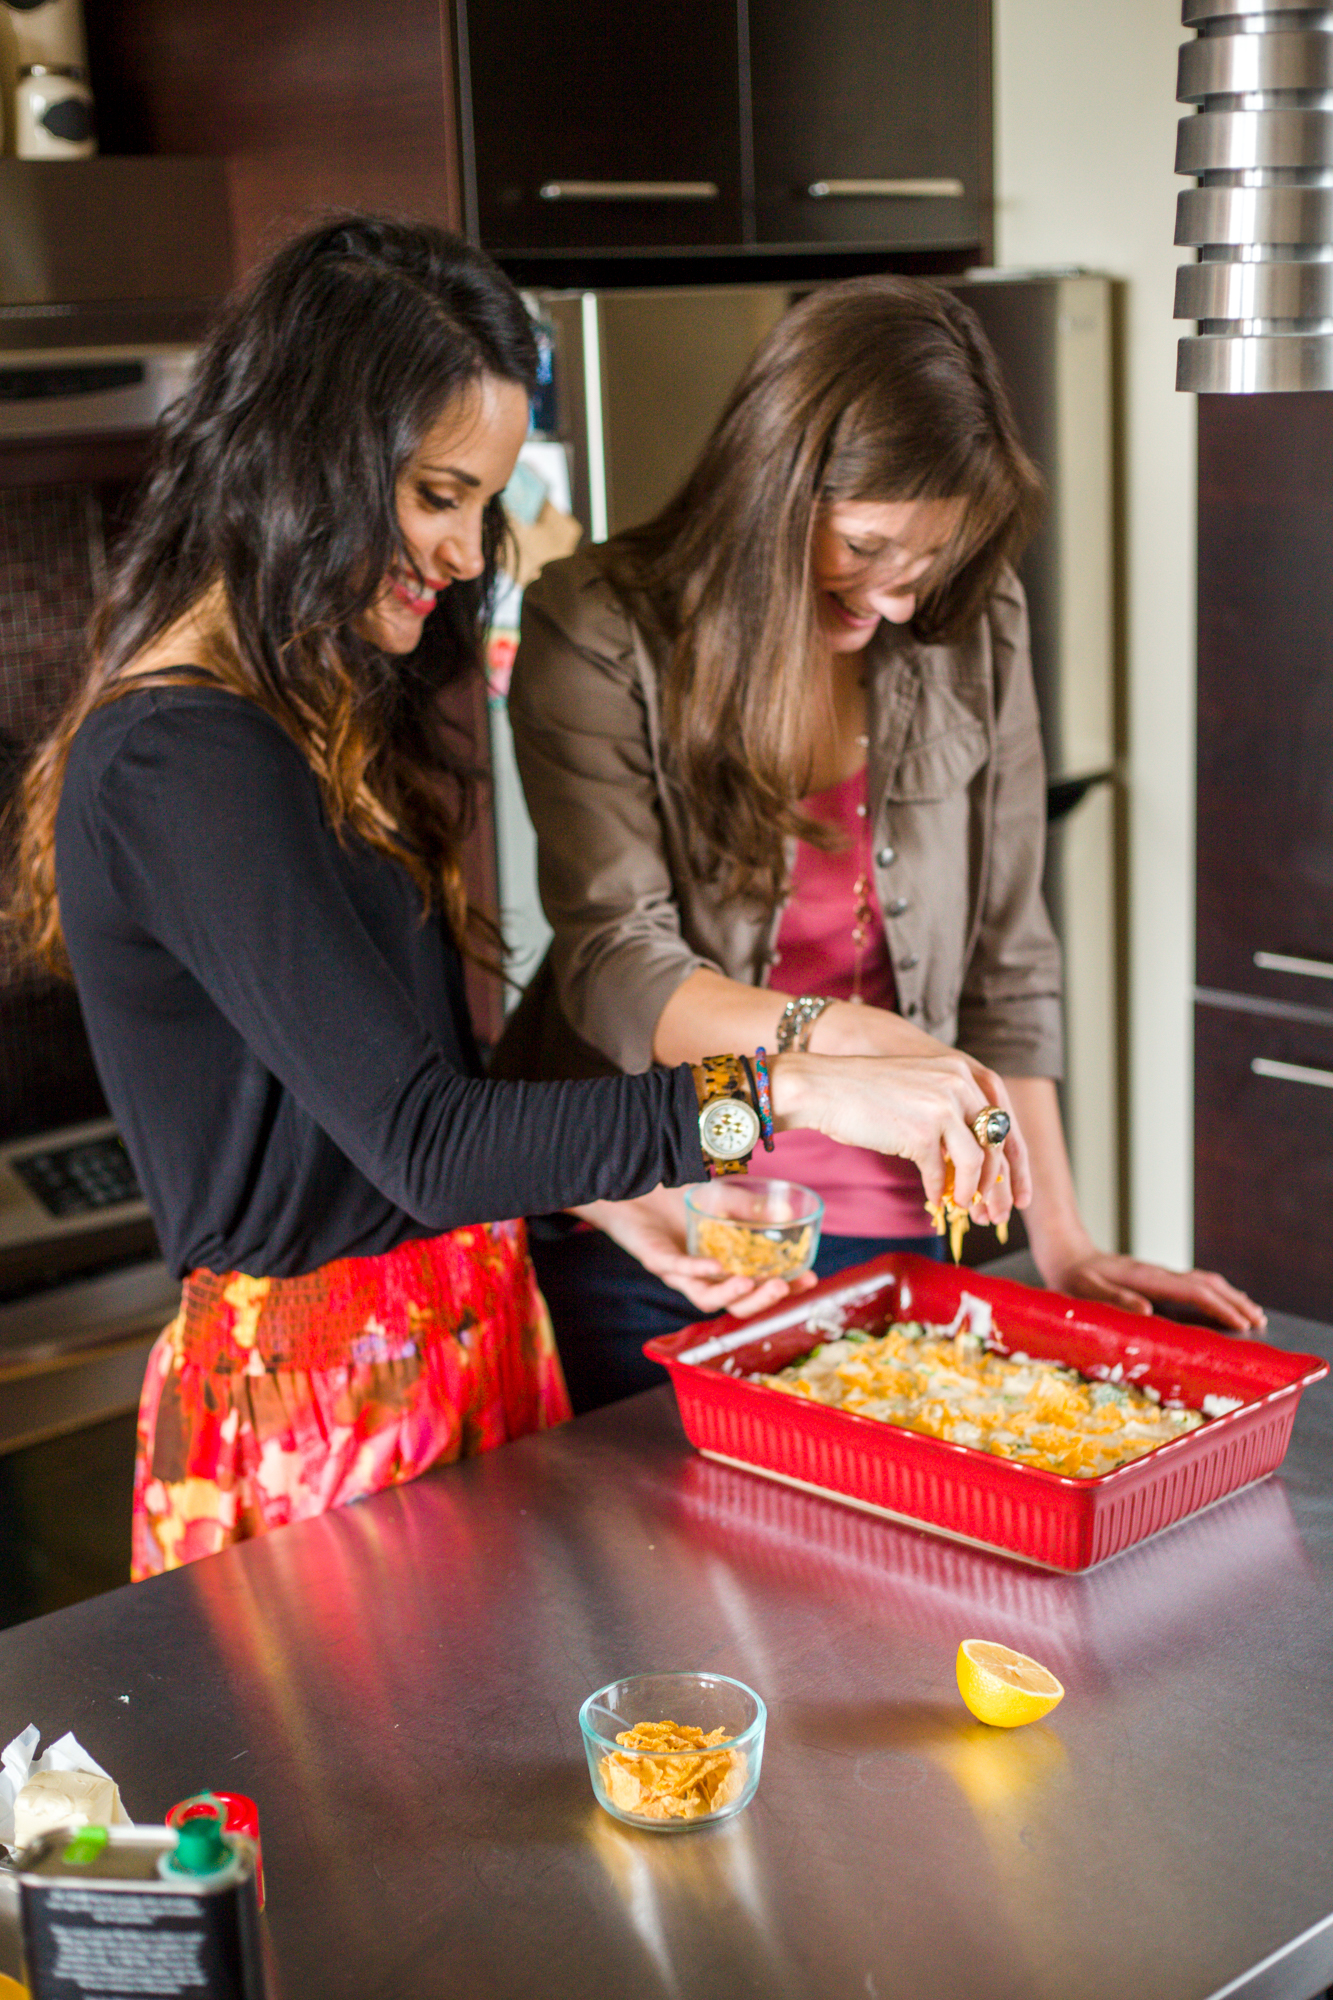
  8. Smooth the creamy mixture with your spatula. Top with shredded cheese, then sprinkle on cornflakes.
  9. Bake in 350 degree oven for 25-30 minutes, until cheese is melted and cornflakes look golden brown and crispy. Enjoy!
*I like to put the broccoli in a glass pan, cover with Saran Wrap, and microwave for two to three minutes.
**Shred chicken using two forks or fork and knife into bite size chunks (stringy, too thinly pulled chicken is not good eats). I prefer the pieces to be  juicy and plump. You can also use pulled rotisserie chicken here, but I prefer the flavor combo of the curried chicken:)
Mattye and I enjoying our "chicken divine"
Mattye and I enjoying our “chicken divine”, a term affectionally coined by her neighbor who smelled it across the walkway

White BBQ Sauce

Pure, saucy deliciousness

Y’all, if there ever was a sauce that is as loved or divisive in the South- maybe as much or more than how you take your tea, which football team you cheer for, or who you invited to your last get together- it’s white BBQ sauce.

Your standard BBQ sauce is essential for any proper barbecue, of course.  Whether it’s sweet, spicy, tomato-based or laced with vinegar, frankly, that’s up to you. But white BBQ sauce? I land on it’s side. To me, that sauce is the piece de resistance, the cherry on the sundae, the touch that brings all of the smoky, juicy flavors of barbecue to their pinnacle.

And the power of a good white BBQ sauce doesn’t just end with the meats. In fact, I am such a fan of this sauce that I feel it absolutey necessary that I list my top five favorite foods to douse it with:

1. Smoked chicken (specifically from here, Oh my Lord, is it goooood!)

2. Scrambled eggs

3. White sticky rice

4. Mashed potatoes

5. Sandwiches of any type (BLT, turkey, ham, roast beef, etc.)

The possibilities are endless, and this sauce is oh-so-easy to make. Therefore, I highly recommend you spreading the white BBQ luv and making some for Labor Day weekend.

Without further waxing of the bbq poetic, I give you a slightly tweaked version of the white bbq sauce from Southern Living. For those of you who don’t know about this magazine, their look is absolutely lovely and reminds me of home. Oh, and check out The Daily South for a daily dose of all things Southern and fabulous. It’s currently a standard site in my blog feed!

I hope each of you takes time to get away, love on those around you, and eat some delicious food this weekend. Topped with white BBQ sauce, of course.

White BBQ Sauce

White BBQ Sauce (This recipe is tweaked a bit from the version here from Southern Living)

What You Need:

  • 1 1/2 cups plus 1-2 tablespoons mayonnaise; I prefer Duke’s
  • 1/4 cup water
  • 1/4 cup apple cider vinegar
  • 1 tablespoon coarsely ground pepper
  • 1 tablespoon Creole mustard (I used Zatarain’s)
  • 1 teaspoon salt
  • 1 teaspoon white sugar
  • 2 garlic cloves, minced
  • 2 teaspoons prepared horseradish

What You Will Do:

1. Whisk together the 1 1/2 cups mayonnaise, water, vinegar, pepper, mustard, salt, sugar, garlic, and horseradish.

2. Taste your sauce and see what you think. I like mine a bit creamier, so I whisked in about 1 1/2 tablespoons more mayonnaise.

3. Enjoy and serve alongside anything you choose! Can’t wait to hear what your fellow tasters think.

Caprese Kabobs with Balsamic BBQ Reduction

James Farmer's Caprese Kabobs-399-3

Y’all- today’s recipe is as wonderful as one, two, three.

One- stack beautiful summer grape tomatoes on a wooden skewer layered with mozzarella and fresh basil leaves.

Two- stir together balsamic vinegar with brown sugar and a few other ingredients over the stove until a glossy, thick, dipping sauce forms.

Three, pile up your skewers on a tray, pour the balsamic into a bowl and invite guests to dig (or should we say dip?) in.

And friends, there are few summer vegetables as deliciously sweet and fun to eat off of a wooden stick as a grape tomato. Don’t get me wrong- I adore frozen popsicles- but consider this our version of a veggie sweet treat.

This summer has been an exciting one. Styling projects have kept me busy, and the creative people I’ve met along the way have wowed me with their ingenuity, talent, and passion. My amazing boyfriend, friends, and family have continued to love and encourage me to push forward toward my dreams, and I am beyond grateful for their prayers, love, and presence in my life.

James Farmer's Caprese Kabobs-415-5

But as always, there is something in each of us that draws us in, pulls us back, and anchors us at our core to be who we are. For me, that is, and always will be, food. I sense the same thing in James Farmers’ cookbook A Time To Cook: Dishes from My Southern Sideboard . He is a talented landscape designer, runs his own design business and is the author of another book on the subject, but I feel the same love of food, community, and his family in his writing.  That’s why I like the book, and this recipe, so much. It invites us all to revel in the bounty of summer’s produce- but also in the bounty that is food shared with a crowd. And did I mention that football season starts in 16 days? #tailgating-recipe!

So pull out those wooden skewers, relax outside on a porch, and enjoy a kabob- or two, or three.

James Farmer's Caprese Kabobs-405-4

Caprese Kabobs with Balsamic BBQ Reduction (Recipe from James’ cookbook, A Time to Cook: Dishes from My Southern Sideboard, copyright 2013, Gibbs Smith publishing)

What You Will Need:

For the skewers:

  • 1 heaping dry pint grape or cherry tomatoes
  • 1/2 pound mozzarella cheese, cubed or rolled into small balls
  • About 24 fresh basil leaves

What You Will Do:

1. On bamboo skewers, alternate a tomato, cube or ball of cheese, and basil leaf until the skewer is full.

For the balsamic reduction:

What You Will Need: 

  • 1 1/2 cups balsamic vinegar
  • 1/2 cup ketchup
  • 1/4 cup packed brown sugar
  • 2 tablespoons yellow mustard
  • 1/2 teaspoon salt
  • 1/2 teaspoon freshly ground black pepper

What You Will Do:

1. Combine all ingredients in a medium sauce pan over medium heat.

2. Stir occasionally, making sure the sugar doesn’t stick on the bottom of the pan, until the liquid reduces by about half. It should be thick, glossy, a good consistency for dipping (not too thin), and taste sweet. A good test for me was if it clung to and coated the back of a spoon.

3. Let the liquid cool and serve as a dipper for, or drizzle on top of, your caprese skewers.


Blackberry Farm Griddle Cakes with Cinnamon Peach Syrup

Pancakes

I have a slight obsession with Blackberry Farm.

And by slight I mean I own both of their cookbooks (at one point I had two copies of The Foothills Cuisine),  and daydream regularly about living there. Oh, and they also recently did a beautiful spread-and are selling their homemade goodies-with Williams Sonoma. Which makes my food wanderlust even worse.

Located in the gorgeously green foothills of the Appalachian Mountains, Blackberry Farm is a foodie’s dream. Fueled by an on-location organic garden and supplied by their own sheep’s (as in, their own pasture full of) cheese, happy diners head back to their customized cabins at the end of a glorious day of eating to rest under the cool mountain stars, only to awake and do it all over again. Or at least, this is what I hear.**

**I did once drive to Blackberry Farms, illegally enter the gates, and scope out their dining room. I stayed under the radar until I attempted to drive my four-door sedan down a road clearly intended for a guests-only golf cart. I also may or may not have hit a large stump in my flustered attempt to back out of the tiny driveway.

I digress.

These Blackberry Farm recipe pancakes graced the cover of Bon Appetit, and I was immediately whisked away by an image of myself  in a rocking chair, overlooking the green scape of the farms, while a gentle gardener served me a plate of steaming pancakes that were gently  releasing their heavenly aroma into the air.

Reality returned, and I decided that the first step toward the dream would be actually cooking them. And in true LuvCooks style, when I made this recipe it was in the middle of a sweltering summer in the south and our syrup options did not include gracefully picking through the blackberries outside in the garden soil. Instead, I braved the 90+degree heat and nabbed some late-summer peaches from a local farmer’s market.

Below are the most delicious gluten-free pancakes you have ever tasted. And the most outstanding peach syrup I’ve ever had. Even if you aren’t eating them on top of a mountain, it will still feel peachy-keen.:)

Blackberry Farm Griddle Cakes (This recipe and its instructions are taken from bonappetit.com)

What You Will Need

  • 1 large egg
  • 2 cups buttermilk
  • 1/4 cup pure maple syrup
  • 1 cup gluten-free oat flour
  • 2/3 cup yellow cornmeal
  • 1/3 cup brown rice flour
  • 1/4 cup buckwheat flour
  • 1 tablespoon baking powder
  • 1 teaspoon baking soda
  • 1 teaspoon kosher salt
  • 1/4 cup (1/2 stick) unsalted butter, melted
  • Vegetable oil (for skillet)

What You Will Do*

  • Whisk egg, buttermilk, and maple syrup in a small bowl. Whisk oat flour, cornmeal, rice flour, buckwheat flour, baking powder, baking soda, and salt in a large bowl.
  • Whisk buttermilk mixture into dry ingredients, then whisk in butter until no lumps remain.
  • Heat a large nonstick or cast-iron skillet over medium heat; lightly brush with oil. Working in batches, pour batter by 1/4-cupfuls into skillet. Cook until bottoms are browned and bubbles form on top of griddle cakes, about 3 minutes. Flip and cook until griddle cakes are cooked through, about 2 minutes longer.

*My incredible, gluten-free chef friend Annie cooked these pancakes, and they turned out beautifully. This batter is a bit thinner than your usual pancake batter, so just make sure you watch them since they cook a bit more quickly than normal.

LuvCooks Cinnamon-Peach Syrup

What You Will Need

  • 1 cup water
  • 1/4 cup honey
  • 1 cup sugar
  • 3 peaches, skinned and cut into 1/2 inch slices
  • 1 teaspoon vanilla extract
  • 1 teaspoon cinnamon

What You Will Do

1.  Bring water, honey, and sugar to a boil.

2. Add the peaches, vanilla extract, and cinnamon, and let the mixture return to a boil.

3. Turn the heat back down to low and simmer until the peaches are soft, or about 15 mintues.

4. Continue to let the mixture simmer at medium to medium-low until it gets about the consistency you want. I watched mine for about 45 more minutes and had to head out to feed some hungry pancake eaters, so mine was a bit thinner. It was delicious, but if you like a thicker syrup, try to avert the hunger pangs by letting it cook for a bit longer.

Jalapeño Sausage Wheels

Sausage with a kick. Go team!

In the South, it goes without saying that almost all of our traditions revolve around food. Having a baby? Let’s get together, open pink or blue gifts, and try Aunt Pat’s cream cheese ball. Getting married? Let’s have a glass of tea, peruse a spread of engagement presents, and eat pimento cheese (this is also known as a “Sip n’ See”). Your favorite football team having a ball game? Come on over, I’ll tell you about the time I spilled the contents of a salad bar into the cuff of our ’92 national championship coach’s pants leg. And, let’s eat!

As fall is upon us, football has once again become all-consuming. I was born and raised around a team of crimson and white jerseys that symbolized everything great about our state- hard work, commitment, heart, legacy. For me though- besides the game, the roar of the crowd and being in one of my favorite stadiums in the world- the best part of football season is the pre and post-game eating.

This recipe for sausage wheels has been passed down through my family; I remember waking up on Saturday mornings to the smell of them. But let’s be honest- there isn’t much you can to to sausage and pie crust to make it taste better. My version just gives it more of a spicy kick, and ends with a sweet, smoky flavor that is absolutely addictive. Plus, I’m hoping the aforementioned kick can somehow serve as good luck for our special teams this Saturday.

You can serve these hot out of the oven; be warned that the sausage fumes may make your mind cloudy and cause unexplained overconsumption of pastries. Or, let them cool to room temperature and take them to the game (or your sofa). They also make a delicious post-game-night breakfast.

I hope you enjoy a beautiful, winning weekend- and that this recipe is good luck for your own tailgating tradition.

Jalapeño Sausage Wheels

What You Will Need

1 package pre-made pie crust (containing 2 pie crusts)

1 pound ground sausage

2 jalapeños, deseeded and minced (Thanks for the peppers mom!)

2 cloves garlic, minced

1 teaspoon Sweet Heat spice

1/2 teaspoon onion powder

1/2 teaspoon ground cumin

What You Will Do

1. Let your pie crusts come to room temperature.

2. In a large bowl, combine the ground sausage, jalepenos, garlic, Sweet Heat, onion powder, and cumin.

3. Lightly flour your countertop or surface of choice (I love my Silpat for this) and gently roll out both pie crusts until they form about a 11 by 11 inch rectangle. No need to measure; I just make sure the dough looks like a large rectangle and is a bit thinner than when I first unrolled the crust.

4.  Divide the sausage mixture in half, and spread it evenly on each pie crust.

5. Here comes the fun part. Starting at the top of your rectangle (the side facing you) gently roll the dough away from you, creating a tight roll. Pull the dough tight as you roll, making sure your sausage mixture stays inside the dough roll. A loose roll will spill it’s contents onto your counter, and why let that tastiness go to waste?

6. Repeat the process for the second pie crust.

7. Once you have your two rolls ready, wrap them in plastic wrap and put them in the freezer for 45 minutes to an hour to help them firm up.

8. Preheat oven to 450. Go ahead and find your broiler pan and spray it generously with cooking spray; you will need it at the ready.

9. Take your rolls out of the freezer, and slice them into thin wheels (about 1/4 an inch to 1/2 inch). Arrange the sausage pinwheels about a 1/2 inch away from each other on the pan.

10. Bake for 15 minutes, then take your pan out of the oven and flip the wheels over; bake for another 10 minutes. Go team!

Red, White and Bleu Coleslaw

A summer side MVP
A summer side MVP

It’s hard to get excited about coleslaw.

In the South, the shredded green lettuce routinely fades into the summer barbecue background, alongside baked beans and summer watermelon, once the true star of the show- salty smoked pork-arrives.

And don’t get me wrong- dry rubbed, tenderly glazed, and artfully pulled pork (substitute beef here if you are west of Mississippi)  deserves every bit of attention it gets. No barbecue would be the same without it. But this year I wanted to get in the coleslaw spirit; to create a recipe that actually stood next to a platter of beautiful chopped meat. A side that I would be motivated to go back for seconds on. Maybe even save extra stomach room for it instead of banana pudding. Maybe.

This recipe confidently held it’s own in more ways than one. As opposed to a mayonnaise-laced version, this is light and summery, with the rich smokiness of gorgonzola and tart sun-dried tomatoes to give it interest and pop. Plus, what’s more fun than an excuse to theme food around a holiday? I envision this coleslaw hitting a home run at all of your summer parties- Memorial Day (next year), Fourth of July, or any event themed around America, nautical elements, fireworks, or park weddings.

So stand up for coleslaw at your next meat-themed cookout. With this secret, sparkler weapon at your side, I promise you’ll be the hit of the backup sides.

Red, White and Bleu Coleslaw

What You Will Need

For the salad

8 cups coleslaw mix

4 cups shredded red cabbage

2/3 cup scallions

14 sundried tomatoes

5 ounces crumbled gorgonzola

For the vinaigrette

1/3 cup good olive oil

1/3 cup sun-dried tomato oil (strain your sun dried tomatoes from the jar and save the remaining oil)

4 tablespoons vinegar

2 tablespoons sugar

What You Will Do

1. Whisk together olive and tomato oils, vinegar, and sugar in a small bowl until combined. Set aside. (This can be made ahead of time and refrigerated if needed.)

2. Combine coleslaw mix, red cabbage, scallions, sun dried tomatoes, and gorgonzola.

3.  Gently fold the dressing mixture into the salad mix, taste, and add salt and pepper as needed. This can be made ahead of time and tastes better if it rests at room temperature for a few hours.

The International Biscuit Festival

A beautiful bonut
A beautiful bonut

If biscuit heaven was a place, I think I found it.

Knoxville, Tennesse- the home of neon orange football jerseys, Mabel, and this former food post– continues to impress me. Having spent the weekend consuming the most delicious olive and scallion hummus and tasting Vietnamese pho for the first time (which, in the words of a friend of mine, tastes like “angel tears”) I thought things couldn’t get better.

That was, until the International Biscuit Festival.

Turning the corner onto Biscuit Boulevard and finding a long stretch of red and white striped tents full of happy people blessing others with hot biscuits-knowing that I could try five of whatever biscuit I chose-was about like how a small child feels staring at a never ending stack of Lucky Charms, candy bars, and free iPads.

From the humming of a biscuit-themed songwriting competition to the smell of fresh dough sizzling in a deep fryer, it was a celebration of what makes Southern food so delicious- the buttery layers of comfort and warmth we lovingly call biscuits.

Since I was forced to choose-one of these biscuit masterminds below made a bonut people- below are my top five favorites. Hopefully these will inspire you to make your own biscuit combos- or visit Knoxville next year and experience it for yourself. I’ll be there-but next year I’ll probably buy two tickets  just so I can go through the line twice.

1. Green-Eyed Monster Pimento Cheese Buttermilk Biscuit, Tupelo Honey

A mind-blowing combination of spicy pimento cheese dough, buttered and sandwiched with fried jalepeno

2. Andouille Shrimp and Grits Biscuit, Applewood Farm House Restaurant

3. Candied Bacon, House-Cured Clabbered Cream, and Honey and Balsamic Reduction Buttermilk Biscuit, The Plaid Apron

Biscuits with balsamic glaze and clabbered cream
For those of you who have never tried it, clabbered cream is fantastic

4. Sweet Water Valley Smoked Cheddar and Onion Biscuit, The Tomato Head

5. Family Reserve Drop Biscuits (aka “bonuts”) with Sorghum Whipped Cream and Blueberries, Biscuit Love Truck

A lovely, sweet drop biscuit fried and filled with cream

Bacon Sweet Rolls with Maple Glaze

Bacon sweet rolls

Most everything is better with bacon.

In the South, bacon might as well be one of the five food groups, alongside vegetables, biscuits and/or cornbread, cheese dip, and sweet tea. It’s the basis of any true Southern side item, tops most casseroles, and makes a great afternoon snack with the aforementioned tea.

While reflecting on what I could post that epitomized a truly Southern breakfast, this recipe for bacon sweet rolls caught my eye. Could there  be a way to take a cinnamon roll- perfect with it’s warm cinnamon smell wafting from the oven, soft in the center with ripples of vanilla icing- to another level? Is there a way to actually upgrade nature’s most perfect fried pork product? Can I personally contribute to a breakfast roll awakening in the kitchens of bacon-lovers everywhere?

I do not claim to know the answers to life’s most serious questions. This one, however- can bacon and sweet rolls coexist in perfect unity?- I can answer. With a resounding yes.

These rolls are why bacon makes most everything better. Filling, rich sweet dough swirled around salty, applewood smoked bacon that folds with brown sugar and butter into a wheel of national championship caliber (Did someone say 11:00 pre-game tailgate food? The other team’s fans will cheer for you). These are a first-meal treat in its highest form.

So don’t let all of that bacon go to waste on the side of your eggs. Wrap it in dough, throw it in the oven, and celebrate the South’s most perfect breakfast roll.

Also, a huge thank you to the incredibly talented Stephen DeVries for taking these beautiful photos. I don’t think breakfast has ever looked this good.

What a polite breakfast eater's plate would look like.
What a polite breakfast eater’s plate would look like.

Bacon Sweet Rolls with Maple Glaze (Recipe adapted from this great food blog)

What You Will Need

1/2 cup granulated sugar
6 TBSP brown sugar
Sweet Dough (recipe below)
4 tablespoons (1/2 stick) unsalted butter, warm room temperature
1 pound bacon, cooked (I liked this brand, applewood-smoked), crispy and crumbled
Maple Glaze (recipe below)

Sweet Dough

1 cup warm whole milk
2 envelopes (4 ½ tsp.) active dry yeast
1/4 tsp. plus 2/3 cup granulated sugar
3 3/4 cups all-purpose flour
1 1/4 tsp. salt
1 large egg
1 large egg yolk
1/2 cup (1 stick) unsalted butter, at room temperature

Stir milk (I microwaved mine until it felt pretty warm to the touch; typically it should be about 110-120 degrees), yeast, and 1/4 tsp. sugar in a small bowl. Let it stand until the mixture bubbles, about 6 minutes (you will see tiny bubbles rising to the surface). Stir it again.

Using a stand mixer fitted with paddle attachment, add the flour and salt and mix on low speed just to combine.

Add yeast mixture to the flour and mix on medium-low speed until dry shaggy mass forms, scraping down the bowl occasionally, about 2 minutes.

Add egg and egg yolk and beat on medium speed until well blended. Then add the sugar and beat until moist soft dough that resembles thick batter forms, about 3 minutes. (Keep on beating the batter here, even when it looks like it is already in dough form. It needs to become more like a silky batter than a thick dough.)

Add room temperature butter 1 tbsp at a time and beat on medium-low speed until almost incorporated before adding more, about 2 minutes (your dough will be sticky, not thick like a traditional bread dough). Beat dough on medium-high 2 minutes longer (make sure all of your butter is incorporated here).

Scrape dough out onto a work surface then gather together. Place it in a large bowl that is oiled or buttered. Cover with plastic wrap; let rise at room temperature until almost doubled, about 2 hours. Punch dough down; cover with plastic wrap and chill overnight.

Peabody’s recipe was slightly adapted from Dorie Greenspan

Maple Glaze

2 TBSP unsalted butter
1/4 cup pure maple syrup (the darker the better, go for the real Vermont thing if you can)
1 ¼ cup powdered sugar

In a small saucepan, melt butter and syrup together over medium heat (watch the mixture because it comes together quickly).  Whisk powdered sugar into the hot mixture until smooth. Let cool slightly…if too thick add a little more maple syrup. Pour over rolls.

To Bring It All Together

Whisk both sugars together.

Turn cold Sweet Dough out onto floured surface; sprinkle with flour. The more flour the better here; when you roll it out it gets a bit sticky.

Divide the dough in half. Roll out the dough to two 15 by 12 inch rectangles. I can never seem to make actual rectangles with my dough, it’s always more of a large oval, so whatever works for you will still be delicious.

Using fingers, spread the butter evenly over each rectangle. Sprinkle ½ sugar mixture and half of the bacon over each. Starting at one long side of each dough rectangle, tightly roll up dough jelly-roll style, enclosing filling. Using a sharp serrated knife, cut each roll crosswise into fifteen or sixteen one inch-thick slices. Arrange your  dough slices on a cookie sheet, spacing evenly apart.

Cover with plastic wrap; let them rise in a warm, draft-free area until the buns are puffy and doubled, about 1 hour 45 minutes.

Bake buns at 375F until deep golden brown. The cooking time varies here. I used a dark metal pan, and it only took mine about 15 minutes to cook. If you use a light metal cookie sheet, it will probably be more like 25 minutes. Just watch your rolls-because of the sugar inside of them, it can become a syrupy pool around your dough and burn them the bottom. Let the buns stand 2 minutes. Then cover with glaze and say hello to the best bacon baked bun of your life!

White Christmas Snack Mix

IMG_1995
Snack food heaven

Happy New Year!

I am really looking forward to 2013. The idea of a brand new year is always exciting- but it’s also an excuse to be more creative with your life. To plan new things, set goals, make changes, drizzle dark chocolate like Jackson Pollock over a heap of white chocolate-covered marshmallows and cashews.

Yes, New Years is a fantastic time for the ultimate, chocolate-covered, dessert mix. It couldn’t be easier, or a better fit for New Years football games, parties, or just sitting at your kitchen table making grand plans for 2013. Whatever works.

This is dangerous to serve on large platters. It means more people can eat your leftovers.
Serving this on large platters means more people can eat your leftovers.

To be frank, whenever I see a recipe for dessert/snack mixes- really anything loosely tied together by a sugary substance with some Chex cereal thrown in- I am wary. I have too often been dissapointed by dessert mixes that look amazing (peanut butter, pretzels, and powdered sugar- sign me up!) but end with a cloyingly-sweet aftertaste.

This mix is different. The light white chocolate layer over salty cashews and pretzels is a nice balance- and I adore marshmallows, so any excuse to add those in anything is perfect. Also, this recipe requires white chocolate almond bark, which (don’t be decieved) is not a health-food product. It is the easiest way to melt white chocolate, and for this recipe, it’s what you need.

Here’s to the best year yet- and an excuse to fling dark chocolate in whatever way you please.

White Christmas Snack Mix

What You Will Need:

6 cups of Crispix cereal
2 cups of Honey Nut Cherrios cereal
Big can of cashews halves and pieces (or an 8 ounce bag)
1 large bag of peanut butter M&M’s
One bag of mini marshmallows
2 cups of knot pretzels
2 high quality dark chocolate bars  (don’t skimp on quality here; it really makes a difference in the contrasting tastes between the two types of chocolate)
Wax paper
What You Will Do:
1. In a very big bowl, mix the Crispix, Honey Nut cheerios, cashews, M&M’s, marshmallows, and pretzels.
2. In a separate bowl, melt one package of white almond bark in the microwave, or follow the directions on the package to melt it on the stove. Pour melted white almond bark onto the cereal mix and stir, making sure to coat each piece.
3. Spread the entire mixture out on wax paper.
4. While it is hardening, melt two dark chocolate bars in the microwave. My preferred method is to melt both bars on high in a microwave-safe bowl for one minute; then microwave the chocolate for 15 second intervals, stirring briskly after each heat blast, to melt the chocolate and create a smooth consistency. Try and microwave the chocolate as little as possible;  the more you microwave it, the more likely it is to burn.
5. After the dark chocolate is melted,  take a spoon and drizzle it over the cereal mixture like the artist that you are. Let it harden for about 15-20 minutes.
6. Once hardened, break the pieces apart and share them with your loved ones. Or not. :)

Red Velvet Brownies

Red velvet- lightly-sweet, moist, and full of semi-sweet chocolate

Oh, red velvet. Of all the flavors of dessert, I feel you are the most misunderstood. And for that, I would like to formally apologize on behalf of those who do not know what they do and/or taste.

Last night I had the distinct privilege of watching Steel Magnolias (as you can see on the Info page of this blog- this movie is near and dear to my heart) with some of my best girl friends. And in honor of the armadillo cake in the movie -“Who knows what even goes into makin’ gray icin?!'” (as quoted by M’Lynn)- and the fact that my favorite football team, whose colors are also red and gray, play this evening, red velvet brownies were in order.

Red Velvet Brownies (from Southern Living)

What You Need:

  • 1 (4-oz.) bittersweet chocolate baking bar, chopped
  • 3/4 cup butter
  • 2 cups sugar
  • 4 large eggs
  • 1 1/2 cups all-purpose flour
  • 1 (1-oz.) bottle red liquid food coloring (All I could find was icing coloring gel, and it worked fine)
  • 1 1/2 teaspoons baking powder
  • 1 teaspoon vanilla extract
  • 1/8 teaspoon salt

What You Will Do:

  1. Preheat oven to 350°. Line bottom and sides of a 9-inch square pan with aluminum foil, allowing 2 to 3 inches to extend over sides; lightly grease foil. (Confession: I can never seem to figure this method out so I just sprayed a 9X13 pan with cooking spray).
  2. Microwave chocolate and butter in a large microwave-safe bowl at HIGH 1 1/2 to 2 minutes or until melted and smooth, stirring at 30-second intervals. Whisk in sugar. Add eggs, 1 at a time, whisking just until blended after each addition. (Ok, at this point, my arms were burning and I thought my wrists were going to give out. I suggest abandoning the whisk at this point. I think people who write baking recipes either have biceps of steel or no feeling in their appendages.) Gently stir in flour and next 4 ingredients.  Pour mixture into prepared pan.
  3. Bake at 350° for 44 to 48 minutes or until a wooden pick inserted in center comes out with a few moist crumbs (I only baked mine for 3o minutes, and they were perfect). Cool completely on a wire rack (about 2 hours).
  4. Lift brownies from pan, using foil sides as handles; gently remove foil.

I iced my brownies with sparkle white icing. This also made excellent “A’s” on the bite-size mini’s for the aforementioned football team.