Vegan Cranberry Breakfast Cookies

Vegan Breakfast Cookies

Have you made any New Years resolutions?

Typically this question unnerves me. Should I have made a resolution? When was the last time I actually kept one of these? What exactly does “resolve” mean anyway? It seems like a softer way to say “pledge”, which both remind me of household cleaners that smell funny.

Once again my new years resolutions this year seem to be hanging in mid-air, frozen in a sea of procrastination and intimidation. Labeling something as a “resolution” feels so final and committal. And restrictive. Like all of the options for daily life have suddenly been zapped into a to-do list, which makes me want to flee for the exits. #freespiritproblems

Honestly though, I really do like to start a new year by pairing down what is in my pantry and getting back to the basics of eating- fruits, vegetables, slow-simmered soups and warm tea. And of all the eating styles I have studied, vegans seem to have this plan down. Like, all natural, no dairy, no meat- a stick-to-the-basics kind of thing. But like a resolution, when I first started researching these vegetarian recipes they felt so limiting. You are telling me I can’t have cheese? Or a steak? What?!! But what I have found is that yes, there are the obvious elemental constraints- but as every creative knows, it’s the constraints that allow creativity to flourish. The more lovers of food I meet, the more I realize that a good cook knows that the best home chefs are the ones who can take what is in their pantry and make it taste great.

Yummy Breakfast Cookie

So this January, instead of a constrictive resolution, I’ve landed on a push to get out of my comfort zone and make something unfamiliar in a genre of eating I am not accustomed to. Also, for heaven’s sake, I have so many compiled ingredients over a season of holiday cooking that it makes me feel like Pioneer Woman to rally the troops, use my brain and make something out of it all!

And these cookies, inspired by Kumquat blog, are a fantastic way to begin a year of healthy breakfasts. They are gluten free and packed with peanut butter protein and punchy dried fruit. The extra hit of salt takes the flavor up a notch, and before you know it, these cookies will most likely become a staple of cleaning out your pantry, wooing your neighbors, and all around impressing anyone craving a cookie, vegan or otherwise.

Here’s to a year of adventures in the kitchen, fresh starts in your life, and showing luv to anyone- regardless of their eating style- who comes across your kitchen.

Vegan Breakfast Cookie

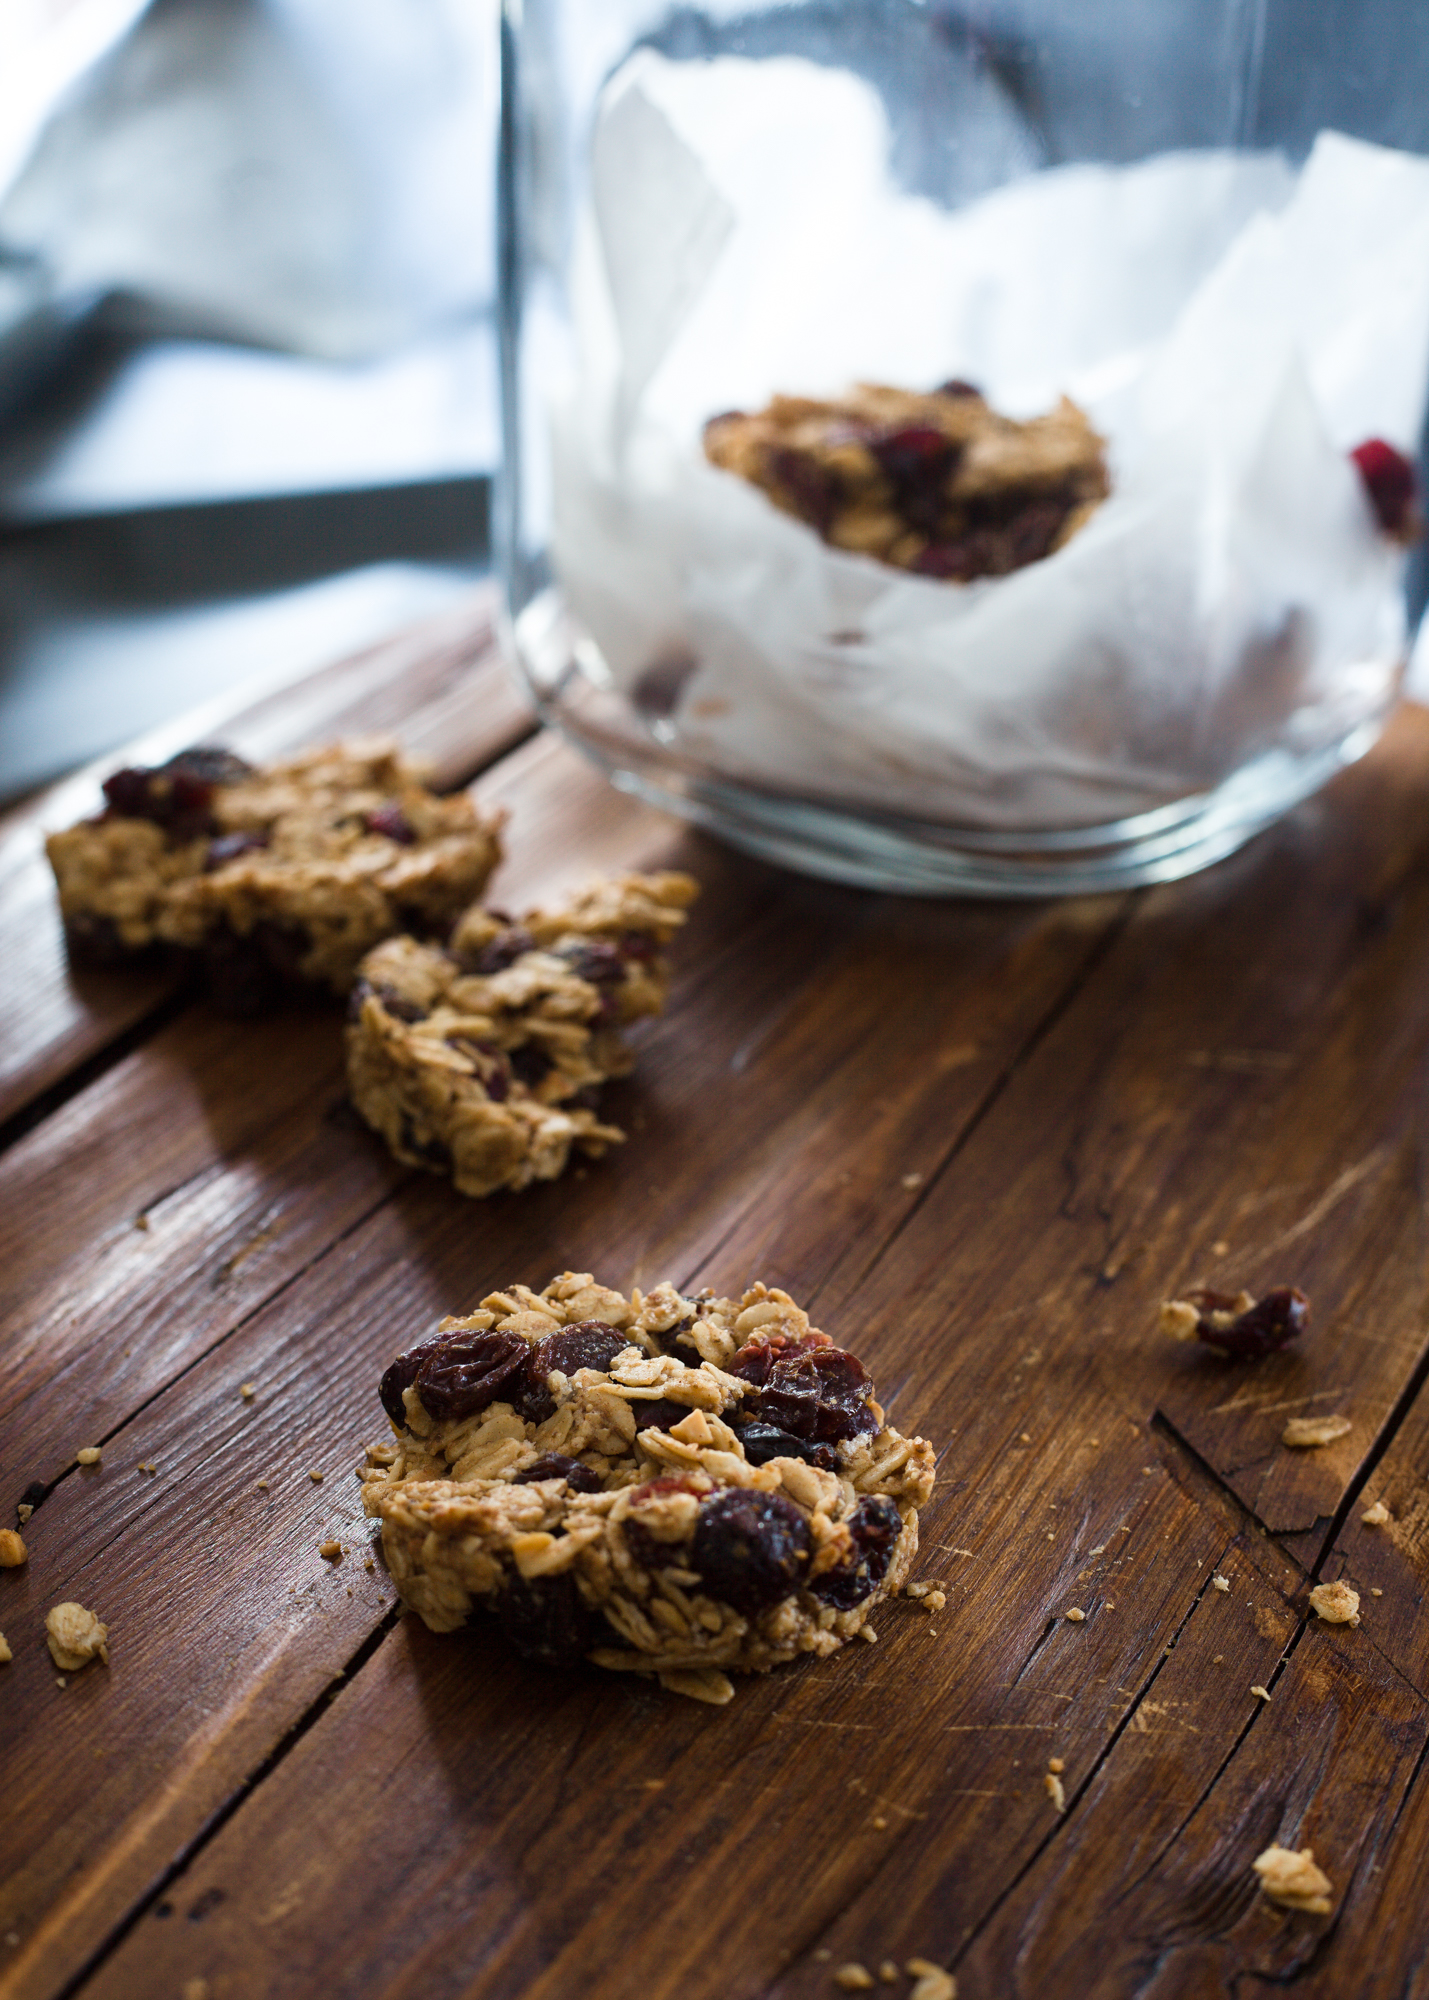
Vegan Breakfast Cookies (Inspired by Kumquat Blog’s Dried Fruit and Peanut Butter Breakfast Cookies)

What You Will Need:

  • ½ cup crunchy peanut butter
  • ¼ cup warm coconut oil
  • 1 large egg (or chia seed egg substitute, which I used. Great recipe here)
  • 3 tablespoons maple syrup
  • 1 teaspoon vanilla paste or extract
  • 2 cups gluten-free rolled oats
  • 1 cup raisins
  • 1 cup dried cranberries
  • 1 teaspoon ground cinnamon
  • ¼ scant teaspoon ground nutmeg (you could add 1/8 if you like less nutmeg)
  • ¼ teaspoon salt

What You Will Do

  1. Preheat your oven to 350°, and line a baking sheet with parchment or wax paper.
  2. If using, assemble chia seed egg substitute (mix together 1 tablespoon ground chia seeds, 3 tablespoons water) and let sit for 5 minutes.
  3. Combine first 5 ingredients in a large bowl and stir thoroughly.
  4. Add remaining ingredients to peanut butter mixture; stir until well combined.
  5. Press 2 heaping tablespoons of mixture into a 2½-inch round biscuit or cookie cutter onto your baking sheet. (I just scooped the mixture into the cookie cutter, then used the back of my tablespoon to press it into a somewhat flat circle.) Continue with remaining mixture.
  6. Bake at 350° for 14-16 minutes, or until fragrant and golden. Let the cookies cool on the pan.* *Be patient here; I got hungry and tried to move mine too soon and they crumbled a bit. I promise it is worth the wait to let them set!


Gluten Free Honey Butter Pretzels

Gluten Free Honey Butter Pretzels

Y’all, my life. It’s crazy.

I am getting married in one week.  Yes, that is o-n-e week. And it is the wedding of my dreams. My fiance- oh my gracious-he is amazing. I knew he was a winner from our first date, when he was picking out pieces for me of white chocolate Christmas mix with extra marshmallows. He’s so creative, even-keeled (for those of you not from the South, that means he doesn’t freak when confronted with a dry, over baked biscuit), talented, unconditionally loving, hilarious. Oh, and my in-laws are amazing too. His mom, like mine, is wonderful and loves to cook! #jackpot

Honestly, everything is coming together and feels just as it should be. The decor-white rose bouquets, greenery, Christmas wreaths, all wrapped in cranberry ribbon- is lovely. It’s going to be such a beautiful day.  I’ve always dreamed of getting married at Christmas, and this is it.

At the same time, in the world of reality I never considered that a Christmas wedding, though beautiful and romantic, also happens during Christmas. Like, a week after Thanksgiving and in the middle of the most busy season of the year for pretty much everyone. When gift shopping traffic at the Summit reaches a fever point and grown adults make grand “hand gestures” to offending Suburbans. So to say that my fiancé and I have been busy, stressed, had hard conversations about the guest list and wondered if we would ever make it unscathed to the altar, that would be an understatement.

In the midst of the crazy, there is always one thing I can count on. It’s my kitchen. It’s the movement of sweeping a knife through a ripe pear, taking celery, combining it with onion and carrot and making a beautiful mirepoix for hot vegetable soup. It’s my safe place- a place of rest, renewal, and a way to calm the hunger pains caused by hours of wedding registry scanning and walking the aisles of Lowes looking at fashion bathroom accessories.

Gluten Free Honey Butter Pretzels

And for me, trying something new is just as therapeutic. It takes my mind off the to-dos and brings me back to rolling out pretzel dough with my hands and figuring out how to shape it into a knot. Dipping light, yeasty dough into boiling water topped with baking soda and watching it bubble over. And that’s why this recipe is perfect for right now. It’s worth the extra time it takes to make these by hand. They are so, so delicious and I will pit them against any you might find while shopping at the mall. Hot out of the oven, I presented them on a platter, and ate half of them by myself. I think at one point I started staring my family down when their hands reached toward the plate. It was that bad. And by bad I mean delicious.

So, if you are like me and in the middle of holiday craziness, take some time to get to your safe place. Let your mind reflect on all the good in your life and all we have to be grateful for. Then enjoy a great soft pretzel, throw on your warmest jacket, and go out there and tackle that to-do list. No hand gestures needed.

Gluten Free Honey Butter Pretzels

Gluten Free Honey Butter Pretzels (recipe taken from Kumquat blog, my favorite gluten free blog I have found! It’s absolutely wonderful!)

What You Will Need:

  • 1 package active dry yeast
  • 1 cup warm water (105° to 115°; I used a candy thermometer to measure my temp)
  • 1 tablespoon plus ½ teaspoon sugar, divided
  • 420 grams (about 3 cups) kumquat’s all-purpose gluten-free flour, divided (this is a great gf flour mix!)
  • 1 teaspoon salt
  • 1 teaspoon xanthan gum
  • 4 tablespoons unsalted butter, softened (plus extra melted butter for topping)
  • 4 cups water
  • 2 tablespoons baking soda
  • cooking spray
  • coarse salt
  • honey for drizzling (I love local honey if you can find it)

What You Will Do:

  1. Combine yeast, water, and ½ teaspoon sugar in a small bowl. Let sit for 5 minutes.
  2. Combine 1½ cups flour, 1 tablespoon sugar, 1 teaspoon salt, xanthan gum, and butter in a large mixing bowl. Cut in butter with pastry cutter or fingers until mixture resembles coarse meal. Add yeast mixture and stir until well combined. Add remaining 1½ cups flour and mix to combine.
  3. Pour out on a surface and knead a few times to make a smooth dough. Place dough in a large, well-greased bowl (I sprayed mine with cooking spray) and cover. Let rise in a warm place, free from drafts for 60 minutes.
  4. Preheat oven to 475° and spray your baking sheet with cooking spray. Divide dough into 5 or 6 pieces (or if you like, you can make the pretzels a bit smaller like I did; I think I ended up with 8-10 pieces).
  5. Knead pieces in your hands until nicely smooth. Roll each piece into a 16-18-inch length and form into a pretzel shape.*
  6. In a non-aluminum pot, bring water to a boil with baking soda. Add pretzels, two at a time, and boil 1 minute. Use a slotted spoon to lift the pretzel out, and shake off excess water. Place pretzels on a baking sheet.
  7. Using a pastry brush, spread melted butter on the pretzels and top with coarse salt. Bake at 475° for 10 minutes or until golden brown. Once out of the oven, drizzle with honey. Voila! The perfect, gluten-free, honey butter pretzel!


*This it the best way I found to shape these pretzels!

1. I like to first make a horse shoe, “u” shape with the dough, facing away from you.

2. Cross the left piece under right piece, right piece under the left piece, then flip that criss cross up and over towards you to the top of the “u” and press to seal it.

3. Shape it a bit to even out the pretzel form and you are ready to go!

Gluten Free Banana Bread and My Life Well Loved

Gluten Free banana bread

Anyone who is familiar with Luv Cooks knows how much I adore banana bread. In my world, banana bread should probably have it’s own Saturday food group pyramid, stacked right above quality coffee and below fresh fruit, complete with a pajama-clad stick figure at the bottom advertising the importance of watching the Cooking Channel as exercise for your cooking muscles. Now this is something I could get behind!

And speaking of muscles, I am so excited to partner with my friend Heather Brown’s site My Life Well Loved for this post! Heather has a knack for succeeding at everything she puts her hand to; seriously, there is nothing she can’t do!; and her blog is NO exception. She is one of the most bubbly, kind-hearted, and energetic people I know, and her passion for life is one of my favorite things about her. She is also a social media wizard and the social media and blogger network director at e-meals.  So not only is she a fashionista, social media consultant, and Pure Barr instructor, she also has a passion for healthy eating.

So click here to visit My Life Well Loved, where you can check out Heather’s fabulous site and find an easy recipe for gluten-free banana bread I am so excited to share (with recipe by My Recipes) and photos by Magen Davis Photography. Enjoy and happy early Saturday!

Gluten Free Banana Bread

Chicken Divan and Making Dinner Time Count

Chicken Divine (Divan)

Y’all!

Fall is in the air; life is in full, golden swing; I am running like a crazy person all over town to assist on shoots and plan a wedding (feelings of glee, planning anxiety and squeal here!! AHH!!), and hopefully we are all eating peanut butter granola energy bars to keep us going.

I can’t think of a better person to share this sweet season with and learn from than the always beautiful, inviting, and relationally gifted Mattye from the lovingkind blog! She is back for our second, October installment together on making meal time matter. And I’m here to share one of the easiest, most deliciously warm recipes I can muster, chicken divan. I think you are going to love hearing from her and making this delicious casserole (and I don’t use the words delicious and casserole together lightly).

So put on some snuggly clothes, smell something pumpkiny and preheat your oven as we hear from Mattye on how we can make our fall meals- admits the wonderful busyness of our lives- even more intentional.

Chicken Divine (Divan)

Make Mealtime Matter

Hey y’all! I’m so excited to be back on the Luv Cooks blog to share some advice that will make your marriage as savory and sweet as your cooking! I promise that if you will purpose to make mealtime matter and cook this Chicken Divan recipe, it will be a happy night in your kitchen and your marriage!

I am not an incredible cook, but I do know something that can make your mealtime significantly better than the average American household. I’m not about to reveal a secret spice, perfected family recipe, or magical cooking tool. In fact, my advice is more about what you leave out than what you put in.

Chicken Divine (Divan)
Fresh broccoli pre-saucing

You can literally transform mealtime in your home with one simple step: remove cell phones from the dinner table! Eliminating this one distraction will give you the chance to look into each others eyes rather than stare at a screen and share about your day in a conversation rather than in a status update.

My husband Woody and I made it a rule that no cell phones are allowed at the table for the Woodcock family before we even got married. While dating, we spent months watching husbands and wives and moms and dads at restaurants ignoring each other or their children in favor of their cell phones. While we were not innocent of this ourselves, it was seeing it take place with other people that really grabbed our attention.

Mattye sprinkling cornflakes on top
Mattye sprinkling cheese on top

We realized that if we don’t want to one day ignore our children, then we need to start by not ignoring each other. Thus, “no cell phones at the table” was established.

We’re not perfect, and we occasionally slip, but we consistently hold each other accountable. On the occasion one of us starts to pull out our phone to look something up, check a message, or share a photo, the other is quick to give a knowing look and say, “What are you doing?” which is enough for the other to slip their phone back in its place and wait until after dinner to use it. As we hoped it would, this has become a healthy habit in our lives. In fact, having a cell phone present at a mealtime with Woody, or anyone else for that matter, just feels unnatural to me now, and it’s all because of a good habit we made a point to develop.

I love that pairing cell-phone-free, intentional time with your spouse alongside mealtime sets it into a part of your schedule that already happens every, single day—eating! Essentially, you don’t have to find extra time in your schedule, you just have to be more purposeful with the time you already have.

Mattye expertly smoothing out the top of our chicken divan

In our nearly two years of marriage, mealtime has become a gift to our relationship because we have chosen to make it matter. It is a consistent time we pause, connect and really see each other. Even on our busier days, a 20-minute meal can make a big difference for us simply by choosing to set aside our phones and other distractions and focus on one another.

When it comes down to it, this isn’t about living a life based on rules or restrictions; rather, it’s about taking a step back to look at your life, see what matters most to you, and find a way to prioritize it. You won’t always feel like making the extra effort to focus on what you really love most, which is exactly why deciding ahead of time is so important. Base your choice on the life you’re trying to build together, not on how you feel in the moment.

Need a snack while you bake? Bust out a box of cornflakes. Seriously, so good!
Chicken Divine (Divan)
Putting the final touches on our casserole

Friends, make mealtime matter. Make it a time where you don’t only refuel your body, but also your marriage. You can do it, and your future self will be thankful you did.

Chicken Divine (Divan)

Chicken Divan
What You Need:
For shredded chicken:
  • 10 frozen chicken tenders (I bought one 32-ounce bag of chicken tenders and took 10 out)
  • 1 tbl olive oil
  • 1 tsp kosher sea salt
  • 1/2 tsp curry powder
For homemade cream of chicken soup:
  • 2 1/2 cups milk (I like unsweetend original almond milk)
  • 7 tbl gluten free flour
  • 2 chicken boullion cubes
  • 2 tablespoons olive oil
  • dash of curry powder
For casserole assembly:
  • 2 lbs fresh broccoli heads, lightly steamed in microwave*
  • 1 cup mayonnaise (I prefer Duke’s)
  • 1 teaspoon fresh lemon juice
  • 1 tablespoon unsalted butter
  • 1 cup grated cheddar cheese (I like Cabot Extra Sharp Cheddar)
  • 1 cup cornflakes
What You Will Do
  1. Preheat oven to 350 and lightly grease a 13X9X2 pan.
  2. Place frozen chicken tenders in an oven safe pan and coat in tablespoon olive oil. Stir together sea salt and curry powder, then sprinkle the spice mixture over the chicken tenders and lightly stir with spatula to evenly coat the chicken.
  3. Once the oven is ready, bake chicken for 30 minutes. Let the chicken cool, then shred to equal two cups of chicken.**
  4. While the chicken is baking, make your cream of chicken soup: In a medium saucepan, whisk together milk and gluten free flour until combined.
  5. Now turn heat to medium, then add bouillon cubes and 2 tablespoons olive oil, whisking constantly until bouillon dissolves and mixture thickens. Turn heat to low and whisk for a minute or two more, until no lumps remain. Take off heat and add a dash of curry powder (a shake or two).
  6. Once the cream of chicken soup has cooled a bit, add mayonnaise, lemon juice, and unsalted butter. Stir to combine with spatula.
  7. Line the bottom of your 13X9X2 pan with the lightly steamed broccoli, making an even layer of veggies. Top with shredded chicken. Using a spatula, gently pour the creamy mixture on top, making sure to scrape the sides of the bowl to get all of that goodness on the chicken/broccoli layer.
  8. Smooth the creamy mixture with your spatula. Top with shredded cheese, then sprinkle on cornflakes.
  9. Bake in 350 degree oven for 25-30 minutes, until cheese is melted and cornflakes look golden brown and crispy. Enjoy!
*I like to put the broccoli in a glass pan, cover with Saran Wrap, and microwave for two to three minutes.
**Shred chicken using two forks or fork and knife into bite size chunks (stringy, too thinly pulled chicken is not good eats). I prefer the pieces to be  juicy and plump. You can also use pulled rotisserie chicken here, but I prefer the flavor combo of the curried chicken:)
Mattye and I enjoying our "chicken divine"
Mattye and I enjoying our “chicken divine”, a term affectionally coined by her neighbor who smelled it across the walkway

Gluten Free Toasted Pecan and Coconut Caramel Brownies

Coconut Pecan Brownies Gluten Free-114


People who bake know that there are certain things you just do. One, you use flour- sifting it with baking powder for cakes, sprinkling generous amounts of it on a board before kneading dough,  stirring fluffy white batches in for cookies. Second, you use an oven; prepping it until it is blazingly hot and then lovingly pushing your doughy creation into the heat box.

However, baking in the South is a bit of a different story. One, it’s ALMOST SUMMER and no one south of the Mason Dixon line should turn on their ovens. This general rule applies from the months of June until at October. The high outdoor temperature combined with additional indoor blasts of heat equals hair frizziness, a higher likelihood of swear-word-slippage and all-around moodiness.

But the second rule- always using flour- I thought was inescapable. What good cook makes biscuits without White Lily? I can’t bring a banana bread made with millet to a bridesmaids brunch! Where I grew up, it’s about like going to Publix without your makeup on and running into your former high school guidance counselor- nightmare! In so many ways in my life, it’s hard to escape that good ol’ Southern upbringing.

Recently, though, my pride hit the fan when I realized my stomach wasn’t bouncing back from a (let’s say, ahem, “international stomach incident”) like I had in the past. After doing some research, I realized that gluten can be a culprit in stomach uneasiness. And Lord a livin’, how this move from wheat has changed my life!

Coconut Pecan Brownies Gluten Free-123

Y’all- I feel so much better, my head feels clearer, and there is an all-around feel-good to my eating that I haven’t had for a long while. But it doesn’t change the fact that I still loooove sweets, and you know, brownies. So here is my attempt at baking a gluten-free recipe from the wonderful, beautiful, inspiring blog The Little White Kitchen. Because you can take the gluten out of the girl, but you can’t take the biscuits out of her psyche. Or the brownies.**

Coconut Pecan Brownies Gluten Free-139

**I’m still working on standing tall when buying gluten-free rice crackers in the aisle at Fresh Market.  If anyone out there has any additional confidence builders, please share.

Toasted Pecan and Coconut Gluten-Free Brownies (from The Little White Kitchen )

What You Need

One batch of brownie dough (recipe below)

One batch of caramel sauce (recipe below)

One batch of pecan coconut topping (recipe to follow)

What You Will Do

STEP A: Make the caramel sauce. Recipe is below:

Caramel Sauce

What You Need

  • 3/4 cup sugar
  • 2 tbsp. corn syrup
  • 1 1/2 tsp water
  • 3 tbsp. unsalted butter
  • 1/4 cup heavy cream
  • pinch salt

What You Will Do

1. Put the sugar, corn syrup and water in a small saucepan. Cook the sugar mixture over medium heat without stirring. With a pastry brush and some water, rinse off any sugar crystals that may form on the sides of the pan.

2. Gently swirl the pot as the sugar melts, but don’t stir (that could crystallize the sugar again). Just keep on swirling it, especially if one side of the pan starts to melt more quickly than the other.

3. Once the caramel reaches a medium amber colour, remove it from the heat and stir in the butter. Whisk in the cream and salt.

4. Set the caramel aside until the first layer of brownie batter has been baked. Keep at room temperature.

STEP B: Bake the brownies.

What You Will Need

  • 10 tbsp. unsalted butter
  • 1 1/4 cups sugar
  • 3/4 cup + 2 tbsp unsweetened cocoa
  • 1/4 tsp. salt
  • 1 tsp. vanilla extract
  • 2 large cold eggs
  • 1/2 cup gluten-free flour blend (I used Bob’s Red Mill)

What You Will Do

1. Preheat the oven to 325 F.

2. Line an 8-inch square pan with parchment paper or spray thoroughly with cooking spray.

3. Combine butter, sugar, cocoa and salt in a medium bowl. Microwave on high for 1 minute and 30 seconds. Whisk until smooth and well-combined (It won’t be completely smooth here, but that’s ok).

4. Whisk in the vanilla, then whisk the eggs one at a time, stirring well until each egg is combined.

5. When the batter looks thick, shiny and well-blended, switch to a wooden spoon, add the flour, and stir until you cannot see anymore flour. Beat vigorously for 40 strokes more with your spoon.

6. Spread half of the brownie batter into the prepared pan and bake for 10 minutes.

7. Remove the pan from the oven and pour the caramel sauce carefully over the baked batter. Spoon the remaining batter onto the caramel and spread it out as evenly as you can with a spatula, making sure to leave lots of undisturbed caramel. Bake the brownies for another 18 minutes, then take them out to let cool (you can insert a knife or toothpick here to make sure they are done; there should be no crumbs left on your utensil).

STEP C: Make the Pecan Coconut topping.

What You Will Need

  • 1/4 cup butter
  • 1 cup shredded sweetened coconut
  • 2/3 cup packed brown sugar
  • 1/2 cup chopped toasted pecans or walnuts

What You Will Do

1. In a small saucepan, melt the butter.

2. Add the remaining ingredients and stir until combined.

STEP D: Top yo’ brownies.

What You Will Do

1. Spread the coconut topping evenly over the baked brownies.

2. Set your oven to broil and make sure the rack is about 6 inches from the top of the oven.

3. Return the brownie pan to the oven and broil the topping until it starts to bubble and turns a nice golden brown. Make sure to keep an eye on it. Mine took a few minutes; I just kept on opening the oven door to make sure it didn’t burn. Once the tops of the pecans turn dark brown pull them out, they can burn before you know it!

4. Once they are ready, cool your brownies on a baking rack and then slice.

ENJOY YOUR GLUTEN-FREE DELICIOUSNESS! Also, these brownies will cut more easily if you can wait on them to cool, then leave them in the fridge for a bit (due to the incredible levels of carmel inside). #yumm


Honey Wheat Pizza with Sun Dried Tomato Sauce and Roasted Chicken

Honey Wheat Sun-dried Tomato Pizza with Roasted Chicken-3

I have a love/hate relationship with pizza.

There are many things to thrill to about pizza. Layers of baked cheese, herb-soaked tomato sauce and fresh meat and/or vegetables piled on top of a soft, but crispy-on-the-edges dough, is song-worthy. Other high points include its sweetly tomatoey flavor hit, satisfyingly warm bite of stringy cheese not quite softened to its base, and beautiful, lingering salt kick from thin slices of meat or seasoned veggies.

But, there are also many things to run from with generic pizza. Overly processed and spiced, bad pizza is too heavy on the dough and not heavy enough on the flavor. Kind of like a rectangle of thick, shellacked cardboard baked to crusty doneness, it leaves a one-note sensation of grease and blandness in its wake.

Needless to say, I am hesitant to try any pizza recipe because of my immediate fear of the untasty; and as you know, it is hard for me to hide my disappointment and displeasure with bad food (I know Mom, I know). However, if there ever was anyone to trust in this journey of facing my fears, it would be Rachel Van Egmond. Vowing from a young age never to leave home without a necklace, she is the one-woman owner and founder of Van Egmond Vintage (where she repurposes vintage jewelry into beautiful necklaces), mother of precious Ramsey, and wife of eighth-grade math teacher and musician Jeremy. To say that her life is busy is an understatement! But on a recent dinner at her home in Montgomery, I was wooed immediately by her take on- gasp!- pizza.

Rachel’s dough was different; sweet and hearty, but not too thick, softer in the center and  airier on the edges. I loved her southwestern-themed toppings- avocado, shredded chicken, bell peppers, lightly sprinkled cheese and tomato sauce. Like Rachel, it was light and fun and full of creative flavors.

Immediately inspired, I set about creating my own version, with her dough as my anchor. And I will tell you, this dish is my new, go-to weeknight dinner. Making the dough is easy, and you only have to be patient enough to let it rise for an hour. The sun dried tomato sauce is inspired by Budget Bytes and tastes just like the jarred variety, but super delicious and much less expensive. Roasting the chicken, doused in spices, skin on and bone in, keeps the flavor in without weighing down the crust. All in all, this version is a winner. And when it comes to pizza, I don’t use that term loosely.*

Honey Wheat Sun-dried Tomato Pizza with Roasted Chicken-5

*Also, please be advised  that you have not been to Body Pump in weeks (ok, let’s be honest, months) like myself, the hand-kneading of dough method will most likely count as your workout for the week and you may or may not be sore tomorrow. You have been sufficiently warned:)

Honey Wheat Pizza with Sun Dried Tomato Sauce and Roasted Chicken

What You Will Need

For the pizza

  • 1 or 2 batches of pizza dough (depending on how many people and/or singles you are feeding; 1 batch feeds 2 hungry people)
  • Sun dried tomato sauce (recipe below)
  • Shredded roasted chicken (recipe below)
  • Fresh spinach leaves
  • One avocado, diced
  • Colby jack cheese (Just make it as cheesy as you like)

For the dough*

  • 2/3 cup warm water
  • 1/2 tsp honey
  • 1 tsp sea salt
  • 1 tbsp extra virgin olive oil
  • 1 cup + 1 tbsp bread flour (plus extra if hand-kneading)
  • 1 cup + 1 tbsp whole wheat flour
  • 1 1/4 tsp active dry instant yeast

What You Will Do

1. By Hand: Go ahead and flour a large, clean surface on which to roll out your dough. Place all dough ingredients in a large bowl. Using a large wooden spoon, manually stir all of the ingredients until they just come together in a ball. Take the dough out of the bowl (it’s totally ok for there to be flour/dough shred pieces at the bottom of the bowl at this point; just scoop them out and add them back into your dough ball) and put it on your floured surface. Knead the dough, taking out all of your aggression from the week onto the now flattened loaf, until it’s warm, sticky, elastic, and it has a nice give when you press into it with your palm; about 10 minutes or as much as your biceps can stand.

OR

2. With a stand mixer. Place all ingredients in a stand mixer. Manually stir a couple of times with a dough hook, then attach dough hook and knead on low for about 2 minutes until a ball of dough forms. Then, increase speed to medium high and let knead for 8-10 minutes.

3. Cover dough bowl with damp washcloth (I used plastic wrap and a damp washcloth) and place in a warm place to rise for about 45 minutes. If you are making the chicken for this pizza, I would get that going now.

5. Preheat oven at 450. Go ahead and place a pizza stone in the oven to get hot.

4. Remove dough from the bowl and roll it out to form pizza crust(s) about 1/3 inch thick. I made three large pizzas with two batches of dough. Now top with sun dried tomato sauce, roasted chicken, spinach, avocado, and cheese.

5. (CAREFULLY! I almost burned my over-ambitious hand off here) slide your pizza onto a preheated stone. Seriously, please use extreme caution and don’t be a spaz and have to ask of help only after you burn yourself like I did. Bake for 10-12 minutes, or until cheese is melted, bubbly, and happily sizzling in the pan.

6. Let cool for a minute or two, then slice with a pizza cutter and serve.

For the sun dried tomato sauce:

  • 2/3 cup olive oil (Use the best quality you can here; it really makes a difference in the sauce!)
  • 2 cloves garlic, minced
  • 1 tsp dried oregano
  • 1 tsp dried basil
  • 1/2 tsp paprika
  • 1/2 tsp cumin
  • two pinches crushed red pepper
  • some freshly cracked pepper
  • 1 tsp salt
  • 6 oz. tomato paste (I like Hunts)
  • 1 tsp honey (Use local honey if you can here too)
 What You Will Do
  1. Add the olive oil, garlic, oregano, basil, paprika, cumin, crushed red pepper, salt, and some freshly cracked pepper to a small skillet.
  2. Stir continually, and heat the mixture over low heat for about 3-5 minutes. If this sizzles that’s totally ok; you just want it to smell aeromatic and try not to let the garlic burn.
  3. Add the tomato paste and honey, and continue to stir continually. The oil will most likely separate from the spices, and that’s great! It tastes good that way. I heated mine over low for about 4 minutes, or until the paste darkened a bit.
  4. This tasted great the day I made it, and the next day when I used it again. I think the spices develop flavor in the sauce over time!

For the roasted chicken

What You Will Need

  • 3 bone-in, skin on chicken thighs, patted dry
  • Some generous shakes of Jim N Nicks’ Chicken and Turkey seasoning

What You Will Do

1. Preheat your oven to 450 degrees.

2. Place your chicken thighs in a roasting pan. Cover generously with spice mix; flip pieces over and do the same thing on the other side.

3. Bake for about 28-30 minutes, or until a meat thermometer reaches 165 when inserted into your chicken.

4. Let cool, then shred into pieces for the pizza pizza.

For those of you who made it all the way to the end of this article, I love you and appreciate your tenacity. Not only will you be rewarded with great pizza, I also give you with the best restaurant pizza link in Alabama: Bettola

Chocolate Spice Cake with White Wine Berry Glaze

White Wine Cake

It’s holiday time! And you know what that means. Dust off that Kool and the Gang record, put on a Christmas scarf, and sing it with me, “Ce-le-brate good times, come on!” Now in your deepest Alto, “It’s a Celebration!”

And really, is there anything better than sparkly Christmas lights, fur trees loaded with ornaments, Elvis singing “Blue Christmas,” and drinking egg nog and/or hot chocolate like it’s your job? Truly, one of the most special times of the year.

And in that state of Christmas joy, I wanted to bake a chocolate cake that tasted like all of those wonderful Christmas feelings: warm and rich, with an unexpected flavor gift in the mix. And who better to parter with in this creative endeavor than uproot? Their Sauvignon Blanc is so versatile, it gave a bright flavor profile to chicken soup and this dessert. Especially perfect for the cinnamon-laced cake is the element of passion fruit the Sauvignon Blanc features- a perfect compliment to the blueberries and raspberries in the berry glaze.

Alright everybody, raise your eggnog-or uproot-glasses high to the best time of the year!

A slice of Christmas cheer

A slice of Christmas cheer

Chocolate Spice Cake with White Wine Berry Glaze

Another great thing about uproot wines is their partnership with Food52– one of my favorite recipe resources- where I went for inspiration in the cake realm. I just added a Christmas spin with a few extra holiday ingredients.

For the Glaze (I listed this first because I suggest you make it first, due to the double-glazing effect we use on this cake.)

What You Will Need

3/4 cup uproot Sauvignon Blanc 

6 ounces fresh blueberries

6 ounces fresh raspberries

1 teaspoon vanilla extract

3/4 cup sugar

What You Will Do

1. In a medium saucepan (make sure you use a larger one than you think you need- your liquid mixture will expand like an over-stuffed Santa when it boils), combine white wine, blueberries, raspberries, vanilla extract, and sugar.

2. Bring the mixture to a rolling boil, and let it cook at high heat for at most five minutes. Watch the mixture to make sure it doesn’t overflow the pan. If things get too crazy and you are afraid it is going to bubble over, just go ahead and turn the heat back down to medium or medium-low.

3. Cook on medium heat for about 24 minutes. Make sure and watch your mixture towards the end, stirring frequently to make sure the sugar and berries don’t burn.*

4. Let your glaze cool as you bake the cake.

* To be honest, this cooking time really depends on how thick you would like your glaze to be. I like mine a bit more like jelly so it gives the cake texture and shine; but, if you would like for it to be thinner, cook it on medium-low heat for up to 45 minutes. I also cooked this twice and had different cooking times for the glaze, so really just watch your mixture to see that it cooks to where you want it to be. When it comes to working with liquid sugar, it’s always better to go slowly so you don’t burn off your holiday fingers, as these are vital to your continued recipe success.

For the Cake

  • 1  1/2 cup all-purpose flour
  • 1/3 cup unsweetened cocoa
  • 1 teaspoon baking soda
  • 1 cup sugar
  • 1/2 teaspoon salt
  • 5 tablespoons neutral oil (like corn, canola, or vegetable)
  • 1 cup cold water
  • 1 1/2 teaspoon vanilla
  • 1 tablespoon cider or white vinegar
  • 1/2 teaspoon cinnamon
  • Freshly grated nutmeg (about 1/4 teaspoon, but up to your preference)
  • 2 ounces semisweet chocolate, chopped (I used this brand)
  • Confectioners’ sugar (optional, for dusting)

What You Will Do

  1. Heat the oven to 350° F and spray a 9-inch cake pan with cooking spray.
  2. Sift together the flour, cocoa, baking soda, sugar, and salt in a bowl. In a separate bowl, whisk together the water, oil, vanilla, and vinegar.
  3. Whisk together the wet and dry mixtures. If lumpy, whisk the mixture until it is smooth.
  4. Add the cinnamon, nutmeg, and chocolate. Whisk together to combine.
  5. Pour the batter into a greased 9-inch round cake pan. Tap the edge of the pan against the edge of the counter, or drop from 6 inches to the floor several times to pop air bubbles. Please do not miss this step, as it is really entertaining and will hopefully make your cake hole-less! Bake for 25 to 30 minutes (mine took 28 minutes), or until the top springs back when pressed gently.
  6. Your cake may have a darker brown ring around the edges; that’s ok. That’s what we have that gorgeous glaze for!
  7. Once the cake is removed from the oven, place it on a cooling rack. Poke tiny holes throughout the cake with a toothpick or fork, going about 3/4 of the way to the bottom.
  8. Spread a thin glaze of white wine berry mixture over the cake, making sure to cover the entire cake surface. This will help infuse some of the berry flavor inside of the cake as it cools.
  9. Once your cake has cooled completely, turn it out onto your serving platter.
  10. Spread the rest of your berry glaze on the top of the cake, working from the center out. Sift confectioners sugar on top if desired for extra celebratory pizazz.

Brown Butter Chocolate Chip Cookies

Comfort Food Cookies

Some weeks, you just need to bake.

And this week, the pull has been especially strong. The weather in the South has been unusually frigid-rain battered against my roof all day yesterday- and cold air continues to seep through the frames of gray, foggy windows.  It’s at this point that my mind wanders to what my kitchen might smell like if I turned on the oven and let the heat do its work on something sweet.

Also, did I mention- it’s the week of THANKSGIVING? And if you don’t want to bake this week, then the likelihood is that you never will. Unless, of course, it’s World Nutella Day and that is an exception to every rule.

But back to baking. There is a coffee shop and book store that I absolutely adore whose chocolate chip break-up cookies are not to be missed. On cold fall days, they are the baking remedy to whatever life looks like. They are buttery; dense but chewy; with chunks of semisweet chocolate that melt in your mouth before you get a slight hit of the salt that is artfully placed on top.

Cookies Up Close

I have wanted to recreate these cookies for a while, and this week, I needed to bake them. This recipe from Joy the Baker is as close as I have gotten to date. Her version tastes and smells like warmth; the browned butter and flaky sea salt roll comfort food into a simply, incredibly delicious form.

I know this aren’t the typical Thanksgiving dessert- we’ll leave that to pumpkin/pecan/cranberry jelly pies- but I am pretty sure that the smell of these warm out of the oven will make any holiday guest feel instantly at home. Even on a cold, rainy, almost wintry fall day.

Cookies from Above

Brown Butter Chocolate Chip Cookies

This recipe is from the super talented and fabulous Joy the Baker. I made a few changes from her original recipe, and they are noted in italics.

What You Will Need

  • 2 1/4 cups all-purpose flour (I used whole wheat pastry flour)
  • 1 teaspoon salt
  • 1 teaspoon baking soda
  • 1 cup (2 sticks) unsalted butter, softened to room temperature
  • 1 cup packed light brown sugar
  • 2 teaspoons pure vanilla extract
  • 1 teaspoon molasses
  • 1/2 cup granulated sugar
  • 1 large egg
  • 1 large egg yolk
  • 1/2 cup coarsely chopped pecans (I prefer my cookies without nuts, unless it is peanut butter, which is a different story)
  • 1 cup bittersweet chocolate chips (or extra dark, about 80% or above, chocolate chunks)
  • coarse sea salt for sprinkling

What You Will Do

1. In a medium bowl, whisk together flour, salt and baking soda.  Set aside.

2. Start by browning 1/2 cup (1 stick) butter.  In a medium skillet, melt butter over medium heat.  Once the butter has melted completely, it will begin to foam and froth as it cooks.  The butter will also crackle and pop.  That’s the water cooking out of the butter.  Swirl the pan occasionally, and keep an eye on the melted butter.  The butter will become very fragrant and brown bits will begin to form at the bottom of the pan.

3. Once the bits are an amber brown (they are about the color of this wood), immediately remove the pan from the heat and pour browned butter (bits and all) into a small bowl.  Leaving the butter in the pan will burn it.  Allow the butter to cool for 20 minutes.

4. In the bowl of a stand mixer fitted with a paddle attachment, cream the  remaining 1/2 cup of butter with brown sugar.  Cream on medium speed until light and fluffy, about 3 to 5 minutes (this will be a very light, beige color).  Add the vanilla extract and molasses (or honey) and beat until incorporated.

5. Once the brown butter has cooled slightly, pour the butter (brown bits and all) into the creamed butter and sugar mixture.  Add the granulated sugar and cream for 2 minutes, until well incorporated.  Add the egg and egg yolk and beat for 1 minute more.

6. Stop the mixer and scrape the bottom of the bowl to ensure that everything is evenly mixed (this is important; I had some unmixed bits in my bowl).  Add the flour mixture all at once to the butter mixture and beat on low speed until the flour is just incorporated.  Remove the bowl from the stand mixer and use a spatula to fold in pecans (optional) and chocolate chips.

7. Spoon batter onto parchment paper or plastic wrap and wrap into a disk or cylinder and seal at both ends.  Allow to rest in the fridge for at least 30 minutes.

8. Place racks in the center and upper third of the oven and preheat the oven to 350 degrees.  Line two baking sheets with parchment paper (or a Silpat).  Scoop dough by the two tablespoonfuls onto prepared sheets (or cut your dough log into 24 slices and make dough balls from each slice with your hands).  Sprinkle with sea salt.  Be sure to leave about 2 inches of space between each cookie.

9. Bake for 12 to 14 minutes or until cookies are golden brown.  Remove them from the oven and allow to rest on the baking sheet for 5 minutes.  Serve warm or allow to cool completely.

Jalapeño Sausage Wheels

Sausage with a kick. Go team!

In the South, it goes without saying that almost all of our traditions revolve around food. Having a baby? Let’s get together, open pink or blue gifts, and try Aunt Pat’s cream cheese ball. Getting married? Let’s have a glass of tea, peruse a spread of engagement presents, and eat pimento cheese (this is also known as a “Sip n’ See”). Your favorite football team having a ball game? Come on over, I’ll tell you about the time I spilled the contents of a salad bar into the cuff of our ’92 national championship coach’s pants leg. And, let’s eat!

As fall is upon us, football has once again become all-consuming. I was born and raised around a team of crimson and white jerseys that symbolized everything great about our state- hard work, commitment, heart, legacy. For me though- besides the game, the roar of the crowd and being in one of my favorite stadiums in the world- the best part of football season is the pre and post-game eating.

This recipe for sausage wheels has been passed down through my family; I remember waking up on Saturday mornings to the smell of them. But let’s be honest- there isn’t much you can to to sausage and pie crust to make it taste better. My version just gives it more of a spicy kick, and ends with a sweet, smoky flavor that is absolutely addictive. Plus, I’m hoping the aforementioned kick can somehow serve as good luck for our special teams this Saturday.

You can serve these hot out of the oven; be warned that the sausage fumes may make your mind cloudy and cause unexplained overconsumption of pastries. Or, let them cool to room temperature and take them to the game (or your sofa). They also make a delicious post-game-night breakfast.

I hope you enjoy a beautiful, winning weekend- and that this recipe is good luck for your own tailgating tradition.

Jalapeño Sausage Wheels

What You Will Need

1 package pre-made pie crust (containing 2 pie crusts)

1 pound ground sausage

2 jalapeños, deseeded and minced (Thanks for the peppers mom!)

2 cloves garlic, minced

1 teaspoon Sweet Heat spice

1/2 teaspoon onion powder

1/2 teaspoon ground cumin

What You Will Do

1. Let your pie crusts come to room temperature.

2. In a large bowl, combine the ground sausage, jalepenos, garlic, Sweet Heat, onion powder, and cumin.

3. Lightly flour your countertop or surface of choice (I love my Silpat for this) and gently roll out both pie crusts until they form about a 11 by 11 inch rectangle. No need to measure; I just make sure the dough looks like a large rectangle and is a bit thinner than when I first unrolled the crust.

4.  Divide the sausage mixture in half, and spread it evenly on each pie crust.

5. Here comes the fun part. Starting at the top of your rectangle (the side facing you) gently roll the dough away from you, creating a tight roll. Pull the dough tight as you roll, making sure your sausage mixture stays inside the dough roll. A loose roll will spill it’s contents onto your counter, and why let that tastiness go to waste?

6. Repeat the process for the second pie crust.

7. Once you have your two rolls ready, wrap them in plastic wrap and put them in the freezer for 45 minutes to an hour to help them firm up.

8. Preheat oven to 450. Go ahead and find your broiler pan and spray it generously with cooking spray; you will need it at the ready.

9. Take your rolls out of the freezer, and slice them into thin wheels (about 1/4 an inch to 1/2 inch). Arrange the sausage pinwheels about a 1/2 inch away from each other on the pan.

10. Bake for 15 minutes, then take your pan out of the oven and flip the wheels over; bake for another 10 minutes. Go team!

Dark Chocolate S’mores with Salted Peanut Butter

Some more s'mores
Some more s’mores

It’s Labor Day weekend, and you know what that means? That’s right- it’s time for s’mores!

For those of you living below the Mason Dixon line, the idea of roasting a marshmallow on a 95-degree afternoon using a open flame is about as appealing standing on the asphalt in your driveway wearing a down vest–and drinking hot chocolate.

Maybe it is the unbearable humidity, or my recent nostalgia for summer camp, or the fact that any excuse to sandwich a toasted marshmallow between chocolate crackers smeared in salty peanut butter is motivation enough, but s’mores are an essentially summer food. Despite the fact that you might have to (currently) sweat when you make them.

That is why this recipe involves marshmallows toasted inside (hallelujah for A/C and a broiler!); homemade peanut butter (whirred together with buttery roasted peanuts and honey); and graham crackers that will make you want to jump outside and start a s’mores caravan. Y’all- these turned out so good. The rich, dense graham cracker with sweet, roasted peanut goodness and melty marshmallow- so worth the sweltering effort.

And besides their taste, one of the best things about s’mores is that they always remind me that fall is on it’s way. Next time I make these I will probably add some chocolate chips to that peanut butter then go online and order a fancy down vest. Fall may be three weeks away. Yes, it’s a sweltering haze of frizzy hair outside. But watch out autumn, here we come- chocolate peanut butter s’mores in tow.

Some assembly required


Dark Chocolate S’mores with Salted Peanut Butter*

What You Will Need:

For the graham crackers: This recipe was taken from one of my favorites, King Arthur Flour

1/2 cup (2 ounces)  unbleached all-purpose flour
3/4 cup (3 3/4 ounces) whole wheat flour
1/2 teaspoon salt
1/2 cup (1 1/2 ounces) Dutch-process cocoa
1 1/4 cups (5 ounces) confectioners’ sugar
1 teaspoon baking powder
1/2 cup (1 stick, 4 ounces) unsalted butter
2 tablespoons (1 1/2 ounces) honey
2 tablespoons (1 ounce) cold milk

 What You Will Do:

1. Preheat your oven to 325°F. Cut out two sheets of parchment as large as your cookie sheets.

2. In a medium-sized bowl, whisk together the flours, salt, cocoa, sugar, and baking powder.

3. With a pastry blender, two knives, or your fingertips, cut the butter into the flour mixture until evenly crumbly.

4. In a separate bowl, combine the honey and milk, stirring until the honey dissolves.

5. Add the liquid to the dry ingredients and toss lightly with a fork until the dough comes together. (This took me a while, and for a bit I thought my dough would remain a shaggy mess. But just keep on stirring with a fork and it will come together! ) Add additional milk, if necessary (I thought I would need this at first but it ended up fine; stir for a bit to make sure you need it before you add it).

6. Turn the dough out onto a well-floured surface and fold it over gently 10 to 12 times, until smooth. Divide the dough in half. Work with half the dough at a time.

7. Transfer one piece of dough to a piece of parchment. Roll it into a rectangle a bit larger than 10 x 14 inches; the dough will be about 1/16-inch thick (Ok, my dough looked a bit more like a misshapen heart rectange. That’s fine! Just make sure you roll the dough out pretty thin- thinner than you will think you need. It should feel like if you lift it, it will tear). Trim the edges and prick the dough evenly with a fork. Repeat with the remaining dough and parchment. Place the rolled-out dough pieces, on their parchment, onto baking sheets. (Ok, let’s be honest- parchment paper is frustrating as mess if you don’t cut it perfectly. I cut mine long, put my cocoa container on the edge to weigh it down and rolled it out. This was also frustrating because it didn’t work that great either. So just work through it and I promise it’s worth it.)

8. Bake the crackers for 15 minutes, or until you begin to smell chocolate. Remove them from the oven, and immediately cut them into rectangles with a pizza wheel or knife. Transfer them to a rack to cool. The longer you let them cool, the crispier they get.

For the peanut butter: The recipe was adapted from the amazing Alton Brown and the Food Network

What You Will Need

2 cups shelled and skinned roasted peanuts (I had an incredible friend who gave me roasted peanuts as a gift that I used here)
1 teaspoon kosher salt
1 1/2 teaspoons plus 1/2 tablespoon honey
1 1/2 tablespoons peanut oil

What You Will Do:

1. Place the peanuts, salt, and all of the honey into the bowl of a food processor. Process for 1 minute. Scrape down the sides and bottom of the bowl.

2. Place the lid back on and continue to process while slowly drizzling in the oil and process until the mixture is smooth, 1 1/2 to 2 minutes. Process it until it smells roasted and when you look into the food processor the edges of the mixture are smooth. You also might have to scrape down the bottom of the bowl again and blend it for a bit longer to make sure it’s smooth.

3. Place the peanut butter in an airtight container and store in the refrigerator for up to 2 months. I made a sandwich/distributed this/used it on the s’mores in one night. I mourned it’s passing.

For the marshmallows: These were provided by the wonderful people at the Jet-Puffed factory.

*For the final product:  This recipe requires a very simple assembly, but I found it helpful to make the following elements in the following order: 1. Bake graham crackers. 2. Make peanut butter. 3. Set oven to broil. 4. Put marshmallows in oven, and while they are broasting (roasting in the broiler), spread peanut butter on graham crackers. 5. Take hot mallows out of the oven, use a spatula to gently place them on the prepped crackers, then sandwich between two grahams. Let the s’mores party begin!!