Starting with Austin


Original antlers at Uncommon Objects in Austin

Picture this. A log cabin the size of a mini-mall looms amidst a gigantic parking lot the expanse of two football fields. Roasty gray smoke billows from the restaurant’s chimneys and wafts towards your nose. You look ahead towards a line of blinking taillights and a large, unshaven man stumbling from the back of a faded brown party bus. A security guard approaches your Prius and announces a 2-hour minimum wait for barbecue, while the oncoming rush of fellow meat lovers towards the check-in point is about like that of me stalking Kerry Washington and/or John Besh on a street corner.

This is the passion of the eaters in Austin, Texas.  It is the city- inspiring, challenging, beautiful, original and unexpected. And Austin changed me.

The change was subtle and slow. It was an initial shift that grew over the following days into a reminder of who I am, what I want this blog to be, and who I hope you find that this blog is. What I realized is this: Luv Cooks is for you, it’s for me, and it’s on a journey.

Without boring you with the details of my inner psyche, I’ve felt lately like I am on the edge of a growth spurt- feeling the ache in my bones for height, but not exactly sure what the final product will end up looking like. Austin clarified for me what I want to grow into. Y’all- just ok isn’t good enough anymore- and while there were some good food moments, I realized how important great food is to me. Not just for taste, but for nourishment- physically, spiritually, emotionally. And the growth spurt has made me hungry. Hungry for better recipes, better food, better health.

So I offer to you a new commitment. I want Luv Cooks to be a place of beauty and well-being. Not in an over-the-top, health-crazed, helicopter-parent kind of way. In an oasis, come here for refreshment and rest and renewal kind of way. I want you to be renewed by the beauty of food and all it has to offer to your life.

So in lieu of a recipe this time, I leave you with food and Austin-spiration. I can’t wait to see where our creativity goes next.


Beef brisket at it's finest, Black's BBQ
Beef brisket at it’s finest, Black’s BBQ
The best root beer in town
Veggie burger with chipotle-pecan pesto at Bouldin Creek Cafe
The line at 9 a.m. Friday, Franklin's bbq
The line at 9 a.m. Friday, Franklin’s bbq


The infamous Austin Hotel


Smoked sausage, divine field peas and jalapeño cornbread at Black's
Smoked sausage, divine field peas and jalapeño cornbread at Black’s
A Mexican twist on a cinnamon twist, delicious


Vintage finds at Uncommon Objects
View from the top of Mount Bonnell


Coconut Chai Latte


The beautiful necklace in the center of the Chai is Jyori's- to see more like it, just visit the Sound of Hope online store.
The beautiful necklace in the center of the chai lattes is Jyoti’s! To see more like it and read more about her, just visit the Sound of Hope site and online store.

Sometimes, as hard as it is to admit, life isn’t just about food. I may never be able to fully express my affection for biting into a hot, crispy beignet and tasting the sweet powdered sugar coat the roof of my mouth (#mardigras!), or the way hot, rich coffee with cream warms me up every morning. But sometimes food moments are about more than just taste. There is more to it- the lingering memory;  the association; the story.

I have never been more aware of this fact than on my recent shoot with Ericka and Rusty Jackson of the Sound of Hope. Ericka and her husband Rusty have made it their mission to raise awareness for and provide rescue, protection, and holistic care to orphans and vulnerable children around the world. But what struck me most about Ericka and the Sound of Hope was her passion for orphans, and the joy she had in sharing her stories of chai and India.

Sweet Ericka stirring her chai
Ericka stirring her chai and modeling the fabulous brass bangle set from the Sound of Hope store


Chai is engrained in the culture of India, and orphanages and almost every home Ericka has entered have welcomed her inside with a hot cup. One of her favorite memories is of chai served to her in a leper colony near Delhi. She sat, singing, laughing, and sipping chai with those whose friends and family had labeled them “untouchable.” Human beings who had endured such exclusion and scorn, but whose overwhelming welcome was made all the more special by the cups of tea they shared.

“A cup of warm chai is a gift” to Ericka, and the warmth and spice is symbolic of friendship and hospitality in India. “Sometimes the smell alone is enough to take me back there,” she says.  “And I long to hold them  [the orphans] in my arms, and to cover their sweet faces with kisses!”

Beautiful Jyoti, an orphan whose life was restored through Sound of Hope's efforts, with her "auntie" Ericka
Beautiful Jyoti, an orphan whose life was restored through Sound of Hope’s efforts, with her “auntie” Ericka

And to be completely honest,  I am HORRIBLE at geography and knowledge of any country outside of America. Literally, I had to learn the fifty states in school. And I think I had to memorize where Mexico was in Spanish class. Thus, I had NO IDEA the level of poverty the children face in India. There are 1.2 billion people in India, a country who has the largest amount of AIDS orphans in the world. Along with poverty and disease, predators are at seemingly every corner to profit off of these children. Drug pedaling, prostitution, and organ selling all occur, and predators looking to make money will break children’s legs or arms to make them more effective as beggars. The exploitation of women is also rampant; there is a certain district in India where 15 to 20 thousand women live on one street and are regularly sold into brothels. Gendercide, where 50,000 females are aborted each month, is rampant among the population. It’s also estimated that one million girls per year simply disappear. To see more on this, check out Sound of Hope’s video.

The precious children of India

But THAT is where Sound of Hope steps in. They work daily to bring hope and help and life to those places where the youngest among us have been abandoned. And there are incredible stories of what has been accomplished through their efforts; like Jyoti, whose necklace is in the photo of our chai cups. She was abandoned by her father at a young age simply because she was a girl, and found on the streets at a year and a half old. She is now thriving, and you can watch more about her here.

Oh, and also, there is a list below of all of the incredible products featured in these photos that you can purchase on the Sound of Hope’s website.  There you’ll find jewelry, hand-woven scarves, super cool home decor, and even original art. Every cent from your purchase goes to benefit children and the Sound of Hope’s work overseas. I highly recommend checking it out, especially if you are like me and have about ten friends with birthdays in March.

Coconut Chai Lattes

And you know what? After talking with Ericka, I think that now, more than ever, it’s important that we not only enjoy our food, but the way our memories of it motivate us to do better for the ones we love.  To use it as a way to welcome others who have been ignored, and to love people like we love ourselves. So enjoy your chai, and know that I appreciate every single person who read this post and visits Sound of Hope’s site so, so much. :)

Coconut Chai Lattes

You Will Need

1 cup water

1 cup coconut milk

2 teaspoons sugar

1 crushed cardamon pod (Just smash it down with the back of a spoon, take out the seeds, and crush those until they form a grainy mix)

2 teaspoons loose black tea leaves

cinnamon sticks to stir

What You Will Do

1. Bring water, milk, sugar, and crushed cardamon pod seeds to a boil in a small saucepan over medium heat.

2. Briefly take the mixture off of the heat and stir in the tea leaves.

3. Put the pan back on the heat, and bring it to a boil again over medium heat.

4. Once boiling, take the pan off of the heat and pour the mixture over a small mesh sieve into a large mug.** (You can also pre-warm your mug by pouring boiling water into it before you begin this process). Stir with cinnamon sticks and enjoy!

**If you like your chai a bit stronger, you can bring the mixture to a boil one more time before you strain it. Also, feel free to add fresh ginger or freshly grated cinnamon to your tea to make it even spicier.

 Online Store Items!


Spicy Chocolate Sweetie-Pie

Chocolate Chili Pie Slice

For those of you who may have spent the last week under a rock, or like one or two people I know (#roommates), have been so immersed in the winter Olympics that all you can think about is ice, snowboarders, and whether or not Sochi is actually a resort destination, I offer a friendly reminder: Valentine’s Day is in THREE DAYS!

I absolutely love Valentine’s Day. Mainly because it involves every one of the items on my top five list of favorite things:
1. Hearts 2. Heart logos 3. Glitter 4. Love!! Or as we say, luv:)  5. Chocolate

Chocolate Chili Mini Pie

Speaking of chocolate, this leads me to my incredible friend and baking inspiration Laura Chancey and her cooking venture, Humble Pie. Laura and her husband Caleb’s love for advancing the city of Birmingham has led them on a very cool journey; not only has Caleb done incredible work  for the music scene in B’ham (he founded Greyhaven, a creative community, and a brilliant music venue called Sound and Page), both Laura and Caleb have a passion for serving the Southern people they love. And in Laura’s eyes, what better way than to extend that love through pies to Birmingham.

Laura rolling out and perfecting her pie crust

Laura’s grandmother MawMaw Betty taught her the art of pies, and she spent many sweet afternoons in the kitchen baking with her. Betty instilled in Laura a love of cooking, but once she passed, so did the secret touch to her pie dough. Desperate to relive memories of her, Laura and her brother began baking, and soon realized that they could incorporate their own creative bent on recipes outside of the apple and pecan versions their family loved so much. Laura also discovered the brilliantly inventive Four and Twenty Blackbirds, and as Laura says their use of “unexpected flavors like cardamon, and ginger, and lime.”

Steps to a Perfect Pie Crust

Beautiful Laura in her kitchen


Laura's favorite, salted caramel pie filling
Laura’s favorite, salted caramel pie filling


Which brings us to Laura’s delightfully creative and flavor-filled chocolate chili pie. In Laura’s words, “chocolate pie dough is a marvel,” and I would agree. This treat is at once bittersweet, dense with a chocolate mousse-like consistency and flaky crust, along with a lingering aroma of chili and spice on your tongue.  And if your Valentine’s plans involve shelter from frigid weather (I want my Southern winter back!), this is the perfect bit of heat to keep you inside and satisfied.

So gather those you love, glitter some Valentines, and order* or make a spicy chocolate chili pie. Because just like Laura’s passion, loving people through food is always creative, tasty, and an adventure.

A Wedge of Chocolate Chili Pie
The cutest wedge of chocolate pie ever

Spicy Chocolate Sweetie-Pie (Laura pulled inspiration from the Four and Twenty Blackbirds version, but tweaked it to be her own).

Chocolate Pie Dough

What You Will Need

  • 1 cup all purpose flour
  • 1/4 cup unsweetened cocoa flour
  • 1/2 tsp salt
  • 1 tbsp sugar
  • 1/2 cup (1 stick) cold butter
  • 1/2 cup ice plus 1/2 cup water to make super cold ice water

What You Will Do

1. Whisk the first 4 ingredients together, then with a pastry knife cut the butter into the flour mix until it resembles small pebbles.
2. Add ice water a tablespoon at a time, using a wooden spoon to incorporate it in.
3. When the mixture starts to resemble dough, form a ball with your hands and wrap in plastic wrap. Refrigerate for at least 1 hour (or if you’re impatient, like me, freeze for at least 30 minutes.)
Note: When you’re ready to begin making the pie, roll the dough out first, put it into the baking dish, poke the bottom with a fork about 10-15 times, and then stick the dish in the freezer until your filling is ready.


Chocolate Chili Filling


What You Will Need


  • 1 cup heavy whipping cream
  • 1 cup milk
  • 12 ounces bittersweet chocolate
  • 1/2 tsp salt
  • 1/2 tsp cardamom
  • 1/4 tsp ginger
  • 1/4 tsp cayenne pepper
  • 2 large eggs
  • Juice of half a lime
What You Will Do


1. Preheat oven to 325 degrees.
2. In a saucepan, heat the cream and milk until almost boiling. Meanwhile mix chocolate, salt, cardamom, ginger, and cayenne in a bowl.
3. Pour hot cream over the chocolate mixture and let it rest for a minute or two. Stir to combine.
4. In a small measuring cup, whisk the eggs. Temper the eggs by adding a bit of the hot chocolate a spoonful at a time. When the temperature of the eggs has risen, mix into the chocolate mixture.
5. Add the lime juice and stir to combine.
6. Pour the mixture into a prepared Chocolate Pie Dough through a sieve.
7. Bake for 35 minutes, making sure to turn the pie dish 180 degrees once the pie has been baking about 20 minutes.

**Though Laura hopes that a brick-and-mortar store are not far off, you can reach her for a pie through Instagram. Her other current faves are salted caramel and lemon chess pie.


Honey Wheat Pizza with Sun Dried Tomato Sauce and Roasted Chicken

Honey Wheat Sun-dried Tomato Pizza with Roasted Chicken-3

I have a love/hate relationship with pizza.

There are many things to thrill to about pizza. Layers of baked cheese, herb-soaked tomato sauce and fresh meat and/or vegetables piled on top of a soft, but crispy-on-the-edges dough, is song-worthy. Other high points include its sweetly tomatoey flavor hit, satisfyingly warm bite of stringy cheese not quite softened to its base, and beautiful, lingering salt kick from thin slices of meat or seasoned veggies.

But, there are also many things to run from with generic pizza. Overly processed and spiced, bad pizza is too heavy on the dough and not heavy enough on the flavor. Kind of like a rectangle of thick, shellacked cardboard baked to crusty doneness, it leaves a one-note sensation of grease and blandness in its wake.

Needless to say, I am hesitant to try any pizza recipe because of my immediate fear of the untasty; and as you know, it is hard for me to hide my disappointment and displeasure with bad food (I know Mom, I know). However, if there ever was anyone to trust in this journey of facing my fears, it would be Rachel Van Egmond. Vowing from a young age never to leave home without a necklace, she is the one-woman owner and founder of Van Egmond Vintage (where she repurposes vintage jewelry into beautiful necklaces), mother of precious Ramsey, and wife of eighth-grade math teacher and musician Jeremy. To say that her life is busy is an understatement! But on a recent dinner at her home in Montgomery, I was wooed immediately by her take on- gasp!- pizza.

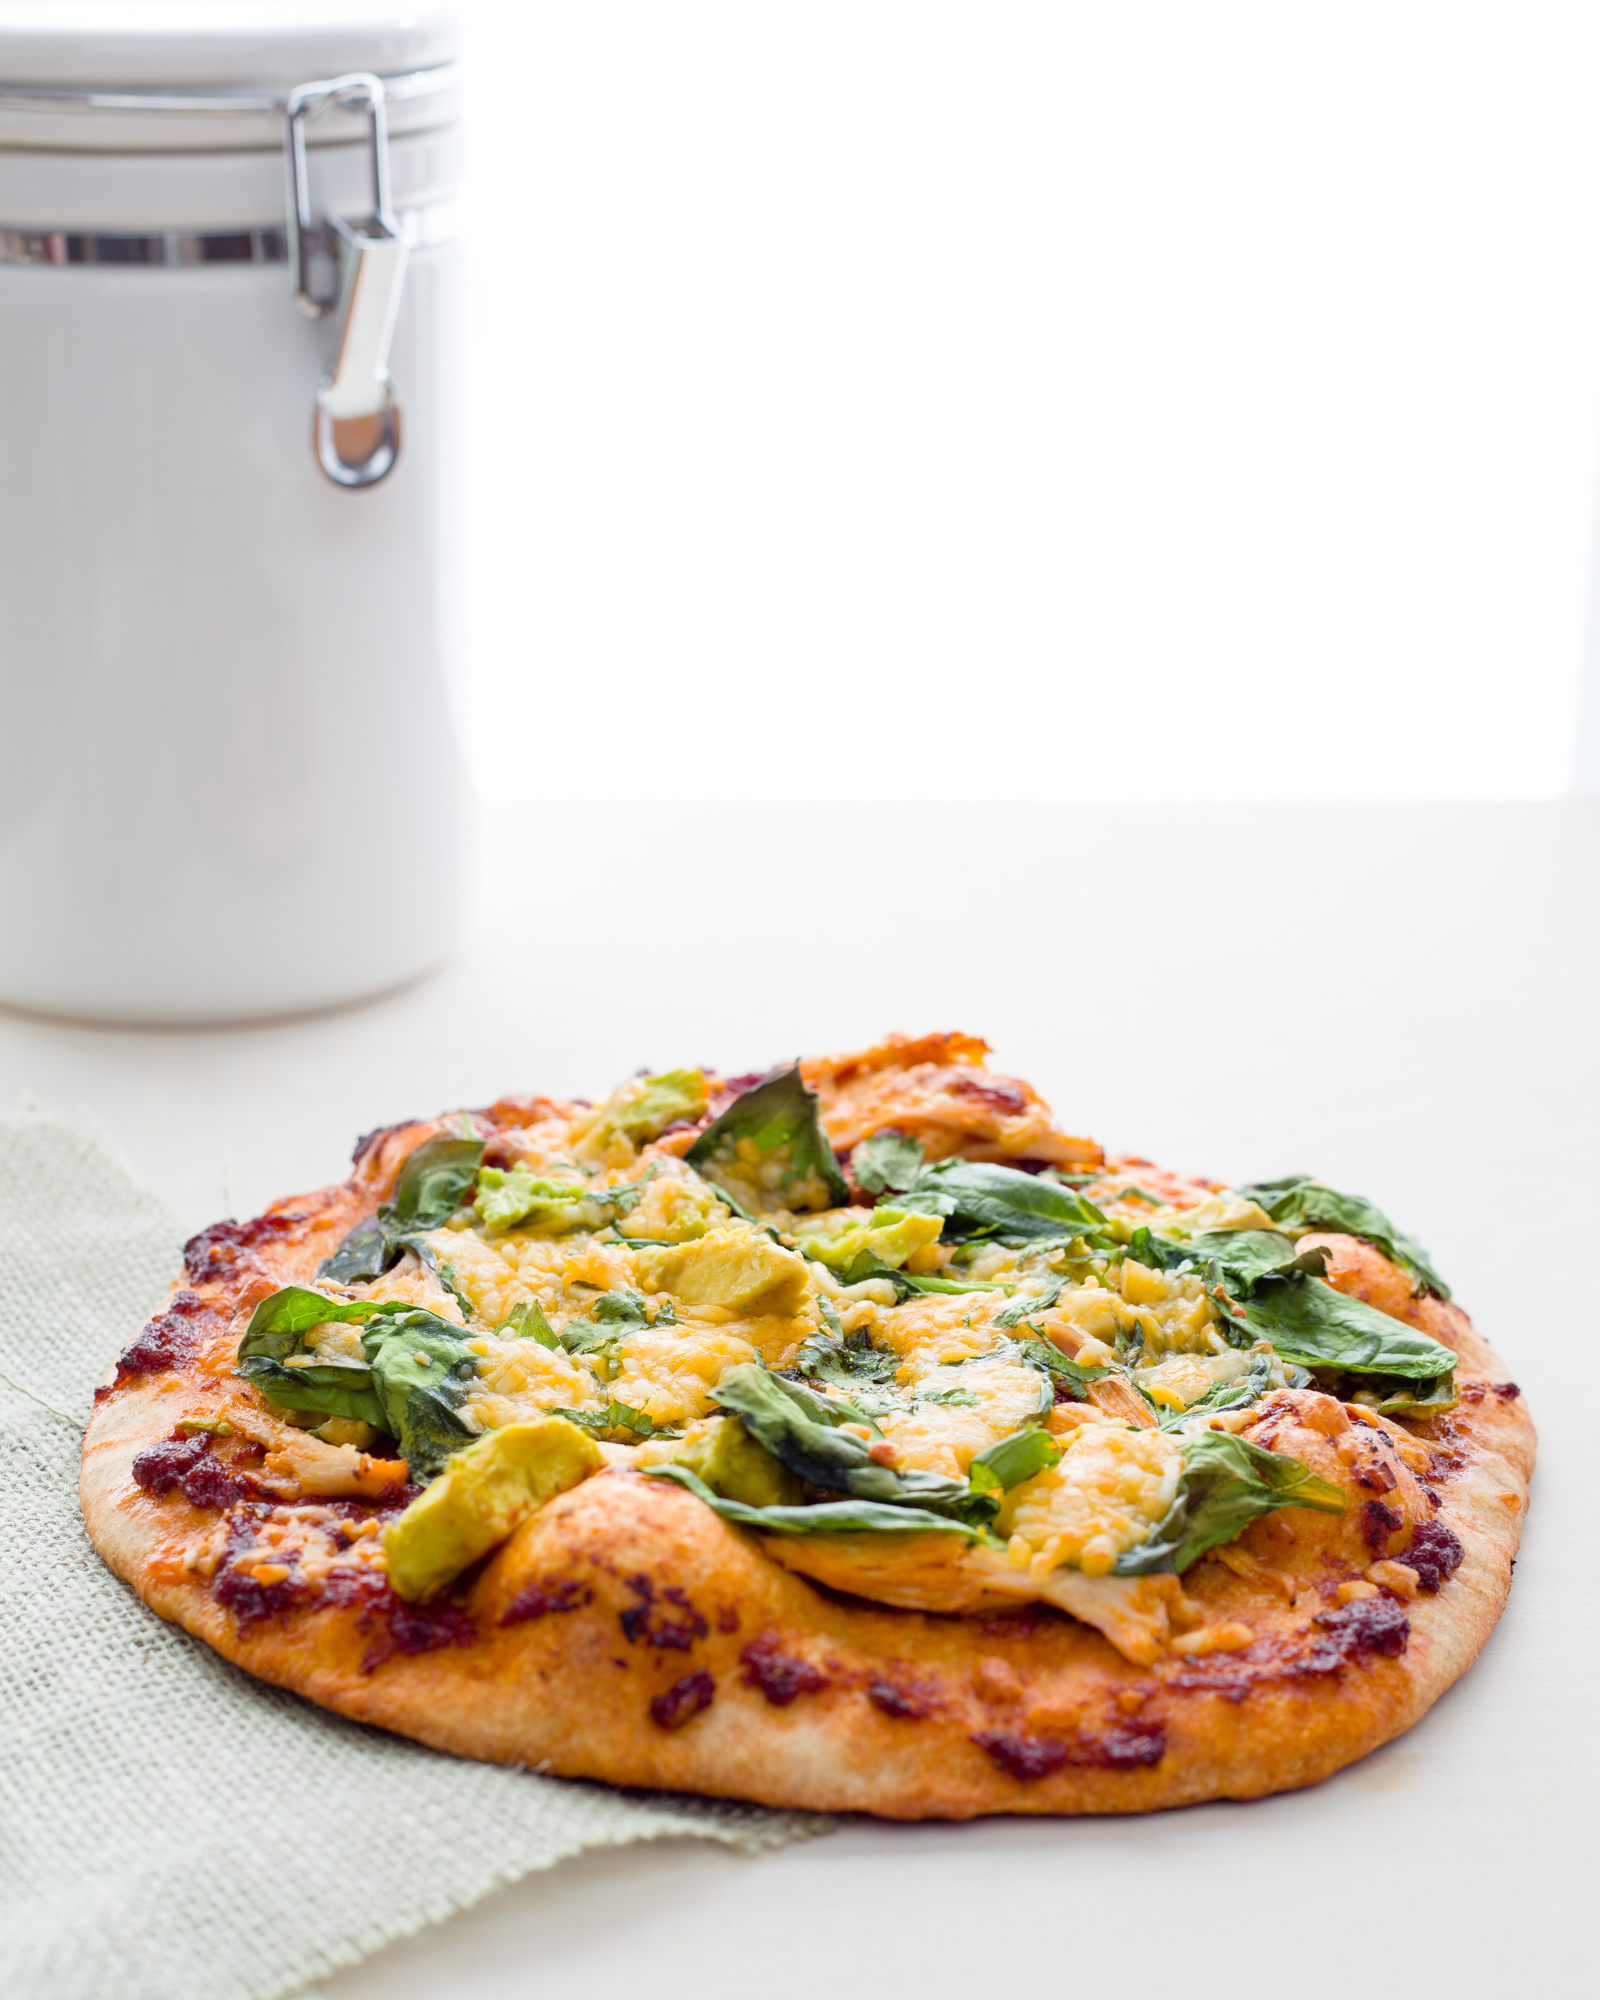
Rachel’s dough was different; sweet and hearty, but not too thick, softer in the center and  airier on the edges. I loved her southwestern-themed toppings- avocado, shredded chicken, bell peppers, lightly sprinkled cheese and tomato sauce. Like Rachel, it was light and fun and full of creative flavors.

Immediately inspired, I set about creating my own version, with her dough as my anchor. And I will tell you, this dish is my new, go-to weeknight dinner. Making the dough is easy, and you only have to be patient enough to let it rise for an hour. The sun dried tomato sauce is inspired by Budget Bytes and tastes just like the jarred variety, but super delicious and much less expensive. Roasting the chicken, doused in spices, skin on and bone in, keeps the flavor in without weighing down the crust. All in all, this version is a winner. And when it comes to pizza, I don’t use that term loosely.*

Honey Wheat Sun-dried Tomato Pizza with Roasted Chicken-5

*Also, please be advised  that you have not been to Body Pump in weeks (ok, let’s be honest, months) like myself, the hand-kneading of dough method will most likely count as your workout for the week and you may or may not be sore tomorrow. You have been sufficiently warned:)

Honey Wheat Pizza with Sun Dried Tomato Sauce and Roasted Chicken

What You Will Need

For the pizza

  • 1 or 2 batches of pizza dough (depending on how many people and/or singles you are feeding; 1 batch feeds 2 hungry people)
  • Sun dried tomato sauce (recipe below)
  • Shredded roasted chicken (recipe below)
  • Fresh spinach leaves
  • One avocado, diced
  • Colby jack cheese (Just make it as cheesy as you like)

For the dough*

  • 2/3 cup warm water
  • 1/2 tsp honey
  • 1 tsp sea salt
  • 1 tbsp extra virgin olive oil
  • 1 cup + 1 tbsp bread flour (plus extra if hand-kneading)
  • 1 cup + 1 tbsp whole wheat flour
  • 1 1/4 tsp active dry instant yeast

What You Will Do

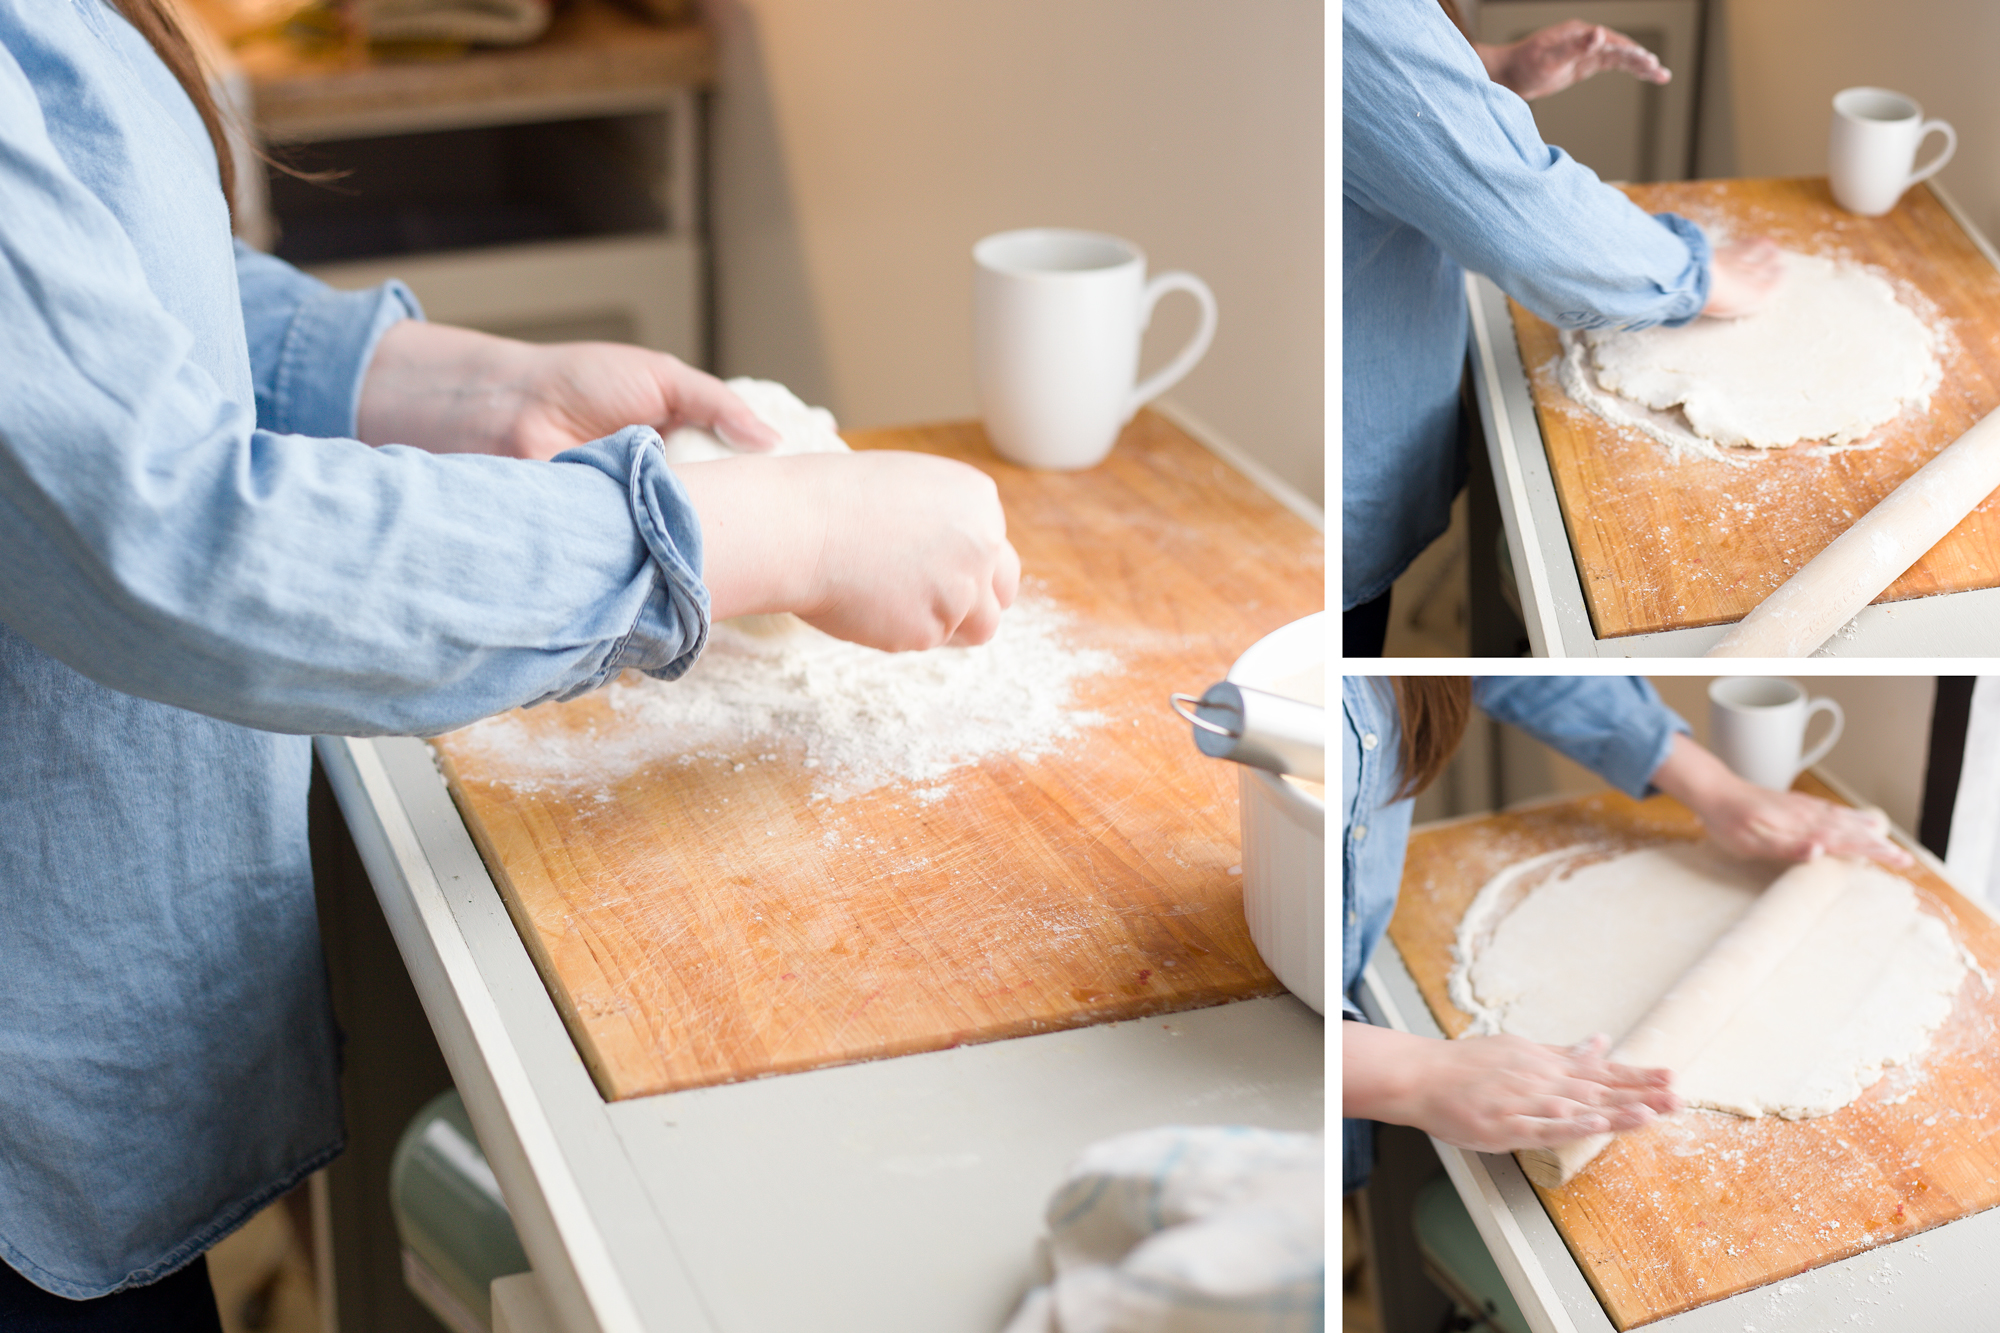
1. By Hand: Go ahead and flour a large, clean surface on which to roll out your dough. Place all dough ingredients in a large bowl. Using a large wooden spoon, manually stir all of the ingredients until they just come together in a ball. Take the dough out of the bowl (it’s totally ok for there to be flour/dough shred pieces at the bottom of the bowl at this point; just scoop them out and add them back into your dough ball) and put it on your floured surface. Knead the dough, taking out all of your aggression from the week onto the now flattened loaf, until it’s warm, sticky, elastic, and it has a nice give when you press into it with your palm; about 10 minutes or as much as your biceps can stand.

OR

2. With a stand mixer. Place all ingredients in a stand mixer. Manually stir a couple of times with a dough hook, then attach dough hook and knead on low for about 2 minutes until a ball of dough forms. Then, increase speed to medium high and let knead for 8-10 minutes.

3. Cover dough bowl with damp washcloth (I used plastic wrap and a damp washcloth) and place in a warm place to rise for about 45 minutes. If you are making the chicken for this pizza, I would get that going now.

5. Preheat oven at 450. Go ahead and place a pizza stone in the oven to get hot.

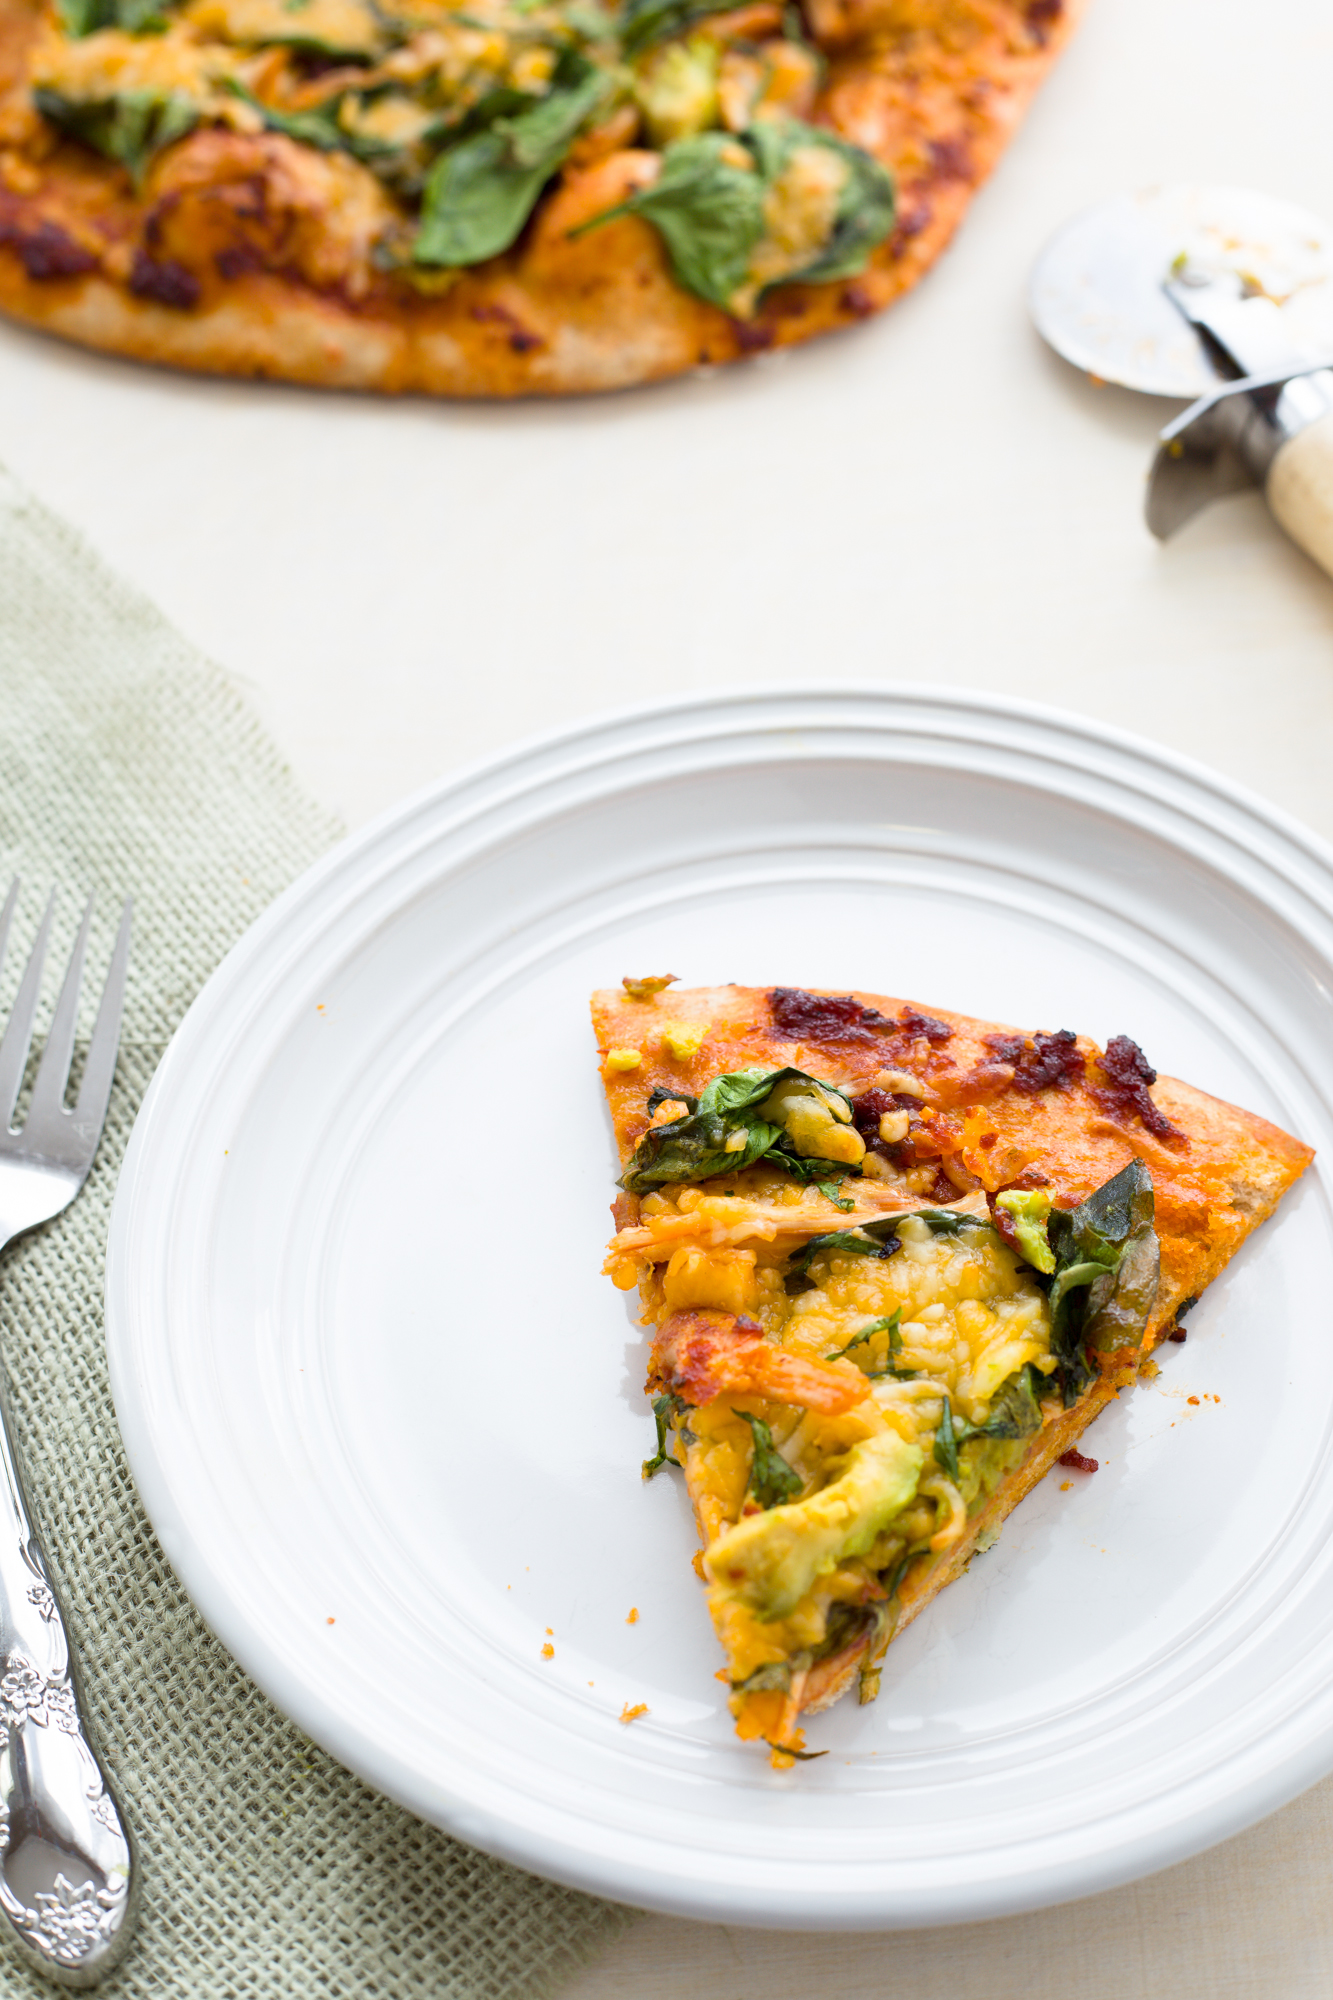
4. Remove dough from the bowl and roll it out to form pizza crust(s) about 1/3 inch thick. I made three large pizzas with two batches of dough. Now top with sun dried tomato sauce, roasted chicken, spinach, avocado, and cheese.

5. (CAREFULLY! I almost burned my over-ambitious hand off here) slide your pizza onto a preheated stone. Seriously, please use extreme caution and don’t be a spaz and have to ask of help only after you burn yourself like I did. Bake for 10-12 minutes, or until cheese is melted, bubbly, and happily sizzling in the pan.

6. Let cool for a minute or two, then slice with a pizza cutter and serve.

For the sun dried tomato sauce:

  • 2/3 cup olive oil (Use the best quality you can here; it really makes a difference in the sauce!)
  • 2 cloves garlic, minced
  • 1 tsp dried oregano
  • 1 tsp dried basil
  • 1/2 tsp paprika
  • 1/2 tsp cumin
  • two pinches crushed red pepper
  • some freshly cracked pepper
  • 1 tsp salt
  • 6 oz. tomato paste (I like Hunts)
  • 1 tsp honey (Use local honey if you can here too)
 What You Will Do
  1. Add the olive oil, garlic, oregano, basil, paprika, cumin, crushed red pepper, salt, and some freshly cracked pepper to a small skillet.
  2. Stir continually, and heat the mixture over low heat for about 3-5 minutes. If this sizzles that’s totally ok; you just want it to smell aeromatic and try not to let the garlic burn.
  3. Add the tomato paste and honey, and continue to stir continually. The oil will most likely separate from the spices, and that’s great! It tastes good that way. I heated mine over low for about 4 minutes, or until the paste darkened a bit.
  4. This tasted great the day I made it, and the next day when I used it again. I think the spices develop flavor in the sauce over time!

For the roasted chicken

What You Will Need

  • 3 bone-in, skin on chicken thighs, patted dry
  • Some generous shakes of Jim N Nicks’ Chicken and Turkey seasoning

What You Will Do

1. Preheat your oven to 450 degrees.

2. Place your chicken thighs in a roasting pan. Cover generously with spice mix; flip pieces over and do the same thing on the other side.

3. Bake for about 28-30 minutes, or until a meat thermometer reaches 165 when inserted into your chicken.

4. Let cool, then shred into pieces for the pizza pizza.

For those of you who made it all the way to the end of this article, I love you and appreciate your tenacity. Not only will you be rewarded with great pizza, I also give you with the best restaurant pizza link in Alabama: Bettola

Sausage Fajitas with Red Beans and Sage Sour Cream

Sausage Fajitas

Y’all, 2013 was an incredible year; I learned a lot. But I have such high expectations for 2014 to be even better!

One of my resolutions for LuvCooks is to focus on the incredible culinary talent, resources, and ingredients we have around us. There are so many inspiring people in this world, and I want you to meet them and their recipes.

Granted, some of these people I do not personally know, but I want to (and may or may not have stalked them on the internet). Ree Drummond, Maggie (my former high school lunch lady who opened her own diner in my hometown and makes cinnamon rolls that are as big as your face) and John T. Edge, here we come! These are the people- new friends, old acquaintances, and like they say in the South- “your momma and them”- that I want you to know about.  My goal is to showcase their recipes, talent, and heart for the food we love.

Also (I will miiissss youuuu Oreoooooos) for the next three months, I am trying to eat as little processed food as possible. This stems from feeling a bit like I am spiting Mother Nature with the amount of wonderful produce we have in the South. ‘Nuff said.

I can’t think of a more fitting way to begin this culinary journey than to start with Deramus Family Sausage in Booth, Alabama. I have been eating Deramus sausage since I was a wee girl, dancing to Paula Abdul and waking up to the smell of savory sausage browning on the weekends. I will never forget the hand-written thank-you notes we received in the mail from Mrs. Deramus after ordering their product. The flavor and ingredients the Deramus family uses is unparalleled in the sausage business, and if you talk with the head of production, Herb Murray, he will tell you that their secret ingredient- the force that makes their sausage delicious, prevents heart burn and all around makes the sausage-eating wonderful- is a specially-grown sage that only they know about. In fact, when Mr. Deramus (Herb’s stepfather) first started making sausage, he was sent to Germany during World War II and put in charge of livestock. While there he discovered the secret ingredient to delicious German sausage (their blend of sage) and came back to the Southern States on a mission to find that herb and recreate it for himself.

Since Herb’s favorite way to eat his sausage is sautéed with bell peppers and onions, below is my own spin on the Deramus family tradition. Using Creole seasoning and liquid smoke instead of fajita seasoning ups the flavor ante to accompany the hot sausage. Red beans round out the Creole flavor line up, and the sage sour cream offers a welcome cool-down, using the Deramus’ signature ingredient to finish it off.

These fajitas are perfect for a warm night in, and while you are eating them, I suggest you go on over to Deramus’ website and order more. You will be greeted by Herb’s voice on the telephone- he handles all calls and customers- and I promise that you won’t be able to help but fall in love with him and his product (and a hand-written thank-you note or two).

Sausage Fajitas with Sage Sour Cream

What You Will Need

  • 2 links Deramus Family hot sausage, halved lengthwise and sliced into 1/2 inch half-moons
  • 1 onion, sliced
  • 2 green bell peppers, sliced
  • 3 cloves garlic, minced
  • 1 teaspoon creole seasoning
  • 1/2 teaspoon liquid smoke
  • salt and pepper to taste
  • 6 corn tortillas

What You Will Do

1. Heat a large cast iron skillet on medium heat for a minute or so.

2. In the cast iron skillet, add your sausage slices and brown sausage about one to two minutes each side, until they are lightly browned on each side. Make sure and watch these as they cook quickly and you want to keep them just a bit crisp.

3. Once your sausage is cooked, use a slotted spoon to place the pieces on a paper-towel lined plate. Pour out all but about 1 tablespoon of the sausage drippings. (Save the extra grease; this stuff is gold! I put mine in a container to use for future cornbread.)

4. Place your skillet with one tablespoon drippings back onto the heat and turn up to medium-high. Add sliced onion and pepper and cook for about five minutes, stirring occasionally; you want the veggies a bit softer than raw. Add creole seasoning and liquid smoke; cook about five minutes more. Watch your veggies to make sure they stay on the crisp-and not limp-side.

5. Once the veggies are cooked, transfer them to a plate and heat your tortillas. I prefer to put each tortilla back into the cast iron skillet for a minute or so on each side until they are warmed through and light brown on the edges. Or, you can spray cooking spray between each tortilla, pile them up, wrap them in aluminum foil, and heat them up in a 300 degree oven until warmed through.

6. Top each warmed tortilla with sausage, fajita mixture, red beans, and sage sour cream. Wrap up and dig-in!

For the Red Beans (This recipe is adapted from My Daily Moment) I always like homemade beans better than the canned variety.

What You Will Need

  • 1 lb. dry red beans
  • 2 qt. water
  • 1 large sweet onion, chopped
  • 1 cup celery, chopped
  • 4 bay leaves
  • 1 green bell pepper, chopped
  • 3 Tbsp. garlic, chopped (about 6-7 large cloves)
  • 2 tsp. dried thyme
  • 1 tsp. salt
  • 1 tsp. black pepper
  • Creole seasoning, to taste

What You Will Do

1. Pick through beans to remove the ones that look funky or broken.

2. Rinse the beans rinse thoroughly, and put them in a large Dutch oven pot with enough water to cover by about an inch. Bring them to a rolling boil for ten minutes, then drain and rinse the beans again.

3. Pour the old bean water out of your Dutch oven, rinse it, then add boiled beans, water, onion, celery, and bay leaves to the pan. Bring to a boil.

4. Reduce the heat, cover, and cook over low heat for about 1 1/2 hours or until beans are tender. Stir.

5. Mash some of the hot beans against the side of your pan. Add green pepper, garlic, thyme, salt, and black pepper.

6. Cook uncovered over low heat until creamy, about 30 minutes. Remove bay leaves.  Add a large dash of Creole seasoning to taste.

For the Sage Sour Cream

What You Will Need

  • 1/2 cup sour cream
  • 1 tsp dried sage (or to taste, depending on how sage-y you like things)

What You Will Do

1. In a small bowl, whisk sour cream with dried sage until combined.

Homemade Nutella and Gratitude

Chocolate and hazelnuts, beautifully blended

I am overwhelmingly grateful when anyone visits LuvCooks. I am blown away when someone sees a recipe and makes it (shout out to @laurietindol!) and astounded when another blogger mentions the site in one of their posts.

Recently Rachel at Derivative Dishes nominated LuvCooks for a Liebster award. Having no idea what a Liebster award was, I embarrassingly asked her about the stipulations for this prize. It turns out it’s a great way to welcome and highlight other blogs in our Creative world. As part of the process, I was also asked to respond to a list of questions Rachel sent, then nominate other blogs I follow that should recieve the award.

I have so many talented friends, I wish that I could gather them all up and introduce you; my friend Melissa, who loves cats and can bake like nobody’s business. Or Stephen, whose ability to light and capture food astounds me. Or my boyfriend Jake whose Creative talent truly knows no bounds. But alas, the inter webs separate us, and this will have to do for now (unless someone comes up with the aforementioned posted magic carpet).

And, you should follow all of these wonderful people! Feeling Full, Jacob Blount, Stephen Devries Photography, Kinora Films,  Emily Cooks Vegan, Twin Days, Chew Out Loud, Create and Place, The Dreamery

Rachel’s questions:

  1.  What inspires you? Beauty! In all of it’s forms. And fun, and dancing. Lots of it.
  2.  Anthony Bourdain or Mario Batali? I am obsessed with Anthony Bourdain. As in, a day without No Reservations/The Layover/Parts Unknown is no way to live.
  3. What’s the worst meal you’ve ever had? I have a complete inability to hide the face I make when things taste bad. So more than likely I have blocked this meal out of my mind.
  4. What’s your favorite cookbook of all time? I adore cookbooks! My top three: America’s Test Kitchen Family Cookbook , The Foothills Cuisine of Blackberry Farms, and for her hilarious story-telling and all-around fabulousness Miss Kay’s Duck Commander Kitchen
  5. What are you looking forward to right now? A Mexican fiesta tonight at Señor Taco with my sister.
  6. What do you think about when you’re cooking? I think about the people I am cooking for. I love anticipating how they will respond to the food, and the simple joy of spending time with them.
  7. What is your favorite thing to cook? Baking. Brownies. Chocolate anything.
  8. What is the last great meal you had? I had a fantastic six-course meal and wine-pairing at Veranda in Birmingham‎, hosted by their sommelier and head chef. Braised shot ribs, quail- it was a dream.
  9. What have you not tried to cook but think you need to make? I need to figure out how to make Ossobuco. Because it sounds both fancy and delicious.
  10. What about the kitchen intimidates you? Other people’s kitchens intimidate me. As weird as that sounds, I feel so at home in my own, I always feel a bit unnerved in another persons’ space.
  11. What’s the most embarrassing kitchen moment you’ve ever had? Oh gracious, there are too many to count! Probably the time I was making boxed macaroni and cheese and caught a dish towel on fire.

Questions for my blogger pals:

1. What is your go-to comfort food?

2. French roast, Keurig, Chemex, pour-over, Nespresso, or drip (coffee)?

3. Your favorite kitchen condiment, go!

4. If you could have dinner with three people dead or alive, who would you choose and why?

5. Bizarre Foods or Chopped?

6. Number #1 reason why Alton Brown would help you make better life choices.

7. Your favorite holiday movie?

8. What is your biggest challenge in food-blogging?

9. What are four of your favorite online recipe resources?

10. Name your favorite season and it’s accompanying ingredient.

And finally, back to gratefulness: I am also consistently grateful for food, friends, and family, and this homemade chocolate hazelnut spread (aka Nutella) recipe encompasses all of these things. Nutella is one of life’s pleasures, and this recipe by Giada at Food Network is SO delicious. By roasting the hazelnuts in the skins before you blend them, it adds a whole new dimension to the roasted flavor of the spread, and the addition of quality melted chocolate and honey sweetens the deal. I made this for a friend of mine and could not keep my spoon out of the food processor (don’t worry Court, #nodoubledipping).  This is also a great addition to any New Year’s Eve spread. Serve it with chocolate or honey graham crackers, apple slices, or hot chocolate, or blend it into a post- New Year’s bash smoothie.

Cheers to the best year yet, and to more amazing tastes, friendships, and adventures in the year to come.

Homemade Nutella (taken from Giada’s version here)

What You Will Need

  • 1/2 cup semisweet chocolate chips (3 ounces)
  • 3/4 cup skinned hazelnuts, toasted (about 4 ounces)
  • 2/3 cup sweetened condensed milk, such as Eagle Brand
  • 1 tablespoon honey
  • 1/8 teaspoon kosher salt

What You Will Do

1. To toast your hazelnuts: Preheat the oven to 350 degrees. Arrange the hazelnuts (skins on) in a single layer on a baking sheet.

2. Bake them for 15 to 18 minutes until lightly toasted. (Just watch these; I baked mine for a little less time because they got toasted pretty quickly.) Cool completely, then rub the skins off with your fingers.

3. Place the chocolate chips in a microwave-safe bowl and cook on high for 45 seconds. Stir. Put the bowl back in for 10-15 second intervals, stirring after every trip in the microwave, until smooth. Be careful to not overheat your chocolate; it can get angry and seize up on ya. Let the chocolate cool to room temperature.

4. Grind the nuts in a food processor until pasty (the nuts will be stuck to the sides of work bowl), 1 minute. Scrape down the bowl with a rubber spatula.

5. Add the condensed milk, honey and salt. Blend well, scraping down the bowl as needed. Add the cooled chocolate and pulse until combined. Transfer the spread to a small bowl.

6. Now try not to eat all of this in one sitting. Enjoy and Happy New Year!!


Chocolate Spice Cake with White Wine Berry Glaze

White Wine Cake

It’s holiday time! And you know what that means. Dust off that Kool and the Gang record, put on a Christmas scarf, and sing it with me, “Ce-le-brate good times, come on!” Now in your deepest Alto, “It’s a Celebration!”

And really, is there anything better than sparkly Christmas lights, fur trees loaded with ornaments, Elvis singing “Blue Christmas,” and drinking egg nog and/or hot chocolate like it’s your job? Truly, one of the most special times of the year.

And in that state of Christmas joy, I wanted to bake a chocolate cake that tasted like all of those wonderful Christmas feelings: warm and rich, with an unexpected flavor gift in the mix. And who better to parter with in this creative endeavor than uproot? Their Sauvignon Blanc is so versatile, it gave a bright flavor profile to chicken soup and this dessert. Especially perfect for the cinnamon-laced cake is the element of passion fruit the Sauvignon Blanc features- a perfect compliment to the blueberries and raspberries in the berry glaze.

Alright everybody, raise your eggnog-or uproot-glasses high to the best time of the year!

A slice of Christmas cheer

A slice of Christmas cheer

Chocolate Spice Cake with White Wine Berry Glaze

Another great thing about uproot wines is their partnership with Food52– one of my favorite recipe resources- where I went for inspiration in the cake realm. I just added a Christmas spin with a few extra holiday ingredients.

For the Glaze (I listed this first because I suggest you make it first, due to the double-glazing effect we use on this cake.)

What You Will Need

3/4 cup uproot Sauvignon Blanc 

6 ounces fresh blueberries

6 ounces fresh raspberries

1 teaspoon vanilla extract

3/4 cup sugar

What You Will Do

1. In a medium saucepan (make sure you use a larger one than you think you need- your liquid mixture will expand like an over-stuffed Santa when it boils), combine white wine, blueberries, raspberries, vanilla extract, and sugar.

2. Bring the mixture to a rolling boil, and let it cook at high heat for at most five minutes. Watch the mixture to make sure it doesn’t overflow the pan. If things get too crazy and you are afraid it is going to bubble over, just go ahead and turn the heat back down to medium or medium-low.

3. Cook on medium heat for about 24 minutes. Make sure and watch your mixture towards the end, stirring frequently to make sure the sugar and berries don’t burn.*

4. Let your glaze cool as you bake the cake.

* To be honest, this cooking time really depends on how thick you would like your glaze to be. I like mine a bit more like jelly so it gives the cake texture and shine; but, if you would like for it to be thinner, cook it on medium-low heat for up to 45 minutes. I also cooked this twice and had different cooking times for the glaze, so really just watch your mixture to see that it cooks to where you want it to be. When it comes to working with liquid sugar, it’s always better to go slowly so you don’t burn off your holiday fingers, as these are vital to your continued recipe success.

For the Cake

  • 1  1/2 cup all-purpose flour
  • 1/3 cup unsweetened cocoa
  • 1 teaspoon baking soda
  • 1 cup sugar
  • 1/2 teaspoon salt
  • 5 tablespoons neutral oil (like corn, canola, or vegetable)
  • 1 cup cold water
  • 1 1/2 teaspoon vanilla
  • 1 tablespoon cider or white vinegar
  • 1/2 teaspoon cinnamon
  • Freshly grated nutmeg (about 1/4 teaspoon, but up to your preference)
  • 2 ounces semisweet chocolate, chopped (I used this brand)
  • Confectioners’ sugar (optional, for dusting)

What You Will Do

  1. Heat the oven to 350° F and spray a 9-inch cake pan with cooking spray.
  2. Sift together the flour, cocoa, baking soda, sugar, and salt in a bowl. In a separate bowl, whisk together the water, oil, vanilla, and vinegar.
  3. Whisk together the wet and dry mixtures. If lumpy, whisk the mixture until it is smooth.
  4. Add the cinnamon, nutmeg, and chocolate. Whisk together to combine.
  5. Pour the batter into a greased 9-inch round cake pan. Tap the edge of the pan against the edge of the counter, or drop from 6 inches to the floor several times to pop air bubbles. Please do not miss this step, as it is really entertaining and will hopefully make your cake hole-less! Bake for 25 to 30 minutes (mine took 28 minutes), or until the top springs back when pressed gently.
  6. Your cake may have a darker brown ring around the edges; that’s ok. That’s what we have that gorgeous glaze for!
  7. Once the cake is removed from the oven, place it on a cooling rack. Poke tiny holes throughout the cake with a toothpick or fork, going about 3/4 of the way to the bottom.
  8. Spread a thin glaze of white wine berry mixture over the cake, making sure to cover the entire cake surface. This will help infuse some of the berry flavor inside of the cake as it cools.
  9. Once your cake has cooled completely, turn it out onto your serving platter.
  10. Spread the rest of your berry glaze on the top of the cake, working from the center out. Sift confectioners sugar on top if desired for extra celebratory pizazz.

Brown Butter Chocolate Chip Cookies

Comfort Food Cookies

Some weeks, you just need to bake.

And this week, the pull has been especially strong. The weather in the South has been unusually frigid-rain battered against my roof all day yesterday- and cold air continues to seep through the frames of gray, foggy windows.  It’s at this point that my mind wanders to what my kitchen might smell like if I turned on the oven and let the heat do its work on something sweet.

Also, did I mention- it’s the week of THANKSGIVING? And if you don’t want to bake this week, then the likelihood is that you never will. Unless, of course, it’s World Nutella Day and that is an exception to every rule.

But back to baking. There is a coffee shop and book store that I absolutely adore whose chocolate chip break-up cookies are not to be missed. On cold fall days, they are the baking remedy to whatever life looks like. They are buttery; dense but chewy; with chunks of semisweet chocolate that melt in your mouth before you get a slight hit of the salt that is artfully placed on top.

Cookies Up Close

I have wanted to recreate these cookies for a while, and this week, I needed to bake them. This recipe from Joy the Baker is as close as I have gotten to date. Her version tastes and smells like warmth; the browned butter and flaky sea salt roll comfort food into a simply, incredibly delicious form.

I know this aren’t the typical Thanksgiving dessert- we’ll leave that to pumpkin/pecan/cranberry jelly pies- but I am pretty sure that the smell of these warm out of the oven will make any holiday guest feel instantly at home. Even on a cold, rainy, almost wintry fall day.

Cookies from Above

Brown Butter Chocolate Chip Cookies

This recipe is from the super talented and fabulous Joy the Baker. I made a few changes from her original recipe, and they are noted in italics.

What You Will Need

  • 2 1/4 cups all-purpose flour (I used whole wheat pastry flour)
  • 1 teaspoon salt
  • 1 teaspoon baking soda
  • 1 cup (2 sticks) unsalted butter, softened to room temperature
  • 1 cup packed light brown sugar
  • 2 teaspoons pure vanilla extract
  • 1 teaspoon molasses
  • 1/2 cup granulated sugar
  • 1 large egg
  • 1 large egg yolk
  • 1/2 cup coarsely chopped pecans (I prefer my cookies without nuts, unless it is peanut butter, which is a different story)
  • 1 cup bittersweet chocolate chips (or extra dark, about 80% or above, chocolate chunks)
  • coarse sea salt for sprinkling

What You Will Do

1. In a medium bowl, whisk together flour, salt and baking soda.  Set aside.

2. Start by browning 1/2 cup (1 stick) butter.  In a medium skillet, melt butter over medium heat.  Once the butter has melted completely, it will begin to foam and froth as it cooks.  The butter will also crackle and pop.  That’s the water cooking out of the butter.  Swirl the pan occasionally, and keep an eye on the melted butter.  The butter will become very fragrant and brown bits will begin to form at the bottom of the pan.

3. Once the bits are an amber brown (they are about the color of this wood), immediately remove the pan from the heat and pour browned butter (bits and all) into a small bowl.  Leaving the butter in the pan will burn it.  Allow the butter to cool for 20 minutes.

4. In the bowl of a stand mixer fitted with a paddle attachment, cream the  remaining 1/2 cup of butter with brown sugar.  Cream on medium speed until light and fluffy, about 3 to 5 minutes (this will be a very light, beige color).  Add the vanilla extract and molasses (or honey) and beat until incorporated.

5. Once the brown butter has cooled slightly, pour the butter (brown bits and all) into the creamed butter and sugar mixture.  Add the granulated sugar and cream for 2 minutes, until well incorporated.  Add the egg and egg yolk and beat for 1 minute more.

6. Stop the mixer and scrape the bottom of the bowl to ensure that everything is evenly mixed (this is important; I had some unmixed bits in my bowl).  Add the flour mixture all at once to the butter mixture and beat on low speed until the flour is just incorporated.  Remove the bowl from the stand mixer and use a spatula to fold in pecans (optional) and chocolate chips.

7. Spoon batter onto parchment paper or plastic wrap and wrap into a disk or cylinder and seal at both ends.  Allow to rest in the fridge for at least 30 minutes.

8. Place racks in the center and upper third of the oven and preheat the oven to 350 degrees.  Line two baking sheets with parchment paper (or a Silpat).  Scoop dough by the two tablespoonfuls onto prepared sheets (or cut your dough log into 24 slices and make dough balls from each slice with your hands).  Sprinkle with sea salt.  Be sure to leave about 2 inches of space between each cookie.

9. Bake for 12 to 14 minutes or until cookies are golden brown.  Remove them from the oven and allow to rest on the baking sheet for 5 minutes.  Serve warm or allow to cool completely.

Chicken Soup with White Wine, Kale and Tomatoes

Kale Soup with White Wine

Sometimes in life, creative inspiration and writing about food comes easily. Other times, one might prefer to bang one’s head against the wall while using a rolling pin to make mad stabs at the keyboard, hoping that something along the lines of creative thought (maybe in the form of a surprise Microsoft Word spell-check rewrite) appears.

And, we’ve all had chicken soup. Your typical recipe is predictable and comforting, and that’s good; but is anyone else out there bored with the standard version? What if we turned the typical method on its head and did something creative and ahem, fun?

Now, to be honest, my sudden zeal for revamping the chicken soup scene did not happen on it’s own. The inspiration actually came from my friends at uproot wines in Napa Valley. Greg and Jay are self-described “renegade wine makers” with a passion for looking to the future to inspire a better, more modern way of creating delicious wine. They are using the best-of-the-best equipment, ingredients, and techniques to create innovative wine like you’ve never tasted before.

And, in a side note, for a novice wine drinker like myself, I appreciate the fact that they label their bottles-how cool is this-by color, with each bar on the bottle representing the wine’s flavor profile. So, the purple stripe represents passion fruit, light green is melon, yellow is grapefruit. Genius.

I will always be grateful to Jay and Greg because, after following their example, there is no better way for me to express my love for this new recipe for chicken soup. Frying the chicken skins in olive oil at the start gives deep, chicken-y richness to the broth, and the de-glazing work done by the 2011 Sauvignon Blanc creates a mellow sweetness, while kale and tomatoes round out the umami punch.

The final result is deliciously inviting on a crisp fall day, smells like roasted chicken with garlic, and is as full-bodied and flavored a soup as I’ve made (the complete opposite of the overly salted, condensed versions lurking in your canned goods pantry).  In fact, this soup is so good that if I could afford a magic carpet, I would find you and bring you a batch of mine (and I don’t play when referring to world travel).

On a final note, you know what makes this soup taste even better? Drinking it with the uproot Sauvignon Blanc. The lively, sweet-but-smooth white is dynamite with the hearty chicken and potatoes in the soup. I can not wait for you to try this. So put a little pre-Thanksgiving vinyl on your record player, visit the uproot site to get inspired, and make some deliciousness this week.

Yes, that's my awesome boyfriend photographer in the spoon.
Yes, that’s my awesome boyfriend photographer in the spoon.

Chicken Soup with White Wine, Kale, and Tomatoes

What You Will Need:

  • 1 rotisserie chicken, meat shredded and skins removed (set the skins aside for the frying process)
  • 3 tablespoons olive oil
  • 1 cup uproot 2011 Sauvignon Blanc
  • 1 white onion, diced (about 1 1/2 cups onion)
  • 2 celery ribs, sliced (don’t forget to include the leafy tops here too!)
  • 3 cloves garlic, minced
  • 1/2 teaspoon smoked paprika
  • 1/4 teaspoon chili powder
  • 4 cups chicken stock
  • 4 red potatoes, diced
  • 1 Parmesan rind (about one to two inches in width and height)
  • 1 15-oz can canned, diced tomatoes
  • 5 cups kale, shredded and ribs removed (I used bag kale for mine)
  • 3 cups white beans (I prefer to make mine from dried using the method below*, but you are more than welcome to used canned white beans too! Just rinse them ahead of time.)

What You Will Do

For the Soup

1. Heat 2 tablespoons olive oil on medium heat to simmering in a large dutch oven.

2. Add about 1/2 cup chicken skin. Flash fry the skins in the oil for about 10-15 seconds, until dark brown bits start to form on the bottom of the pan.

3. Using a slottted spoon, remove the chicken skins, and add 1 tablespoon more oil. Add the onion and celery and saute until translucent, stirring frequently. Once the vegetables are soft, add the garlic, paprika, and chili powder and cook for about one more minute.

4. Add the Sauvignon Blanc and stir frequently, deglazing the pan and capturing all of those tasty brown bits that might be left. Cook until the liquid is reduced to about half.

5. Add the chicken stock, potatoes, Parmesan rind, and tomatoes, and bring to a boil. Once boiling, reduce the heat to medium and cover for twenty minutes.

6.  Add the shredded chicken, 3 cups beans, and kale. Let everything warm through until the kale is slightly wilted. Remove the Parmesan rind if it hasn’t dissolved, and season with additional salt and pepper  to taste. Serve the soup, adding extra grated Parmesan cheese if desired.

*For the beans (if making from dried; this method was adapted from Whole Foods instructions):

What You Will Need

  • 1 lb dried white beans
  • 2 bay leaves
  • salt and pepper

What You Will Do:

1. Sort through 1 pound of white beans, removing any stragglers or broken beans.

2. Rinse beans over a colander to remove any extra grit.

3. Put beans in a large dutch oven, and cover with water until you have about a two- inch margin of water above the beans (about six to eight cups of water). Put the beans in the fridge about eight hours or overnight.

4. Once ready, drain and rinse your beans one more time.

5. Bring your soaked white beans with enough water to cover them by about 1 1/2 to 2 inches, two bay leaves, and a generous dash of salt and pepper to boil in a large dutch oven. Once the beans are boiling, skim the beige foam that forms off of the top. Reduce the heat to simmer, and cover the beans for about an hour to an hour and a half, or until they are tender.

Blackberry Farm Griddle Cakes with Cinnamon Peach Syrup

Pancakes

I have a slight obsession with Blackberry Farm.

And by slight I mean I own both of their cookbooks (at one point I had two copies of The Foothills Cuisine),  and daydream regularly about living there. Oh, and they also recently did a beautiful spread-and are selling their homemade goodies-with Williams Sonoma. Which makes my food wanderlust even worse.

Located in the gorgeously green foothills of the Appalachian Mountains, Blackberry Farm is a foodie’s dream. Fueled by an on-location organic garden and supplied by their own sheep’s (as in, their own pasture full of) cheese, happy diners head back to their customized cabins at the end of a glorious day of eating to rest under the cool mountain stars, only to awake and do it all over again. Or at least, this is what I hear.**

**I did once drive to Blackberry Farms, illegally enter the gates, and scope out their dining room. I stayed under the radar until I attempted to drive my four-door sedan down a road clearly intended for a guests-only golf cart. I also may or may not have hit a large stump in my flustered attempt to back out of the tiny driveway.

I digress.

These Blackberry Farm recipe pancakes graced the cover of Bon Appetit, and I was immediately whisked away by an image of myself  in a rocking chair, overlooking the green scape of the farms, while a gentle gardener served me a plate of steaming pancakes that were gently  releasing their heavenly aroma into the air.

Reality returned, and I decided that the first step toward the dream would be actually cooking them. And in true LuvCooks style, when I made this recipe it was in the middle of a sweltering summer in the south and our syrup options did not include gracefully picking through the blackberries outside in the garden soil. Instead, I braved the 90+degree heat and nabbed some late-summer peaches from a local farmer’s market.

Below are the most delicious gluten-free pancakes you have ever tasted. And the most outstanding peach syrup I’ve ever had. Even if you aren’t eating them on top of a mountain, it will still feel peachy-keen.:)

Blackberry Farm Griddle Cakes (This recipe and its instructions are taken from bonappetit.com)

What You Will Need

  • 1 large egg
  • 2 cups buttermilk
  • 1/4 cup pure maple syrup
  • 1 cup gluten-free oat flour
  • 2/3 cup yellow cornmeal
  • 1/3 cup brown rice flour
  • 1/4 cup buckwheat flour
  • 1 tablespoon baking powder
  • 1 teaspoon baking soda
  • 1 teaspoon kosher salt
  • 1/4 cup (1/2 stick) unsalted butter, melted
  • Vegetable oil (for skillet)

What You Will Do*

  • Whisk egg, buttermilk, and maple syrup in a small bowl. Whisk oat flour, cornmeal, rice flour, buckwheat flour, baking powder, baking soda, and salt in a large bowl.
  • Whisk buttermilk mixture into dry ingredients, then whisk in butter until no lumps remain.
  • Heat a large nonstick or cast-iron skillet over medium heat; lightly brush with oil. Working in batches, pour batter by 1/4-cupfuls into skillet. Cook until bottoms are browned and bubbles form on top of griddle cakes, about 3 minutes. Flip and cook until griddle cakes are cooked through, about 2 minutes longer.

*My incredible, gluten-free chef friend Annie cooked these pancakes, and they turned out beautifully. This batter is a bit thinner than your usual pancake batter, so just make sure you watch them since they cook a bit more quickly than normal.

LuvCooks Cinnamon-Peach Syrup

What You Will Need

  • 1 cup water
  • 1/4 cup honey
  • 1 cup sugar
  • 3 peaches, skinned and cut into 1/2 inch slices
  • 1 teaspoon vanilla extract
  • 1 teaspoon cinnamon

What You Will Do

1.  Bring water, honey, and sugar to a boil.

2. Add the peaches, vanilla extract, and cinnamon, and let the mixture return to a boil.

3. Turn the heat back down to low and simmer until the peaches are soft, or about 15 mintues.

4. Continue to let the mixture simmer at medium to medium-low until it gets about the consistency you want. I watched mine for about 45 more minutes and had to head out to feed some hungry pancake eaters, so mine was a bit thinner. It was delicious, but if you like a thicker syrup, try to avert the hunger pangs by letting it cook for a bit longer.